Three-time in a week and still peeling little squares of cheese just right so they fit perfectly next to those turkey slices—this Easy DIY Lunchable-Style Bento Boxes obsession is real. Honestly, I didn’t plan on making these bento boxes every single Friday for a month straight, but once I found the right combo of flavors and textures, I just couldn’t quit. There’s something oddly satisfying about balancing crunchy crackers with juicy grapes and just the right dollop of hummus, all packed neatly in these little compartments. And yes, I may have tested the peanut butter and jelly version twice too many times (sorry, kitchen counter!).
It’s not just the fuss-free assembly that pulls me back, but the tiny moments of calm when everything clicks: the colors, the bite-sized portions, the way the kids beam when they open their lunch boxes. I’m not even sure if it’s the nostalgia of those classic Lunchables or the fresh take on them that keeps me hooked. The real kicker? Making these easy DIY lunchable-style bento boxes feels like a little act of love disguised as lunch prep chaos. So while you might think these are just kid lunches, for me, they’re a quiet reminder that sometimes the best meals come in perfectly portioned, thoughtfully packed boxes.
By the last one I packed, I realized these bento boxes weren’t just about feeding kids; they were about creating tiny moments of joy and a little order in the daily lunch madness. And that’s why this recipe stuck around in my kitchen—and maybe in yours too.
Why You’ll Love This Recipe
This Easy DIY Lunchable-Style Bento Boxes recipe has been put through the wringer with my own kids and friends—tested, tweaked, and approved by picky eaters and busy parents alike. Here’s what makes it stand out:
- Quick & Easy: Comes together in under 15 minutes, perfect for hectic weekday mornings or last-minute lunch packing.
- Simple Ingredients: No need for a special grocery run—most items are pantry staples or fresh produce you likely have on hand.
- Perfect for Kids’ Lunches: Tailored for little appetites with balanced portions and fun variety, making lunchtime something to look forward to.
- Crowd-Pleaser: My kids’ friends rave about these, and honestly, adults love them too (don’t tell the kids!).
- Unbelievably Delicious: The combination of textures and flavors keeps it interesting—crunchy crackers, creamy dips, sweet fruits, and savory bites all in one box.
This is not just another “copycat” Lunchable—you get to control every ingredient, avoid all the unnecessary additives, and customize to your kid’s exact preferences. Plus, I’ve included five different variations to keep things fresh, so you’re not stuck in a lunchbox rut. If you want to make lunches that feel special but are a breeze to assemble, this recipe is a game-changer. It’s like turning simple ingredients into a mini feast that fits in a lunchbox, and honestly, that’s a win every time.
What Ingredients You Will Need
These easy DIY lunchable-style bento boxes use straightforward ingredients that come together to create balanced, tasty meals. Most are pantry staples or fresh, easy-to-find items. Feel free to swap in what you have—these boxes are all about flexibility.
For the Base Protein and Cheeses
- Sliced turkey breast or chicken breast (about 4 oz / 115 g per box) – Choose nitrate-free for better flavor and quality
- Cheddar cheese slices or string cheese (1-2 oz / 28-56 g) – I prefer sharp cheddar for that punch, but mozzarella works too
- Hard-boiled eggs (1 per box, optional) – Adds protein and keeps things interesting
For the Crunch and Dippers
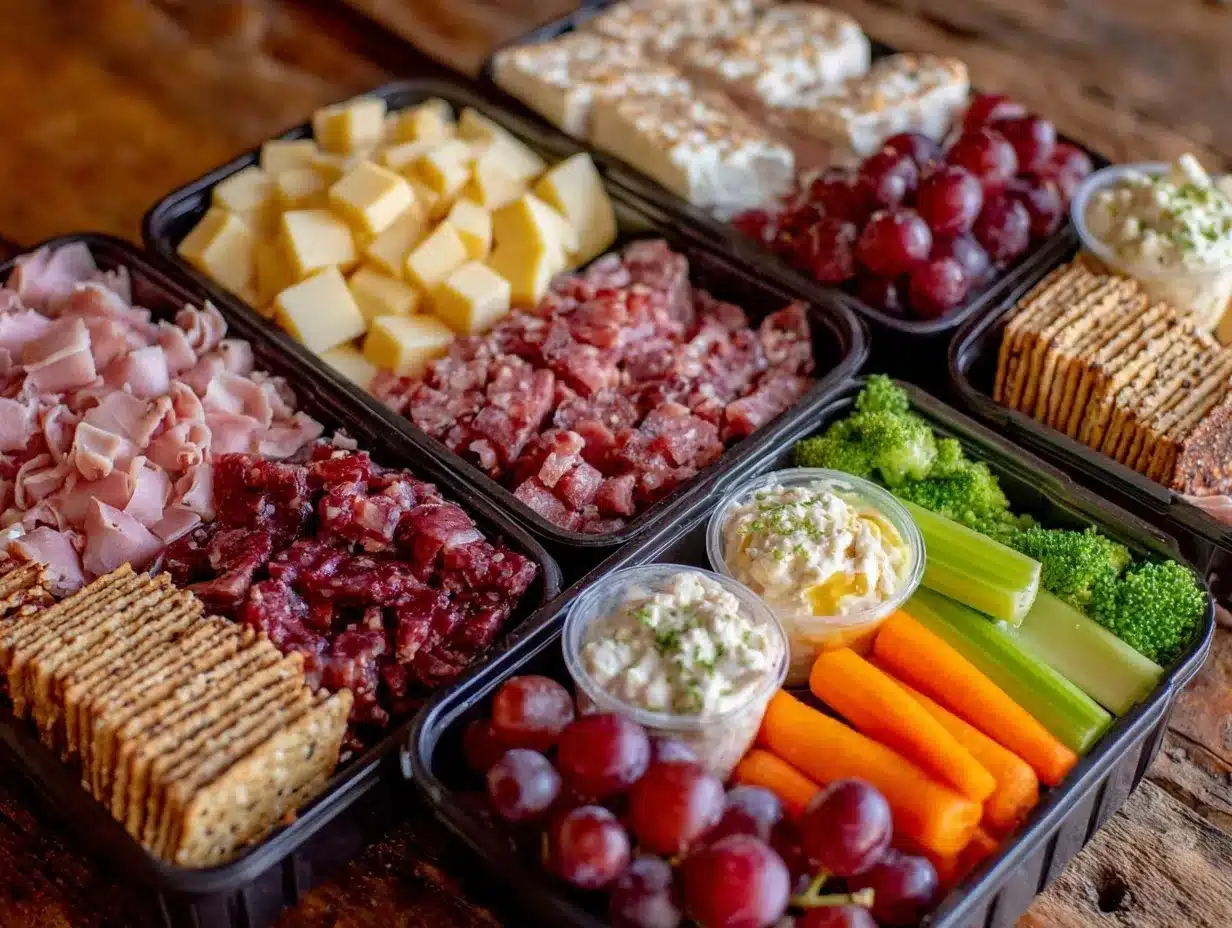
- Whole grain crackers or mini rice cakes (about 10-12 pieces) – Look for low-sodium options
- Baby carrots or cucumber slices (about ½ cup / 75 g) – Fresh and crisp for contrast
- Hummus or ranch dip (2 tablespoons / 30 ml) – Use store-bought or homemade hummus for a creamy touch
For the Sweet Touch
- Grapes or berries (½ cup / 75 g) – Seasonal fruits work great here; swap frozen berries thawed in cooler months
- Apple slices (1 small apple, sliced) – Spritz with lemon juice to keep fresh
- A small sweet treat such as a couple of dark chocolate chips or a mini muffin (optional)
Extras and Customizations
- Mini pretzels or popcorn (handful) – For an extra salty crunch
- Nut or seed butter (1 tablespoon / 15 ml) – Substitute sunflower seed butter if nut allergies are a concern
- Olives or pickles (a few pieces) – For kids who like a tangy bite
With these ingredients, you can mix and match to create fresh boxes every week. I like to keep a few different cheeses and proteins on hand so I can switch things up easily. If you want a gluten-free option, almond crackers or rice cakes work wonderfully. The key is balancing protein, carbs, and fresh produce for a well-rounded lunch that keeps energy steady through the afternoon.
Equipment Needed
To make these easy DIY lunchable-style bento boxes, you don’t need fancy gadgets—just some simple tools that make assembly quicker and tidier.
- Bento Box or Compartmentalized Lunch Container: I use a plastic bento box with 3-4 sections. If you don’t have one, small reusable silicone muffin cups inside a regular lunchbox work too.
- Sharp Knife: For slicing cheese, apples, and other fresh items neatly. A serrated knife can be handy for fruit.
- Cutting Board: Any sturdy surface works; I have a small one just for lunch prep.
- Small Containers or Silicone Cups: These help keep dips and crackers separate, preventing sogginess.
- Measuring Spoons: Handy for portioning dips and spreads so it doesn’t get messy.
- Reusable Snack Bags or Wraps: For fruits or treats that might need extra protection inside the lunchbox.
Personally, investing in a few durable bento boxes made mornings way easier. They clean well and hold up after repeated use. If you’re on a budget, check out thrift stores or online deals—you can often find great options without breaking the bank. And if you’re curious about making dips from scratch, a simple blender or food processor will come in handy but isn’t essential.
Preparation Method
- Prepare the Proteins: Slice your turkey or chicken breast into bite-sized pieces, about 1-inch squares (about 4 oz / 115 g per box). If using hard-boiled eggs, peel and slice them in half or quarters for easy eating. This step should take about 5 minutes.
- Slice the Cheese: Cut cheese slices or break string cheese into smaller sticks that fit nicely in the compartment (1-2 oz / 28-56 g). Keeping sizes consistent helps with portion control and prevents overcrowding. About 3 minutes here.
- Wash and Cut Veggies and Fruits: Rinse grapes, berries, and baby carrots under cold water. Slice apples thinly and spritz with lemon juice to prevent browning. Cucumbers can be sliced into rounds or sticks. This step usually takes 5-7 minutes, depending on how much fruit you’re prepping.
- Portion the Crackers and Dips: Place 10-12 crackers or mini rice cakes in one compartment. Use small silicone cups for dips like hummus or ranch, measuring about 2 tablespoons (30 ml) per serving. This keeps everything neat and stops crackers from getting soggy. Takes about 2 minutes.
- Assemble the Bento Box: Start by adding the proteins and cheese slices in their own sections. Arrange veggies and fruits side by side for visual appeal and ease of eating. Add dips in their cups and a small sweet treat if using. The key is balancing colors and textures for an inviting look. Expect 5 minutes here.
- Pack and Store: Close the bento box firmly to avoid spills. Keep refrigerated until ready to eat. If packing ahead, line the container with a small ice pack to keep everything fresh. Total time for packing is around 2 minutes.
Some tips from experience: don’t overfill compartments—kids appreciate space to pick and choose. Also, if you’re prepping multiple boxes, lay out ingredients assembly-line style for faster packing. This method is especially useful when making a bunch of lunches before the week starts.
Cooking Tips & Techniques
Honestly, making these DIY lunchable-style bento boxes is more about prep and presentation than cooking, but a few tricks help everything come together effortlessly:
- Keep Ingredients Fresh: Use crisp veggies and fresh fruits to balance the richer items like cheese and deli meat. Wash and dry produce thoroughly to avoid sogginess.
- Portion Control Matters: Kids’ appetites vary, so start with smaller amounts and adjust as needed. This prevents waste and keeps lunch fun rather than overwhelming.
- Use Silica Gel Packs or Ice Packs: When packing lunches for several hours, including an ice pack maintains freshness, especially for dairy and meats.
- Prep Ahead: Hard-boil eggs and slice cheese at the start of the week. Store in airtight containers for quick assembly on busy days.
- Keep Dips Separate: I learned the hard way that crackers and hummus don’t mix well if stored together overnight. Little silicone cups or mini containers are a game changer.
- Switch Up the Flavors: Don’t hesitate to swap seasonings or try different cheeses for variety. For example, pepper jack adds a fun kick.
From my trial and error, one key is to avoid packing too many similar textures. Mixing crunchy, creamy, and juicy keeps kids interested, and it’s easier for little hands to manage. I also recommend prepping all ingredients first, then assembling to speed up the process and keep things organized.
Variations & Adaptations
Variety is the spice of lunchbox life, so here are five easy variations of the DIY lunchable-style bento boxes to keep things exciting and suit different dietary needs:
- Gluten-Free Option: Swap regular crackers for gluten-free rice crackers or crunchy vegetable chips. Use almond flour crackers for a nutty twist.
- Vegetarian Version: Replace deli meats with chickpea salad or sliced avocado. Add a boiled egg for extra protein.
- Low-Carb Variation: Skip crackers and load up on cheese sticks, nuts (if no allergies), and crunchy veggies like celery and bell pepper strips.
- Seasonal Twist: In summer, swap grapes for fresh berries or melon chunks. During fall, add apple slices with a cinnamon sprinkle for warmth.
- International Flair: Try including mini pita pockets with tzatziki, olives, and sliced cucumbers for a Mediterranean touch.
I personally tried a Mediterranean-inspired box last week with hummus, cherry tomatoes, olives, and pita chips; it was a hit even with the usual picky crowd. Adjusting the dips and sides depending on your child’s preferences can make this lunchbox truly their own. For more quick and tasty homemade ideas, you might enjoy the quick creamy tuna pasta recipe which offers a great protein-packed meal for dinner, perfect for balancing out your weekly meal plan.
Serving & Storage Suggestions
These lunchable-style bento boxes serve best chilled but not ice-cold—room temperature is ideal for optimal flavor and texture. Pack the lunchbox with an ice pack if it will be stored for several hours to keep dairy and meats fresh.
Pair the box with a refreshing drink like water infused with lemon or a small juice box for extra hydration. For a complete day of meals, these lunch boxes complement dinners like the quick zesty lemon chicken perfectly, giving variety throughout the day.
Leftovers can be stored in airtight containers in the fridge for up to 24 hours, but I recommend assembling the boxes fresh each day for the best crunch and taste. If you do prep ahead, keep dips separate and add fruits like apples just before serving to avoid browning. Reheat any cooked proteins gently in the microwave with a splash of water to keep moisture.
Flavors tend to mellow slightly over time, so if you like bold tastes, add a sprinkle of fresh herbs or a dash of seasoning right before serving. These small touches make a difference!
Nutritional Information & Benefits
Each easy DIY lunchable-style bento box contains approximately 350-450 calories, depending on the protein and snacks included. They offer a balanced mix of macronutrients:
- Protein: From turkey, cheese, eggs, and dips, supporting energy and growth.
- Carbohydrates: Whole grain crackers and fresh fruits provide sustained energy and fiber.
- Fats: Healthy fats come from cheese, nut butters, and dips like hummus.
Key ingredients like fresh veggies and fruits provide vitamins A and C, antioxidants, and important minerals. This lunch is naturally gluten-free if you use the right crackers and can be adjusted for nut allergies by choosing seed butters or skipping those altogether.
From a wellness perspective, these lunch boxes encourage portion control and variety, helping kids develop healthy eating habits without the processed additives found in store-bought kits. Plus, the homemade approach means you know exactly what’s going in, which is peace of mind for any parent.
Conclusion
Easy DIY Lunchable-Style Bento Boxes are a simple way to make lunchtime fun, nutritious, and stress-free. Whether you’re juggling school days, busy work schedules, or just want to add a little magic to the midday meal, these boxes deliver. They’re customizable to fit your family’s tastes and dietary needs and are a small but meaningful way to show you care.
I love this recipe because it takes the guesswork out of packing lunches and adds a little joy with each compartment. Plus, it’s become a bit of a ritual in my household—something I look forward to crafting. If you try these lunch boxes, I’d love to hear how you make them your own or any fun twists you add!
Here’s to lunchboxes that bring smiles and keep little tummies happy.
FAQs
What are some good protein options for these lunchable-style bento boxes?
Turkey, chicken breast, hard-boiled eggs, cheese, and even chickpea salad or tuna make great protein choices. You can customize based on preferences and allergies.
How can I keep the crackers from getting soggy?
Keep crackers separate from dips by using small silicone cups or containers inside the box. Pack dips just before serving when possible to maintain crunch.
Can these bento boxes be made ahead of time?
You can prep most ingredients a day or two in advance, but it’s best to assemble the boxes fresh daily to keep fruits and veggies crisp and prevent sogginess.
What are some allergy-friendly substitutions?
For nut allergies, swap nut butters with sunflower seed butter or skip them. Use gluten-free crackers for gluten sensitivities and dairy-free cheese alternatives if needed.
How do I keep fruits like apples from browning in the lunchbox?
Spritz apple slices with lemon juice or soak briefly in a mixture of water and lemon before packing. This slows oxidation and keeps them looking fresh.
Pin This Recipe!
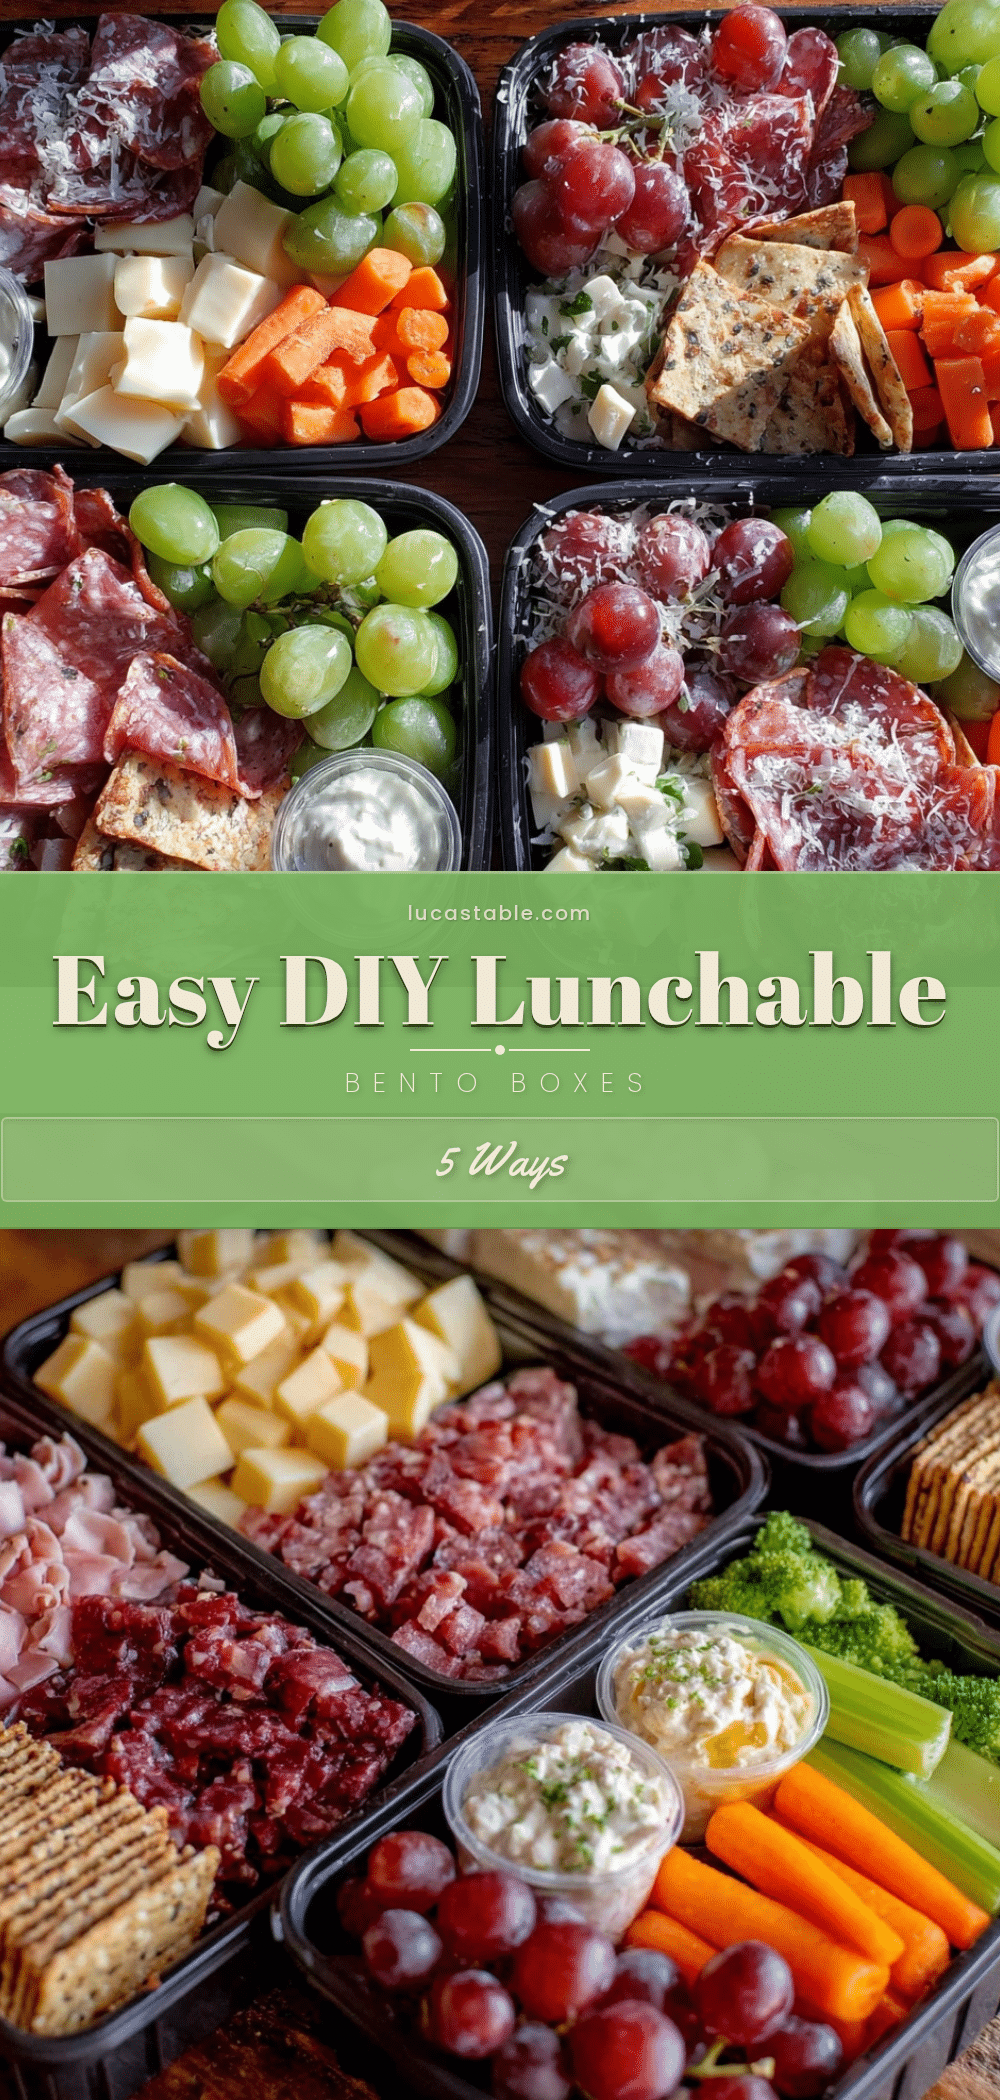
Easy DIY Lunchable-Style Bento Boxes 5 Ways for Perfect Kids Lunches
These easy DIY lunchable-style bento boxes are quick to assemble, customizable, and perfect for kids’ lunches with balanced portions of protein, crunchy snacks, fresh fruits, and dips.
- Prep Time: 10 minutes
- Cook Time: 0 minutes
- Total Time: 15 minutes
- Yield: 1 serving 1x
- Category: Kids Lunch
- Cuisine: American
Ingredients
- 4 oz sliced turkey breast or chicken breast (nitrate-free preferred)
- 1–2 oz cheddar cheese slices or string cheese (sharp cheddar preferred, mozzarella optional)
- 1 hard-boiled egg per box (optional)
- 10–12 whole grain crackers or mini rice cakes (low-sodium preferred)
- ½ cup baby carrots or cucumber slices (about 75 g)
- 2 tablespoons hummus or ranch dip (store-bought or homemade)
- ½ cup grapes or berries (about 75 g, seasonal or frozen thawed)
- 1 small apple, sliced and spritzed with lemon juice
- A small sweet treat such as a couple of dark chocolate chips or a mini muffin (optional)
- Handful of mini pretzels or popcorn (optional)
- 1 tablespoon nut or seed butter (sunflower seed butter as allergy alternative)
- A few olives or pickles (optional)
Instructions
- Slice turkey or chicken breast into 1-inch bite-sized pieces (about 4 oz per box). Peel and slice hard-boiled eggs if using.
- Cut cheese slices or break string cheese into smaller sticks (1-2 oz).
- Wash and cut veggies and fruits: rinse grapes, berries, and baby carrots; slice apples thinly and spritz with lemon juice; slice cucumbers into rounds or sticks.
- Portion 10-12 crackers or mini rice cakes in one compartment. Place 2 tablespoons of hummus or ranch dip in small silicone cups or containers.
- Assemble the bento box by adding proteins and cheese in separate sections. Arrange veggies and fruits side by side. Add dips and a small sweet treat if desired.
- Close the bento box firmly and keep refrigerated until ready to eat. Use an ice pack if storing for several hours.
Notes
Keep dips separate from crackers to avoid sogginess by using small silicone cups. Prep ingredients ahead but assemble boxes fresh daily for best texture. Use ice packs to keep dairy and meats fresh. Spritz apple slices with lemon juice to prevent browning. Adjust portions based on kids’ appetites to avoid waste.
Nutrition
- Serving Size: One bento box servin
- Calories: 350450
- Sugar: 812
- Sodium: 300400
- Fat: 1520
- Saturated Fat: 57
- Carbohydrates: 3040
- Fiber: 35
- Protein: 2025
Keywords: DIY lunchable, kids lunch, bento box, easy lunch, healthy lunch, quick lunch, lunchbox ideas, balanced lunch, gluten-free lunch option, vegetarian lunch option


