For a while, I just accepted that no-bake cheesecakes were either too fussy or too complicated to actually feel easy and light. I mean, there’s something about the phrase “no-bake” that makes you think “lots of steps, weird ingredients, or a fridge timer nightmare.” But honestly, I was after a simple dessert that didn’t demand a bunch of special tools or a whole afternoon spent waiting for things to set. It was that quiet craving for something sweet but straightforward, something I could pull together on a whim without fussing over a complicated recipe.
One particular afternoon, I was staring at a basket of ripe strawberries and a block of cream cheese, thinking about how much I wanted a treat that felt homemade but didn’t have me sweating over the oven or a mixer. The idea of little jars of strawberry cheesecake popped into my head—something portable, pretty, and with a fresh fruit twist. Not too sweet, not too heavy, and definitely no complicated steps.
The result was this recipe for Easy No-Bake Strawberry Cheesecake Jars with 5 Ingredients. It’s quietly satisfying without being over the top, and it’s the kind of dessert you can make just because you want to, not because you planned a whole dessert menu. The jars keep well, they look charming whether you’re hosting or just treating yourself, and the strawberries add that perfect touch of freshness that keeps it feeling light.
It’s not a triumphant story, just a simple one—that moment when you realize sometimes, simple is exactly what you needed all along.
Why You’ll Love This Recipe
This Easy No-Bake Strawberry Cheesecake Jars recipe quickly became a quiet favorite in my kitchen for plenty of reasons. Having tried countless no-bake desserts, I can tell you this one hits the sweet spot between ease and flavor — no weird ingredients or long waits.
- Quick & Easy: You can put these together in about 15 minutes, making them perfect for those last-minute dessert urges or when you want something sweet but don’t want to spend hours in the kitchen.
- Simple Ingredients: Just five staples—cream cheese, strawberries, sugar, crushed cookies, and whipped cream. No need to hunt down anything exotic; chances are you have these in your pantry or fridge.
- Perfect for Any Occasion: Whether it’s a casual get-together, a picnic, or just a sweet treat after dinner, these jars look lovely and taste fresh without being fussy.
- Crowd-Pleaser: The combination of creamy cheesecake and juicy strawberries always gets smiles. Even my picky eaters couldn’t resist asking for seconds.
- Unbelievably Delicious: The texture is silky and light, with just the right balance of tangy cream cheese and sweet berries. Honestly, it’s the kind of dessert that makes you slow down for a moment and savor each bite.
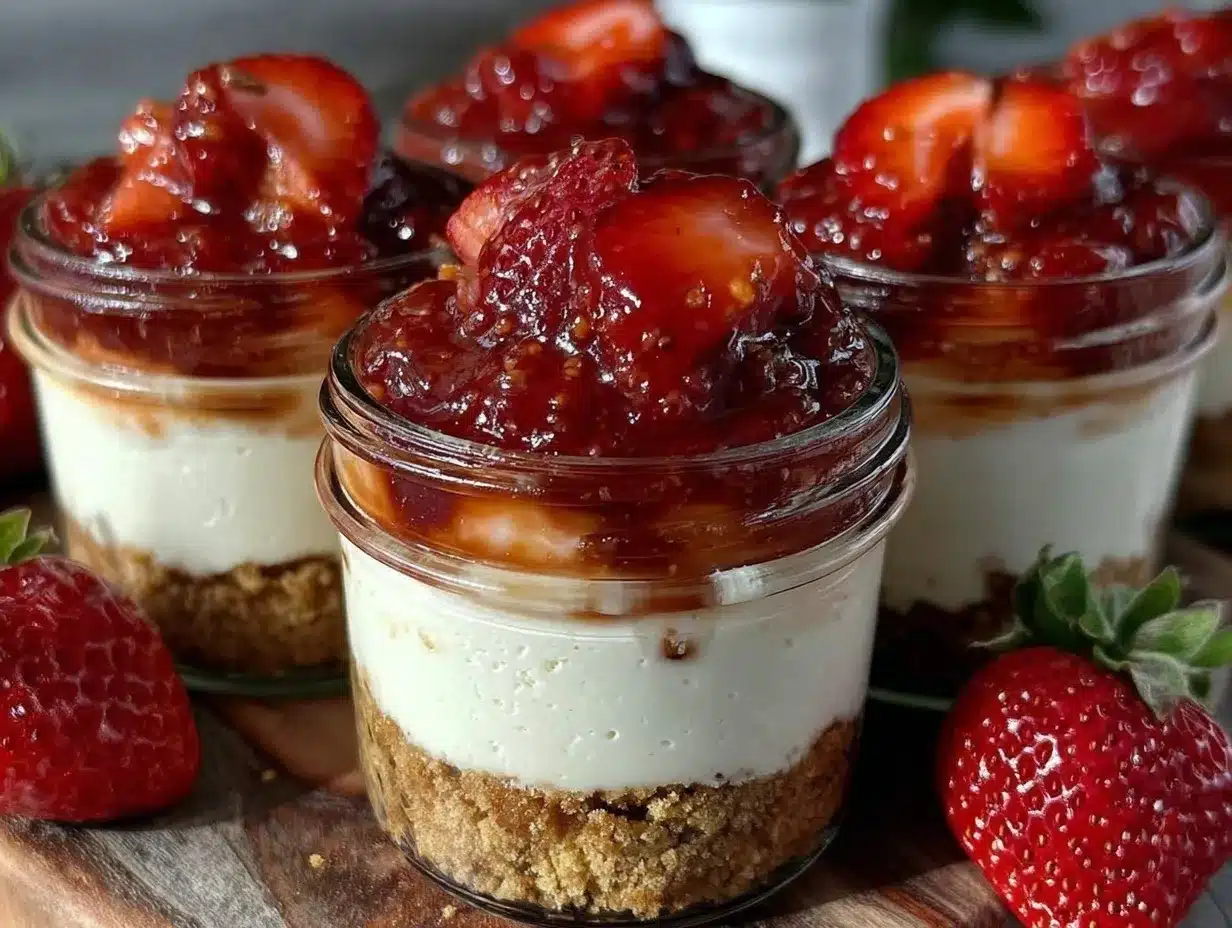
What really sets this apart is the layering technique I stumbled on — crushed cookies on the bottom for crunch, a creamy cheesecake middle, and fresh strawberries on top. It’s simple, but that layering adds a satisfying texture contrast that makes all the difference. Plus, using whipped cream instead of heavy cream keeps it lighter but still luscious.
This recipe has stuck around in my rotation because it feels like dessert without the drama, kind of like the kind of comfort food that doesn’t need to shout to be noticed. If you’re into quick, easy desserts that still deliver on flavor and presentation, this one will quietly win you over.
What Ingredients You Will Need
This recipe uses simple, wholesome ingredients that come together to create a fresh and satisfying dessert without the fuss. Most are pantry or fridge staples, and substitutions are easy if needed.
- Cream Cheese (8 oz / 225 g, softened) – The base of your cheesecake layer. For best texture, I recommend using full-fat cream cheese like Philadelphia, which gives a smooth, creamy consistency.
- Powdered Sugar (1/2 cup / 60 g) – Adds sweetness while dissolving easily into the cream cheese for a smooth finish. You can adjust this amount if you prefer less sweet.
- Vanilla Extract (1 tsp) – Just a splash to bring out the flavors and add warmth to the cheesecake filling.
- Whipped Cream (1 cup / 240 ml) – Either store-bought or homemade. Whipped cream lightens the cheesecake mixture and adds that airy texture. If you want, you can swap for coconut whipped cream for a dairy-free option.
- Strawberries (1 1/2 cups / 225 g, hulled and sliced) – Fresh and sweet, they top the jars and add a juicy, refreshing contrast. In winter, frozen thawed strawberries work too.
- Crushed Graham Crackers or Digestive Biscuits (1 cup / 120 g) – For the base layer. I like using a brand with a little honey or cinnamon for added depth, but plain works fine. You can swap for gluten-free cookies if needed.
These ingredients come together without any complicated steps or extra additives. You don’t need gelatin, eggs, or special thickeners. Just five simple components that keep the dessert light, fresh, and easy to prepare.
Equipment Needed
For this recipe, you don’t need anything fancy. Here’s what I use:
- Mixing Bowls: One medium bowl for the cheesecake mixture and another for whipping cream if you’re making it from scratch.
- Electric Mixer or Hand Whisk: An electric hand mixer speeds things up and helps get the cream cheese silky smooth, but a sturdy whisk works in a pinch if you don’t mind a little arm work.
- Measuring Cups and Spoons: For accuracy, especially with powdered sugar and vanilla extract.
- Small Jars or Dessert Cups: I like using clear glass jars (about 6 oz / 180 ml) so the layers show through. Mason jars are great for gifting or serving.
- Spoon or Small Spatula: To layer the ingredients neatly in each jar.
If you want to make whipped cream fresh, a chilled metal bowl helps it whip faster. For those on a budget, store-bought whipped cream is totally fine and saves time. I’ve tried this recipe with everything from wide-mouth mason jars to simple tumblers, and it always looks pretty and tasty.
Preparation Method
- Crush the cookies: Place about 1 cup (120 g) of graham crackers or digestive biscuits into a sealed plastic bag. Use a rolling pin or the bottom of a heavy pan to crush them into fine crumbs. This should take about 3-5 minutes. The crumbs should be mostly fine but with a few small chunks for texture.
- Prepare the cheesecake filling: In a medium bowl, beat 8 oz (225 g) softened cream cheese with 1/2 cup (60 g) powdered sugar and 1 tsp vanilla extract using an electric mixer or whisk until smooth and creamy, about 2-3 minutes. Make sure there are no lumps. This step is key for a silky filling.
- Fold in whipped cream: Gently fold 1 cup (240 ml) whipped cream into the cream cheese mixture using a spatula. Do this slowly to keep the mixture light and airy. This should take about 1-2 minutes. The filling will look fluffy and slightly thickened.
- Layer the jars: Spoon about 2 tablespoons of the crushed cookie crumbs into the bottom of each jar. Press down lightly with the back of the spoon to create a firm base. Next, add a generous 3-4 tablespoons of the cheesecake filling on top of the crumbs. Smooth the top gently.
- Add the strawberries: Top each jar with about 3-4 sliced strawberries (roughly 1/4 cup or 40 g). If you want, you can toss the strawberries with a little powdered sugar or a squeeze of lemon juice for extra brightness before adding.
- Chill: Cover the jars with lids or plastic wrap and refrigerate for at least 2 hours to let the flavors meld and the cheesecake layer set slightly. Overnight chilling works well too if you want to prep ahead.
- Serve: Before serving, you can add a fresh strawberry slice or a small mint leaf on top for garnish. Enjoy chilled directly from the jar.
Watch out for overmixing the whipped cream into the filling — you want to keep it airy, not dense. Also, pressing the cookie crumbs too hard can make the base too compact; a light press is enough. The best sign you’re on track is a smooth, fluffy cheesecake layer and vibrant, fresh-looking strawberries on top.
Cooking Tips & Techniques
Getting the texture right in no-bake cheesecakes is a bit of an art, but a few tips make all the difference.
- Softening cream cheese: Take it out of the fridge about 30 minutes before starting. If you’re in a hurry, cut it into small cubes to soften faster. Cold lumps lead to a grainy filling.
- Whipping cream: If you’re making your own whipped cream, chill your bowl and beaters first. Stop whipping as soon as you see soft peaks to avoid turning it into butter.
- Folding technique: Use a spatula to fold whipped cream into the cream cheese gently. Overmixing can deflate the air and make the filling heavy.
- Cookie crumbs: For a bit of extra flavor, try mixing a pinch of cinnamon or a teaspoon of melted butter into your crumbs before layering.
- Strawberries: Choose ripe but firm berries so they hold shape when layered. If using frozen, thaw and drain excess juice to avoid soggy tops.
- Chilling time: Don’t skip the chilling step. It helps the cheesecake layer firm up just enough to hold its shape but still feels creamy.
From experience, skipping the chilling or rushing the mixing leads to a less satisfying texture. I learned this the hard way back when I tried to whip together a dessert before a last-minute dinner party, and it ended up too runny. Patience here pays off.
Variations & Adaptations
This recipe is a great base that you can tweak to suit different tastes or dietary needs.
- Berry Swap: Swap strawberries for raspberries, blueberries, or a mix for a different flavor profile. Just keep the quantity the same.
- Gluten-Free Option: Use gluten-free cookies or crushed nuts like pecans or almonds for the crust layer if you avoid gluten.
- Dairy-Free Version: Substitute cream cheese with a plant-based alternative and whipped cream with coconut cream whipped up. The texture will be a little different but still tasty and creamy.
- Chocolate Twist: Add a tablespoon of cocoa powder to the cream cheese mixture for a chocolate cheesecake flavor or sprinkle mini chocolate chips on the crust layer.
- Personal Favorite: I sometimes add a drizzle of balsamic glaze over the strawberries before serving — sounds odd, but it brings out the berry sweetness beautifully.
And if you want to get fancy, layering the jars with a spoonful of strawberry jam or compote between the crust and cheesecake adds a sweet surprise. It’s a nice variation I’ve tried when I had leftover jam from my zesty lemon chicken dinner nights—works great!
Serving & Storage Suggestions
These jars are best served chilled, straight from the fridge. The cool, creamy texture is part of what makes this dessert so refreshing.
- Presentation: Serve with a small spoon and maybe a fresh mint leaf or a thin slice of strawberry on top for a pretty touch.
- Pairings: Goes great with a cup of coffee or light tea after a meal. If you’re serving at a picnic or casual gathering, they complement simple dishes like the easy spaghetti aglio olio or even the creamy tuna pasta for something savory.
- Storage: Keep the jars covered in the refrigerator for up to 3 days. The crust softens slightly over time but the flavor deepens.
- Freezing: Not recommended, as the texture of the cream cheese and whipped cream changes upon thawing.
- Reheating: No need to reheat—this dessert is meant to be enjoyed cold.
Leftovers (if you have any!) taste great the next day, and the strawberries get a bit juicier, making the whole jar a little more luscious. Just give it a gentle stir before eating.
Nutritional Information & Benefits
Here’s an estimate per jar (makes about 4 jars):
| Calories | 280 |
|---|---|
| Fat | 18g |
| Carbohydrates | 25g |
| Protein | 4g |
The cream cheese provides a good source of calcium and protein, while the strawberries add vitamin C and antioxidants. Using whipped cream keeps the dessert light compared to heavier creams or custards. This is a gluten option-friendly recipe if you choose gluten-free cookies, and it’s naturally vegetarian.
From a wellness perspective, this dessert satisfies sweet cravings without overloading on sugar or artificial ingredients. It’s a treat you can feel a little better about, especially when you make it fresh at home.
Conclusion
Easy No-Bake Strawberry Cheesecake Jars with 5 Ingredients is the kind of dessert that feels like a quiet little victory in the kitchen—simple, fresh, and genuinely satisfying. It’s proof that you don’t need a long ingredient list or complicated steps to enjoy a homemade treat that tastes like it took more work than it did.
Feel free to make it your own with different berries, cookie bases, or little flavor twists. I love how adaptable it is, and how it always feels just right, whether it’s a quick weekday dessert or a casual weekend indulgence.
Give it a try and see how easily this becomes your go-to for fuss-free sweets. And if you experiment with it, I’d love to hear how you made it yours!
Frequently Asked Questions
Can I make these jars ahead of time?
Yes, you can prepare the jars up to a day in advance. Just keep them covered in the fridge and add fresh strawberries on top before serving if you want them extra fresh.
What can I use instead of graham crackers?
Digestive biscuits, shortbread cookies, or gluten-free cookies work great as a crust substitute. Even crushed nuts can add a nice crunch if you prefer.
Can I use frozen strawberries?
Yes, but thaw and drain them well to avoid excess moisture making the jars soggy.
Is it possible to make this recipe vegan?
With some tweaks—using plant-based cream cheese and coconut whipped cream—you can create a vegan version. Just be mindful the texture will differ slightly.
How long do these cheesecake jars last in the fridge?
They keep well for up to 3 days when stored covered. The crust softens over time, but the flavor remains delicious.
Pin This Recipe!
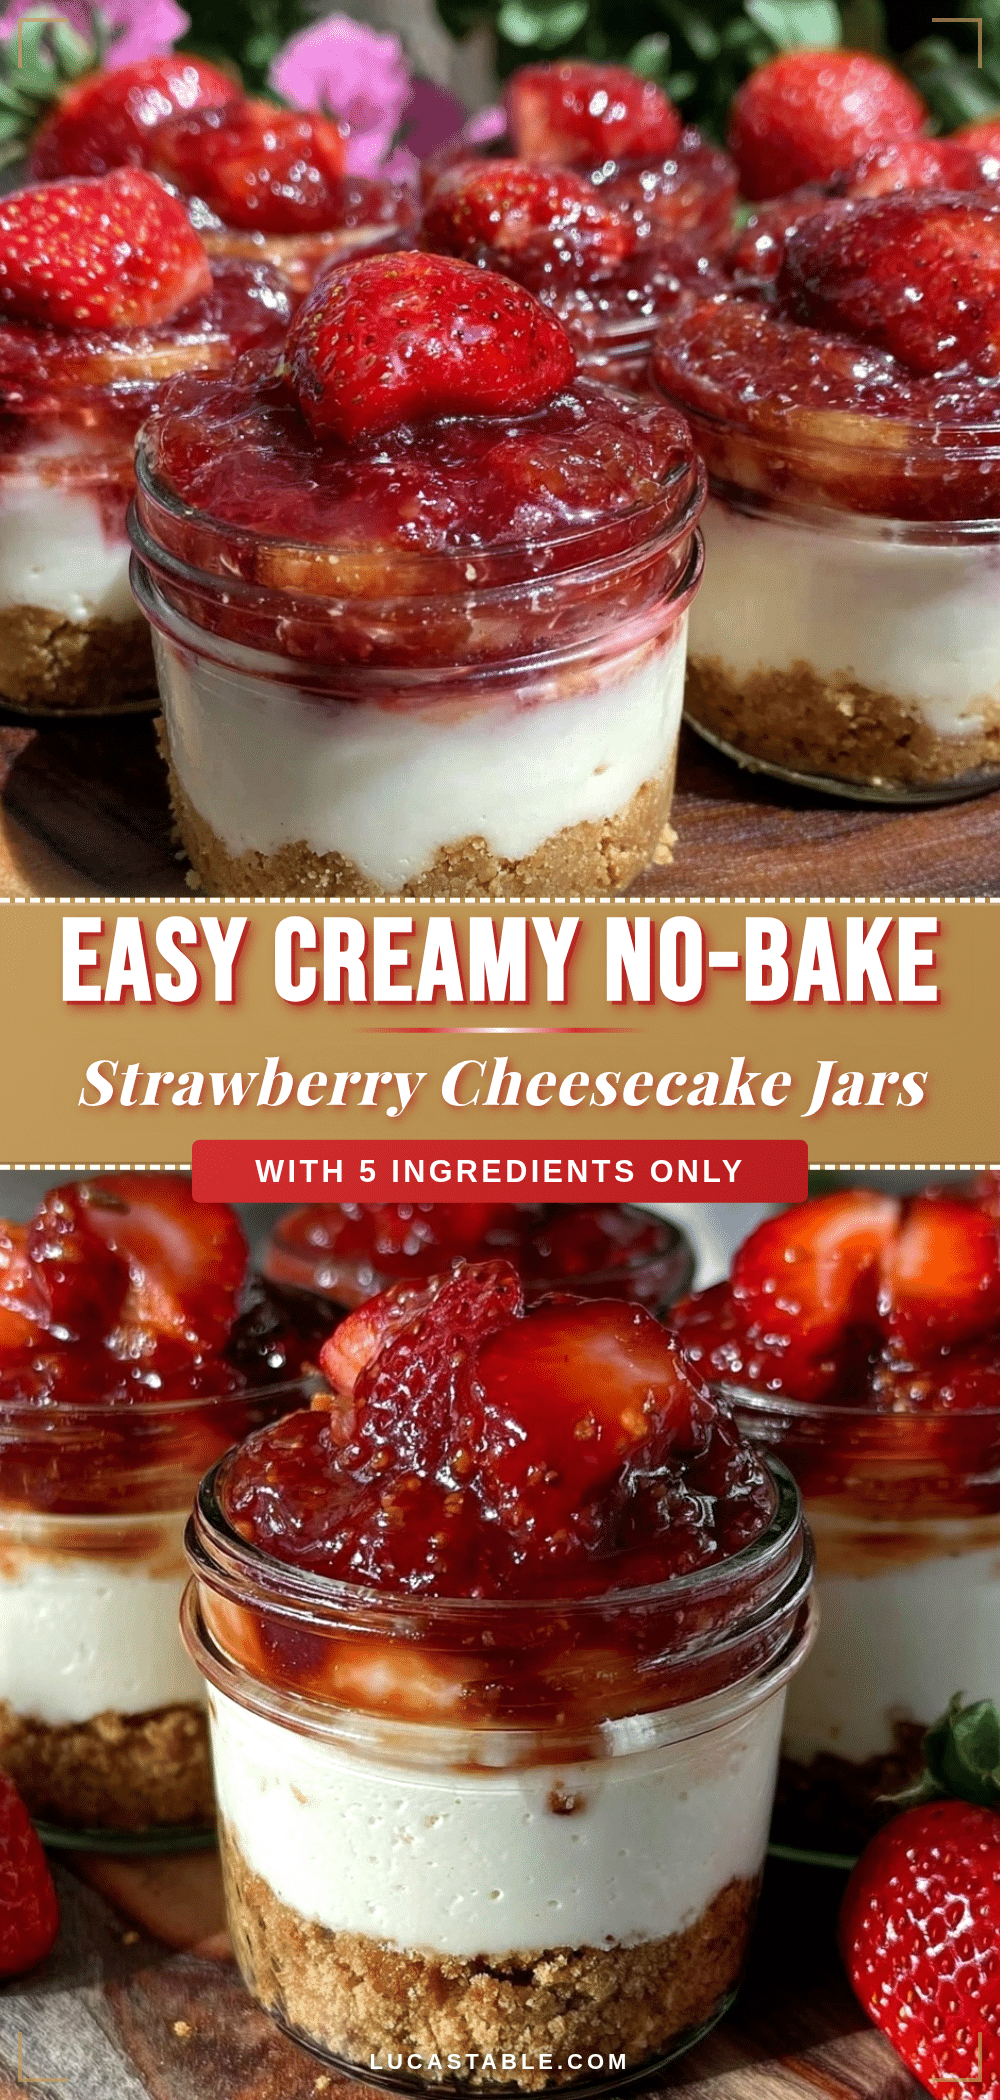
Easy No-Bake Strawberry Cheesecake Jars Recipe with 5 Simple Ingredients
A simple, quick, and light no-bake strawberry cheesecake dessert in portable jars, made with just five ingredients and no complicated steps.
- Prep Time: 15 minutes
- Cook Time: 0 minutes
- Total Time: 2 hours 15 minutes
- Yield: 4 servings 1x
- Category: Dessert
- Cuisine: American
Ingredients
- 8 oz (225 g) cream cheese, softened
- 1/2 cup (60 g) powdered sugar
- 1 tsp vanilla extract
- 1 cup (240 ml) whipped cream (store-bought or homemade)
- 1 1/2 cups (225 g) strawberries, hulled and sliced
- 1 cup (120 g) crushed graham crackers or digestive biscuits
Instructions
- Crush the cookies: Place about 1 cup (120 g) of graham crackers or digestive biscuits into a sealed plastic bag. Use a rolling pin or the bottom of a heavy pan to crush them into fine crumbs with some small chunks for texture (3-5 minutes).
- Prepare the cheesecake filling: In a medium bowl, beat 8 oz (225 g) softened cream cheese with 1/2 cup (60 g) powdered sugar and 1 tsp vanilla extract using an electric mixer or whisk until smooth and creamy (2-3 minutes).
- Fold in whipped cream: Gently fold 1 cup (240 ml) whipped cream into the cream cheese mixture using a spatula to keep it light and airy (1-2 minutes).
- Layer the jars: Spoon about 2 tablespoons of the crushed cookie crumbs into the bottom of each jar. Press lightly to create a firm base. Add 3-4 tablespoons of the cheesecake filling on top and smooth gently.
- Add the strawberries: Top each jar with about 3-4 sliced strawberries (roughly 1/4 cup or 40 g). Optionally toss strawberries with a little powdered sugar or lemon juice before adding.
- Chill: Cover the jars with lids or plastic wrap and refrigerate for at least 2 hours or overnight to let flavors meld and cheesecake layer set.
- Serve: Garnish with a fresh strawberry slice or mint leaf if desired. Serve chilled directly from the jar.
Notes
Soften cream cheese before mixing for smooth texture. Fold whipped cream gently to keep filling airy. Lightly press cookie crumbs to avoid compact base. Chill jars for at least 2 hours for best texture. Use ripe but firm strawberries. Frozen strawberries should be thawed and drained. Variations include swapping berries, gluten-free crust, dairy-free alternatives, or adding cocoa powder for chocolate flavor.
Nutrition
- Serving Size: 1 jar (about 6 oz /
- Calories: 280
- Fat: 18
- Carbohydrates: 25
- Protein: 4
Keywords: no-bake cheesecake, strawberry cheesecake, easy dessert, no-bake dessert, cheesecake jars, quick dessert, simple ingredients


