Flour dust on the counter, kids tugging at my sleeves, and a frantic hunt for the missing rolling pin — all while the clock’s ticking down to trick-or-treat time. Half a pan of sugar cookies already baked but no pumpkin shapes in sight, and honestly, I wasn’t about to let Halloween dinner guests settle for plain old circles. That’s when this recipe for perfect pumpkin-shaped Halloween sugar cookies with marbled icing was born: out of sheer necessity, a pinch of chaos, and a desperate craving for something festive that didn’t require hours of fuss. The kitchen smelled like cinnamon and vanilla, and the vibrant orange and green swirls of icing almost made me forget the mess trailing behind me.
This recipe stuck with me because it’s that rare combo of fun and foolproof — even when you’re juggling sticky little hands and a million other things. The marbled icing is especially satisfying, swirling in those imperfect pumpkin hues that somehow feel just right, like a little handcrafted masterpiece each time. Plus, the cookies hold their shape perfectly, crisp on the edges but tender in the middle — exactly what you want when you’re serving up treats at a last-minute Halloween bash. It’s become my go-to whenever the October rush sneaks up, and honestly, it always gets a little cheer from everyone around the table.
There’s something quietly sweet about these cookies, beyond the sugar and spice. They remind me that even in the middle of chaos, a little creativity (and a steady hand with icing!) can bring a touch of magic to the day.
Why You’ll Love This Recipe
Honestly, making these pumpkin-shaped sugar cookies with marbled icing is one of those kitchen wins that feels like a secret weapon for Halloween. You know how sometimes you want to bake something festive without turning your whole afternoon upside down? This recipe nails that balance by being both approachable and impressive. It’s been tested through many Halloween seasons, with kids and adults alike reaching for seconds (and thirds!).
- Quick & Easy: Comes together in under 45 minutes, perfect for last-minute Halloween prep or a spontaneous baking session with the kids.
- Simple Ingredients: No need for fancy or hard-to-find items; you likely already have everything in your pantry and fridge.
- Perfect for Halloween Parties: Shaped like pumpkins, these cookies add that seasonal charm without any extra effort.
- Crowd-Pleaser: Kids love the fun shapes and colors, and adults appreciate the buttery, soft texture with just the right amount of sweetness.
- Unbelievably Delicious Marbled Icing: The icing is smooth, glossy, and swirled with just enough orange and green to make each cookie look like a tiny work of art.
This recipe isn’t just another sugar cookie. The marbled icing technique adds a creative twist that feels professional but is actually super forgiving for home bakers. Plus, the pumpkin shape holds up well, so your cookies don’t lose their festive silhouette when baked. I’ve even swapped in some gluten-free flour blends for friends with sensitivities, and those turned out fantastic. Honestly, these cookies make me think of all the little moments around the kitchen table — sticky fingers, laughing kids, and that satisfying crunch when you bite in.
What Ingredients You Will Need
This recipe uses simple, wholesome ingredients to deliver bold flavor and satisfying texture without the fuss. Most are pantry staples, and you can easily swap or adjust based on what you have on hand.
- For the Sugar Cookie Dough:
- 2 ¾ cups (345g) all-purpose flour (or gluten-free flour blend for a gluten-free option)
- 1 teaspoon baking powder
- ½ teaspoon salt
- 1 cup (227g) unsalted butter, softened (I like to use Land O Lakes for its creamy flavor)
- 1 ½ cups (300g) granulated sugar
- 1 large egg, room temperature
- 1 teaspoon vanilla extract (pure, if you can get it—makes a difference!)
- 2 tablespoons whole milk (or dairy-free milk like almond if needed)
- For the Marbled Icing:
- 2 cups (240g) powdered sugar, sifted
- 2 tablespoons whole milk (or as needed to adjust consistency)
- 1 teaspoon vanilla extract
- Orange gel food coloring
- Green gel food coloring
- Optional Decoration:
- Edible black food pen (for pumpkin face details)
- Sprinkles or edible glitter for extra sparkle
Look for firm, fresh butter and sift your powdered sugar to avoid lumps in the icing. The gel food colors are best because they give vibrant hues without thinning out the icing. When pumpkins are in season, feel free to swap in some fresh pumpkin puree to the dough for a softer, spiced version — but that’s a whole different vibe from this classic cookie texture.
Equipment Needed
- Stand mixer or hand mixer (a good mixer really speeds up creaming the butter and sugar)
- Rolling pin (a classic wooden one works great, but silicone is easier to clean)
- Pumpkin-shaped cookie cutters (various sizes for fun variety)
- Baking sheets lined with parchment paper or silicone mats
- Mixing bowls (medium and small)
- Spatula for mixing and spreading icing
- Small bowls or cups for dividing and coloring icing
- Toothpicks or small forks (to create the marbled effect)
- Cooling racks (to cool cookies completely before icing)
If you don’t have a stand mixer, a sturdy hand mixer works just fine. For rolling pins, I sometimes use a clean wine bottle in a pinch (not ideal, but desperate times!). The pumpkin cookie cutters can be found at most craft or kitchen stores around fall, but if you want to get creative, a simple circle cutter and a knife can make rough pumpkin shapes too.
Preparation Method
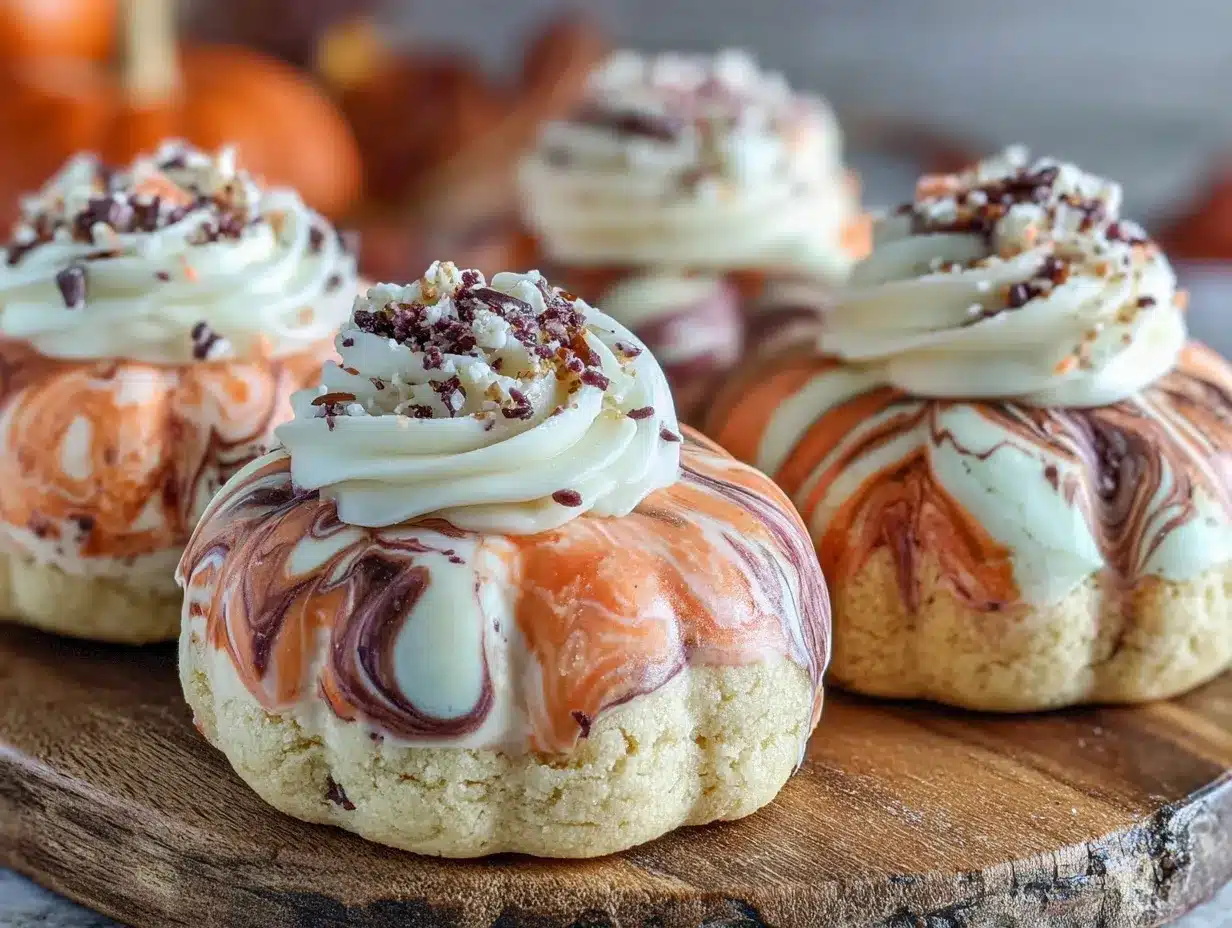
- Mix Dry Ingredients: In a medium bowl, whisk together 2 ¾ cups (345g) all-purpose flour, 1 teaspoon baking powder, and ½ teaspoon salt. Set aside.
- Cream Butter and Sugar: Using a stand mixer or hand mixer, beat 1 cup (227g) softened unsalted butter with 1 ½ cups (300g) granulated sugar until light and fluffy, about 3–4 minutes. This step is key for tender cookies, so don’t rush it.
- Add Egg and Vanilla: Beat in 1 large room-temperature egg and 1 teaspoon pure vanilla extract until combined. The mixture should look creamy and smooth.
- Combine Wet and Dry: Gradually add the dry ingredients to the wet, alternating with 2 tablespoons whole milk, mixing just until incorporated. Over-mixing at this stage can make cookies tough, so mix gently.
- Chill the Dough: Flatten the dough into a disk, wrap in plastic wrap, and refrigerate for at least 30 minutes. This keeps the dough firm and easier to roll out.
- Preheat Oven: Set your oven to 350°F (175°C) and line baking sheets with parchment paper.
- Roll and Cut: Lightly flour your surface and rolling pin. Roll dough to about ¼ inch (6 mm) thickness. Use pumpkin-shaped cookie cutters to cut out shapes, rerolling scraps as needed.
- Bake: Place cookies about 1 inch (2.5 cm) apart on baking sheets. Bake for 10–12 minutes, until edges are just golden. Avoid overbaking to keep them soft inside.
- Cool: Transfer cookies to wire racks and let cool completely before icing.
- Prepare Icing: In a bowl, mix 2 cups (240g) sifted powdered sugar with 2 tablespoons milk and 1 teaspoon vanilla. Adjust milk to get a thick but spreadable consistency.
- Divide and Color: Split icing into three bowls. Leave one plain (white), and color the others orange and green with gel food coloring.
- Create Marbled Icing: On each cookie, spoon small dollops of each icing color next to one another. Use a toothpick or small fork to gently swirl the colors together, forming a marbled pumpkin effect. Be careful not to over-mix or colors will blend into a single shade.
- Decorate: If desired, once icing sets slightly, use an edible black food pen to add pumpkin faces or stems for a little extra personality.
- Let Set: Allow icing to harden for at least 1 hour before stacking or storing.
Pro tip: If your dough feels sticky while rolling, pop it back in the fridge for 10 minutes. Also, don’t skip chilling—it makes cutting shapes much easier and helps avoid spreading in the oven. When I was testing this recipe, the marbling was always the most fun part — a little messy but totally worth it for those swirled patterns.
Cooking Tips & Techniques
Making sugar cookies with perfect shape and icing that looks as good as it tastes takes a few tricks up your sleeve. First, patience is key. Chilling the dough isn’t just a suggestion — it keeps the cookies from spreading like crazy and losing their pumpkin shape. I learned that the hard way after a couple of too-thin batches.
When creaming butter and sugar, make sure your butter is softened but not melted. Too warm, and your cookies spread too much; too cold, and mixing is a slog. The light and fluffy texture at this stage means air is incorporated, which helps the cookies rise just right.
The marbled icing is where you can get creative but be careful. Use gel colors sparingly — they pack a punch. Swirling with a toothpick is all you need, no heavy mixing. If the icing gets too thin, add more powdered sugar. I’ve found that setting up a little assembly line with bowls of colored icing helps speed things up, especially if you’re decorating with kids.
Also, bake the cookies on parchment or silicone mats — it helps them bake evenly and prevents sticking. And don’t overload your baking sheet, or they’ll steam rather than crisp. If you want to multitask, this recipe pairs well with some quick and flavorful dinners — I often make zesty lemon chicken or spaghetti aglio e olio on busy nights before dessert time rolls around.
Variations & Adaptations
This recipe is pretty versatile, and you can tweak it to fit your taste or dietary needs without losing the festive Halloween charm.
- Spiced Pumpkin Cookies: Add 1 teaspoon cinnamon, ½ teaspoon nutmeg, and a pinch of cloves to the dry ingredients for a cozy fall flavor twist.
- Gluten-Free Version: Swap the all-purpose flour for a 1-to-1 gluten-free blend like Bob’s Red Mill. The texture stays soft, and the shapes hold up well.
- Vegan Adaptation: Use dairy-free butter and substitute the egg with a flax egg (1 tablespoon ground flaxseed mixed with 3 tablespoons water). The icing can be made with plant-based milk too.
- Alternative Icing Colors: Instead of traditional orange and green, try purple and black for a spooky vibe or pastel shades for a more whimsical look.
- Chocolate Swirl: Add a tablespoon of cocoa powder to part of the icing for a chocolate twist in the marbling.
Personally, I once tried adding a little pumpkin puree to the dough for extra moisture, but the dough got too soft to hold shapes well. If you want pumpkin flavor, I recommend sticking to the spice addition and saving the puree for other dishes instead.
Serving & Storage Suggestions
These pumpkin-shaped sugar cookies are best served at room temperature once the icing has set fully. Arrange them on a festive platter with a few fresh autumn leaves or mini pumpkins for a charming Halloween display. They’re perfect alongside a warm cup of spiced cider or your favorite black coffee.
Store leftovers in an airtight container at room temperature for up to 5 days. If you want to keep them longer, freeze the plain cookies before icing for up to 3 months. Once iced, freezing is possible but might slightly affect the icing texture.
To reheat, let frozen cookies thaw at room temperature; avoid microwaving as it can soften the icing too much. Over time, the flavors meld beautifully—the buttery cookie and vanilla icing taste even better the next day, if you can resist eating them all immediately!
Nutritional Information & Benefits
Each pumpkin-shaped sugar cookie with marbled icing contains approximately 150-180 calories, making it a treat you can enjoy without going overboard. The cookies provide a decent amount of energy from butter and sugar but keep in mind they’re best as an occasional indulgence.
The use of real butter adds a touch of richness and some fat-soluble vitamins, while the egg contributes protein and binding. Using natural vanilla extract enhances the flavor without artificial additives. For those mindful of allergies, this recipe can be adapted to gluten-free or vegan versions as mentioned earlier.
From a wellness perspective, baking at home means you control the ingredients and avoid preservatives. Plus, sharing these cookies with family or friends adds a special connection that’s just as nourishing as the treat itself.
Conclusion
Perfect pumpkin-shaped Halloween sugar cookies with marbled icing are one of those recipes that feel like a tiny celebration in your mouth and your kitchen. They come together quickly, look festive without stress, and taste like classic comfort with a fun twist. I’ve kept coming back to this recipe year after year because it’s forgiving, adaptable, and always a hit with guests.
Feel free to make these your own — whether that means switching up the colors, playing with spices, or getting the whole family involved in decorating. It’s those little homemade touches that turn simple sugar cookies into memorable Halloween treats. I hope these cookies bring a bit of calm to your busy kitchen and a lot of smiles to your table this spooky season.
When you get a chance, I’d love to hear how your marbled pumpkins turned out or any creative spins you took on the recipe. Baking is better when shared, after all!
FAQs About Perfect Pumpkin-Shaped Halloween Sugar Cookies
Can I make the dough ahead of time?
Yes! You can prepare the dough and chill it wrapped in plastic for up to 3 days before rolling and cutting. Just let it soften slightly at room temperature before rolling.
What if I don’t have pumpkin-shaped cookie cutters?
No worries! You can use a circle cutter and gently shape the dough with a knife to form rough pumpkin shapes, or try other fall-themed cutters like leaves or ghosts.
How do I prevent the icing from getting too runny?
Add powdered sugar a tablespoon at a time until the icing reaches a thick but spreadable consistency. Using gel food coloring helps keep the icing from thinning out.
Can I store the iced cookies in the fridge?
It’s better to keep them at room temperature in an airtight container. Refrigeration can cause the icing to sweat or soften too much.
Is there a way to make these cookies dairy-free?
Absolutely! Use dairy-free butter and milk alternatives, and check your powdered sugar to ensure it’s vegan-friendly. The cookies turn out just as tasty!
Pin This Recipe!
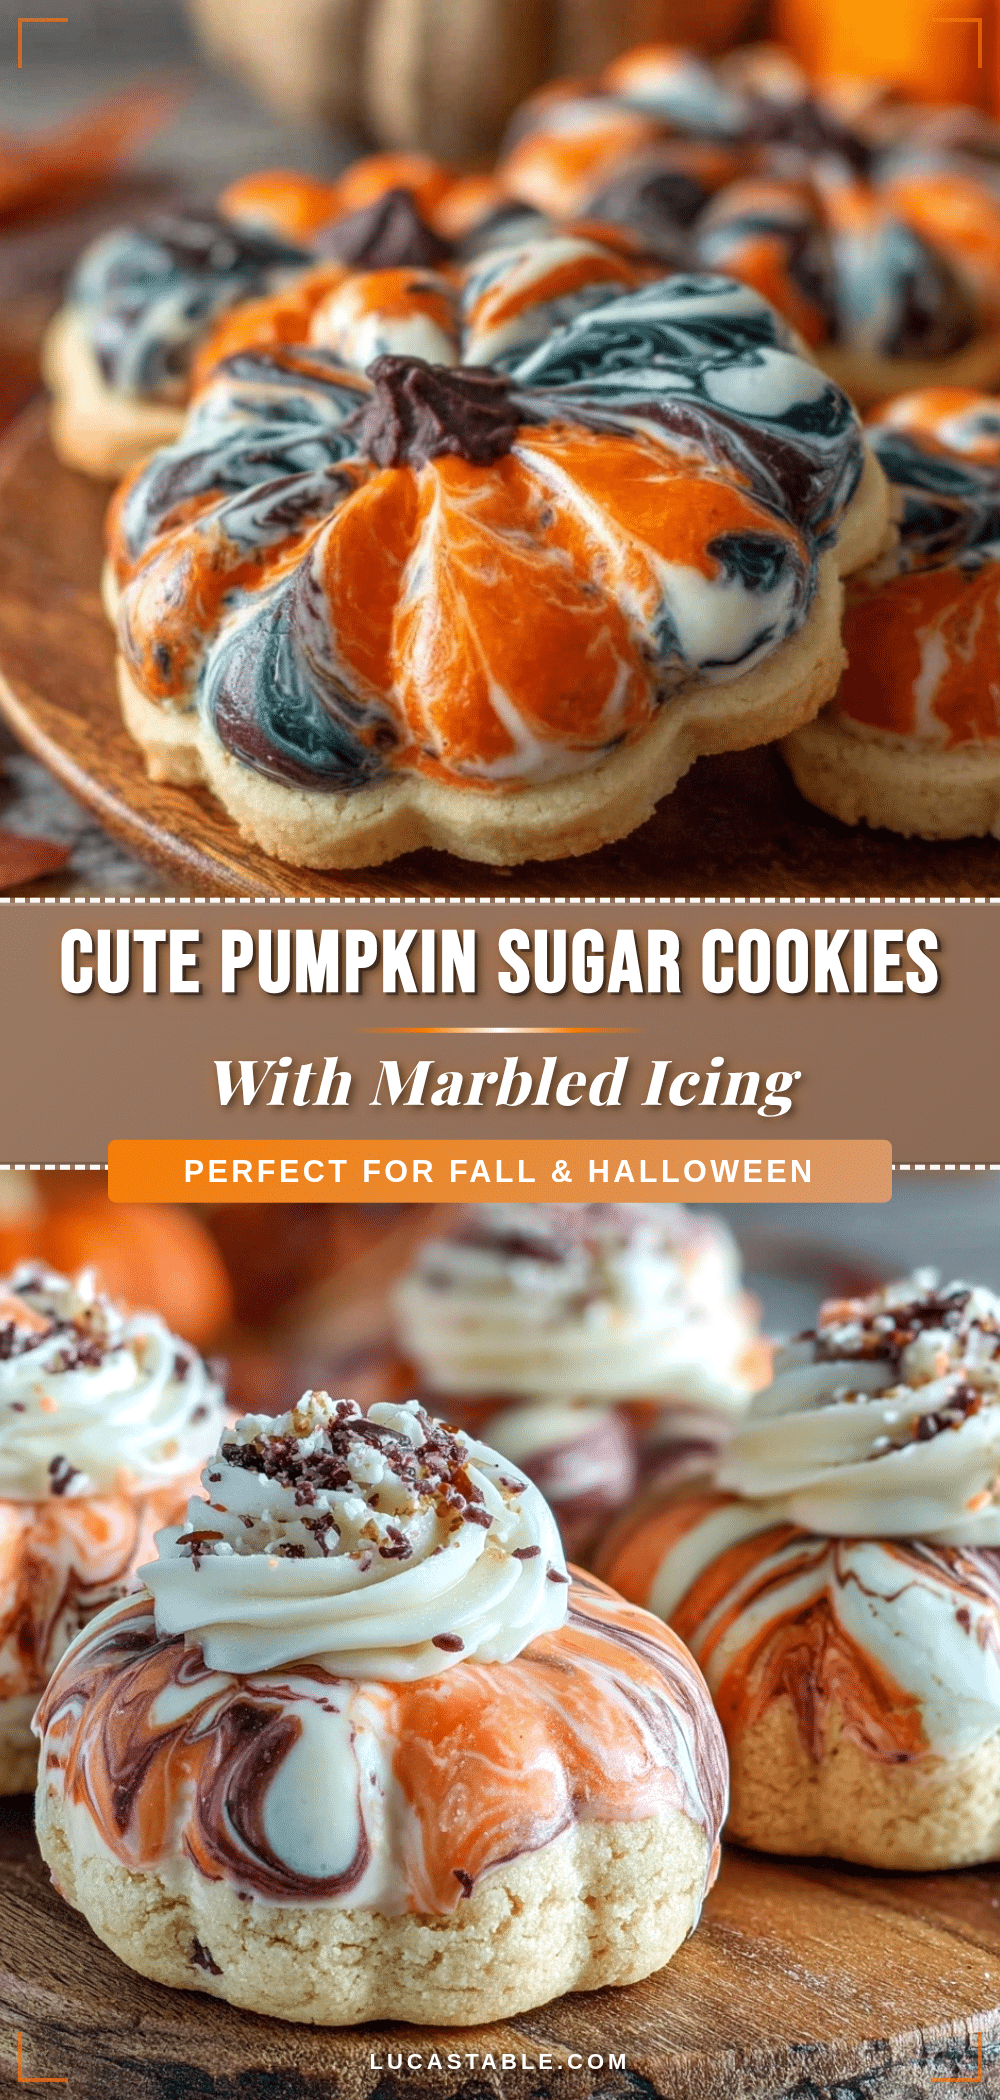
Perfect Pumpkin-Shaped Halloween Sugar Cookies Easy Marbled Icing Recipe

Festive pumpkin-shaped sugar cookies with a fun and foolproof marbled icing, perfect for Halloween parties. These cookies are crisp on the edges, tender inside, and decorated with vibrant orange and green swirls.
- Prep Time: 15 minutes
- Cook Time: 12 minutes
- Total Time: 45 minutes
- Yield: 24 cookies 1x
- Category: Dessert
- Cuisine: American
Ingredients
- 2 ¾ cups (345g) all-purpose flour (or gluten-free flour blend for a gluten-free option)
- 1 teaspoon baking powder
- ½ teaspoon salt
- 1 cup (227g) unsalted butter, softened
- 1 ½ cups (300g) granulated sugar
- 1 large egg, room temperature
- 1 teaspoon vanilla extract
- 2 tablespoons whole milk (or dairy-free milk like almond if needed)
- 2 cups (240g) powdered sugar, sifted
- 2 tablespoons whole milk (or as needed to adjust consistency)
- 1 teaspoon vanilla extract
- Orange gel food coloring
- Green gel food coloring
- Optional: Edible black food pen (for pumpkin face details)
- Optional: Sprinkles or edible glitter for extra sparkle
Instructions
- In a medium bowl, whisk together 2 ¾ cups (345g) all-purpose flour, 1 teaspoon baking powder, and ½ teaspoon salt. Set aside.
- Using a stand mixer or hand mixer, beat 1 cup (227g) softened unsalted butter with 1 ½ cups (300g) granulated sugar until light and fluffy, about 3–4 minutes.
- Beat in 1 large room-temperature egg and 1 teaspoon pure vanilla extract until combined.
- Gradually add the dry ingredients to the wet, alternating with 2 tablespoons whole milk, mixing just until incorporated.
- Flatten the dough into a disk, wrap in plastic wrap, and refrigerate for at least 30 minutes.
- Preheat oven to 350°F (175°C) and line baking sheets with parchment paper.
- Lightly flour your surface and rolling pin. Roll dough to about ¼ inch (6 mm) thickness. Use pumpkin-shaped cookie cutters to cut out shapes, rerolling scraps as needed.
- Place cookies about 1 inch (2.5 cm) apart on baking sheets. Bake for 10–12 minutes, until edges are just golden.
- Transfer cookies to wire racks and let cool completely before icing.
- In a bowl, mix 2 cups (240g) sifted powdered sugar with 2 tablespoons milk and 1 teaspoon vanilla. Adjust milk to get a thick but spreadable consistency.
- Split icing into three bowls. Leave one plain (white), and color the others orange and green with gel food coloring.
- On each cookie, spoon small dollops of each icing color next to one another. Use a toothpick or small fork to gently swirl the colors together, forming a marbled pumpkin effect.
- If desired, once icing sets slightly, use an edible black food pen to add pumpkin faces or stems.
- Allow icing to harden for at least 1 hour before stacking or storing.
Notes
Chill dough for at least 30 minutes to prevent spreading and maintain shape. Use gel food coloring for vibrant icing without thinning. If dough is sticky, chill again before rolling. Avoid overbaking to keep cookies tender. Store iced cookies at room temperature in an airtight container for up to 5 days. Freeze plain cookies for up to 3 months.
Nutrition
- Serving Size: 1 cookie
- Calories: 165
- Sugar: 15
- Sodium: 90
- Fat: 7
- Saturated Fat: 4
- Carbohydrates: 25
- Protein: 2
Keywords: Halloween cookies, pumpkin sugar cookies, marbled icing, sugar cookies, festive cookies, Halloween treats, easy sugar cookies


