For a while, I just accepted that hosting a parents’ night meant standing over a hot stove for two hours while everyone else sipped wine and caught up. The whole point was to relax with other adults, but I’d be stuck layering dips and slicing baguettes until my back ached. I wanted something that felt special—something that looked like I’d put in way more effort than I actually did—without missing the actual conversation. That’s where these easy small-batch charcuterie cups for parents’ night came from. Honestly, they started as a bit of a last-minute panic. I had a dozen mini plastic cups left over from a kid’s party, a block of cheddar, and about fifteen minutes before the doorbell rang. I threw some salami and grapes in there, crossed my fingers, and set them out. They disappeared before I even got my coat off.
That was the moment I realized finger food didn’t have to be fussy. These little cups are the perfect answer to the “I want to host but I also want to enjoy myself” problem. They’re portable, which means no one is stuck holding a plate on their lap. They’re customizable, so you can make a few for picky eaters and a few for the adventurous types. And the best part? You can prep the whole batch in under twenty minutes. It’s the kind of appetizer that lets you be a good host without becoming a frazzled one. I’ve been making this version for two years now, and it’s the only thing I bring to school events. It just works.
Why You’ll Love This Recipe
These easy small-batch charcuterie cups for parents’ night are designed for the person who wants to show up with something impressive but doesn’t have time to fuss. I’ve tested this approach through a dozen different gatherings, and it never fails.
- Quick & Easy : You can assemble the entire batch in under 20 minutes. No cooking, no baking, no complicated steps. Just grab, layer, and go.
- Simple Ingredients : Everything comes from the grocery store deli section. You likely already have crackers and nuts in your pantry.
- Perfect for Parents’ Night : These cups are self-contained, so there is no double-dipping, no shared serving spoons, and no mess. They are ideal for mingling.
- Crowd-Pleaser : I’ve watched kids sneak these, adults grab seconds, and even my picky mother-in-law finish an entire cup. The variety ensures there is something for everyone.
- Unbelievably Delicious : The combination of salty meats, creamy cheese, tangy pickles, and sweet fruit hits every craving. It’s a flavor bomb in a tiny cup.
What makes this recipe different from other charcuterie ideas is the portion control and the no-plate-required setup. You aren’t wrestling with a giant wooden board that takes up half the table. Each person gets their own curated selection. It feels personal, intentional, and way more thoughtful than a standard appetizer platter. Plus, you can make them ahead of time and just pull them out of the fridge when guests arrive. That alone is worth its weight in gold on a busy school night.
What Ingredients You Will Need
This recipe uses simple, store-bought ingredients that come together to create a balanced, satisfying bite every time. Here is what you need to grab:
- Salami or Pepperoni – Thinly sliced. I prefer Genoa salami for its mild flavor, but pepperoni works great for a spicier kick. (Fold or roll each slice for visual appeal)
- Cheddar Cheese – Cut into small cubes, about ½-inch. Sharp cheddar adds a nice tang. I recommend Tillamook or Cabot for consistent quality.
- Red Seedless Grapes – Washed and dried. They add a burst of sweetness that cuts through the saltiness of the meat and cheese.
- Almonds or Cashews – Roasted and salted. A handful adds crunch and a nutty flavor. (Use honey-roasted for a sweeter twist)
- Mini Pretzel Twists or Crackers – For crunch and a bit of salt. Ritz crackers work beautifully, or use gluten-free crackers if needed.
- Cornichons or Small Pickles – These tiny gherkins add acidity and brightness. They are optional but highly recommended for balance.
- Olives (Optional) – Pitted kalamata or green olives add a briny pop. I use them about half the time depending on the crowd.
- Fresh Rosemary Sprigs (Optional) – For garnish. It adds a nice visual touch and a subtle herbal aroma.
Substitution Guidance: If you are avoiding dairy, swap the cheddar for dairy-free cheese cubes or omit cheese entirely and double up on the nuts and olives. For a lower-sodium version, use unsalted nuts and low-sodium deli meats. You can also swap grapes for dried apricots or apple slices, though fresh fruit holds up better in the cup without getting soggy.
Equipment Needed
You don’t need any fancy tools to make these cups. In fact, you probably already own everything required.
- Small Plastic or Paper Cups – 5-ounce or 7-ounce sizes work best. I use clear plastic cups so the layers are visible. (Solo brand is reliable)
- Cutting Board – For slicing cheese and prepping fruit.
- Sharp Knife – A chef’s knife or paring knife works fine for cubing cheese.
- Small Bowl or Tray – For holding prepped ingredients before assembly.
- Serving Tray – To arrange the cups for easy grabbing.
Budget-Friendly Tip: If you don’t have small cups, use small mason jars or even disposable shot glasses for a fun, mini version. I’ve used cleaned-out yogurt cups in a pinch, and they worked perfectly.
Preparation Method
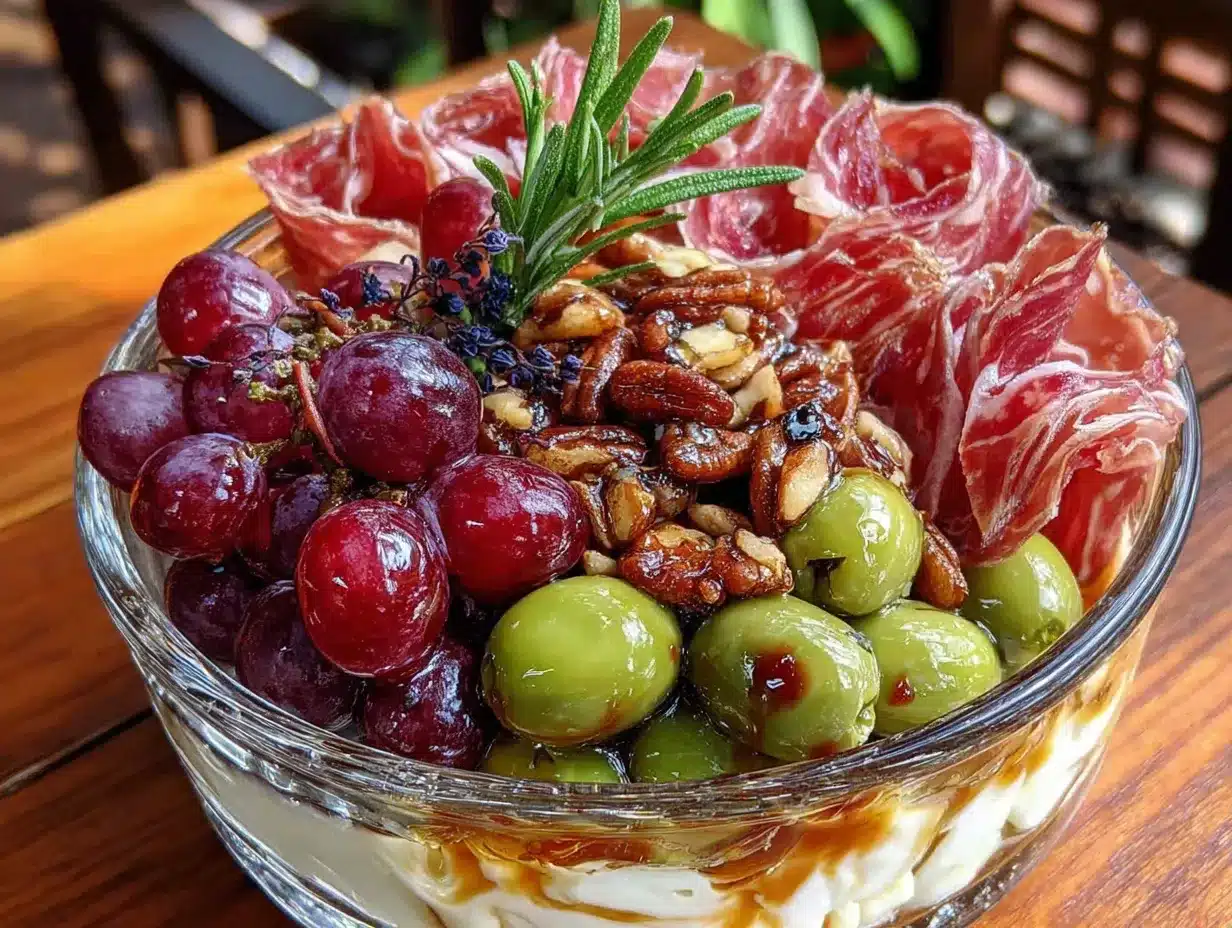
- Prep Your Ingredients (5 minutes): Wash and dry the grapes thoroughly. Cube the cheddar cheese into even ½-inch pieces. If your salami slices are large, cut them in half or into quarters. Set everything out in small bowls so you can grab and go.
- Layer the Base (2 minutes per cup): Start by placing a small handful of almonds or cashews in the bottom of each cup. This creates a sturdy base and adds crunch. For 12 cups, use about ¼ cup of nuts total.
- Add the Cheese (1 minute per cup): Drop 3 to 4 cubes of cheddar cheese on top of the nuts. Try to space them out so they aren’t all stuck together.
- Layer the Meat (2 minutes per cup): Fold or roll a slice of salami and tuck it into the cup, leaning it against the side so it is visible. This adds height and visual appeal. Use one slice per cup for small cups, or two for larger ones.
- Add the Fruit (1 minute per cup): Place 2 to 3 grapes on top of the cheese and meat. They should sit naturally without being crammed. If you are using olives, add one or two next to the grapes.
- Insert the Pickles (1 minute per cup): Tuck one or two cornichons into the side of the cup. They add a bright green pop of color and acidity.
- Top with Crackers (1 minute per cup): Gently press 2 to 3 mini pretzel twists or crackers into the top layer, standing them upright or leaning them against the rim. This keeps them from getting soggy.
- Garnish (Optional, 30 seconds per cup): Stick a small sprig of fresh rosemary into the center of each cup. It looks fancy and smells wonderful.
- Chill Until Serving (Optional): If you are making these ahead, cover the tray with plastic wrap and refrigerate for up to 4 hours. Take them out 15 minutes before serving to let the cheese soften slightly.
Sensory Cue: When you finish layering, the cup should look full but not overflowing. The cheese and grapes should peek out from between the meat and crackers. You want each cup to feel abundant but not messy.
Cooking Tips & Techniques
I’ve made these cups enough times to know where things can go sideways. Here are a few lessons I learned the hard way:
Don’t overfill the cups. I know it’s tempting to cram as much as possible into each one, but if the cup is too full, the crackers will break and the grapes will pop out. Leave a little breathing room at the top. Your guests will appreciate being able to actually grab the food without a struggle.
Keep wet ingredients away from dry. If you are using olives or pickles, make sure they are patted dry with a paper towel before adding them. Excess moisture will turn your crackers and pretzels into sad, limp pieces within an hour. Nobody wants a soggy snack.
Layer strategically for visual appeal. The first thing people see is the top layer. Make sure your best-looking ingredients (like the folded salami and bright red grapes) are visible. The nuts and smaller pieces can hide at the bottom. This is the same trick professional caterers use to make small plates look expensive.
Prep everything before you start assembling. I used to cube cheese and wash grapes while building the cups, and it always took twice as long. Have all your ingredients prepped and within arm’s reach. This turns the assembly into a quick, almost meditative process.
Make extra for yourself. Honestly, these cups are addictive. I always set aside two cups for myself before the guests arrive. Otherwise, I end up hovering near the tray and looking guilty.
Variations & Adaptations
One of the best things about this recipe is how flexible it is. You can swap ingredients based on what you have on hand or what your guests like.
Dietary Variations: For a gluten-free version, use gluten-free crackers or omit crackers entirely and add extra nuts and cheese. For a dairy-free version, swap cheddar for dairy-free cheese cubes or use marinated artichoke hearts instead. For a low-carb option, skip the crackers and pretzels and double up on salami and nuts.
Seasonal Variations: In the summer, swap grapes for fresh cherry tomatoes or sliced peaches. In the fall, use apple slices and dried cranberries. In the winter, add a few mini gingerbread cookies for a festive touch. The base structure stays the same; just rotate the fruit and garnish to match the season.
Flavor Variations: Try a Mediterranean version with feta cheese, kalamata olives, cherry tomatoes, and cucumber slices. Or go Italian with mozzarella balls, prosciutto, sun-dried tomatoes, and basil leaves. The possibilities are endless, and each variation feels like a completely different recipe.
Personal Variation I Love: I once made a batch with smoked gouda instead of cheddar and added a few candied pecans on top. It was a huge hit. The smoky flavor paired beautifully with the sweet grapes and salty pretzels. I still make that version for holiday parties.
Serving & Storage Suggestions
These cups are best served at room temperature. If you have refrigerated them, let them sit out for about 15 minutes before serving. This allows the cheese to soften slightly and the flavors to meld together.
Presentation Tip: Arrange the cups on a large wooden board or a white platter. If you are feeling extra fancy, add a small bowl of extra crackers or nuts in the center of the tray for refills. You can also label each cup if you made multiple variations, using small flags or toothpick labels.
Complementary Dishes: These cups pair beautifully with a glass of crisp white wine or a light beer. If you are serving a full spread, they go great alongside a quick zesty lemon chicken or a creamy tuna pasta for a more substantial meal. For a lighter option, a simple green salad with vinaigrette balances the richness of the charcuterie.
Storage Instructions: If you have leftovers (which rarely happens, but just in case), cover the tray tightly with plastic wrap and refrigerate for up to 24 hours. The crackers may soften slightly, but the flavors will still be good. Do not freeze these cups—the texture of the grapes and cheese will suffer.
Reheating: These are served cold or at room temperature, so no reheating is needed. If you want to serve them warm, you can briefly heat the cheese and meat in a microwave for 10 seconds, but I prefer them as-is.
Nutritional Information & Benefits
These cups are designed to be a balanced snack with protein, healthy fats, and a touch of natural sweetness. Here is an approximate nutritional breakdown for one cup (using almonds, cheddar, salami, grapes, and pretzels):
- Calories: 180-220
- Protein: 10-12g
- Fat: 14-16g
- Carbohydrates: 12-14g
- Fiber: 2-3g
- Sugar: 6-8g (from grapes)
- Sodium: 400-500mg
Health Benefits: Almonds are rich in vitamin E and healthy monounsaturated fats. Grapes provide antioxidants and hydration. Cheese offers calcium and protein. This snack provides sustained energy without a sugar crash, making it perfect for a long parents’ night event.
Dietary Considerations: This recipe contains dairy (cheese), gluten (pretzels/crackers), and tree nuts (almonds). It can be made gluten-free, dairy-free, or nut-free with simple substitutions. Always check labels if serving guests with allergies.
Conclusion
These easy small-batch charcuterie cups for parents’ night are my go-to for a reason. They solve the real problem of wanting to host well without spending the whole evening in the kitchen. The cups look impressive, taste fantastic, and let you actually enjoy the party you worked so hard to put together. I love that I can make them in the afternoon, stash them in the fridge, and then just pull them out when the doorbell rings. It’s the kind of recipe that makes you feel like a pro even when you’re running on three hours of sleep and a cup of cold coffee.
I encourage you to customize these cups based on what you and your guests love. Swap the cheese, change the meat, or add a fun seasonal fruit. The structure is forgiving, and the results are always delicious. If you try this recipe, I’d love to hear how it went. Drop a comment below with your favorite variation, or share a photo of your cups on social media. Until next time, happy snacking!
Frequently Asked Questions
Can I make these charcuterie cups ahead of time?
Yes, you can assemble them up to 4 hours in advance. Cover the tray with plastic wrap and refrigerate. Let them sit at room temperature for 15 minutes before serving to let the flavors come together.
What size cups should I use?
Small 5-ounce or 7-ounce cups work best. Clear plastic cups are ideal because they show off the beautiful layers. Paper cups also work, but you lose the visual appeal.
Can I use different types of cheese?
Absolutely. Smoked gouda, brie, mozzarella balls, or even crumbled goat cheese all work wonderfully. Just make sure the cheese is firm enough to hold its shape in the cup.
How many cups does this recipe make?
This recipe makes about 12 small cups. You can easily double or triple the ingredients for a larger crowd. Just keep the layering proportions the same.
What if I don’t have all the ingredients listed?
No problem. The beauty of this recipe is its flexibility. Use whatever cured meat, cheese, nuts, and fruit you have on hand. Even a simplified version with just cheese, crackers, and grapes tastes great.
Pin This Recipe!
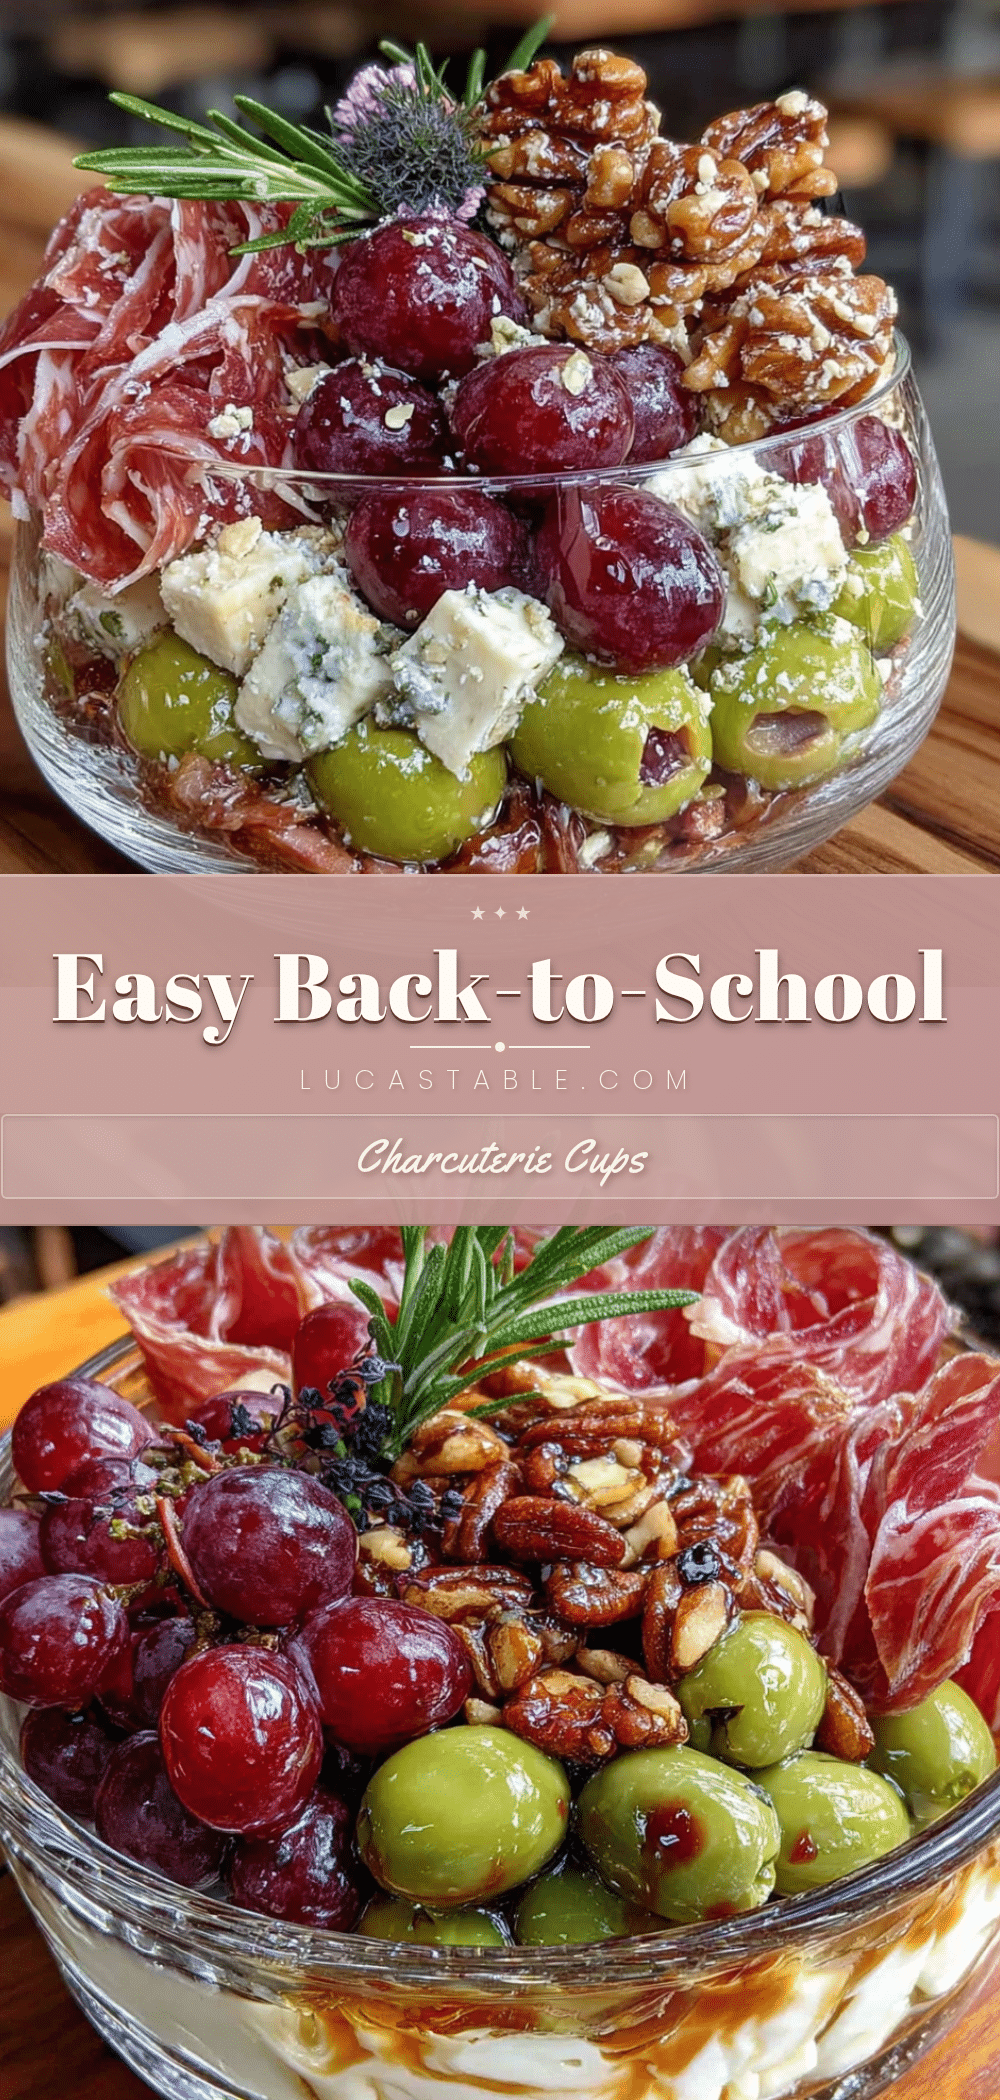
Easy Small-Batch Charcuterie Cups: Best Parents Night Appetizer
These easy small-batch charcuterie cups are the perfect no-cook appetizer for parents’ night. They are portable, customizable, and can be assembled in under 20 minutes, allowing you to enjoy the party without being stuck in the kitchen.
- Prep Time: 20 minutes
- Cook Time: 0 minutes
- Total Time: 20 minutes
- Yield: 12 servings
- Category: Appetizer
- Cuisine: American
Ingredients
- Salami or Pepperoni, thinly sliced (Genoa salami recommended)
- Cheddar cheese, cut into ½-inch cubes (sharp cheddar recommended)
- Red seedless grapes, washed and dried
- Almonds or cashews, roasted and salted
- Mini pretzel twists or crackers (Ritz crackers or gluten-free crackers)
- Cornichons or small pickles
- Olives, pitted kalamata or green (optional)
- Fresh rosemary sprigs for garnish (optional)
Instructions
- Prep your ingredients: Wash and dry the grapes. Cube the cheddar cheese into ½-inch pieces. If salami slices are large, cut them in half or into quarters. Set everything out in small bowls.
- Layer the base: Place a small handful of almonds or cashews in the bottom of each cup (about ¼ cup total for 12 cups).
- Add the cheese: Drop 3 to 4 cubes of cheddar cheese on top of the nuts.
- Layer the meat: Fold or roll a slice of salami and tuck it into the cup, leaning it against the side so it is visible. Use one slice per cup for small cups, or two for larger ones.
- Add the fruit: Place 2 to 3 grapes on top of the cheese and meat. If using olives, add one or two next to the grapes.
- Insert the pickles: Tuck one or two cornichons into the side of the cup.
- Top with crackers: Gently press 2 to 3 mini pretzel twists or crackers into the top layer, standing them upright or leaning them against the rim.
- Garnish (optional): Stick a small sprig of fresh rosemary into the center of each cup.
- Chill until serving (optional): Cover the tray with plastic wrap and refrigerate for up to 4 hours. Take them out 15 minutes before serving to let the cheese soften slightly.
Notes
Don’t overfill the cups. Keep wet ingredients (olives, pickles) patted dry to avoid soggy crackers. Layer strategically for visual appeal. Prep all ingredients before assembling. Make extra for yourself.
Nutrition
- Serving Size: 1 cup
- Calories: 200
- Sugar: 7
- Sodium: 450
- Fat: 15
- Saturated Fat: 5
- Carbohydrates: 13
- Fiber: 2.5
- Protein: 11
Keywords: charcuterie cups, parents night appetizer, easy appetizer, no-cook appetizer, portable appetizer, small-batch charcuterie


