Staring into the fridge at 4 PM on a Tuesday, the post-school meltdown was in full swing. My youngest was declaring he was “starving to death” (dramatic, much?), and I had exactly zero prepared snacks. Half a bag of baby carrots, a lonely red bell pepper, and a container of hummus that was about to expire stared back at me. That was the moment the Easy Rainbow Veggie & Hummus Snack Boxes for Kids were born. No fancy meal prep, no elaborate Pinterest board execution — just pure, desperate improvisation.
I grabbed a bento-style container and started chopping. Red pepper strips, orange carrot sticks, yellow bell pepper squares, cucumber rounds, and a handful of purple grapes. I plopped a generous scoop of hummus in the center and called it dinner. The kids devoured it. Not a single complaint. Honestly, I think the novelty of the colors tricked them into eating vegetables without a fight.
These snack boxes have become our go-to for after-school snacks, lunchbox fillers, and even light dinners on busy nights. They’re not just a snack — they’re a little edible rainbow that makes eating veggies feel like a game. And the best part? You can prep them in under ten minutes. If that isn’t a parenting win, I don’t know what is.
Why You’ll Love This Recipe
Let’s be real — getting kids to eat vegetables can feel like negotiating with tiny, stubborn food critics. These Easy Rainbow Veggie & Hummus Snack Boxes for Kids changed the game in our house. Here’s why I think they’ll work for you too.
- Quick & Easy: From fridge to table in under 10 minutes. No cooking required. That’s faster than ordering takeout.
- Simple Ingredients: You probably already have most of these veggies in your crisper drawer. Hummus is a pantry staple at this point.
- Perfect for Busy Afternoons: After-school hunger strikes are real. These boxes are ready before the second “I’m hungry” whine.
- Crowd-Pleaser: Even my pickiest eater, who usually treats broccoli like it’s poison, reaches for the colorful strips. The rainbow effect is practically magic.
- Unbelievably Satisfying: The creamy hummus paired with crunchy veggies hits that perfect texture combo. It’s comfort food for the snack-obsessed.
What makes these snack boxes different from just throwing vegetables on a plate? It’s the presentation, honestly. Kids eat with their eyes first. Arranging veggies by color creates a visual appeal that makes them curious instead of suspicious. Plus, the hummus acts as a dip, which is basically the secret weapon for any parent trying to sneak in extra nutrients. I’ve tested this on my kids, their friends, and even skeptical adults at a playdate — everyone reaches for the rainbow.
What Ingredients You Will Need
This recipe is all about flexibility, but here’s my go-to lineup for the perfect rainbow veggie & hummus snack box. The ingredients are simple, colorful, and easy to find at any grocery store.
- Hummus: ½ cup per box (store-bought or homemade). I’m partial to Sabra classic hummus for its smooth texture, but any brand works. For a twist, try roasted red pepper or garlic hummus.
- Red Bell Pepper: 1 medium, sliced into thin strips. Adds sweetness and a satisfying crunch. Look for firm, glossy peppers with no soft spots.
- Carrots: 2 large, peeled and cut into sticks or rounds. Baby carrots work in a pinch, but full-sized carrots have better flavor. I prefer Bolthouse Farms for consistent sweetness.
- Yellow Bell Pepper: 1 medium, sliced into squares or strips. Milder than green peppers with a touch of sweetness. Great for kids who find green peppers too bitter.
- Cucumber: 1 medium, sliced into rounds or half-moons. English cucumbers have fewer seeds and a milder taste. No need to peel them — the skin adds color and fiber.
- Purple Grapes: ½ cup, washed and halved lengthwise. They add a pop of purple and a burst of sweetness. Red grapes work too, but purple keeps the rainbow intact.
- Cherry Tomatoes: ½ cup, halved. For that perfect red component. Grape tomatoes are sweeter and less watery than standard cherry tomatoes.
- Broccoli Florets: ½ cup, raw or lightly steamed. Adds green and a satisfying crunch. If your kids are anti-broccoli, try sugar snap peas instead.
- Optional Add-ins: Snow peas, jicama sticks, radish slices, or even apple wedges for extra sweetness. The goal is variety and color.
For the hummus, I usually grab a tub of Hope Foods or make my own with canned chickpeas, tahini, lemon juice, and garlic. Homemade hummus is surprisingly easy and lets you control the salt and garlic levels for little taste buds. If you’re short on time, store-bought is totally fine — no judgment here.
Equipment Needed
You don’t need fancy kitchen gadgets for this recipe, which is part of the beauty. Here’s what you’ll need:
- Bento Box or Divided Container: The key to keeping colors separate and visually appealing. I use a Bentgo box for my kids, but any compartmentalized lunch container works. Even a muffin tin in a pinch.
- Sharp Knife: A good chef’s knife makes slicing vegetables quick and safe. I swear by my Victorinox 8-inch chef’s knife — it’s affordable and stays sharp.
- Cutting Board: Preferably a large wooden or plastic board. I use a Oxo cutting board with a non-slip edge for stability.
- Vegetable Peeler: For carrots and cucumbers. A standard Y-peeler is my favorite for speed and control.
- Small Bowl or Cup: For the hummus portion. I use silicone baking cups that fit perfectly into bento compartments.
- Optional: Cookie Cutters: For extra fun shapes. Star-shaped cucumber slices or flower-shaped carrot rounds make snack time feel like a party.
If you don’t have a bento box, no worries. A regular plate with small ramekins for the hummus works just as well. The presentation is less about the container and more about the colorful arrangement.
Preparation Method
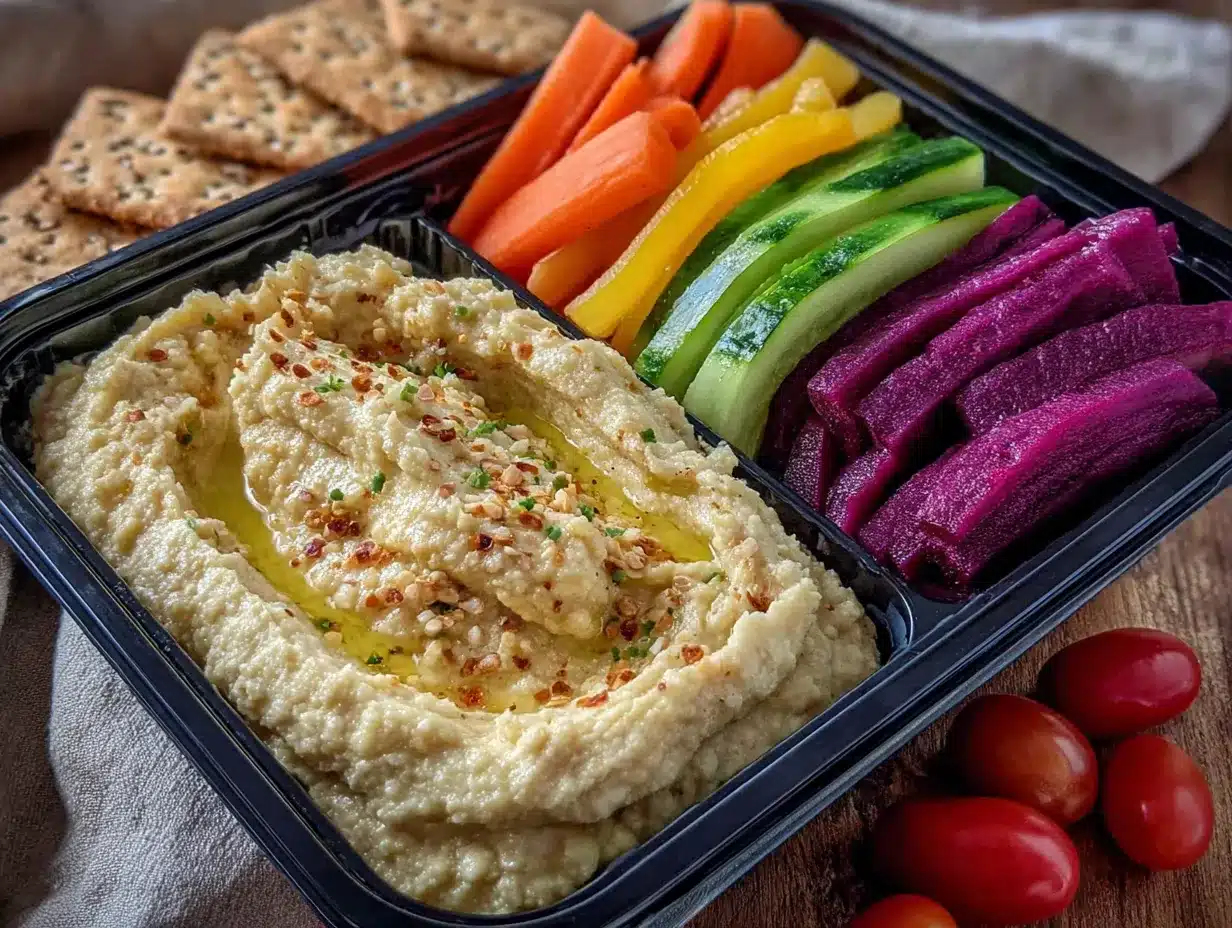
Let’s get to the fun part — building these rainbow snack boxes. This method takes about 10 minutes total, and you’ll feel like a snack artist by the end.
- Wash all produce thoroughly. Rinse the bell peppers, carrots, cucumber, grapes, tomatoes, and broccoli under cool water. Pat dry with a clean kitchen towel. Wet veggies make the hummus watery, so drying is important.
- Prep the hummus. Scoop ½ cup of hummus into a small bowl or silicone cup. If you’re using store-bought hummus, give it a quick stir to make it creamy again. For homemade, drizzle a little olive oil on top for extra richness.
- Slice the red bell pepper. Cut off the top and bottom, remove the seeds and white pith, then slice into thin strips about 2 inches long. The strips should be kid-friendly — not too thick or too thin. Aim for matchstick thickness.
- Cut the carrots. Peel the carrots, then slice into sticks or rounds. For younger kids, rounds are safer and easier to chew. For older kids, sticks are more fun to dip. I alternate based on mood.
- Slice the yellow bell pepper. Same method as the red pepper. Cut into squares or strips. The yellow adds a cheerful pop of color that kids notice immediately.
- Prepare the cucumber. Slice into rounds about ¼-inch thick. If your cucumber is large, cut the rounds in half to make half-moons. Leave the skin on for that green color and extra crunch.
- Halve the grapes. For safety, especially with younger kids, slice purple grapes lengthwise into halves or quarters. This prevents choking and makes them easier to pick up.
- Halve the cherry tomatoes. Cut each tomato in half. If your kids are tomato-averse, you can skip these or swap for strawberry slices for the red component.
- Prep the broccoli. Cut into small florets. If your kids prefer softer veggies, blanch the broccoli in boiling water for 1 minute, then plunge into ice water. This keeps the color bright and the texture tender.
- Assemble the snack box. Place the hummus cup in the center. Arrange each vegetable color in its own section around the hummus. Start with red (bell pepper or tomatoes), then orange (carrots), yellow (bell pepper), green (cucumber and broccoli), and purple (grapes). The rainbow effect is the star here.
- Add any extras. If you’re including optional items like snow peas or apple wedges, tuck them into empty spaces. The goal is a full, colorful box that looks like a treasure chest of healthy snacks.
- Serve immediately or refrigerate. These boxes keep well for up to 2 days in the fridge. Just keep the hummus separate until serving to prevent sogginess.
Cooking Tips & Techniques
After making these snack boxes dozens of times, I’ve picked up a few tricks that make the process even smoother. Let me share what I’ve learned the hard way.
Slice uniformity matters. Kids notice when one carrot stick is huge and another is tiny. Try to cut all pieces roughly the same size so every bite feels fair. I use a mandoline slicer for perfectly even cucumber rounds, but a steady hand and a sharp knife work just as well.
Don’t skip the drying step. I once assembled a snack box with freshly washed veggies, and by lunchtime, the hummus was swimming in a watery mess. Pat everything dry with paper towels or a clean dishcloth. It makes a huge difference in texture and shelf life.
Make it a game. I tell my kids they have to “eat the rainbow” — one color at a time. They love the challenge, and I love that they’re eating five different vegetables without a single complaint. Sometimes I’ll hide a small treat (like a yogurt-covered raisin) under the hummus cup as a surprise reward.
Prep ahead for busy weeks. On Sunday evenings, I wash and chop all the veggies, storing each color in separate airtight containers. Then during the week, assembling a snack box takes less than two minutes. It’s a game-changer for school lunch prep.
Temperature matters. Kids often prefer cold, crisp veggies. Store the assembled boxes in the coldest part of the fridge. If you’re packing for lunch, add a small ice pack to keep everything fresh and crunchy until noon.
One mistake I made early on was using too much hummus. A little goes a long way. Stick to ¼ to ½ cup per box, depending on your child’s appetite. Too much hummus and they fill up on dip instead of veggies. Balance is key.
Variations & Adaptations
The beauty of these snack boxes is their flexibility. Here are some variations I’ve tried and loved.
Dietary Adaptations: For gluten-free diets, this recipe is naturally safe — just double-check your hummus brand for any hidden gluten. For dairy-free, most hummus is already dairy-free, but read labels if you’re buying flavored varieties. For nut-free, stick to classic hummus without tahini (some brands use peanut butter instead of sesame).
Seasonal Swaps: In summer, swap in fresh berries for the grapes — blueberries for purple, strawberries for red. In fall, add roasted pumpkin cubes or apple slices. Winter calls for citrus segments like mandarin oranges for the orange component. The rainbow stays intact, but the flavors shift with the seasons.
Flavor Twists: Try different hummus flavors to keep things interesting. Roasted red pepper hummus adds a smoky sweetness. Garlic hummus is great for older kids who love bold flavors. For a sweet-savory combo, use beet hummus (it turns pink, which kids find hilarious).
Protein Boost: Add hard-boiled egg wedges, cheese cubes, or edamame for extra protein. My kids love when I sneak in a few mini mozzarella balls alongside the veggies. It turns a snack into a mini meal.
Method Variations: If you’re packing for school lunch, use a thermos for the hummus to keep it cool. For a picnic, assemble everything in a mason jar for a colorful layered effect. The jar method is especially fun — kids can see all the layers before they dig in.
Serving & Storage Suggestions
These snack boxes shine at room temperature or slightly chilled. Serve them straight from the fridge for maximum crunch, or let them sit on the counter for 10 minutes if your child prefers less cold bites. The hummus should be served cool but not icy.
For presentation, I like to arrange the veggies in rainbow order — red, orange, yellow, green, purple — clockwise around the hummus. It’s visually satisfying and makes the box feel like a treat, not just a snack. Sometimes I’ll add a small handful of pretzel sticks or whole-grain crackers on the side for extra crunch.
Storage: Assembled boxes keep in the refrigerator for up to 2 days. Store them in airtight containers to keep the veggies crisp. Keep the hummus separate if you’re prepping more than a day ahead — it prevents the veggies from getting soggy. If you’re using a bento box with a tight seal, you can store the hummus in its own compartment.
Freezing: I don’t recommend freezing assembled boxes. The veggies will lose their crunch and become watery when thawed. However, you can freeze individual components — chop bell peppers and carrots, then freeze them in separate bags. Thaw in the fridge overnight before assembling.
Reheating: No reheating needed for this recipe. That’s the beauty of it. But if you’ve blanched broccoli or carrots, you can serve them warm if your child prefers. Just microwave the veggies for 15 seconds before adding to the box.
Flavors actually develop nicely over time. The veggies stay crisp, and the hummus absorbs a little of the vegetable aromas — in a good way. Day-old boxes taste just as fresh as freshly made ones, as long as they’re stored properly.
Nutritional Information & Benefits
Here’s an estimated nutritional breakdown for one snack box (using ½ cup hummus and about 1 cup of mixed veggies):
- Calories: 250-300
- Protein: 8-10 grams (from hummus and chickpeas)
- Fiber: 8-10 grams (veggies and hummus are fiber-rich)
- Vitamin A: 120% DV (from carrots and bell peppers)
- Vitamin C: 150% DV (from bell peppers and broccoli)
- Iron: 10% DV (from hummus and spinach if added)
- Calcium: 6% DV (from hummus)
The health benefits here are no joke. Bell peppers are packed with vitamin C — more than oranges, believe it or not. Carrots are famous for beta-carotene, which supports eye health. Cucumbers are hydrating and low in calories, making them a guilt-free crunch. Grapes provide antioxidants and natural sweetness without added sugar. And hummus? It’s a protein-fiber powerhouse that keeps kids full and satisfied.
This snack box is naturally gluten-free, dairy-free (check your hummus), and vegan. It’s also low in added sugars — the sweetness comes entirely from the veggies and grapes. For parents worried about picky eating, this is a sneaky way to pack in multiple servings of vegetables without the battle.
From a wellness perspective, I love that these boxes encourage mindful eating. The colors make kids slow down and notice what they’re eating. It’s not just fuel — it’s an experience. And that’s a habit worth building early.
Conclusion
These Easy Rainbow Veggie & Hummus Snack Boxes for Kids have become a staple in our home for good reason. They’re fast, flexible, and genuinely fun to make. I’ve watched my kids go from vegetable avoiders to vegetable enthusiasts, all because a little color and a good dip changed the game.
Don’t be afraid to customize based on what your family loves. Swap in jicama for crunch, add cheese cubes for protein, or let your kids arrange their own rainbow. The more involved they are, the more likely they’ll eat it. I’ve learned that lesson the hard way after too many rejected lunches.
Honestly, this recipe is my favorite kind of cooking — no stress, no complicated steps, just real food that makes everyone happy. I’d love to hear how your rainbow boxes turn out. Drop a comment below with your kids’ favorite veggie combos, or tag me in your snack box photos. Happy snacking, friends!
Frequently Asked Questions
Can I use store-bought hummus for this recipe?
Absolutely. Store-bought hummus works perfectly and saves time. I recommend classic or roasted red pepper flavors for the best kid-friendly taste. Just check the label for any added preservatives if that’s a concern.
How long do these snack boxes stay fresh in the fridge?
Assembled boxes keep for up to 2 days in an airtight container. Keep the hummus separate if you’re storing longer than a day to prevent sogginess. The veggies stay crunchy for about 48 hours.
Can I pack these for school lunch without a bento box?
Yes! Use a regular lunch container with a small silicone cupcake liner for the hummus. You can also layer the veggies in a mason jar for a fun, colorful presentation. Just keep the hummus in a separate small container until lunchtime.
What if my child doesn’t like hummus?
Swap the hummus for Greek yogurt dip, ranch dressing, or even peanut butter (if nut-free is okay). The rainbow veggie concept works with any dip your child loves. The key is the colorful presentation, not the specific dip.
Can I make these snack boxes ahead for the whole week?
You can prep the veggies up to 4 days ahead — wash, chop, and store each color in separate airtight containers. Then assemble the boxes fresh each morning. This saves time without sacrificing texture or freshness.
Pin This Recipe!
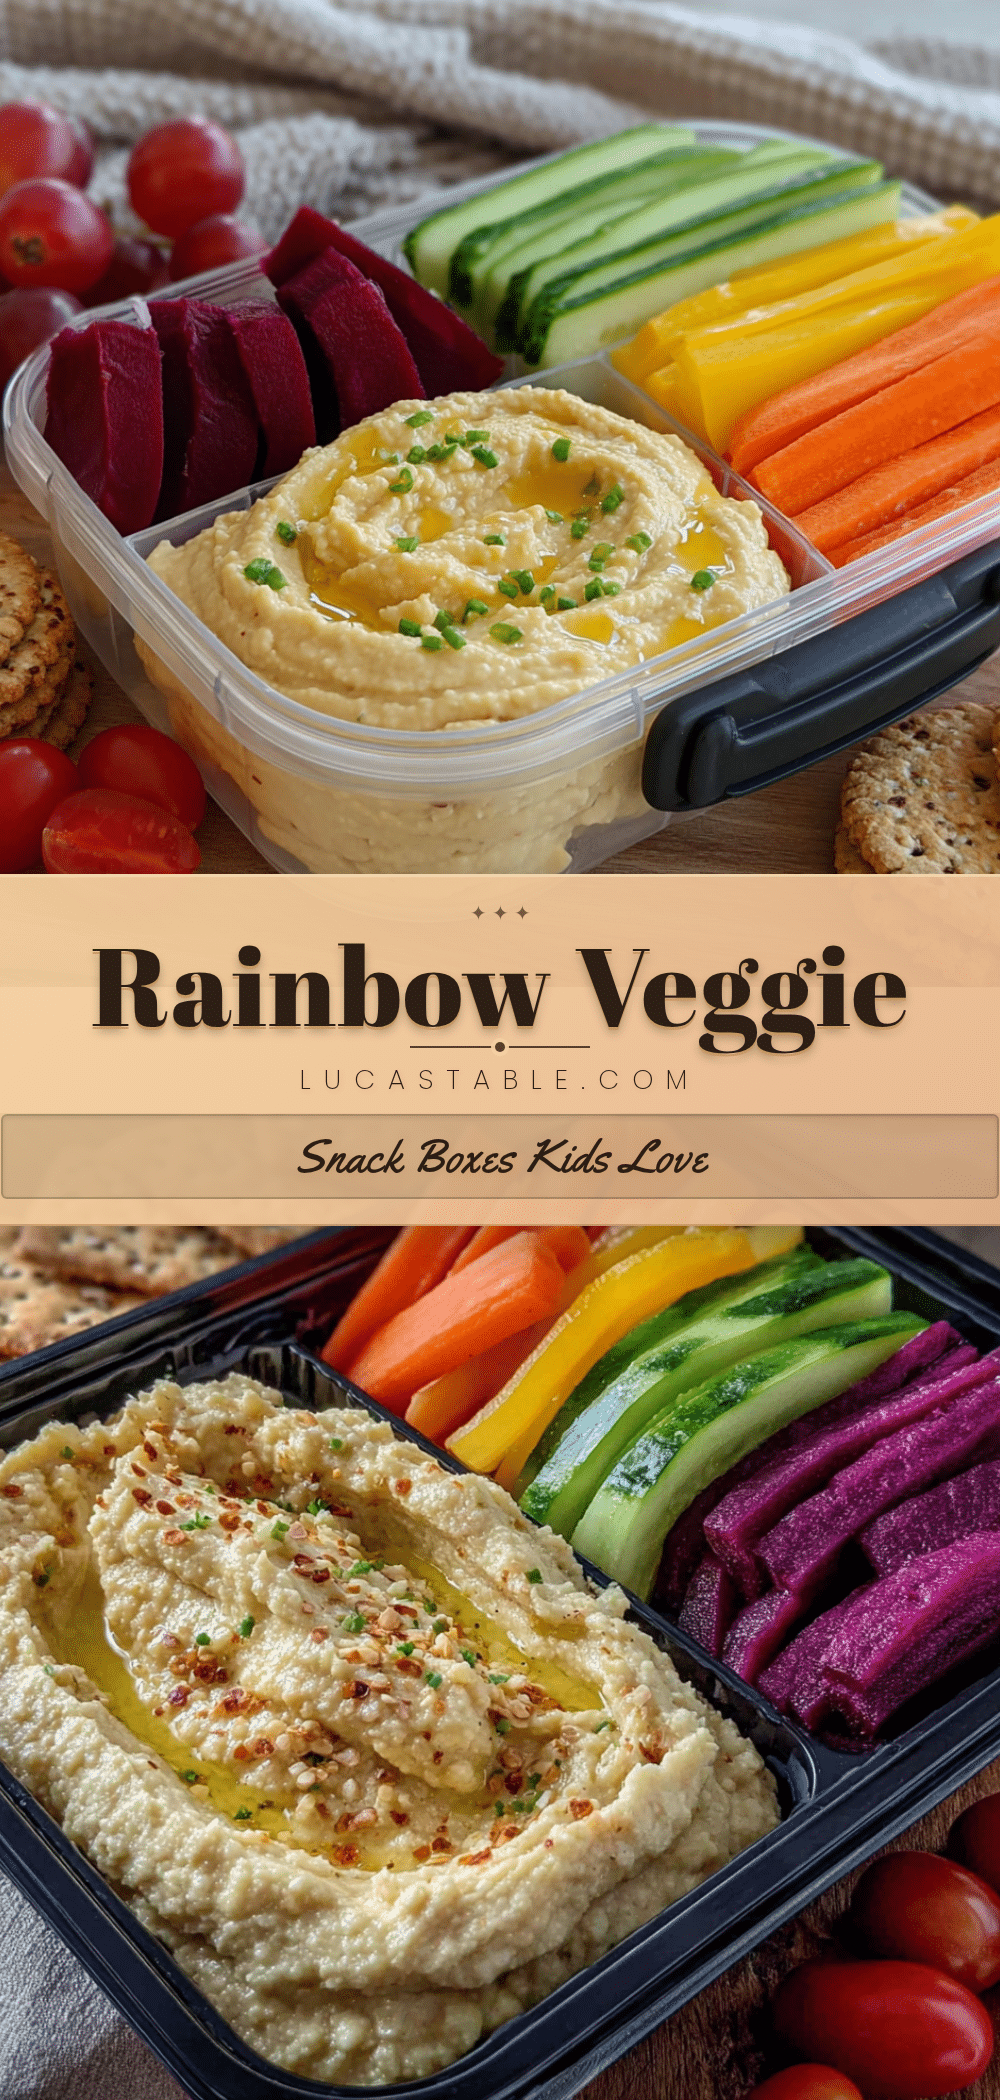
Easy Rainbow Veggie & Hummus Snack Boxes for Kids
A quick, no-cook snack box featuring colorful vegetables arranged like a rainbow around a creamy hummus dip. Perfect for after-school snacks, lunchboxes, or light dinners, these boxes make eating veggies fun and visually appealing for kids.
- Prep Time: 10 minutes
- Cook Time: 0 minutes
- Total Time: 10 minutes
- Yield: 4 servings 1x
- Category: Snack
- Cuisine: American
Ingredients
- ½ cup hummus (store-bought or homemade)
- 1 medium red bell pepper, sliced into thin strips
- 2 large carrots, peeled and cut into sticks or rounds
- 1 medium yellow bell pepper, sliced into squares or strips
- 1 medium cucumber, sliced into rounds or half-moons
- ½ cup purple grapes, washed and halved lengthwise
- ½ cup cherry tomatoes, halved
- ½ cup broccoli florets (raw or lightly steamed)
- Optional: snow peas, jicama sticks, radish slices, apple wedges
Instructions
- Wash all produce thoroughly under cool water and pat dry with a clean kitchen towel.
- Scoop ½ cup of hummus into a small bowl or silicone cup. Stir if using store-bought hummus; drizzle with olive oil if homemade.
- Cut off the top and bottom of the red bell pepper, remove seeds and white pith, then slice into thin strips about 2 inches long.
- Peel the carrots, then slice into sticks or rounds (rounds for younger kids, sticks for older kids).
- Slice the yellow bell pepper using the same method as the red pepper, cutting into squares or strips.
- Slice the cucumber into rounds about ¼-inch thick. If large, cut rounds in half to make half-moons. Leave skin on.
- Halve the purple grapes lengthwise (or quarter for younger kids) to prevent choking.
- Halve the cherry tomatoes. If kids are tomato-averse, swap for strawberry slices.
- Cut broccoli into small florets. If desired, blanch in boiling water for 1 minute, then plunge into ice water.
- Place the hummus cup in the center of a bento box or divided container.
- Arrange each vegetable color in its own section around the hummus: red (bell pepper or tomatoes), orange (carrots), yellow (bell pepper), green (cucumber and broccoli), purple (grapes).
- Add any optional extras (snow peas, jicama, etc.) into empty spaces.
- Serve immediately or refrigerate for up to 2 days. Keep hummus separate if storing longer than a day.
Notes
Slice veggies uniformly for fairness. Pat produce dry to prevent soggy hummus. Make it a game by asking kids to ‘eat the rainbow’ one color at a time. Prep veggies ahead on Sunday for quick assembly during the week. Use ¼ to ½ cup hummus per box to avoid overfilling. For school lunch, pack hummus separately and add an ice pack.
Nutrition
- Serving Size: 1 snack box (about 1
- Calories: 275
- Sugar: 14
- Sodium: 320
- Fat: 12
- Saturated Fat: 1.5
- Carbohydrates: 32
- Fiber: 9
- Protein: 9
Keywords: rainbow veggie snack, hummus snack box, kids snack, healthy snack, no-cook snack, bento box, after-school snack, lunchbox idea


