The blistering, oil-crisped bottom. That’s what I made this for—everything else is secondary. When you flip a piece of this Easy No-Knead Sourdough Focaccia with Rosemary & Sea Salt over, the underbelly should look like a lace doily made of fried dough, all golden-brown crackle and crunch. I know people talk about the fluffy crumb, the air pockets, the fragrant rosemary. And sure, those matter. But I’m a bottom-first eater. I press my thumb into the dimpled surface, feel it spring back, and then I immediately flip the slice over to inspect the crust. If it’s pale and soft? We have a problem.
This recipe started because I had a sourdough starter named Barnaby that I was neglecting. You know how it goes—you feed it, you ignore it, you feel guilty. I wanted something that didn’t require the whole stretch-and-fold, wait-all-day routine of a traditional boule. Something that rewarded patience with almost zero effort. Honestly, the first time I made it, I forgot about the dough for an extra three hours. I figured I’d made a brick. Instead, I got the most pillowy, olive oil-soaked focaccia of my life. The dough basically said, “I got this.”
There’s a specific moment with this bread that I’ve come to crave. It happens about ten minutes into baking, when your kitchen starts smelling like a trattoria that’s been open since 1972. The sea salt crystals catch the light, the rosemary needles crisp up into little green spears, and you realize you didn’t have to knead a single thing. That’s the quiet promise of this recipe: it delivers bakery-level texture with the effort level of a lazy Sunday afternoon.
Why You’ll Love This Recipe
I’ve tested this focaccia maybe a dozen times. I’ve made it in a cast iron skillet, a glass baking dish, and a cheap aluminum sheet pan. I’ve used strong bread flour and all-purpose. I’ve even (don’t tell anyone) used discard that was three days old. Every single time, it worked. That’s the kind of reliability you want in a bread recipe—especially one that doesn’t ask you to knead.
- No Kneading Required : Forget the stand mixer. Forget the arm workout. You just mix, wait, and fold the dough over itself a few times. That’s it.
- Simple Pantry Ingredients : Flour, water, olive oil, salt, your sourdough starter, and some fresh rosemary. If you have a starter, you probably already have everything.
- Perfect for Sourdough Discard : This is my favorite way to use up unfed starter. It doesn’t need the bubbly, active stuff—lazy discard works beautifully.
- Incredible Texture : The crumb is open and airy, the top is golden and dimpled, and the bottom is shatteringly crisp thanks to the pool of olive oil it bakes in.
- Minimal Active Time : You’re looking at about 15 minutes of hands-on work. The rest is just waiting for the dough to do its thing.
What makes this different from every other focaccia recipe out there? It’s the fermentation. The sourdough starter gives this bread a subtle tang that balances the rich olive oil and the piney rosemary. It’s not a yeast bread pretending to be sourdough. It’s the real deal, just with a lot less fuss. I’ve had friends tell me this is the best focaccia they’ve ever eaten, and they said it with a mouthful of the stuff. That’s the kind of endorsement I trust.
What Ingredients You Will Need
This recipe uses simple, wholesome ingredients to deliver that signature chewy crumb and crispy bottom. The magic is in the fermentation, not the shopping list. Here’s what you’ll need:
For the Dough
- Bread flour (3 cups / 375g) – I prefer King Arthur for its higher protein content, which gives the focaccia better structure. All-purpose works in a pinch, but the crumb won’t be as chewy.
- Water (1 ¼ cups / 300ml), lukewarm – Not hot, not cold. About 80°F (27°C) is perfect. Too hot will kill the natural yeast in your starter.
- Sourdough starter (½ cup / 120g), unfed or discard – This is the heart of the recipe. Use it straight from the fridge. No need to feed it first.
- Olive oil (¼ cup / 60ml), plus extra for the pan – Use good-quality extra virgin here. It’s a major flavor component. I use California Olive Ranch for everyday baking.
- Fine sea salt (1 ½ teaspoons / 9g) – Dissolved into the water to ensure even distribution through the dough.
For the Topping
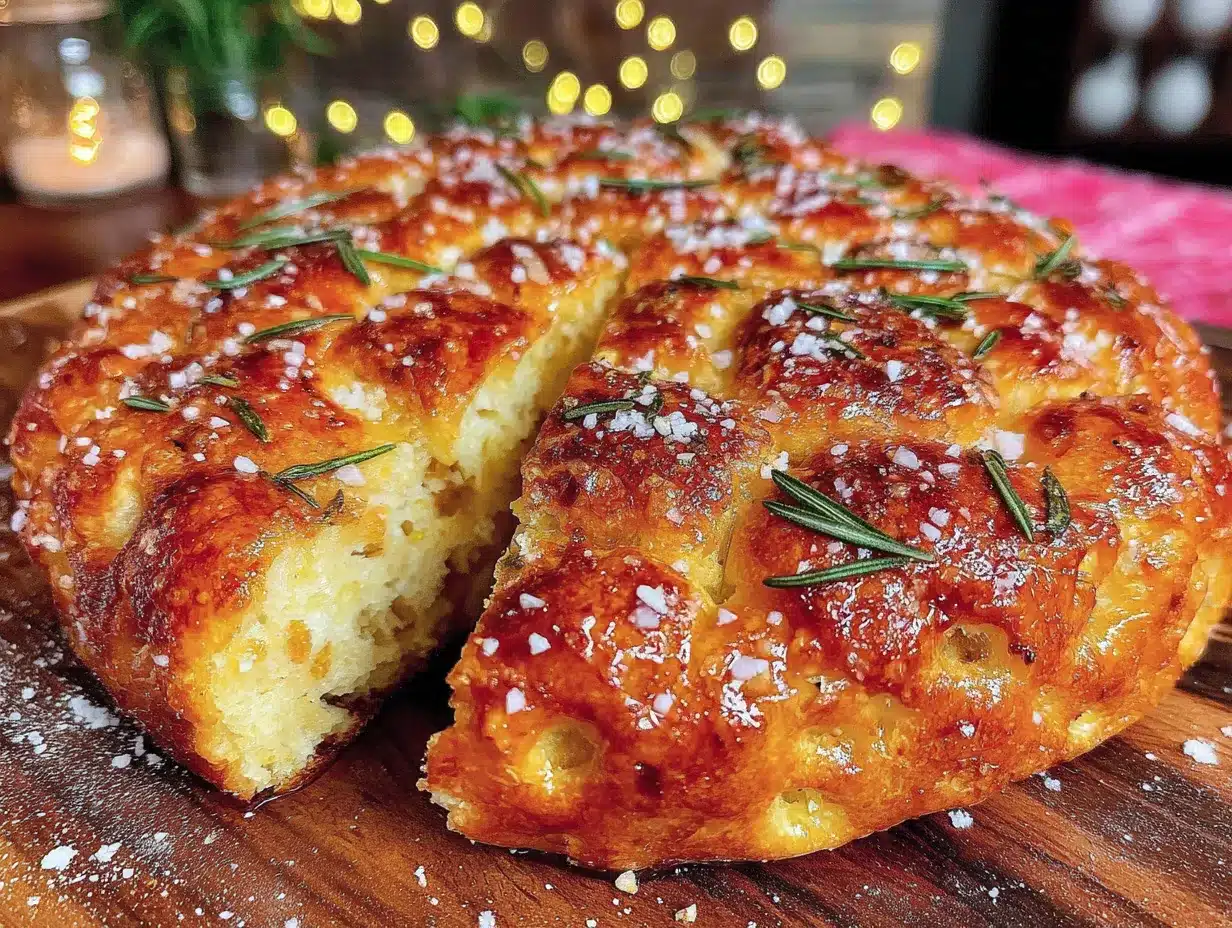
- Fresh rosemary (2 tablespoons, finely chopped) – Strip the leaves from the woody stems. Dried rosemary works in a pinch, but fresh gives that aromatic punch.
- Flaky sea salt (1 teaspoon, or to taste) – Maldon is my go-to. Those big, pyramid-shaped crystals are perfect for finishing.
- Extra virgin olive oil (2-3 tablespoons, for drizzling) – Don’t skimp here. This is what creates that golden, crisp bottom and glossy top.
One thing I’ve learned the hard way: don’t use table salt for the topping. It’s too fine and will dissolve into the oil, leaving you with salty patches instead of those satisfying little bursts of saltiness. Use flaky salt. Your taste buds will thank you.
Equipment Needed
- Large mixing bowl – Any bowl big enough to hold the dough as it rises. Glass or ceramic works great.
- 9×13-inch baking pan – Metal or glass both work. I prefer a light-colored metal pan for the crispiest bottom. Dark pans can over-brown the crust.
- Bench scraper or spatula – For folding the dough and transferring it to the pan.
- Kitchen scale – Not strictly necessary, but baking by weight is so much more consistent. I use a simple OXO scale.
- Plastic wrap or a clean kitchen towel – To cover the dough during its long rise.
- Small bowl of water – For wetting your fingers when dimpling the dough. Trust me, the dough will stick to dry fingers like glue.
If you don’t have a 9×13 pan, you can use a 10-inch cast iron skillet or a 9-inch round cake pan. Just adjust the baking time slightly—smaller, thicker focaccia needs a few extra minutes. I’ve also used a disposable aluminum pan for camping trips, and it worked like a charm.
Preparation Method
This is the part where patience does the heavy lifting. The actual work is minimal, but the timeline is long. Plan to start this in the morning or the night before you want to eat it.
- Mix the dough (5 minutes): In a large bowl, combine the lukewarm water and fine sea salt. Stir until the salt dissolves. Add the sourdough starter and olive oil, and whisk to combine. Add the bread flour and mix with a spatula until a shaggy, sticky dough forms. There should be no dry flour pockets. Cover the bowl with plastic wrap and let it rest for 30 minutes. This is called the autolyse, and it helps the flour absorb the water and develop gluten without any kneading.
- Perform the first set of folds (1 minute): After the rest, wet your hand with a little water. Grab one side of the dough, stretch it up, and fold it over the center. Rotate the bowl 90 degrees and repeat. Do this four times, folding all sides into the center. The dough will resist at first, but it will start to tighten up. Cover and let it rest for 30 minutes.
- Repeat the folding process (1 minute, every 30 minutes): Do this two more times. So in total, you’ll do three sets of folds over about 1.5 hours. After the last fold, the dough should feel smoother and more elastic. It will still be sticky, but it will hold its shape better.
- Bulk fermentation (8-12 hours at room temperature, or 24 hours in the fridge): Cover the bowl tightly and let it rise. At room temperature (about 70°F/21°C), it will take 8-12 hours. The dough should double in size and look bubbly on the surface. If you’re using the fridge, let it rise slowly for 24 hours. The cold fermentation develops more flavor. I prefer the fridge method—it makes the dough easier to handle and gives a deeper tang.
- Prepare the pan (2 minutes): Pour a generous amount of olive oil into your 9×13 pan—about 2-3 tablespoons. Use your fingers to spread it all over the bottom and up the sides. The dough will absorb some of this oil as it bakes, creating that crispy crust.
- Transfer the dough (1 minute): Gently scrape the dough out of the bowl and into the oiled pan. It will be very soft and bubbly. Don’t deflate it too much. Just let it fall into the pan.
- Second rise (2-3 hours): Cover the pan with plastic wrap or a towel. Let the dough rise until it’s puffy and nearly doubled in height. It should fill the pan and look jiggly when you shake it gently.
- Dimple the dough (2 minutes): This is the fun part. Preheat your oven to 425°F (220°C). Dip your fingers in a small bowl of water (to prevent sticking) and press them straight down into the dough, all the way to the bottom of the pan. Create dimples all over the surface. Don’t be shy—this is what creates those iconic pockets that hold the oil and salt.
- Add the toppings (2 minutes): Drizzle another 2-3 tablespoons of olive oil over the top. The oil will pool in the dimples. Sprinkle the chopped rosemary evenly over the surface, followed by a generous pinch of flaky sea salt.
- Bake (25-30 minutes): Place the pan on the middle rack. Bake until the top is deep golden brown and the bottom is crispy. If you can, lift the focaccia with a spatula and check the bottom—it should be golden and sound hollow when tapped. Let it cool in the pan for 5 minutes, then transfer to a wire rack. If you leave it in the pan too long, the bottom will steam and lose its crunch.
One sensory cue I always look for: when the focaccia is done, the rosemary will look slightly crispy and the oil around the edges will be bubbling. The whole kitchen will smell like an Italian bakery. That’s when you know it’s ready.
Cooking Tips & Techniques
I’ve made this focaccia when I was grumpy, when I was distracted, and when I was rushing. Here’s what I learned.
Don’t skip the folds. I know it’s called “no-knead,” but those three sets of folds are crucial. They build enough gluten structure to give the focaccia its chewy texture without the work of kneading. I once skipped the folds entirely and ended up with a flat, dense focaccia that looked like a deflated pancake. Never again.
Use enough oil. This is not the time to be shy with the olive oil. The dough needs to swim in it a little. That oil pool in the pan is what fries the bottom into that crispy, golden crust. If you skimp, the bottom will be pale and sad.
Wet your fingers for dimpling. The dough will be sticky. If you try to poke it with dry fingers, the dough will cling to you and pull up. Dip your fingertips in a small bowl of water before each press. It’s a small trick that makes a huge difference.
Let it cool. I know it’s tempting to tear into it right out of the oven. But if you cut it while it’s hot, the interior will be gummy. Let it rest on a wire rack for at least 10 minutes. The steam needs to escape. The crust needs to set. Patience, my friend.
Multitasking strategy: Start the dough in the morning. While it’s in its bulk fermentation, you can make a quick shrimp scampi for lunch or prep a chicken fajitas dinner. The focaccia is a side dish that works on its own schedule.
Variations & Adaptations
This recipe is a canvas. Once you’ve mastered the basic version, try these twists.
- Everything Bagel Focaccia : Skip the rosemary. After dimpling, sprinkle the dough with everything bagel seasoning (sesame seeds, poppy seeds, dried garlic, dried onion, and salt). It’s amazing with cream cheese spread on top.
- Garlic & Herb Focaccia : Before dimpling, press 3-4 thinly sliced garlic cloves into the dough. Add the rosemary and some fresh thyme leaves. The garlic roasts into sweet, mellow pockets of flavor.
- Gluten-Free Adaptation : Use a gluten-free bread flour blend (like King Arthur Measure for Measure). The texture will be denser and more cake-like, but it’s still delicious. Add an extra tablespoon of olive oil to help with moisture.
- Cheese-Stuffed Focaccia : After the second rise, before dimpling, press small cubes of fresh mozzarella or crumbled feta into the dough. Cover with the toppings and bake. You get these gooey cheese pockets that are absolutely addictive.
- Olive & Sun-Dried Tomato : Press halved Kalamata olives and chopped sun-dried tomatoes into the dimples before baking. It adds a salty, tangy punch that pairs beautifully with the rosemary.
I once made a caramelized onion and goat cheese version for a dinner party. I topped the baked focaccia with the onions and crumbled goat cheese, then put it back in the oven for 5 minutes. It was gone in 10. People were fighting over the corner pieces.
Serving & Storage Suggestions
This focaccia is best served warm, fresh from the oven. But let’s be real—it’s also amazing at room temperature, cold from the fridge, or even toasted the next day.
Serving temperature: Warm is ideal. If you’re serving it alongside a meal, like a chicken lo mein or a hearty soup, reheat it in a 350°F (175°C) oven for 5-7 minutes. It brings back the crisp bottom.
What to serve with it: This focaccia is a natural partner for tomato soup, minestrone, or a simple green salad. It’s also perfect for dipping in balsamic vinegar and olive oil. For a full meal, serve it alongside a BBQ chicken pizza or a bowl of pasta.
Storage: Store leftover focaccia in an airtight container at room temperature for up to 2 days. Do not refrigerate it—the fridge will dry it out and make the crumb stale. If you need to keep it longer, wrap it tightly in plastic wrap and freeze for up to 3 months.
Reheating: From room temperature, reheat slices in a toaster oven or under the broiler for 2-3 minutes. From frozen, thaw at room temperature and then reheat in a 350°F (175°C) oven for 5-8 minutes. The microwave will make it soggy. Don’t do it.
Flavor development: Honestly, this focaccia tastes even better the next day. The rosemary and olive oil have time to meld, and the salt crystals mellow out. I’ve been known to make a batch just for breakfast the next morning, toasted and topped with a fried egg.
Nutritional Information & Benefits
This focaccia is a bread, so it’s not health food. But it’s made with real ingredients, and that counts for something. Here’s the estimated breakdown per serving (1/8 of the recipe):
- Calories: ~280
- Fat: 14g (mostly from olive oil, which is heart-healthy monounsaturated fat)
- Carbohydrates: 32g
- Protein: 6g
- Fiber: 1g
- Sodium: ~450mg (varies with salt topping)
Health benefits of key ingredients: The olive oil is rich in antioxidants and anti-inflammatory compounds. The sourdough fermentation process breaks down some of the gluten and phytic acid, making the bread easier to digest than conventional yeast breads. The rosemary contains compounds that may support memory and digestion.
Dietary considerations: This recipe is vegetarian and vegan. It’s not gluten-free (unless you use the adaptation above). It contains no dairy, eggs, or refined sugars. If you’re watching your sodium, use less flaky salt on top.
I’m not a nutritionist, and I don’t pretend to be. But I do believe that eating real food—made with your hands, fermented slowly, shared with people you love—is good for the soul. And that counts for something.
Conclusion
This Easy No-Knead Sourdough Focaccia with Rosemary & Sea Salt is the kind of recipe that makes you feel like a bread baker without the anxiety. It’s forgiving. It’s patient. It rewards you with the crackliest bottom, the airiest crumb, and the most satisfying kitchen smell on the planet.
I want you to make this your own. Use different herbs. Add olives. Stuff it with cheese. Serve it with soup or eat it straight off the pan while standing over the counter (I won’t tell). The beauty of this recipe is that it asks very little of you and gives back so much.
If you try this focaccia, let me know how it goes. Did you add anything fun? Did you burn the bottom like I did the first time? Did you eat the whole thing in one sitting? I want to hear it all. Drop a comment below, share your photos, and tag me. This bread was made for sharing—both the recipe and the actual bread. Now go make some dimples.
Frequently Asked Questions
Can I use active sourdough starter instead of discard?
Yes, absolutely. If you use active, bubbly starter, the fermentation will happen faster. Keep an eye on the dough—it might be ready to bake in 6-8 hours instead of 8-12. The flavor will be slightly milder, but the texture will be even airier.
Why is my focaccia dense and not airy?
This usually happens for one of two reasons: either the dough didn’t ferment long enough, or you deflated it too aggressively when transferring it to the pan. Be gentle. Let it rise until it’s truly puffy and jiggly. If your kitchen is cold, find a warm spot—like on top of the fridge or near a sunny window.
Can I make this recipe without a sourdough starter?
This recipe is designed for sourdough. If you don’t have a starter, you can use ½ teaspoon of active dry yeast dissolved in the water instead. Skip the starter. The fermentation time will drop to about 4-6 hours at room temperature. The flavor won’t be as tangy, but it will still be delicious.
How do I get the bottom really crispy?
Two things: use enough olive oil in the pan, and bake on the lowest rack of your oven. The direct heat from the bottom helps crisp the crust. Also, don’t skip the cooling step on a wire rack—if you leave it in the pan, the steam will soften the bottom.
Can I freeze this focaccia?
Yes, and it freezes beautifully. Bake it completely, let it cool, then wrap it tightly in plastic wrap and a layer of foil. Freeze for up to 3 months. To serve, thaw at room temperature and reheat in a 350°F (175°C) oven for 5-8 minutes. It will taste almost as good as fresh.
Pin This Recipe!
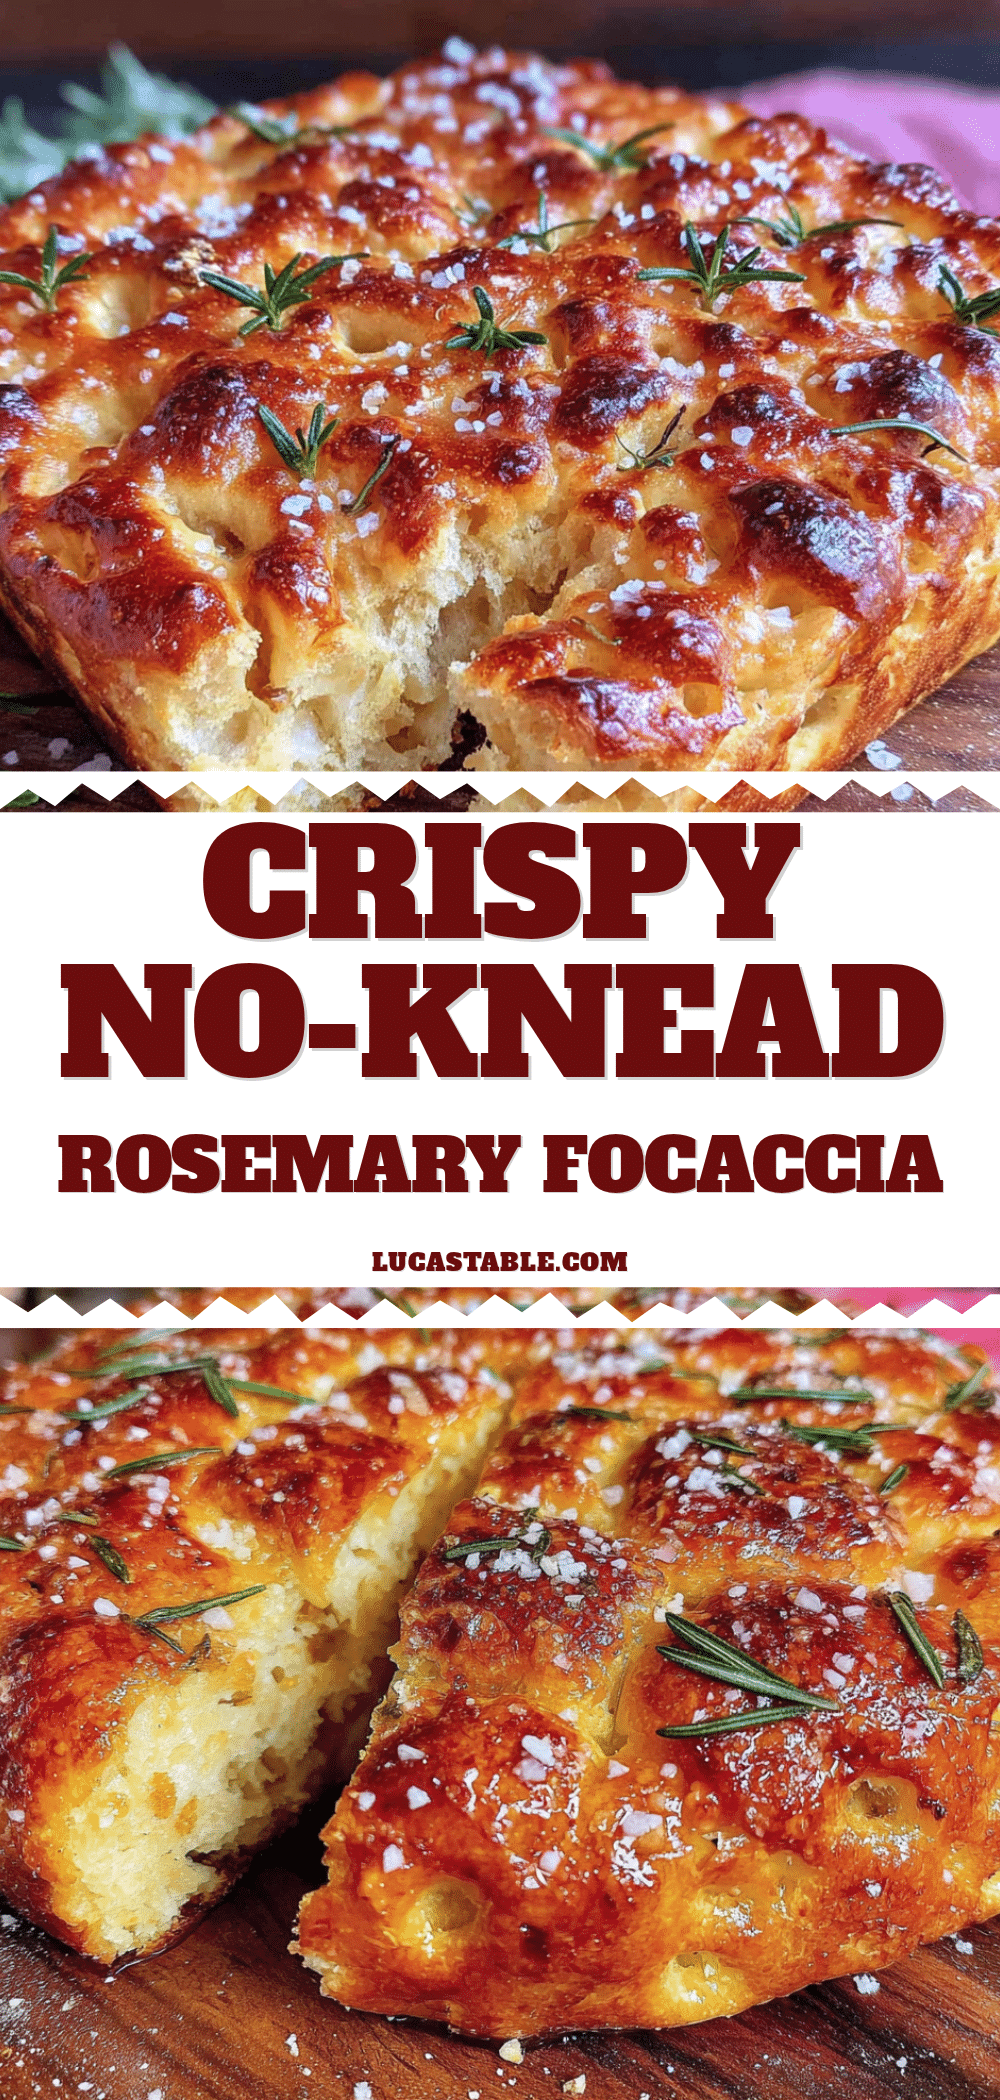
Easy No-Knead Sourdough Focaccia with Rosemary

This easy no-knead sourdough focaccia delivers a pillowy, olive oil-soaked crumb with a shatteringly crisp bottom. Made with simple pantry ingredients and minimal active time, it’s the perfect way to use sourdough discard for a bakery-level bread.
- Prep Time: 15 minutes
- Cook Time: 30 minutes
- Total Time: 13 hours 45 minutes (includes fermentation and rising time)
- Yield: 8 servings 1x
- Category: Bread
- Cuisine: Italian
Ingredients
- 3 cups (375g) bread flour
- 1 ¼ cups (300ml) lukewarm water
- ½ cup (120g) sourdough starter, unfed or discard
- ¼ cup (60ml) olive oil, plus extra for the pan
- 1 ½ teaspoons (9g) fine sea salt
- 2 tablespoons fresh rosemary, finely chopped
- 1 teaspoon flaky sea salt (e.g., Maldon)
- 2–3 tablespoons extra virgin olive oil, for drizzling
Instructions
- Mix the dough: In a large bowl, combine the lukewarm water and fine sea salt. Stir until the salt dissolves. Add the sourdough starter and olive oil, and whisk to combine. Add the bread flour and mix with a spatula until a shaggy, sticky dough forms. Cover the bowl with plastic wrap and let it rest for 30 minutes (autolyse).
- Perform the first set of folds: After the rest, wet your hand with a little water. Grab one side of the dough, stretch it up, and fold it over the center. Rotate the bowl 90 degrees and repeat. Do this four times, folding all sides into the center. Cover and let it rest for 30 minutes.
- Repeat the folding process: Do two more sets of folds, each 30 minutes apart. After the last fold, the dough should feel smoother and more elastic.
- Bulk fermentation: Cover the bowl tightly and let it rise at room temperature (about 70°F/21°C) for 8-12 hours, or in the fridge for 24 hours. The dough should double in size and look bubbly on the surface.
- Prepare the pan: Pour 2-3 tablespoons of olive oil into a 9×13-inch baking pan. Use your fingers to spread it all over the bottom and up the sides.
- Transfer the dough: Gently scrape the dough out of the bowl and into the oiled pan. Let it fall into the pan without deflating it too much.
- Second rise: Cover the pan with plastic wrap or a towel. Let the dough rise for 2-3 hours until puffy and nearly doubled in height.
- Dimple the dough: Preheat the oven to 425°F (220°C). Dip your fingers in a small bowl of water and press them straight down into the dough, all the way to the bottom of the pan, creating dimples all over the surface.
- Add the toppings: Drizzle 2-3 tablespoons of olive oil over the top. Sprinkle the chopped rosemary evenly over the surface, followed by a generous pinch of flaky sea salt.
- Bake: Place the pan on the middle rack and bake for 25-30 minutes, until the top is deep golden brown and the bottom is crispy. Let it cool in the pan for 5 minutes, then transfer to a wire rack.
Notes
Don’t skip the folds—they build gluten structure. Use enough olive oil for a crispy bottom. Wet your fingers for dimpling to prevent sticking. Let the focaccia cool on a wire rack for at least 10 minutes before cutting to avoid a gummy interior. For best results, use a light-colored metal pan for the crispiest bottom.
Nutrition
- Serving Size: 1/8 of recipe
- Calories: 280
- Sodium: 450
- Fat: 14
- Saturated Fat: 2
- Carbohydrates: 32
- Fiber: 1
- Protein: 6
Keywords: sourdough focaccia, no-knead bread, rosemary focaccia, sourdough discard recipe, easy focaccia, Italian bread, homemade focaccia


