I killed my first three sourdough starters. Not figuratively—I mean I actually poured gray, foul-smelling liquid down the drain and wondered if I was fundamentally incapable of keeping a living thing alive. The first one molded on day four. The second one never bubbled at all—just sat there like sad, lumpy wallpaper paste. The third one actually looked promising until I forgot to feed it for two days and came back to a science experiment that smelled like a gym sock soaked in nail polish remover. I almost gave up entirely.
Here’s the thing nobody tells you about making a sourdough starter from scratch: it’s not complicated, but it is particular. It needs consistency, not skill. You don’t need to be a baker—you just need to show up. Once I stopped treating my starter like a mysterious alchemy project and started treating it like a very low-maintenance pet, everything clicked. The bubbles appeared. The smell turned from funky to pleasantly tangy. And on day seven, I baked my first loaf of bread that actually rose.
This is the guide I wish I’d had. No fluff, no intimidation, no gatekeeping. Just a straightforward, day-by-day plan to get you from zero to your first bubbly, active starter in exactly one week. If I can do this after three failed attempts, you can absolutely do it on your first try.
Why You’ll Love This Recipe
This isn’t just another sourdough starter guide. I’ve tested this method multiple times after those initial failures, tweaking ratios and timing until I found a rhythm that works for busy people who don’t have hours to fuss over flour and water.
- Beginner-Friendly: No special skills required. If you can stir and wait, you can make this starter. I promise.
- Simple Ingredients: You only need two things—flour and water. That’s it. No fancy organic grapes, no mysterious “starter boosters,” no complicated ratios.
- 7-Day Timeline: Most guides promise a starter in 7-14 days. This one actually delivers on day seven if you follow the steps. I’ve done it multiple times.
- Minimal Daily Effort: Each feeding takes about two minutes. The hardest part is remembering to do it.
- Foolproof Troubleshooting: I’ve included every mistake I made so you can avoid them. Gray liquid? I got you. No bubbles? We’ll fix it.
What makes this starter different from other recipes is the feeding schedule. Instead of complicated ratios that change daily, you’ll use a consistent 1:1:1 ratio (starter:flour:water) from day one. This simplicity reduces confusion and increases success rates dramatically. Plus, I’ll show you exactly what your starter should look, smell, and feel like at each stage—so you’re never guessing whether you’re on track.
This is the kind of starter that makes you feel like a real baker. The first time you see those bubbles after a feeding, you’ll actually smile. And when you bake your first loaf? That’s a moment you won’t forget.
What Ingredients You Will Need
One of the best things about making a sourdough starter is the ingredient list. You literally need two things. Maybe three if you count water. But that’s it—no trips to specialty stores, no expensive online orders, no hunting for obscure flours.
Here’s exactly what you need:
For the Starter:
- Unbleached all-purpose flour (or bread flour)—this is your best bet for consistent results. Bleached flour is treated with chemicals that can slow down or prevent fermentation. I recommend King Arthur Flour or Bob’s Red Mill for reliable results. If you only have bleached flour, it might still work, but expect slower activity.
- Whole wheat flour or rye flour—you’ll use this for the first feeding only. Whole grains have more natural yeast and bacteria on them, which gives your starter a stronger initial boost. After day one, you’ll switch back to all-purpose.
- Filtered or bottled water—tap water often contains chlorine or chloramine, which can inhibit yeast growth. Let tap water sit out overnight to dechlorinate, or just use filtered water. Room temperature is ideal—cold water slows things down.
For Feeding (Days 2-7):
- Unbleached all-purpose flour—this becomes your primary flour. Keep it handy because you’ll use it daily.
- Room temperature filtered water—same water rules apply throughout the process.
Ingredient Selection Tips:
- Fresh flour matters. Old flour that’s been sitting in your pantry for months has less microbial activity. If your flour smells stale or musty, buy a fresh bag.
- Different flours produce different starters. Rye flour creates a very active, tangy starter. Whole wheat gives a nuttier flavor. All-purpose is the most neutral and versatile. I recommend starting with all-purpose for consistency.
- You’ll use about 1-2 cups of flour total over the 7 days. It’s not a huge investment.
Substitution Guidance:
- Gluten-free option: Use brown rice flour or sorghum flour. The process is the same, but gluten-free starters tend to be less vigorous and may take longer to develop.
- No whole wheat or rye? Just use all-purpose for the first feeding too. It will still work, but might take an extra day or two to show activity.
- No filtered water? Boil tap water and let it cool to room temperature. This removes chlorine effectively.
Equipment Needed
You don’t need fancy equipment to make a sourdough starter. Here’s what you actually need:
- A glass jar or container—a quart-sized Mason jar works perfectly. You want something you can see through so you can monitor bubbles and activity. Avoid metal containers (reactive) and plastic (hard to clean thoroughly).
- A kitchen scale—this is non-negotiable for consistent results. Measuring by volume (cups) is too imprecise for sourdough. A simple digital scale costs about $15 and will save you from countless failed batches.
- A wooden or silicone spoon—metal can react with the acidic starter. Wood or silicone is gentler and won’t affect fermentation.
- A clean kitchen towel or coffee filter—to cover your jar. You want something breathable that keeps dust and bugs out but allows air circulation. A paper towel works in a pinch.
- A rubber band—to mark the starting height of your starter after feeding. This helps you see how much it rises.
Budget-Friendly Tips: I started with a repurposed pasta sauce jar. It worked fine. The scale is the only item I’d actually recommend buying new. Everything else you probably already have in your kitchen. If you don’t want to buy a scale, you can use measuring cups—just be aware that results will be less consistent and you may need extra days.
Preparation Method
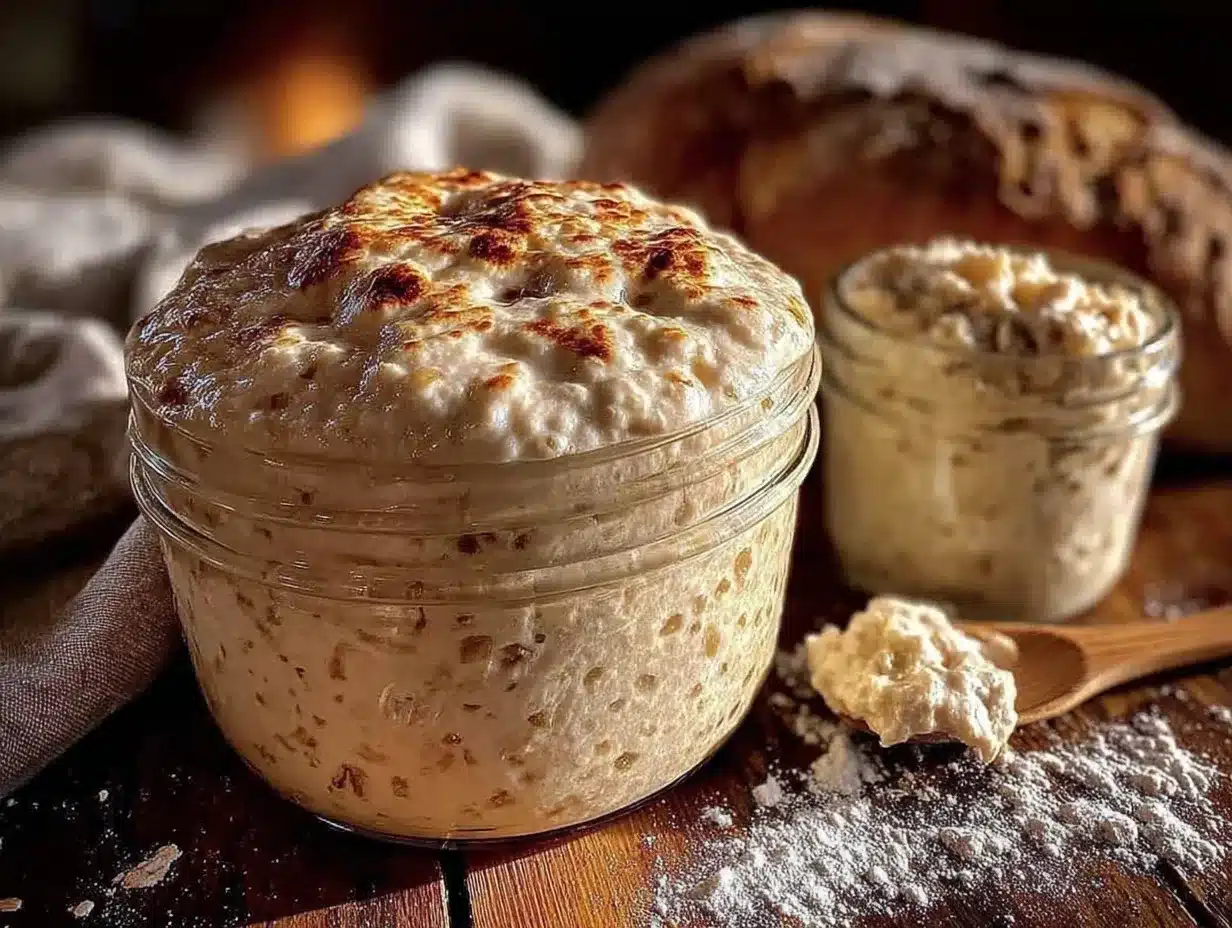
This is the heart of the guide. Follow these steps daily, and by day seven, you’ll have an active, bubbly starter ready to bake with.
Day 1: The Beginning
- Combine 60 grams (about 1/2 cup) of whole wheat or rye flour with 60 grams (1/4 cup) of room temperature filtered water in your clean jar.
- Stir vigorously until no dry flour remains. The mixture should be thick and pasty—like thick pancake batter.
- Scrape down the sides of the jar with your spoon.
- Cover loosely with a kitchen towel or coffee filter and secure with a rubber band.
- Place in a warm spot in your kitchen (70-75°F is ideal). Avoid drafty windows or cold countertops.
- Wait 24 hours. Don’t peek too much—let it do its thing.
Sensory Cue: After 24 hours, you might see a few tiny bubbles or none at all. The mixture might smell slightly sour or like wet flour. This is normal. Don’t panic if nothing seems to happen—some starters are just slow starters (pun intended).
Day 2: First Feeding
- You should see some bubbles and maybe a thin layer of liquid (called “hooch”) on top. This is good—it means fermentation is happening.
- Discard half of the starter (about 60 grams). Don’t skip this step—it prevents the mixture from becoming too acidic.
- Add 60 grams of unbleached all-purpose flour and 60 grams of room temperature water to the remaining starter.
- Stir well, scraping down the sides.
- Cover and return to its warm spot.
- Wait 24 hours.
Troubleshooting Tip: If you see no bubbles at all, your kitchen might be too cold. Try moving the jar to a slightly warmer spot—on top of the refrigerator or near the stove (but not too close to heat).
Day 3: Patience Pays Off
- By now, you should notice more bubbles and a pleasant sour smell—like yogurt or sourdough bread. If it smells like nail polish remover, don’t worry; that’s just the yeast producing acetone. It will balance out.
- Discard half the starter again (about 60 grams).
- Feed with 60 grams all-purpose flour and 60 grams water.
- Stir, cover, and wait 24 hours.
Personal Note: Day three is where my first starter died. I forgot to feed it. Set an alarm on your phone. Seriously. I now feed my starter right after my morning coffee—it’s part of my routine.
Day 4: Activity Increases
- Your starter should be noticeably more active now. You might see bubbles forming within a few hours of feeding. The volume should increase by about 50% within 12 hours.
- Discard half (60 grams).
- Feed with 60 grams all-purpose flour and 60 grams water.
- Stir, cover, and wait 24 hours.
Warning: If you see mold (fuzzy green, black, or white spots), throw everything away and start over. Mold means contamination—usually from unclean equipment or a jar that wasn’t properly sterilized. Wash your jar with hot soapy water and dry thoroughly before restarting.
Day 5: Almost There
- Your starter should be doubling in volume within 6-8 hours after feeding. It should smell pleasantly sour—like sourdough bread, not like garbage.
- Discard half (60 grams).
- Feed with 60 grams all-purpose flour and 60 grams water.
- Stir, cover, and wait 24 hours.
Visual Cue: The starter should look bubbly and aerated, like a thick foam. When you stir it, it should feel light and airy, not dense and pasty.
Day 6: Testing Readiness
- Feed your starter in the morning. By evening (about 8-12 hours later), it should have at least doubled in volume. If it has, you’re close to ready.
- Discard half (60 grams) and feed again with 60 grams flour and 60 grams water.
- Let it sit overnight.
Float Test: Drop a small spoonful of your starter into a glass of room temperature water. If it floats, your starter is active enough to bake with. If it sinks, give it another day or two of feedings.
Day 7: Ready to Bake!
- Your starter should be reliably doubling within 4-8 hours of feeding. It should smell tangy and pleasant—like sourdough bread.
- Discard half (60 grams) and feed one final time with 60 grams flour and 60 grams water.
- Wait 4-6 hours, and your starter is ready to use in any sourdough recipe.
Congratulations! You now have a living sourdough starter. Name it if you want—I call mine “Bubbles.” It sounds silly, but it makes the daily feeding feel more personal.
Cooking Tips & Techniques
After killing three starters and successfully maintaining this one for over a year, I’ve learned a few things the hard way. Here are my best tips:
Temperature Matters More Than You Think. Your starter is alive, and like all living things, it prefers a comfortable environment. The ideal temperature range is 70-75°F. If your kitchen is colder, your starter will be sluggish. If it’s hotter, fermentation speeds up and your starter might become overly sour or develop off flavors. I keep my starter on top of my refrigerator—it’s consistently a few degrees warmer than the counter.
Don’t Skip the Discard. I know it feels wasteful to throw away half your starter every day. But here’s the thing: if you don’t discard, the yeast and bacteria produce too much acid, which kills the yeast. Your starter becomes sour and sluggish. The discard is essential for maintaining a healthy balance. If you really hate wasting food, save the discard for recipes like pancakes, crackers, or quick breads. I make sourdough discard pancakes every weekend—they’re amazing.
Consistency is Everything. Feed your starter at roughly the same time every day. Your starter develops a rhythm based on when it expects food. If you feed it erratically, it will be less predictable. I feed mine every morning at 8 AM. It’s become as automatic as brushing my teeth.
Watch for the “Hungry” Signs. If your starter develops a layer of clear or grayish liquid on top (hooch), it’s hungry—it’s consumed all its food and needs feeding. If you see hooch, just stir it back in before discarding and feeding. A little hooch is normal if you miss a feeding by a few hours. A lot of hooch means you waited too long.
My Biggest Failure: On my second attempt, I used tap water straight from the faucet. The starter never bubbled. After three days, I switched to filtered water, and suddenly everything took off. Don’t underestimate the chlorine issue—it’s real.
Variations & Adaptations
Once you’ve mastered the basic starter, you can experiment with different flours and techniques to create unique flavors and textures.
Whole Wheat Starter: Replace the all-purpose flour with whole wheat flour for a nuttier, more complex flavor. Whole wheat starters tend to be more active because they have more nutrients for the yeast. The trade-off is a denser, heartier flavor that works well in rustic breads.
Rye Starter: Rye flour creates an incredibly active, tangy starter. It ferments faster and produces a distinctive sour flavor. This is my personal favorite for making dark rye breads. The starter will be thinner and more liquid than an all-purpose starter—that’s normal.
Gluten-Free Starter: Use brown rice flour or sorghum flour for a gluten-free option. The process is identical, but the starter will be less vigorous and may take 10-14 days to become active. It also needs more frequent feedings (every 12 hours) because gluten-free flours digest faster.
Cold Fermentation Method: Once your starter is established, you can store it in the refrigerator and feed it once a week instead of daily. Cold temperatures slow down fermentation dramatically. Just remember to take it out and feed it 24 hours before you plan to bake. This is perfect for occasional bakers who don’t want daily maintenance.
Flavor Add-Ins: Some bakers add a small amount of pineapple juice (a tablespoon) on day one to create an acidic environment that discourages unwanted bacteria. I’ve tried this—it works, but it’s not necessary. The pineapple flavor doesn’t carry through to the final bread.
Serving & Storage Suggestions
Once your starter is active and ready, you’ll need to know how to maintain it for ongoing use.
Room Temperature Storage: If you bake regularly (at least once a week), keep your starter at room temperature and feed it daily. This keeps it active and ready to use anytime. Feed it at the same time each day, and always discard half before feeding to maintain the right balance.
Refrigerator Storage: For less frequent baking, store your starter in the refrigerator. Feed it, let it sit at room temperature for 1-2 hours, then cover and refrigerate. It will stay dormant for up to two weeks without feeding. When you want to bake, take it out, discard half, feed it, and let it sit at room temperature for 12-24 hours until it becomes active again.
Freezing Starter: You can freeze starter for long-term storage. Spread it in a thin layer on parchment paper, freeze until solid, then transfer to a freezer bag. It will keep for several months. To revive, thaw in the refrigerator, then feed as usual. It might take a few feedings to become fully active again.
Drying Starter: For the longest storage without electricity, dry your starter. Spread it thinly on parchment paper and let it air dry completely (2-3 days). Break it into flakes and store in an airtight container. To revive, crumble a few flakes into warm water and flour, and feed as usual. This method can keep starter viable for years.
Flavor Development: Your starter’s flavor will deepen and become more complex over time. A starter that’s been maintained for months produces much better bread than a week-old starter. The tanginess increases with age and with more frequent feedings. If you prefer a milder flavor, feed your starter more frequently (every 12 hours) for a few days before baking.
Nutritional Information & Benefits
Sourdough bread has some unique nutritional advantages over regular bread, thanks to the fermentation process.
Estimated Nutritional Values (per 100g of sourdough bread made with this starter):
- Calories: 250-280
- Protein: 8-10g
- Carbohydrates: 45-50g
- Fiber: 2-4g
- Fat: 1-2g
Health Benefits:
- Lower Glycemic Index: The fermentation process breaks down some of the starches and sugars, resulting in a lower glycemic index compared to regular bread. This means steadier blood sugar levels after eating.
- Improved Digestibility: The lactic acid bacteria in sourdough break down phytic acid, which can interfere with mineral absorption. This makes the nutrients in the bread more bioavailable.
- Gut Health: Sourdough contains beneficial bacteria that can support gut health. While most of these bacteria don’t survive baking, the prebiotic fibers they produce do.
- Natural Preservative: The acetic acid produced during fermentation acts as a natural preservative, keeping sourdough bread fresh longer without additives.
Dietary Considerations: This starter is vegan, nut-free, and soy-free. It contains gluten (unless you use gluten-free flour). The fermentation process reduces gluten content but does not eliminate it—this is not safe for people with celiac disease.
Conclusion
Making your own sourdough starter from scratch is one of those kitchen projects that feels intimidating until you actually do it. Then you wonder why you waited so long. It’s just flour and water, after all—two ingredients that humans have been turning into bread for thousands of years.
I won’t pretend my first few loaves were beautiful. They were lopsided, dense, and had a crust that could double as a weapon. But they were my loaves, made with my starter, and they tasted better than anything I could buy at a bakery. There’s something deeply satisfying about feeding a living thing and watching it transform simple ingredients into bread.
I’d love to hear how your starter turns out. Did you name it? Did your first loaf actually rise? Drop a comment below and let me know. And if you run into trouble, don’t give up—I promise it’s worth pushing through the weird-smelling, bubble-less days. Your future self, eating warm sourdough straight from the oven, will thank you.
Happy baking, friend. You’ve got this.
Frequently Asked Questions
Why isn’t my sourdough starter bubbling?
Several factors can cause a sluggish starter. The most common is temperature—your kitchen might be too cold. Try moving the jar to a warmer spot (70-75°F is ideal). Another culprit is chlorine in tap water—switch to filtered or bottled water. Finally, make sure you’re using unbleached flour. Bleached flour has been chemically treated and can inhibit fermentation.
Can I use a different flour for my starter?
Absolutely. While all-purpose flour is the most reliable for beginners, you can use bread flour, whole wheat, rye, spelt, or gluten-free blends. Each flour produces a slightly different flavor and activity level. Rye and whole wheat create more vigorous starters with tangier flavors. Gluten-free starters take longer to develop and need more frequent feedings.
How do I know if my starter has gone bad?
Your starter is likely fine if it smells sour, tangy, or even slightly like acetone (nail polish remover)—that’s normal fermentation. It has gone bad if you see mold (fuzzy spots in green, black, pink, or orange), if it smells like rotten eggs or garbage, or if the liquid on top is bright orange or pink. When in doubt, throw it out and start fresh.
Can I skip the discard step?
No, and here’s why: if you don’t discard, the yeast and bacteria produce too much acid, which kills the yeast. Your starter becomes overly sour and stops rising. The discard is essential for maintaining a healthy balance. Save the discard for pancakes, crackers, or quick breads—there are hundreds of recipes for sourdough discard.
How long does a sourdough starter last?
With proper care, a sourdough starter can last indefinitely. There are starters that have been maintained for decades—even centuries. The key is consistent feeding. If you store it in the refrigerator and feed it weekly, it will last for years. You can also dry or freeze it for long-term storage. My current starter is over a year old, and it just keeps getting better.
Pin This Recipe!
Easy Beginner Sourdough Starter: 7-Day Guide
A straightforward, day-by-day plan to create a bubbly, active sourdough starter from scratch in exactly one week. No fluff, no intimidation, just simple ingredients and consistent steps for beginners.
- Prep Time: 5 minutes per feeding
- Cook Time: 0 minutes
- Total Time: 7 days
- Yield: 1 active sourdough starter (about 180 grams) 1x
- Category: Starter
- Cuisine: American
Ingredients
- 60 grams (about 1/2 cup) whole wheat or rye flour (for Day 1 only)
- Unbleached all-purpose flour (for feeding Days 2-7)
- Filtered or bottled water, room temperature
Instructions
- Day 1: Combine 60 grams whole wheat or rye flour with 60 grams room temperature filtered water in a clean jar. Stir until no dry flour remains. Scrape down sides, cover loosely with a towel or coffee filter, and place in a warm spot (70-75°F). Wait 24 hours.
- Day 2: Discard half the starter (about 60 grams). Add 60 grams unbleached all-purpose flour and 60 grams room temperature water. Stir, cover, and wait 24 hours.
- Day 3: Discard half the starter (about 60 grams). Feed with 60 grams all-purpose flour and 60 grams water. Stir, cover, and wait 24 hours.
- Day 4: Discard half the starter (60 grams). Feed with 60 grams all-purpose flour and 60 grams water. Stir, cover, and wait 24 hours.
- Day 5: Discard half the starter (60 grams). Feed with 60 grams all-purpose flour and 60 grams water. Stir, cover, and wait 24 hours.
- Day 6: Feed starter in the morning. By evening (8-12 hours), it should double in volume. Discard half (60 grams) and feed again with 60 grams flour and 60 grams water. Let sit overnight. Perform float test: drop a spoonful in water; if it floats, it’s ready.
- Day 7: Starter should double within 4-8 hours of feeding. Discard half (60 grams) and feed one final time with 60 grams flour and 60 grams water. Wait 4-6 hours. Starter is ready to use.
Notes
Consistency is key: feed at the same time daily. Use filtered water to avoid chlorine inhibiting fermentation. If starter develops hooch (grayish liquid), stir it back in before feeding. Ideal temperature is 70-75°F; colder kitchens slow activity. Discard is essential to prevent over-acidification. Save discard for pancakes or crackers. If mold appears (fuzzy green, black, or white), discard and start over.
Nutrition
- Serving Size: 1 tablespoon (about
- Calories: 250280100
- Fat: 12100
- Carbohydrates: 4550100
- Fiber: 24100
- Protein: 810100
Keywords: sourdough starter, beginner sourdough, homemade starter, 7-day starter, easy sourdough, sourdough for beginners, natural yeast starter


