The pan came out of the oven and the whole kitchen smelled like a pumpkin spice candle had exploded—in the best way. My husband walked in, coffee cup in hand, and just stood there breathing it in before saying, “Okay, those smell like fall in a muffin tin.” He wasn’t wrong. I’d been tinkering with baked oatmeal for weeks, trying to get something that was portable enough for busy mornings but still felt like a warm hug. These cozy pumpkin baked oatmeal cups were the result of that obsession, and honestly? They disappeared faster than I expected. Three days later, I was making a second batch.
I’ve always loved baked oatmeal—it’s forgiving, filling, and makes the house smell incredible. But turning it into individual cups? That was a game-changer for mornings when sitting down with a bowl just isn’t happening. You grab one, maybe two if you’re really hungry, and you’re out the door with breakfast that actually tastes like something you’d want to eat. Not dry. Not boring. Not sad.
These little cups are packed with hearty oats, real pumpkin puree, and just enough warm spice to make you feel like you’re wrapped in a blanket. They’re not overly sweet, which I love, because it means the pumpkin and spice get to shine. And they come together with ingredients you probably already have in your pantry this time of year. That’s the kind of recipe I can get behind—simple, reliable, and genuinely good.
Why You’ll Love This Recipe
Let me tell you why these pumpkin baked oatmeal cups have earned a permanent spot in my fall breakfast rotation. First off, they’re incredibly easy to make. We’re talking one bowl, a whisk, and about ten minutes of hands-on time. The oven does the rest. No stand mixer, no complicated steps, no fussing with multiple bowls. That’s my kind of morning.
- Quick & Easy : From mixing bowl to oven in under 10 minutes. Perfect for meal prep on Sunday so you have breakfast ready all week.
- Simple Ingredients : Rolled oats, pumpkin puree, eggs, milk, maple syrup, and basic pantry spices. Nothing weird or hard to find.
- Perfect for Fall Mornings : There’s something about the combo of pumpkin and warm spices that just screams autumn. These cups deliver that cozy feeling in every bite.
- Crowd-Pleaser : My kids eat them. My husband packs them for work. Even my neighbor, who claims she doesn’t like oatmeal, asked for the recipe after trying one.
- Unbelievably Delicious : The texture is soft and tender with slightly crisp edges. The pumpkin keeps them moist without being mushy. And the spice blend? Chef’s kiss.
What makes these different from every other pumpkin oatmeal recipe out there is the ratio. I tested this more times than I care to admit to get the perfect balance of oats to liquid. Too much milk and they get soggy. Too little and they’re dry and crumbly. These cups hit that sweet spot where they hold together beautifully but stay soft and almost custard-like inside. Plus, they’re naturally sweetened with maple syrup, so you don’t get that cloying sugar rush. Just honest, wholesome flavor.
These aren’t just good for healthy breakfast cups—they’re genuinely good, period. The kind of good that makes you look forward to Monday morning. And honestly, that’s saying something.
What Ingredients You Will Need
This recipe relies on simple, wholesome ingredients that work together to create something greater than the sum of their parts. Most of these are pantry staples, especially if you’re already in full fall mode like I am. Here’s what you’ll need and why each one matters.
- Rolled oats (2 cups) – Not quick oats, not steel-cut. Rolled oats give these cups the perfect chewy texture without turning mushy. I use Bob’s Red Mill or Quaker old-fashioned. Quick oats will work in a pinch, but the texture will be softer and less defined.
- Pumpkin puree (1 cup) – Make sure you’re grabbing pure pumpkin puree, not pumpkin pie filling. They look almost identical in the can, but pie filling has added sugar and spices that will throw off the balance. Libby’s is my go-to brand. If you’re feeling ambitious, homemade pumpkin puree works great too—just make sure to drain any excess liquid.
- Eggs (2 large) – These act as the binder that holds everything together. Room temperature eggs incorporate more evenly, so pull them out of the fridge about 15 minutes before you start.
- Milk (1 cup) – Whole milk gives the creamiest result, but I’ve made these with oat milk and almond milk and they turn out just fine. If using a thinner non-dairy milk, reduce the amount to ¾ cup to avoid soggy cups.
- Maple syrup (⅓ cup) – Real maple syrup, not pancake syrup. The flavor is more complex and less cloying. If you’re out, honey works as a substitute, but the flavor profile will shift slightly.
- Coconut oil (2 tablespoons, melted) – Adds moisture and a subtle richness. You can substitute melted butter or any neutral oil like avocado oil. Butter will give a slightly richer flavor.
- Vanilla extract (1 teaspoon) – Pure vanilla is worth the splurge here. It rounds out the spices and adds warmth.
- Pumpkin pie spice (2 teaspoons) – You can use store-bought or make your own blend. I usually mix cinnamon, nutmeg, ginger, and a pinch of cloves. If you only have cinnamon, use 1½ teaspoons and add a pinch of nutmeg.
- Cinnamon (1 teaspoon) – Because you can never have too much cinnamon in pumpkin recipes. It’s non-negotiable in my book.
- Baking powder (1 teaspoon) – Gives the cups a little lift so they’re not dense hockey pucks. Make sure it’s fresh—test it by dropping a bit in hot water; it should fizz.
- Salt (½ teaspoon) – Sounds weird in a sweet recipe, but salt is the secret to making the flavors pop. Don’t skip it.
- Optional mix-ins – Chocolate chips, chopped pecans, dried cranberries, or raisins. About ½ cup total if you’re adding them. I’m partial to dark chocolate chips and pecans together. That salty-sweet-crunchy thing is irresistible.
Equipment Needed
You don’t need a fancy kitchen to make these pumpkin baked oatmeal cups. Here’s what I use and a few alternatives if you’re working with less.
- Muffin tin (standard 12-cup) – This is non-negotiable. A 12-cup muffin tin is what the recipe is designed for. If you only have a 6-cup tin, you’ll need to bake in batches or halve the recipe.
- Muffin liners (paper or silicone) – Paper liners make cleanup a breeze. Silicone liners are reusable and work great, but you might need to spray them lightly with oil. I’ve forgotten to spray silicone liners before and ended up picking oat crumbs out of the pan for ten minutes. Learn from my mistake.
- Large mixing bowl – Any bowl will do. I use a big ceramic one that belonged to my grandmother. It’s chipped and imperfect, but it works perfectly.
- Whisk – For combining the wet ingredients. A fork works in a pinch, but a whisk gets everything smooth faster.
- Spatula – For scraping down the sides of the bowl and folding in any mix-ins. A rubber spatula is ideal.
- Measuring cups and spoons – Standard set. Nothing fancy. I have a set from Target that’s held up for years.
- Ice cream scoop or large spoon – For portioning the batter into the muffin cups. An ice cream scoop gives you even portions, which means even baking.
If you don’t have a muffin tin, you can bake this as a single dish in an 8×8 baking pan. Just add about 10-15 minutes to the bake time. The texture will be slightly different—softer in the middle—but it’s still delicious.
Preparation Method
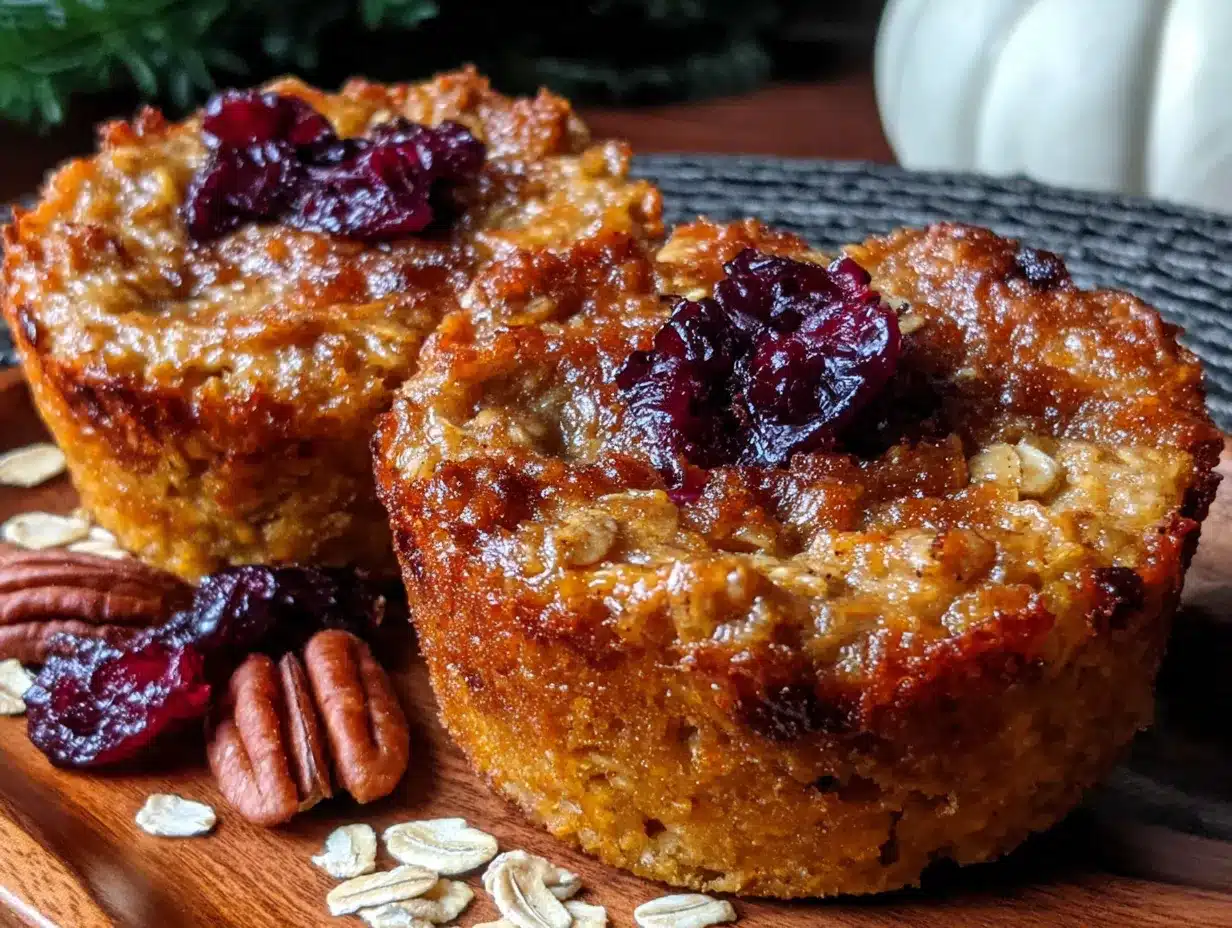
Making these cozy pumpkin baked oatmeal cups is almost embarrassingly simple. Here’s how I do it, step by step, with all the little details I’ve learned from making them more times than I can count.
- Preheat your oven to 375°F (190°C). Line a 12-cup muffin tin with paper liners or lightly grease each cup with coconut oil. I prefer liners because they make cleanup faster, but greasing works too. Just make sure you get into all the crevices.
- In a large mixing bowl, whisk together the eggs, pumpkin puree, milk, maple syrup, melted coconut oil, and vanilla extract. Whisk until everything is smooth and well combined. The mixture should be a deep orange color and smell like fall already. If your coconut oil solidifies when it hits the cold ingredients, don’t panic—just keep whisking. It’ll incorporate as you go.
- Add the rolled oats, pumpkin pie spice, cinnamon, baking powder, and salt. Stir with a spatula until everything is evenly distributed. Make sure there are no dry pockets of oats hiding at the bottom of the bowl. The batter will look thick and almost porridge-like at this point. That’s exactly what you want.
- If you’re using mix-ins, fold them in now. I usually add about ½ cup of dark chocolate chips and ¼ cup of chopped pecans. Be gentle—you don’t want to break up the oats too much. Just fold until everything is evenly distributed.
- Let the batter sit for 5 minutes. This is important. The oats need a few minutes to absorb some of the liquid, which helps the cups hold their shape better during baking. Use this time to clean up a few dishes or just breathe. You’ve earned it.
- Divide the batter evenly among the 12 muffin cups. An ice cream scoop makes this easy and ensures even portions. Each cup should be about three-quarters full. Don’t overfill them—they’ll puff up a bit in the oven.
- Bake for 20-25 minutes, or until the tops are set and lightly golden. A toothpick inserted into the center of a cup should come out mostly clean, with just a few moist crumbs attached. If it’s wet, give them another 2-3 minutes. Ovens vary, so start checking at 18 minutes if yours runs hot.
- Let the cups cool in the pan for 5 minutes. This allows them to set up properly. If you try to remove them immediately, they might fall apart. Patience is hard, I know, but it’s worth it.
- Transfer the cups to a wire rack to cool completely. If you’re eating them warm, go for it—they’re amazing fresh out of the oven. Just be careful because the filling stays hot longer than you’d expect. Ask me how I know.
One thing I’ve learned: don’t skip the cooling step. The first time I made these, I was impatient and tried to eat one straight out of the pan. It was delicious, but it completely fell apart in my hands. They need that few minutes to set up and become sturdy enough to hold. Trust the process.
Cooking Tips & Techniques
After making these pumpkin baked oatmeal cups at least a dozen times, I’ve picked up a few tricks that make a real difference. Here are the ones I wish someone had told me from the start.
Don’t overmix the batter. Stir just until the dry ingredients are incorporated. Overmixing can break down the oats and make the cups gummy instead of tender. I learned this the hard way when I made a batch that came out dense and almost paste-like. Not my finest moment.
Use room temperature ingredients. Cold eggs and cold milk can cause the melted coconut oil to solidify into little chunks. It’s not the end of the world—they’ll melt in the oven—but room temperature ingredients blend together more smoothly. If you forgot to take them out ahead of time, place the eggs in a bowl of warm water for 5 minutes and microwave the milk for 15 seconds.
Toast your oats first for extra flavor. Spread the rolled oats on a baking sheet and toast them in the oven at 350°F for 5-7 minutes before adding them to the batter. This brings out a nutty flavor that pairs beautifully with the pumpkin and spices. It’s an extra step, but it’s worth it when you have the time.
Watch your bake time carefully. These cups go from perfectly done to slightly dry in about 2 minutes. I always set a timer for 18 minutes and start checking from there. The tops should be firm to the touch and a toothpick should come out with just a few moist crumbs. If the toothpick is wet, they need more time. If it comes out completely clean, you’ve gone a minute too far.
Let them cool completely before storing. If you put warm cups in an airtight container, the steam will make them soggy. I learned this one the hard way when I packed a batch for a road trip and ended up with a container of mush. Let them cool on a wire rack for at least 30 minutes before storing.
Variations & Adaptations
One of the best things about this recipe is how easy it is to adapt. Here are some of my favorite variations, all of which I’ve tested and approved.
Vegan version: Replace the eggs with flax eggs (2 tablespoons ground flaxseed mixed with 6 tablespoons water, let sit for 5 minutes) and use a plant-based milk like oat or almond. The texture will be slightly less firm, but still delicious. I’ve made this version for a friend who’s vegan and she said it was the best breakfast she’d had all month.
Gluten-free option: Use certified gluten-free rolled oats. That’s literally the only change. Oats are naturally gluten-free, but they’re often processed in facilities that handle wheat, so look for the certified label if you’re sensitive.
Lower sugar version: Reduce the maple syrup to ¼ cup and add an extra ¼ cup of milk to compensate for the lost liquid. The cups will be less sweet, but the pumpkin and spice flavors will shine even more. You can also add a mashed banana for natural sweetness.
Protein boost: Add 2 scoops of vanilla or unflavored protein powder and increase the milk by ¼ cup. I’ve done this with collagen peptides and it works great—the cups stay moist and the protein is barely noticeable. Perfect for post-workout breakfast.
Pumpkin chocolate chip: Fold in ½ cup of dark chocolate chips and ¼ cup of chopped pecans. This is my personal favorite. The combination of warm pumpkin spice and melted chocolate is absolutely next-level. I’ve been known to eat two of these in one sitting without an ounce of guilt.
Apple pumpkin combo: Finely dice one small apple and fold it into the batter along with an extra ¼ teaspoon of cinnamon. The apple adds little bursts of sweetness and texture that complement the pumpkin beautifully. This version feels extra fall-ish, if that’s even possible.
Serving & Storage Suggestions
These pumpkin baked oatmeal cups are incredibly versatile when it comes to serving. Here’s how I like to enjoy them and how to keep them fresh for the week ahead.
Serving temperature: They’re delicious warm, at room temperature, or even cold straight from the fridge. Warm is my favorite—I pop one in the microwave for 15-20 seconds and it’s like fresh from the oven. If you’re serving them to guests, a quick warm-up in a 300°F oven for 5 minutes works great.
Toppings: A drizzle of maple syrup, a dollop of Greek yogurt, a sprinkle of chopped nuts, or a pat of butter all work beautifully. I like mine with a little yogurt and a dusting of cinnamon. It adds creaminess and a little tang that balances the sweetness.
Pairings: These cups are perfect alongside a hot cup of coffee or a pumpkin spice latte. For a more substantial breakfast, serve them with scrambled eggs and fresh fruit. They also make a great snack with a glass of milk or a cup of tea in the afternoon.
Storage: Store the cups in an airtight container in the refrigerator for up to 5 days. I layer them with parchment paper between each layer to prevent sticking. They actually get better after a day or two as the flavors meld together.
Freezing: These freeze beautifully. Place the cooled cups in a single layer on a baking sheet and freeze for 1 hour, then transfer to a freezer-safe bag or container. They’ll keep for up to 3 months. To reheat, microwave one for 30-40 seconds or warm in a 350°F oven for 10 minutes. The texture stays remarkably good after freezing—I’ve done this many times.
Make-ahead tip: You can prepare the dry ingredients (oats, spices, baking powder, salt) in a jar and the wet ingredients in a separate container the night before. In the morning, just combine, portion, and bake. Fresh oatmeal cups in under 30 minutes with almost no cleanup.
Nutritional Information & Benefits
These pumpkin baked oatmeal cups are as nourishing as they are delicious. Here’s a quick look at what you’re getting in each cup (based on the base recipe without mix-ins).
- Calories: Approximately 185 per cup
- Protein: 6g
- Fiber: 4g
- Fat: 7g
- Carbohydrates: 28g
- Sugar: 11g (from maple syrup and natural sugars)
What I love about these cups is that they’re made with whole food ingredients that actually do something good for your body. The oats provide steady-release energy to get you through the morning without the crash you get from sugary cereal. Pumpkin is packed with vitamin A and fiber, which supports eye health and digestion. The eggs add high-quality protein that keeps you full and satisfied.
These cups are also naturally dairy-free if you use a plant-based milk, and they’re free from refined sugars—only maple syrup for sweetness. They’re a great option for anyone looking for a balanced breakfast that doesn’t compromise on flavor. If you’re watching your sugar intake, you can easily reduce the maple syrup without sacrificing too much sweetness, thanks to the natural sweetness of the pumpkin.
Conclusion
These cozy pumpkin baked oatmeal cups have become a staple in my fall kitchen for good reason. They’re simple to make, packed with wholesome ingredients, and they deliver that warm, spiced comfort that makes autumn mornings feel special. Whether you’re meal-prepping for a busy week, looking for a healthier breakfast option, or just want something that tastes like fall in every bite, these cups deliver.
I love that this recipe is flexible enough to adapt to whatever you have on hand and whatever dietary needs you’re working with. It’s the kind of recipe that feels forgiving—like it wants you to succeed. And honestly, that’s the best kind of recipe to have in your back pocket.
I’d love to hear how these turn out for you. Did you add chocolate chips? Try them with apples? Serve them to your family and watch them disappear? Drop a comment below and let me know. And if you tweaked the recipe and made it your own, share that too—I’m always looking for new ideas to try in my own kitchen. Happy fall baking, friends!
Frequently Asked Questions
Can I use quick oats instead of rolled oats?
You can, but the texture will be different. Quick oats are more finely chopped, so they absorb liquid faster and create a softer, more uniform texture. The cups won’t have that nice chewy bite that rolled oats provide. If you only have quick oats, reduce the milk to ¾ cup and check for doneness a few minutes earlier.
How do I prevent the cups from sticking to the liners?
This can happen if you use cheap paper liners or if the cups aren’t baked long enough. I recommend using good-quality parchment liners or silicone liners. If using paper liners, give them a quick spray with non-stick cooking spray before filling. Let the cups cool completely in the pan before trying to peel off the liners—warm cups are more fragile and likely to stick.
Can I make these without eggs?
Yes! Replace the eggs with flax eggs (2 tablespoons ground flaxseed mixed with 6 tablespoons water, let sit for 5 minutes until gel-like). The texture will be slightly softer and less structured, but they’ll still hold together well. I’ve tested this version and it works great for vegan diets.
How long do these keep in the fridge?
Store them in an airtight container in the refrigerator for up to 5 days. They actually taste better on day 2 or 3 as the flavors have time to meld together. Just reheat in the microwave for 15-20 seconds or enjoy them cold. I’ve never had a batch last longer than 5 days because they get eaten too fast!
Can I double this recipe?
Absolutely. The recipe doubles beautifully. Use two muffin tins or bake in batches. If you’re baking in batches, keep the batter at room temperature and stir it briefly before portioning into the second batch. You can also freeze the extras for up to 3 months, so doubling is a great way to stock up for busy mornings.
Pin This Recipe!
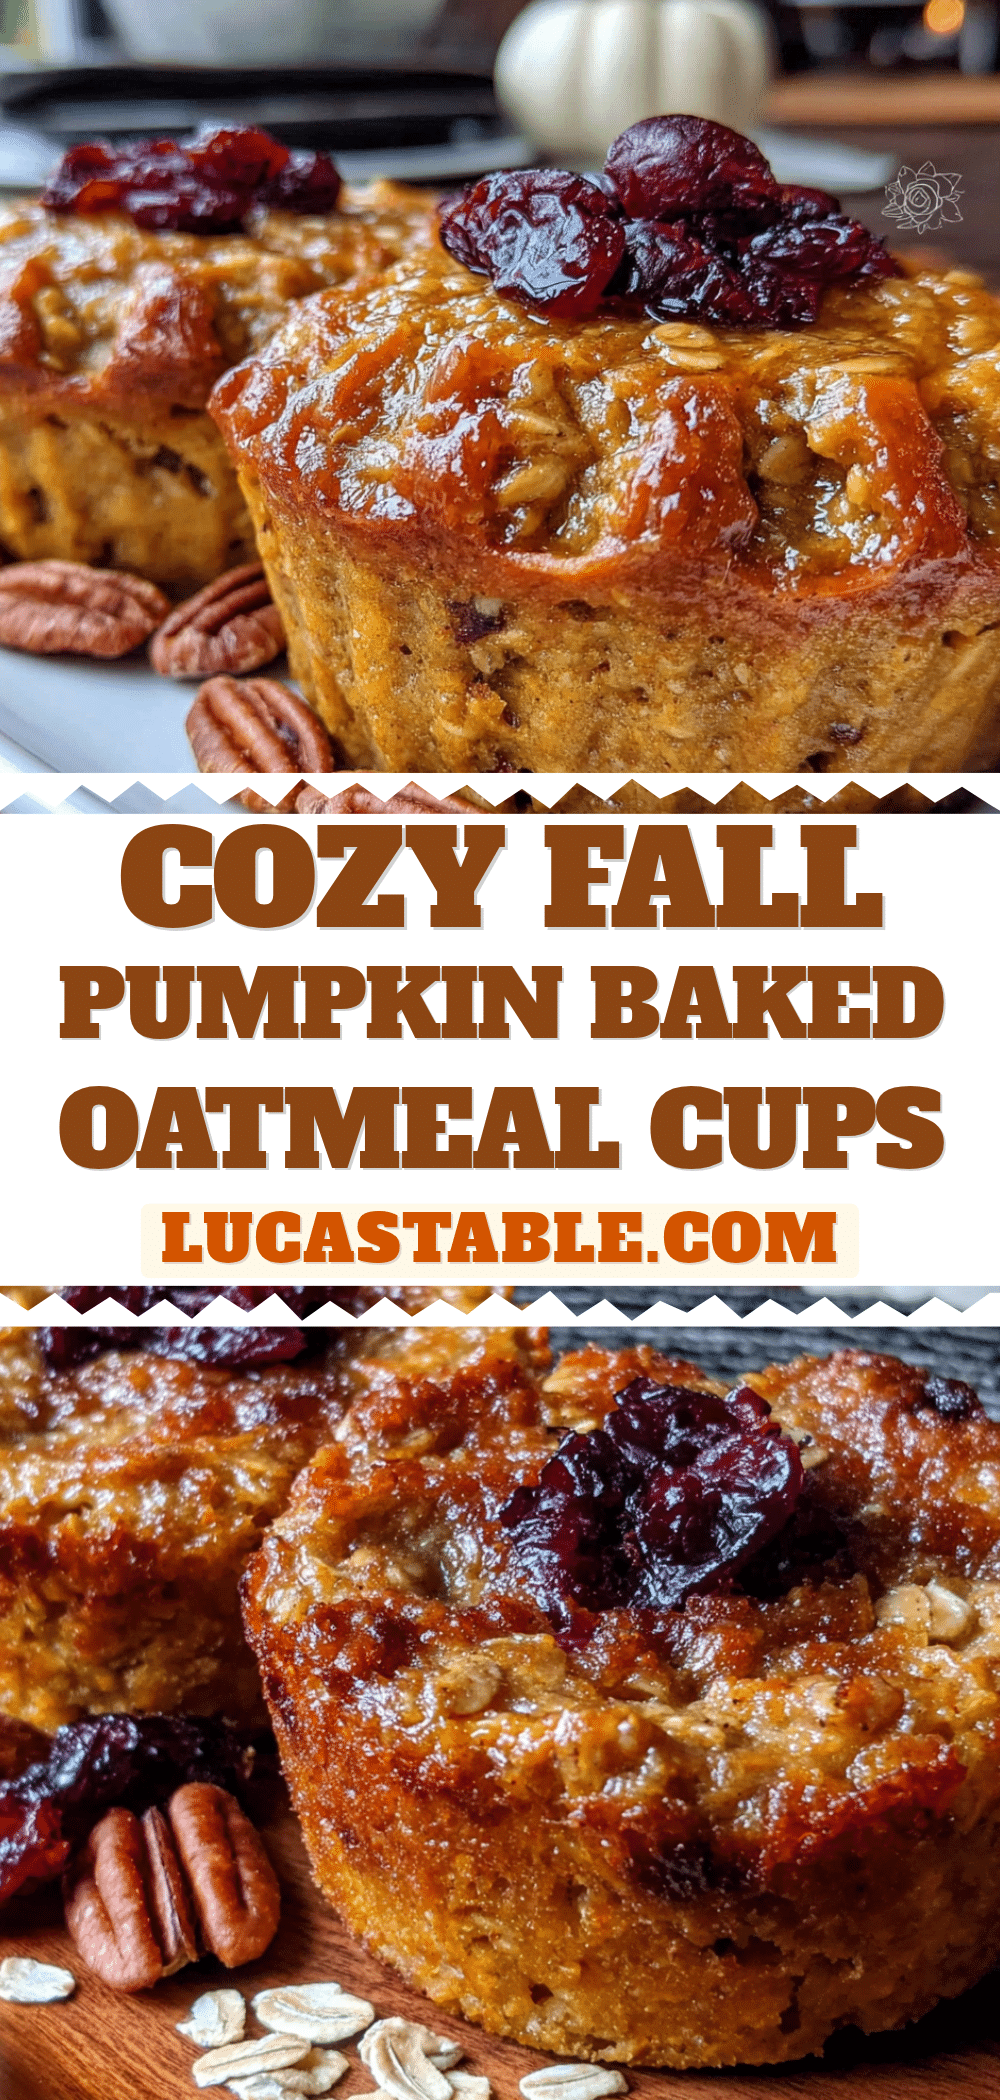
Cozy Pumpkin Baked Oatmeal Cups: Easy Fall Breakfast
These cozy pumpkin baked oatmeal cups are packed with hearty oats, real pumpkin puree, and warm spices. They’re portable, easy to make, and perfect for busy fall mornings.
- Prep Time: 10 minutes
- Cook Time: 25 minutes
- Total Time: 35 minutes
- Yield: 12 servings 1x
- Category: Breakfast
- Cuisine: American
Ingredients
- 2 cups rolled oats
- 1 cup pumpkin puree
- 2 large eggs
- 1 cup milk (whole milk preferred)
- ⅓ cup maple syrup
- 2 tablespoons coconut oil, melted
- 1 teaspoon vanilla extract
- 2 teaspoons pumpkin pie spice
- 1 teaspoon cinnamon
- 1 teaspoon baking powder
- ½ teaspoon salt
- Optional mix-ins: ½ cup dark chocolate chips, ¼ cup chopped pecans
Instructions
- Preheat your oven to 375°F (190°C). Line a 12-cup muffin tin with paper liners or lightly grease each cup with coconut oil.
- In a large mixing bowl, whisk together the eggs, pumpkin puree, milk, maple syrup, melted coconut oil, and vanilla extract until smooth and well combined.
- Add the rolled oats, pumpkin pie spice, cinnamon, baking powder, and salt. Stir with a spatula until everything is evenly distributed.
- If using mix-ins, fold them in gently.
- Let the batter sit for 5 minutes to allow the oats to absorb some liquid.
- Divide the batter evenly among the 12 muffin cups, filling each about three-quarters full.
- Bake for 20-25 minutes, or until the tops are set and lightly golden. A toothpick inserted into the center should come out mostly clean with a few moist crumbs.
- Let the cups cool in the pan for 5 minutes.
- Transfer the cups to a wire rack to cool completely.
Notes
Don’t skip the cooling step—cups need to set up to hold their shape. For vegan version, use flax eggs and plant-based milk. For gluten-free, use certified gluten-free rolled oats. Store in an airtight container in the refrigerator for up to 5 days or freeze for up to 3 months.
Nutrition
- Serving Size: 1 cup
- Calories: 185
- Sugar: 11
- Sodium: 180
- Fat: 7
- Saturated Fat: 3
- Carbohydrates: 28
- Fiber: 4
- Protein: 6
Keywords: pumpkin baked oatmeal cups, fall breakfast, healthy breakfast cups, pumpkin oatmeal, meal prep breakfast


