I figured a pumpkin roll was one of those things you just had to accept might crack. It took about three Thanksgivings and a lot of crumpled parchment paper for that idea to fall apart completely. The first one I ever made looked like a topographical map of a mountain range, and I served it anyway, telling everyone it was “rustic.” They were polite. But I knew better.
Honestly, I thought the trick was all in the rolling while it was hot. That part is important, sure. But it turns out the real secret—the thing nobody tells you—is way simpler. It’s about the moisture balance in the batter and the exact moment you stop mixing. Too much air, and the cake billows up, bubbles, and cracks when you look at it funny. Too little, and it’s a dense, sad little log.
This recipe for a Perfect Pumpkin Roll with Cream Cheese Filling (No-Crack Method) came from a season of being stubborn. I wanted a slice that looked like it belonged on a magazine cover but tasted like something you’d actually want to eat a second piece of. The filling had to be tangy, not just sweet. The cake had to be tender enough to bend without breaking.
After more batches than I care to count, I landed on a method that works every single time. It’s not about expensive equipment or fancy techniques. It’s about paying attention to a few small details that make all the difference. If you’ve been burned by a cracked pumpkin roll before, I get it. This one is different.
Why You’ll Love This Recipe
This isn’t just another pumpkin roll recipe. It’s the one I’ve tested until my family begged me to stop making them (they didn’t actually beg, because they ate every single one). Here is why this version stands out from the rest:
- No-Crack Guarantee: The method here is built around preventing cracks before they happen. From the flour-to-pumpkin ratio to the rolling technique, every step is designed to give you a smooth, beautiful spiral.
- Perfectly Tangy Filling: The cream cheese filling strikes that ideal balance between sweet and tangy. It’s thick enough to hold its shape but soft enough to spread without tearing the cake.
- Simple Pantry Ingredients: You likely have everything you need already. No weird extracts or hard-to-find flours. Just basic baking staples that come together beautifully.
- Make-Ahead Friendly: This roll actually gets better after a day in the fridge. The flavors meld, and the cake becomes even more tender. Perfect for holiday prep or just getting ahead of the week.
- Impressive Without the Stress: Let’s face it, a pumpkin roll looks like you spent hours in the kitchen. The first time you slice into a perfect spiral, you’ll feel like a baking rockstar. And now you have the method to back it up.
I’ve made this for Thanksgiving, Christmas brunch, and random Tuesday cravings. It always gets the same reaction—a pause, a raised eyebrow, and then “Wait, you made this? It looks like it’s from a bakery.” That never gets old.
What Ingredients You Will Need
This recipe uses simple, wholesome ingredients to create that tender, spiced cake and luscious filling. Most of these are pantry staples, but a few have specific roles that matter.
For the Pumpkin Cake
- Pumpkin puree (¾ cup, 170g): Make sure it’s 100% pure pumpkin, not pumpkin pie filling. I prefer Libby’s for its consistent texture and moisture content. The pumpkin is key here—it provides both flavor and the moisture needed for that pliable cake.
- All-purpose flour (¾ cup, 95g): Spoon and level your flour. Scooping directly from the bag packs in too much flour, which can lead to a dry, crack-prone cake.
- Granulated sugar (1 cup, 200g): Standard white sugar. It adds sweetness and helps with the cake’s structure.
- Large eggs (3, room temperature): Room temperature eggs emulsify better into the batter, creating a smoother, more even crumb. Cold eggs can make the batter seize up.
- Baking powder (1 teaspoon): The only leavening agent here. It gives the cake a gentle lift without creating too many air bubbles.
- Pumpkin pie spice (2 teaspoons): You can use store-bought or make your own blend with cinnamon, nutmeg, ginger, and cloves. I’ve done both, and honestly, the homemade version lets you dial in the warmth exactly how you like it.
- Cinnamon (1 teaspoon): For that extra layer of cozy flavor.
- Salt (½ teaspoon): Balances the sweetness and enhances all the spices.
- Powdered sugar (for dusting): Not in the cake itself, but essential for the rolling process. It prevents sticking and adds a touch of sweetness to the outside.
For the Cream Cheese Filling
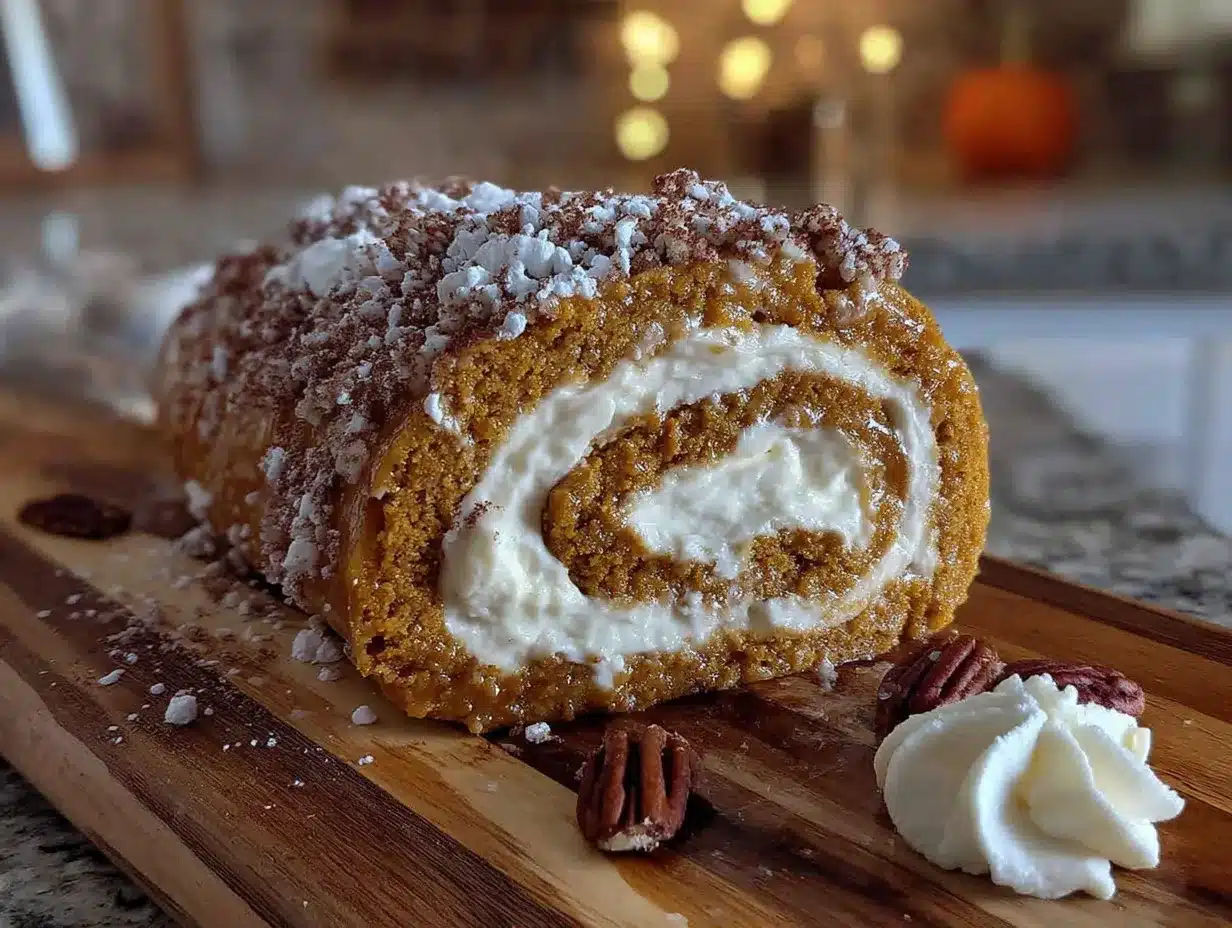
- Cream cheese (8 ounces, 226g, softened): Full-fat, block-style cream cheese is non-negotiable here. The spreadable kind in a tub has too much water and will make your filling runny. Let it sit on the counter for at least 30 minutes before using.
- Unsalted butter (¼ cup, 57g, softened): Adds richness and helps the filling hold its shape. Make sure it’s softened to the same temperature as the cream cheese for a smooth, lump-free mixture.
- Powdered sugar (1 cup, 120g): Sifted to avoid lumps. It sweetens the filling without the grittiness of granulated sugar.
- Vanilla extract (1 teaspoon): Pure vanilla extract makes a noticeable difference. Imitation vanilla works in a pinch, but the flavor won’t be as deep.
Substitution note: If you’re dairy-free, you can use a high-quality vegan cream cheese and plant-based butter, but the texture will be slightly softer. I’ve tried it, and it works, but the filling won’t be as firm for slicing.
Equipment Needed
You don’t need much for this recipe, which is part of its charm.
- 10×15-inch jelly roll pan: This specific size is important. A different size will change the thickness of the cake and affect the rolling. I use a standard Nordic Ware pan, and it’s never let me down.
- Parchment paper: Don’t skip this. You need it to lift the cake out of the pan and to roll it. I always cut a piece that hangs over the long sides of the pan by about an inch—it makes for easy handles.
- Electric mixer (hand or stand): You need to beat the eggs and sugar until thick and pale, which is hard to do by hand. A hand mixer works perfectly fine.
- Spatula: For spreading the batter evenly in the pan. An offset spatula is ideal, but a regular one works too.
- Clean kitchen towel: This is your rolling tool. Use a thin, lint-free towel. Terry cloth towels have too much texture and can stick to the cake.
- Wire cooling rack: Essential for cooling the cake properly.
- Sifter or fine-mesh strainer: For dusting powdered sugar and sifting the powdered sugar for the filling.
Budget-friendly tip: If you don’t have a jelly roll pan, you can use a similar-sized baking sheet, but the sides are usually lower. Just make sure to line it well and watch the baking time closely—it might cook a minute or two faster.
Preparation Method
Follow these steps carefully, and you’ll have a beautiful, crack-free pumpkin roll. I’ve broken it down with all the little details that make the difference.
- Preheat and prep. Preheat your oven to 375°F (190°C). Line your 10×15-inch jelly roll pan with parchment paper, leaving an overhang on the two long sides. Lightly grease the parchment with a thin layer of butter or non-stick spray. This ensures the cake releases cleanly.
- Mix the dry ingredients. In a small bowl, whisk together the flour, baking powder, pumpkin pie spice, cinnamon, and salt. Set this aside. Whisking aerates the flour and distributes the spices evenly.
- Beat the eggs and sugar. In a large mixing bowl, beat the eggs and granulated sugar together on high speed for 3 to 4 minutes. You’re looking for a thick, pale mixture that falls off the beaters in a ribbon. This is called the “ribbon stage,” and it’s crucial. The mixture should be thick enough that when you lift the beaters, it leaves a trail on the surface for a few seconds. This incorporates the air that will give the cake its light texture.
- Add the pumpkin and vanilla. Beat in the pumpkin puree and vanilla extract on low speed until just combined. Don’t overmix here. The batter will look a bit loose, and that’s okay.
- Fold in the dry ingredients. Gently fold the flour mixture into the wet ingredients using a spatula. Use a folding motion—cut through the center, scrape along the bottom, and lift the batter over the top. Stop as soon as you no longer see streaks of flour. Overmixing at this stage develops gluten, which can make the cake tough and prone to cracking.
- Spread the batter. Pour the batter into the prepared pan. Use your spatula to spread it evenly into all corners. The layer will be thin—about ¼ inch thick. Make sure it’s as even as possible so it bakes uniformly.
- Bake. Bake for 12 to 14 minutes. The cake is done when the top springs back lightly when touched, and the edges are just starting to pull away from the pan. It should look set and slightly golden. Don’t overbake—this is the most common cause of cracking.
- Prepare for rolling. While the cake bakes, lay your clean kitchen towel flat on the counter. Dust it generously with powdered sugar. You want a visible, even layer. This prevents the cake from sticking to the towel during the initial roll.
- Invert and roll. As soon as the cake comes out of the oven, run a knife around the edges to loosen it. Invert the pan onto the sugared towel. Carefully peel off the parchment paper. Starting from one of the short ends, roll the cake and the towel together into a tight log. Don’t press too hard—you just want a gentle, even roll.
- Cool completely. Place the rolled cake (still wrapped in the towel) on a wire rack to cool completely. This usually takes about 1 hour. Do not unroll it while it’s warm. The cake needs to cool in this rolled shape to “remember” the curve, which prevents cracks when you fill and re-roll it later.
- Make the filling. While the cake cools, make the filling. In a medium bowl, beat the softened cream cheese and butter together on medium speed until smooth and creamy, about 2 minutes. There should be no lumps. Add the sifted powdered sugar and vanilla extract, and beat on low speed until combined, then increase to medium speed for another minute until the filling is light and fluffy.
- Unroll and fill. Once the cake is completely cool, gently unroll it. It will want to curl back up a bit—that’s fine. Spread the cream cheese filling evenly over the cake, leaving a ½-inch border on all sides. Use an offset spatula for a smooth, even layer.
- Re-roll. Starting from the same short end, re-roll the cake tightly, this time without the towel. Use the parchment paper that was under the cake to help you lift and guide it. Wrap the finished roll tightly in plastic wrap.
- Chill. Refrigerate the wrapped pumpkin roll for at least 2 hours, or overnight. This firms up the filling and makes slicing much cleaner. The roll is easier to cut when it’s cold.
Sensory cue: At step 3, the egg-sugar mixture should feel thick and look pale yellow, almost like a thin pudding. At step 7, the baked cake should feel springy and have a faint, warm pumpkin spice aroma filling your kitchen.
Cooking Tips & Techniques
I’ve made every mistake you can imagine with pumpkin rolls. Here’s what I learned so you don’t have to repeat my errors.
The biggest mistake is overbaking. I once left a cake in the oven for 17 minutes because I got distracted by a phone call. It came out dry and cracked the second I tried to roll it. Set a timer for 12 minutes and start checking. The cake should be set but still tender. Take it out the moment it springs back to the touch.
Don’t skip the ribbon stage. I know it feels like you’re beating the eggs forever, but that 3 to 4 minutes of high-speed mixing is what creates the structure. If you under-beat, the cake won’t have enough support and will collapse when you roll it. If you over-beat, you can deflate it. Watch for that thick, pale ribbon that holds its shape for a moment.
Roll it while it’s hot. This is non-negotiable. The cake is most pliable when it’s warm from the oven. Waiting even 5 minutes can make it start to set and crack. Have your sugared towel ready before the cake comes out of the oven.
Use a light touch when rolling. You’re not trying to compress the cake into a tight cylinder. Gentle, even pressure is all you need. Think of it as guiding the cake into a curve, not forcing it.
Chill before slicing. I know it’s tempting to cut into it right away, but a warm filling will squish out, and the cake will be fragile. Two hours in the fridge makes for clean, beautiful slices. Use a sharp serrated knife and wipe it clean between cuts for the prettiest presentation.
Variations & Adaptations
Once you master the basic method, you can play around with flavors. Here are some variations I’ve tried and loved.
- Spiced Apple Roll: Substitute the pumpkin puree with unsweetened applesauce. Add ½ teaspoon of apple pie spice and ¼ cup of finely diced dried apples to the batter. The filling stays the same, and you get a lovely apple cider flavor.
- Chocolate Pumpkin Roll: Replace 2 tablespoons of the flour with unsweetened cocoa powder. The chocolate and pumpkin spices are a surprisingly good match. Dust the finished roll with a little extra cocoa powder for a dramatic look.
- Vegan Version: Use a flax egg (1 tablespoon ground flaxseed mixed with 3 tablespoons water per egg) and a high-quality vegan cream cheese. The texture will be slightly more delicate, so be extra gentle during the rolling step. I’ve had good results with Miyoko’s brand cream cheese.
- Gluten-Free Option: Swap the all-purpose flour with a 1:1 gluten-free baking flour blend that contains xanthan gum. Cup4Cup and Bob’s Red Mill both work well. The cake might be a touch more fragile, but the no-crack method still holds up.
- Pumpkin Cheesecake Roll: Add ¼ cup of graham cracker crumbs to the cream cheese filling for a subtle cheesecake crust flavor. It adds a nice texture contrast too.
My personal favorite variation is the one I make for fall brunches—I add a tablespoon of bourbon to the cream cheese filling. It adds a warmth that pairs beautifully with the pumpkin spice. Just a heads up, it makes the filling slightly softer, so chill it well before serving.
Serving & Storage Suggestions
Serving: This pumpkin roll is best served chilled or at cool room temperature. Slice it into ½-inch to ¾-inch rounds using a sharp serrated knife. Wipe the blade clean between cuts for the neatest slices. Arrange the slices on a platter with a light dusting of powdered sugar and maybe a few candied pecans or a drizzle of caramel sauce for a fancy touch.
It pairs beautifully with a hot cup of coffee or a spiced chai latte. If you’re serving it for dessert after a heavy meal, like a Thanksgiving dinner, it’s light enough to feel indulgent without being overwhelming. I’ve also served it alongside a simple crispy lemon butter salmon for a surprisingly elegant fall dinner party—the citrus cuts through the richness of the roll.
Storage: Wrap the unfilled or filled roll tightly in plastic wrap and store it in the refrigerator. It will keep well for up to 5 days. The flavors actually deepen and meld after a day or two, so it’s a great make-ahead dessert.
Freezing: You can freeze the unfilled cake roll (still wrapped in the towel) for up to 3 months. Thaw it in the refrigerator overnight, then unroll, fill, and re-roll. You can also freeze the filled roll for up to 2 months. Wrap it tightly in plastic wrap, then in foil. Thaw in the refrigerator overnight before slicing and serving.
Reheating: Honestly, this is best served cold. If you prefer it at room temperature, let the slices sit out for about 15 minutes before serving. Don’t microwave it—the filling will melt and the cake will become soggy.
Nutritional Information & Benefits
Per serving (based on 10 servings): Approximately 280 calories, 12g fat, 38g carbohydrates, 5g protein, 2g fiber. These are estimates and will vary based on specific ingredients used.
Pumpkin is a nutritional powerhouse. It’s packed with vitamin A (in the form of beta-carotene), which supports eye health and immune function. It’s also a good source of fiber, which aids digestion. The cream cheese filling provides calcium and protein, though it’s also where most of the fat and calories come from.
This recipe can be made lower in sugar by using a sugar substitute like Swerve in both the cake and filling, but I’ll be honest—the texture changes slightly. For a special occasion, I say go for the real thing and enjoy every bite.
Allergen note: This recipe contains gluten (flour), dairy (butter, cream cheese), and eggs. For those with dietary restrictions, the variations section above offers some alternatives.
Conclusion
This Perfect Pumpkin Roll with Cream Cheese Filling (No-Crack Method) is the dessert that finally made me feel like I could handle any baking project. It’s impressive enough for holidays, simple enough for a weekend treat, and forgiving enough for beginners who are nervous about rolling.
I love this recipe because it proves that a few small technique tweaks—the ribbon stage, the hot roll, the chill—can transform a frustrating recipe into a reliable favorite. It’s the kind of thing you’ll make once, then find yourself making again for every fall gathering.
If you give this recipe a try, I’d love to hear how it turned out. Leave a comment below and let me know if your roll came out crack-free. Share your photos, tag a friend who needs a confidence boost in the kitchen, and don’t be shy about customizing the filling or spices to make it your own. Happy baking!
Frequently Asked Questions
Can I use fresh pumpkin instead of canned?
Yes, you can, but you need to make sure the puree is very dry. Fresh pumpkin has more water than canned, which can make the cake soggy and prone to cracking. Roast the pumpkin, puree it, then strain it through a cheesecloth-lined sieve for at least an hour to remove excess moisture.
Why did my cake stick to the towel?
This usually happens if you didn’t use enough powdered sugar on the towel, or if the towel had any moisture. Make sure the towel is completely dry and dust it generously with powdered sugar. Also, roll the cake immediately after inverting it—don’t let it sit on the towel even for a minute.
Can I make this recipe dairy-free?
Absolutely. Use a high-quality vegan cream cheese and plant-based butter for the filling. For the cake, you can use a dairy-free butter substitute, but the texture will be slightly different. I’ve had the best results with Miyoko’s brand for both the butter and cream cheese.
How do I get clean slices without the filling squishing out?
Chill the roll for at least 2 hours before slicing. Use a sharp serrated knife and use a gentle sawing motion. Wipe the blade clean between each cut. If the roll is still too soft, pop it in the freezer for 15 minutes before slicing.
Can I double this recipe?
You can, but I recommend making two separate batches rather than doubling the batter in one bowl. The mixing times and baking times are calibrated for a single batch, and doubling can throw off the texture. Plus, you’ll need two jelly roll pans, so make sure you have the equipment.
Pin This Recipe!
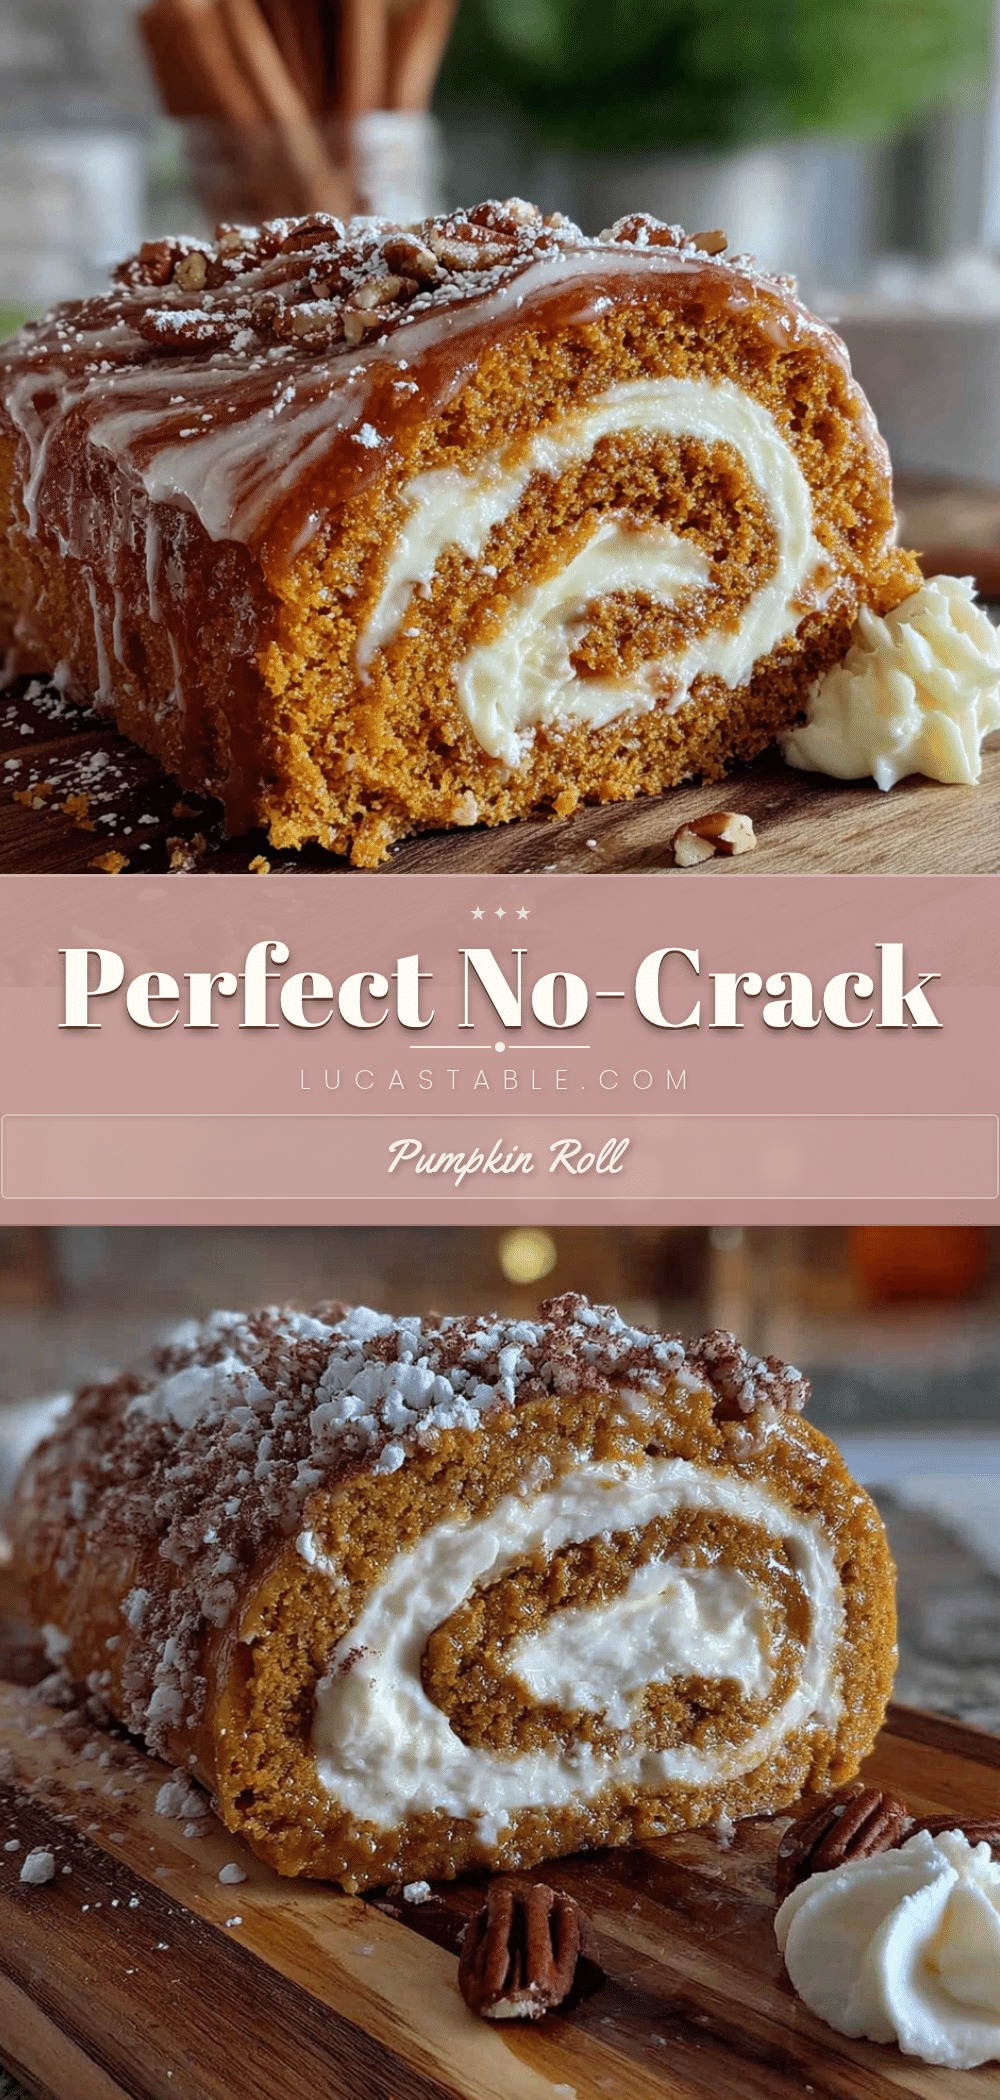
Easy Pumpkin Roll with No-Crack Cream Cheese Filling

A foolproof pumpkin roll recipe with a perfectly tangy cream cheese filling that never cracks. This tender, spiced cake rolls up beautifully every time, making it an impressive yet stress-free dessert for holidays or any fall gathering.
- Prep Time: 30 minutes
- Cook Time: 14 minutes
- Total Time: 3 hours 44 minutes (includes cooling and chilling)
- Yield: 10 servings 1x
- Category: Dessert
- Cuisine: American
Ingredients
- ¾ cup (170g) pumpkin puree (100% pure pumpkin, not pie filling)
- ¾ cup (95g) all-purpose flour, spooned and leveled
- 1 cup (200g) granulated sugar
- 3 large eggs, room temperature
- 1 teaspoon baking powder
- 2 teaspoons pumpkin pie spice
- 1 teaspoon cinnamon
- ½ teaspoon salt
- Powdered sugar, for dusting
- 8 ounces (226g) cream cheese, softened
- ¼ cup (57g) unsalted butter, softened
- 1 cup (120g) powdered sugar, sifted
- 1 teaspoon vanilla extract
Instructions
- Preheat oven to 375°F (190°C). Line a 10×15-inch jelly roll pan with parchment paper, leaving an overhang on the two long sides. Lightly grease the parchment with butter or non-stick spray.
- In a small bowl, whisk together flour, baking powder, pumpkin pie spice, cinnamon, and salt. Set aside.
- In a large mixing bowl, beat eggs and granulated sugar on high speed for 3 to 4 minutes until thick, pale, and ribbon-like (mixture falls off beaters in a ribbon that holds its shape for a few seconds).
- Beat in pumpkin puree and vanilla extract on low speed until just combined.
- Gently fold the flour mixture into the wet ingredients using a spatula, using a folding motion until no streaks of flour remain. Do not overmix.
- Pour batter into prepared pan and spread evenly into all corners (about ¼ inch thick).
- Bake for 12 to 14 minutes, until the top springs back lightly when touched and edges just start to pull away from the pan. Do not overbake.
- While cake bakes, lay a clean kitchen towel flat on the counter and dust generously with powdered sugar.
- As soon as cake comes out of the oven, run a knife around edges to loosen. Invert pan onto the sugared towel. Carefully peel off parchment paper.
- Starting from one short end, roll the cake and towel together into a tight log. Do not press too hard.
- Place rolled cake (still in towel) on a wire rack to cool completely, about 1 hour. Do not unroll while warm.
- While cake cools, make filling: In a medium bowl, beat softened cream cheese and butter on medium speed until smooth and creamy, about 2 minutes. Add sifted powdered sugar and vanilla extract, beat on low until combined, then increase to medium speed for 1 minute until light and fluffy.
- Once cake is completely cool, gently unroll it. Spread cream cheese filling evenly over cake, leaving a ½-inch border on all sides.
- Starting from the same short end, re-roll the cake tightly without the towel. Use parchment paper to help lift and guide. Wrap tightly in plastic wrap.
- Refrigerate for at least 2 hours, or overnight, before slicing.
Notes
For best results, use full-fat block cream cheese (not spreadable). Ensure eggs and cream cheese are at room temperature. Roll the cake while hot to prevent cracks. Chill before slicing for clean cuts. The roll can be made ahead and stored in the refrigerator for up to 5 days, or frozen (unfilled or filled) for up to 3 months.
Nutrition
- Serving Size: 1 slice (1/10 of rol
- Calories: 280
- Sugar: 28
- Sodium: 220
- Fat: 12
- Saturated Fat: 7
- Carbohydrates: 38
- Fiber: 2
- Protein: 5
Keywords: pumpkin roll, cream cheese filling, no-crack, pumpkin dessert, fall dessert, Thanksgiving dessert, easy pumpkin roll


