Pulled out a box of vanilla pudding mix and three packets of unflavored gelatin when my seven-year-old announced she wanted to make “Halloween jiggly stuff” for the school bake sale. I had exactly zero fancy ingredients in the pantry and about forty-five minutes before carpool. The candy corn was leftover from last year’s trick-or-treating stash, and honestly, I was just hoping the layers wouldn’t turn into a muddy brown mess.
But here’s the thing about these Easy Candy Corn Layered Vanilla Jello Cups — they actually worked. Like, really worked. The kids at the bake sale went nuts for them, and I got asked for the recipe four times before noon. I’ve been making them ever since, tweaking the vanilla layer until it had that perfect wobbly texture that doesn’t fall apart when you dig your spoon in.
These little cups have become my go-to for last-minute school events, Halloween parties, and honestly, random Tuesdays when the kids need a treat that doesn’t come from a plastic wrapper. They’re the kind of dessert that makes you look like you put in way more effort than you actually did. And isn’t that the best kind of recipe?
Why You’ll Love These Easy Candy Corn Layered Vanilla Jello Cups
Let me tell you why these little cups of joy have earned a permanent spot in my dessert rotation. First off, they’re ridiculously simple — three main ingredients and you’re done. No baking, no complicated techniques, no fancy equipment. Just mix, pour, and let the fridge do the work.
- Three Ingredients Only : Vanilla pudding mix, unflavored gelatin, and candy corn. That’s it. You probably have most of this stuff already.
- No Baking Required : Perfect for hot days when turning on the oven feels like a crime. The fridge does all the heavy lifting.
- Kid-Approved and Kid-Friendly : My kids love helping with these — layering the colors is like a mini science experiment they can eat afterwards.
- Perfect for Parties : They look impressive on a dessert table, but they’re secretly the easiest thing you’ll make all week.
- Make-Ahead Magic : These actually get better after a few hours in the fridge, so you can prep them the day before your event.
What makes these different from other jello desserts is the texture. The vanilla layer isn’t too firm or too soft — it’s that perfect jiggly consistency that holds its shape but melts in your mouth. I tested this recipe about six times before getting the gelatin ratio right, and let me tell you, the difference between a good jello cup and a great one is all in that balance.
These cups are the kind of dessert that makes people close their eyes after the first bite. It’s nostalgic comfort food with a festive twist, and it takes about fifteen minutes of active work. You can’t beat that.
What Ingredients You Will Need
This recipe uses simple, everyday ingredients to create something that looks like it took hours. Here’s what you’ll need and why each one matters.
- Vanilla Pudding Mix (3.4 oz box, instant) : This is the base of your vanilla layer. I prefer Jell-O brand for consistency, but store brands work fine too. Make sure you get the instant kind, not cook-and-serve — the texture is completely different.
- Unflavored Gelatin (3 packets, about 0.25 oz each) : Knox is my go-to brand. This is what gives the vanilla layer that perfect jiggly texture. Don’t skip this or try to substitute with flavored gelatin — the ratio matters here.
- Candy Corn (about 1 cup) : Regular candy corn works perfectly. I’ve tried the seasonal variations like chocolate candy corn, but the classic orange and yellow ones give the best color contrast. Brach’s is my preferred brand because they hold their shape well.
- Water (2 cups, divided) : You’ll use boiling water to dissolve the gelatin and cold water to cool it down. Tap water is fine, but if your water has a strong mineral taste, use filtered.
- Milk (2 cups, cold) : Whole milk gives the creamiest texture, but 2% works great too. I’ve tested this with oat milk and almond milk, and while they work, the texture is slightly less creamy. If you’re using a dairy-free option, go with oat milk for the best results.
- Whipped Topping (optional, for garnish) : Cool Whip or homemade whipped cream adds a nice finishing touch. I usually add a dollop on top just before serving.
For the vanilla layer, the key is dissolving the gelatin completely in boiling water before mixing it with the pudding. If you see any lumps, you’ll end up with weird chewy bits in your jello. Not the end of the world, but not ideal either.
One thing I learned the hard way — don’t use sugar-free pudding mix for this recipe. The texture comes out grainy, and the layers don’t set as firmly. Save the sugar-free stuff for other recipes where the texture matters less.
Equipment Needed
You don’t need much for this recipe, which is part of why I love it. Here’s what you’ll need:
- Small Clear Cups (8-10, about 6 oz each) : Clear plastic or glass cups work best so you can see the layers. I use these disposable plastic cups from the party supply store, but small mason jars or glass tumblers work beautifully too.
- Medium Mixing Bowl : For whisking the gelatin and pudding mixture. A glass bowl works best because it doesn’t retain odors.
- Whisk : A good whisk is essential for getting the gelatin fully dissolved. I prefer a balloon whisk for this job.
- Saucepan : For boiling water. Any small saucepan will do.
- Measuring Cups and Spoons : Accuracy matters with gelatin, so use proper measuring tools.
- Refrigerator Space : You’ll need about 2-3 hours of chill time, so make sure you have room in your fridge.
If you don’t have clear cups, you can use any small serving dishes. The visual effect won’t be as dramatic, but the taste is still the same. I’ve made these in small ramekins before, and they worked perfectly — just harder to see the layers.
Preparation Method
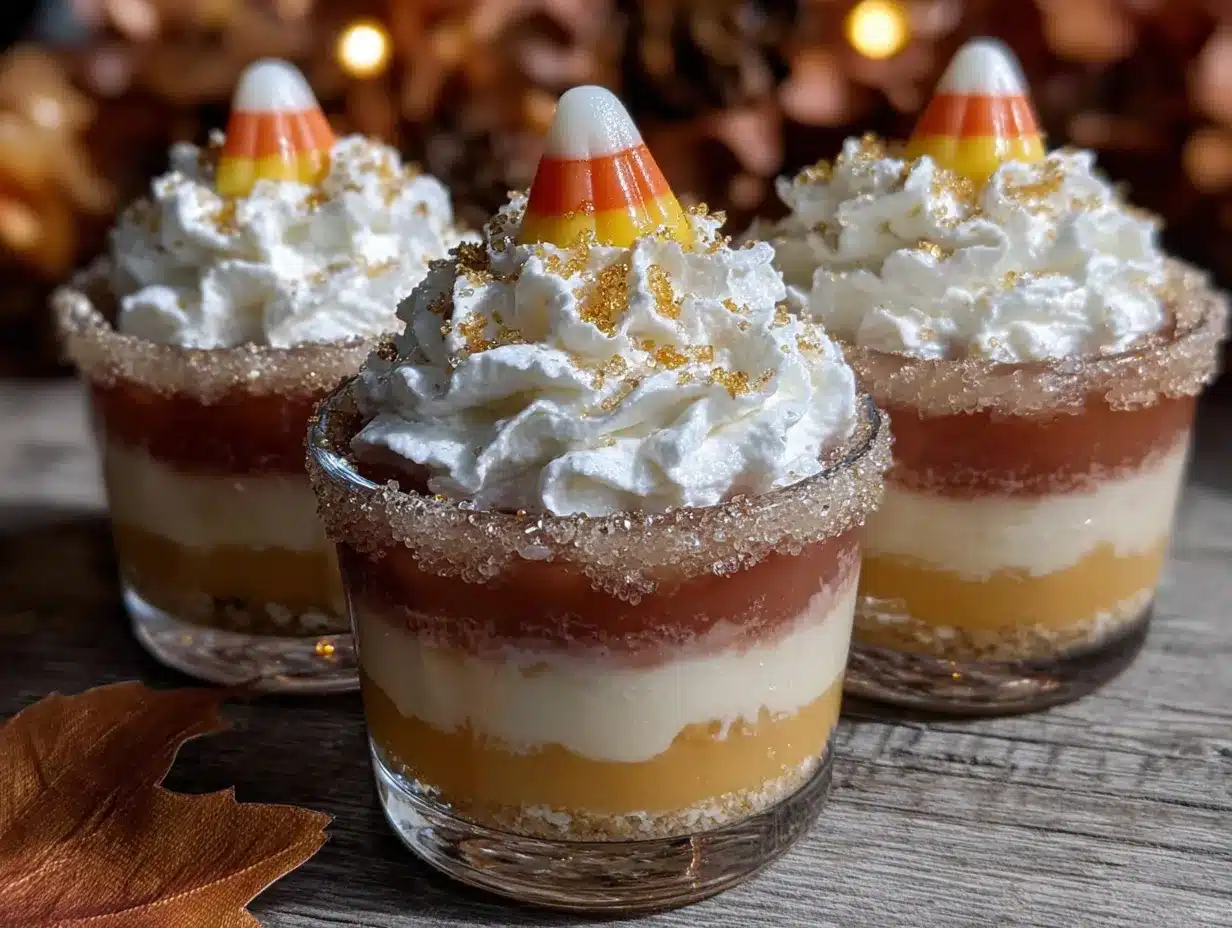
Here’s how to make these Easy Candy Corn Layered Vanilla Jello Cups. Take your time with the first step — getting the gelatin right makes everything else easier.
- Prepare the gelatin mixture. In a medium bowl, combine 1 cup of boiling water with all three packets of unflavored gelatin. Whisk constantly until the gelatin is completely dissolved — about 2 minutes. You shouldn’t see any granules at the bottom of the bowl. If you do, keep whisking. Add 1 cup of cold water and whisk again. Set aside.
- Make the vanilla layer. In a separate bowl, whisk together the vanilla pudding mix and 2 cups of cold milk. Whisk for about 2 minutes until the mixture thickens slightly. It won’t be fully set yet — that’s normal.
- Combine the mixtures. Slowly pour the gelatin mixture into the pudding mixture while whisking continuously. Keep whisking until everything is smooth and well combined. This should take about 1 minute. The mixture will be thin and liquidy — don’t worry, that’s how it’s supposed to look.
- Pour the first layer. Divide the mixture evenly among your cups, filling each about one-third full. This will be the bottom layer of your jello cups. Place the cups in the refrigerator for about 45 minutes, or until the layer is set but still slightly tacky on top.
- Add the candy corn layer. Once the first layer is set, remove the cups from the fridge. Arrange a single layer of candy corn on top of the vanilla layer. Press them down gently so they stick — don’t push them all the way in, just enough to hold them in place.
- Pour the second layer. Carefully pour the remaining vanilla mixture over the candy corn, filling the cups almost to the top. Leave about a quarter-inch of space for garnish if you’re adding whipped topping.
- Chill completely. Return the cups to the refrigerator and chill for at least 2 hours, or until fully set. The jello should be firm to the touch and should jiggle as one solid piece when you gently shake the cup.
- Garnish and serve. If desired, add a dollop of whipped topping and a few extra candy corn pieces on top just before serving. Serve cold.
A few things I’ve learned from making these dozens of times — the first layer needs to be set enough that the candy corn doesn’t sink through. If you pour the second layer too early, the candy corn will float to the bottom and mess up your layers. Trust me, I’ve had to fish candy corn out of half-set jello more times than I care to admit.
Also, don’t let the cups sit out at room temperature for too long. These are best served straight from the fridge, especially on warm days. They’ll start to soften after about 20 minutes at room temperature.
Cooking Tips & Techniques
After making these Easy Candy Corn Layered Vanilla Jello Cups more times than I can count, I’ve picked up a few tricks that make the process smoother and the results better.
Dissolve the gelatin completely. This is the most important step. If your gelatin isn’t fully dissolved, you’ll end up with little chewy bits in your jello. I whisk for a full two minutes, then let the mixture sit for 30 seconds and whisk again. If you see any granules, keep going.
Use room temperature milk. Cold milk straight from the fridge can cause the gelatin to seize up and form lumps. Let your milk sit out for about 15 minutes before you start, or microwave it for 15 seconds to take the chill off.
Don’t rush the layers. I know it’s tempting to pour the second layer right away, but trust me — wait until the first layer is fully set. I usually set a timer for 45 minutes and do something else while I wait. Checking it too early just leads to frustration.
Press the candy corn in gently. You want the candy corn to stick to the first layer without sinking in completely. I use the back of a spoon to gently press each piece down. If you push too hard, the candy corn will disappear into the jello and you won’t see it.
Make extra for testing. I always make one extra cup to test the texture. That way, if something goes wrong, I haven’t ruined the whole batch. Plus, you get to eat a tester cup — win-win.
One mistake I made early on was using too much gelatin. I thought more gelatin would make the layers set faster, but it actually made the jello rubbery and unpleasant. Stick to the three packets — it’s the sweet spot.
Variations & Adaptations
These Easy Candy Corn Layered Vanilla Jello Cups are surprisingly versatile. Here are some variations I’ve tried and loved.
Chocolate Version : Swap the vanilla pudding mix for chocolate pudding mix. The chocolate layer looks amazing with the candy corn, and the combination of chocolate and vanilla candy corn is surprisingly good. My kids actually prefer this version.
Dairy-Free Option : Use oat milk instead of regular milk, and make sure your pudding mix is dairy-free. Most instant pudding mixes are, but check the label. The texture will be slightly less creamy, but it still sets up nicely.
Layered Rainbow Cups : Instead of just one layer of candy corn, try making multiple thin layers with different colored candies. M&Ms work great for this, and you can create a rainbow effect. Just be patient with the layering — each layer needs to set before you add the next one.
Spiced Version : Add a pinch of cinnamon and nutmeg to the vanilla mixture before pouring. It gives the jello a warm, cozy flavor that pairs beautifully with the candy corn. I make this version for Thanksgiving and it’s always a hit.
Individual Serving Glasses : For a fancier presentation, use small wine glasses or martini glasses instead of cups. The layers look gorgeous through the glass, and it feels more special for dinner parties.
I tried a version with caramel sauce drizzled between the layers once, and while it tasted amazing, the caramel made the jello layers slide around too much. Stick to the candy corn for the best structural integrity.
Serving & Storage Suggestions
These Easy Candy Corn Layered Vanilla Jello Cups are best served cold, straight from the fridge. The texture is at its peak when they’ve been chilled for at least 2 hours, but overnight is even better.
For serving, I like to place each cup on a small plate or saucer. If you’re serving them at a party, arrange them on a tray with a few extra candy corn scattered around for decoration. A dollop of whipped cream on top makes them look extra special.
These pair beautifully with a warm drink like hot chocolate or coffee. The cold, jiggly texture contrasts nicely with something warm. If you’re serving them as part of a dessert table, they go well with cookies or brownies.
Storage : Keep these in the refrigerator, covered with plastic wrap or a lid. They’ll stay good for up to 5 days, but the texture starts to change after day 3. The gelatin can break down over time, making the jello slightly watery.
Freezing : I don’t recommend freezing these. The texture becomes grainy and unappetizing when thawed. If you need to make them ahead, just make them up to 2 days in advance and keep them in the fridge.
One thing I’ve noticed — the flavors actually develop and mellow out after a day in the fridge. The candy corn flavor infuses into the vanilla jello slightly, creating a more cohesive taste. So don’t be afraid to make these a day ahead.
Nutritional Information & Benefits
These Easy Candy Corn Layered Vanilla Jello Cups are a treat, so they’re not exactly health food. But here’s what you should know:
Estimated per serving (1 cup, without whipped topping) :
- Calories: 180
- Fat: 3g
- Carbohydrates: 35g
- Sugar: 28g
- Protein: 4g
The gelatin in this recipe provides a small amount of protein and collagen, which is good for skin and joint health. The milk adds calcium and vitamin D. Of course, the candy corn is mostly sugar, but that’s the fun part.
If you’re watching your sugar intake, you can reduce the amount of candy corn or use a sugar-free pudding mix. Just know that the texture will be different with sugar-free pudding — I’ve found it’s less creamy and doesn’t set as firmly.
These are not suitable for vegans or those with dairy allergies, but the dairy-free variation I mentioned earlier works well. Always check labels if you’re serving someone with food allergies.
I personally see these as a special occasion treat — something to enjoy at Halloween parties or holiday gatherings. They’re not an everyday dessert, but for a fun celebration, they’re perfect.
Conclusion
These Easy Candy Corn Layered Vanilla Jello Cups are proof that you don’t need fancy ingredients or complicated techniques to make something beautiful and delicious. Three ingredients, fifteen minutes of work, and a little patience in the fridge — that’s all it takes.
I’ve made these for Halloween parties, school bake sales, and even just for fun on a random weekend. Every time, people are amazed that something so simple can look so impressive. And honestly, that’s my favorite kind of recipe — the one that makes you look like a kitchen wizard without actually being one.
I’d love to hear how these turn out for you. Did you try any fun variations? Did your kids help with the layering? Drop a comment below and let me know. And if you’re looking for another quick and easy dessert, you might enjoy these easy honey mustard chicken for a savory option to balance out all the sugar.
Happy cooking, and don’t forget to save this recipe for your next Halloween party!
Frequently Asked Questions
Can I use sugar-free pudding mix for these jello cups?
You can, but the texture won’t be as creamy. Sugar-free pudding mixes have a different starch structure that doesn’t set up as firmly with gelatin. If you do use sugar-free, reduce the milk to 1 3/4 cups and expect a slightly softer set.
How long do these jello cups need to set in the fridge?
The first layer needs about 45 minutes to set before you add the candy corn. After you pour the second layer, give them at least 2 hours in the fridge. Overnight is even better — the flavors meld together and the texture becomes perfectly uniform.
Can I use flavored gelatin instead of unflavored?
I wouldn’t recommend it. Flavored gelatin has a different setting strength and will change the flavor of the vanilla layer. If you want a different color, use food coloring instead. Just a drop or two is enough.
What if my jello cups don’t set properly?
This usually happens if the gelatin wasn’t fully dissolved or if the milk was too cold. You can try putting them back in the fridge for another hour, but if they’re still liquidy after that, the gelatin likely didn’t activate properly. Unfortunately, there’s no way to fix it once it’s happened — you’ll have to start over.
Can I make these in advance for a party?
Absolutely! These are perfect for making ahead. They’ll stay good in the fridge for up to 5 days, and the texture actually improves after a day. Just wait to add the whipped topping until right before serving.
Pin This Recipe!
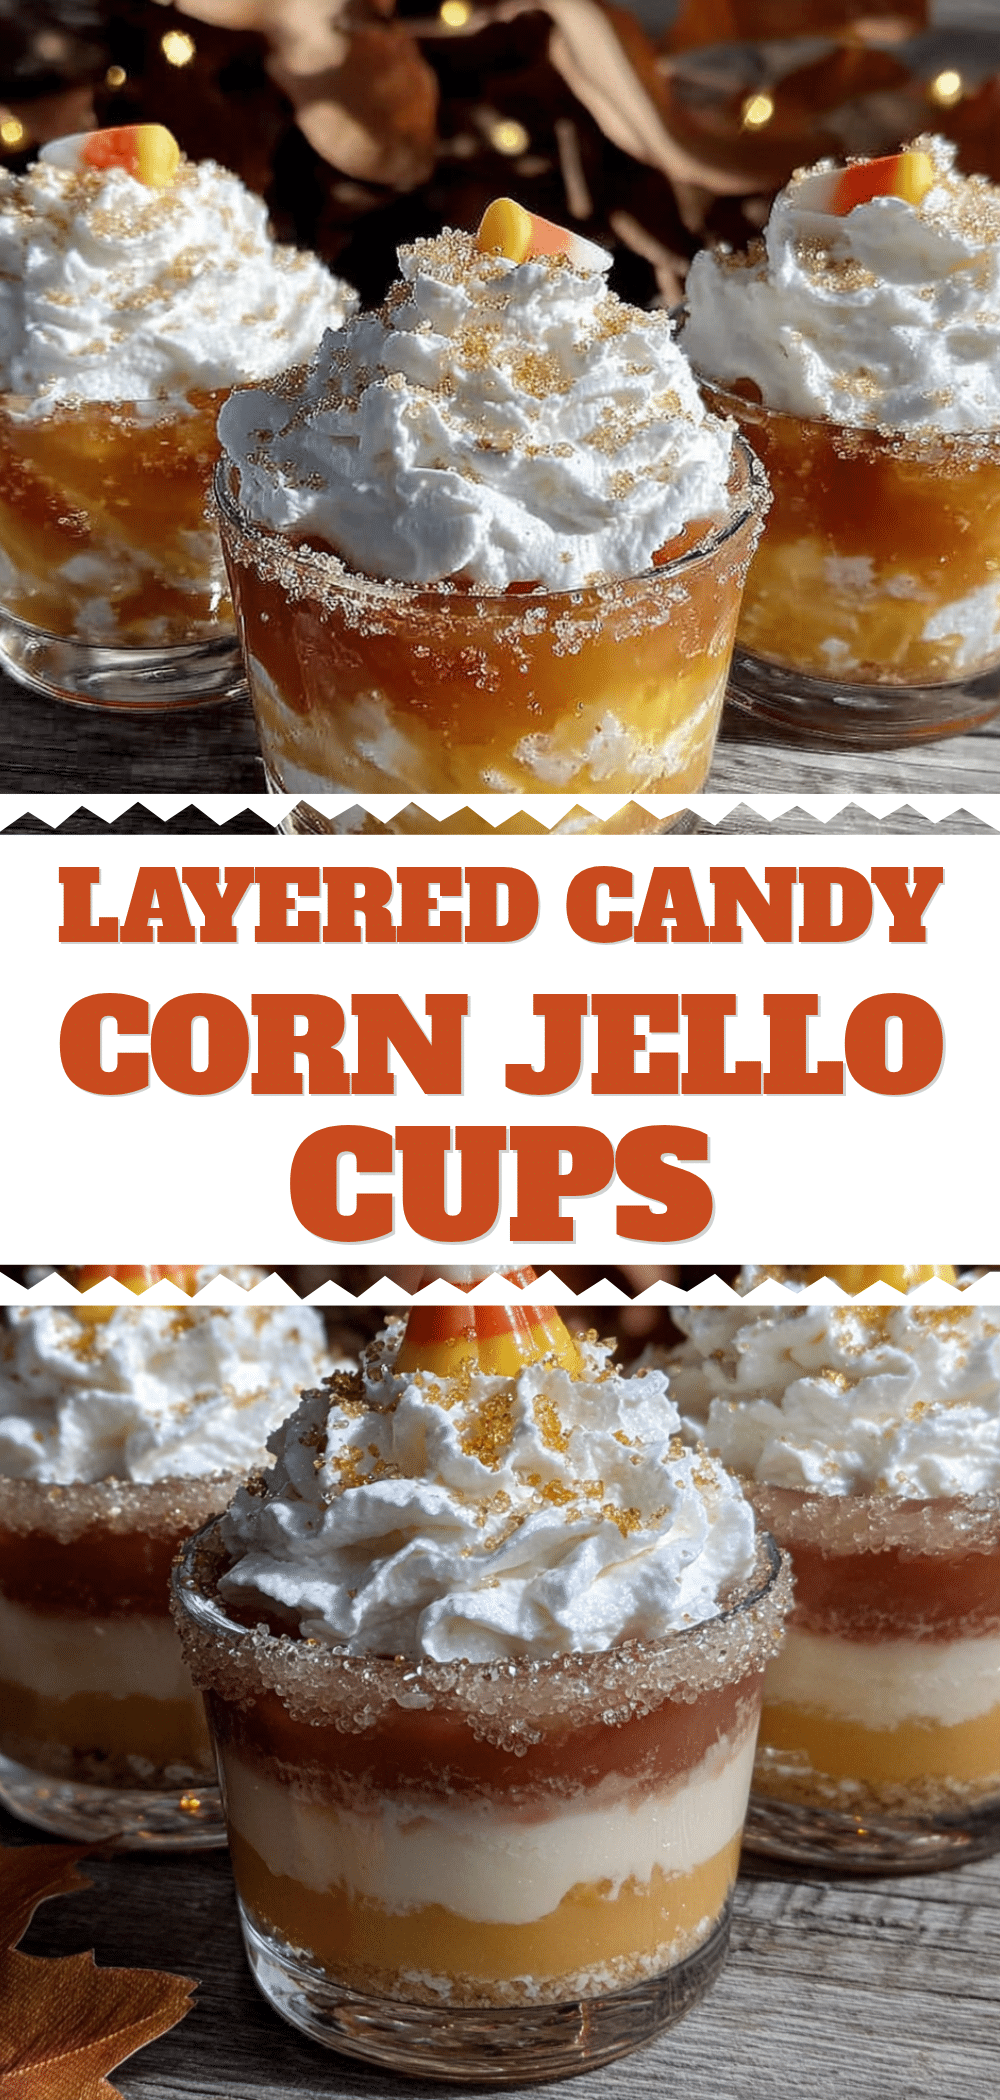
Easy Candy Corn Layered Vanilla Jello Cups: 3-Ingredient Dessert
These Easy Candy Corn Layered Vanilla Jello Cups are a simple, no-bake dessert made with just three ingredients. Perfect for Halloween parties, school bake sales, or any festive occasion, they feature a creamy vanilla jello layer with candy corn suspended in the middle.
- Prep Time: 15 minutes
- Cook Time: 0 minutes
- Total Time: 2 hours 15 minutes (includes chilling)
- Yield: 8-10 servings 1x
- Category: Dessert
- Cuisine: American
Ingredients
- 1 box (3.4 oz) instant vanilla pudding mix
- 3 packets (about 0.25 oz each) unflavored gelatin
- 1 cup candy corn
- 2 cups water, divided (1 cup boiling, 1 cup cold)
- 2 cups cold milk (whole or 2%)
- Whipped topping (optional, for garnish)
Instructions
- In a medium bowl, combine 1 cup of boiling water with all three packets of unflavored gelatin. Whisk constantly until the gelatin is completely dissolved, about 2 minutes. Add 1 cup of cold water and whisk again. Set aside.
- In a separate bowl, whisk together the vanilla pudding mix and 2 cups of cold milk for about 2 minutes until the mixture thickens slightly.
- Slowly pour the gelatin mixture into the pudding mixture while whisking continuously until smooth and well combined, about 1 minute.
- Divide the mixture evenly among 8-10 small clear cups, filling each about one-third full. Refrigerate for about 45 minutes, or until the layer is set but still slightly tacky on top.
- Once the first layer is set, remove the cups from the fridge. Arrange a single layer of candy corn on top of the vanilla layer, pressing them down gently so they stick.
- Carefully pour the remaining vanilla mixture over the candy corn, filling the cups almost to the top (leave about 1/4 inch of space for garnish if using).
- Return the cups to the refrigerator and chill for at least 2 hours, or until fully set.
- If desired, add a dollop of whipped topping and a few extra candy corn pieces on top just before serving. Serve cold.
Notes
Dissolve gelatin completely to avoid chewy bits. Use room temperature milk to prevent lumps. Don’t rush the layers; let the first layer set fully before adding candy corn. For best results, chill overnight. Not suitable for freezing.
Nutrition
- Serving Size: 1 cup (without whipp
- Calories: 180
- Sugar: 28
- Sodium: 200
- Fat: 3
- Saturated Fat: 2
- Carbohydrates: 35
- Protein: 4
Keywords: candy corn, jello cups, vanilla pudding, Halloween dessert, no-bake dessert, 3-ingredient dessert, easy dessert, kid-friendly dessert


