“You have to try browning the butter,” my sister said, shoving her phone in my face. It was a photo of a cookie—golden, craggy, with pools of melted chocolate. “It changes everything.”
I was skeptical, honestly. I’d been making chocolate chip cookies since I was tall enough to reach the counter on a step stool. My go-to recipe was fine. Good, even. But that photo stuck with me. The edges looked almost caramelized, and the centers had this soft, pillowy look that my cookies never quite achieved. So the next weekend, I grabbed a stick of butter and a heavy-bottomed saucepan.
The first batch I made? A complete mess. The butter scorched because I walked away to check my email (classic mistake). The second batch was better. The third? That was the one. The butter turned a deep amber, smelling like toasted nuts and caramel. The dough came together differently—almost fudgy. And the cookies? They were everything I wanted but didn’t know I was missing. Soft in the middle, crisp at the edges, with a nutty, toasty flavor that regular cookies just can’t touch.
These Soft-Baked Brown Butter Chocolate Chip Cookies have been my go-to ever since. They’re not complicated. They just ask for a little patience and a watchful eye. And honestly? That’s what makes them worth it.
Why You’ll Love This Recipe
Look, I’m not here to tell you that these cookies will change your life. But they might change how you think about chocolate chip cookies. Here’s why this recipe is different:
- Quick & Easy: From start to finish, you’re looking at about 30 minutes. The active time is even less—maybe 15 minutes of actual work. Perfect for those random Tuesday cravings.
- Simple Ingredients: No weird extracts, no specialty flours, no hunting down obscure baking supplies. You probably have everything except maybe the brown butter (but we’re making that, so it doesn’t count).
- Perfect for Any Occasion: These work for bake sales, holiday cookie exchanges, midnight snacks, or just because it’s Wednesday. They’re fancy enough to impress but familiar enough to feel like comfort.
- Crowd-Pleaser: I’ve brought these to parties, potlucks, and family gatherings. They disappear fast. People ask for the recipe. Kids and adults both go for seconds.
- Unbelievably Delicious: The brown butter adds a nutty, almost butterscotch flavor that regular cookies just can’t replicate. Paired with gooey chocolate and a soft-baked texture? It’s next-level comfort food.
What makes this recipe different from the rest is the technique. Browning the butter isn’t just a fancy trick—it fundamentally changes the flavor profile. The milk solids toast, releasing compounds that taste like toasted nuts and caramel. Plus, the reduced water content in the butter means less spread, giving you that perfect soft-baked texture without being cakey.
This isn’t just another cookie recipe. It’s the one you’ll come back to.
What Ingredients You Will Need
This recipe uses simple, wholesome ingredients to deliver that deep, nutty flavor and soft, chewy texture. Nothing fancy here—just smart technique with everyday staples.
- Unsalted Butter (1 cup / 2 sticks / 226g): This is the star. Use unsalted so you control the salt level. I prefer Kerrygold or Challenge for their higher butterfat content, which browns more evenly. Cut into pieces for even melting.
- Brown Sugar (1 cup / 200g, packed): Light or dark works. Dark brown sugar gives a deeper molasses flavor that complements the brown butter beautifully. Pack it firmly into the measuring cup.
- Granulated Sugar (1/2 cup / 100g): Adds sweetness and helps with spreading. The combination of brown and white sugar gives that perfect balance of chew and crisp edges.
- All-Purpose Flour (2 1/4 cups / 280g): Spoon and level—don’t scoop directly from the bag or you’ll end up with dry cookies. If you’re measuring by volume, fluff the flour first.
- Large Eggs (2, room temperature): Room temperature eggs incorporate more evenly into the brown butter. If you forget to take them out early, place them in a bowl of warm water for 5 minutes.
- Vanilla Extract (2 teaspoons / 10ml): Pure vanilla, not imitation. It enhances the brown butter’s nutty notes. I use Nielsen-Massey or just a decent store brand—anything pure works.
- Baking Soda (1 teaspoon / 5g): Helps the cookies spread and brown. Make sure it’s fresh—test it by dropping a bit in vinegar; it should fizz vigorously.
- Baking Powder (1/2 teaspoon / 2g): Adds a little extra lift for that soft-baked texture. Don’t skip it—the combination of soda and powder is key.
- Salt (1 teaspoon / 6g): Use flaky sea salt like Maldon for best results. Regular table salt works too, but reduce to 3/4 teaspoon. Salt balances the sweetness and enhances the brown butter flavor.
- Semi-Sweet Chocolate Chips (2 cups / 340g): I prefer Ghirardelli or Guittard for their flavor and meltability. You can also chop a good quality chocolate bar for those nice pools of chocolate. Dark, milk, or a mix—whatever you love.
Substitution Notes: For a dairy-free version, use vegan butter (I like Miyoko’s) and follow the same browning process—it works surprisingly well. For gluten-free, swap the all-purpose flour with a 1:1 gluten-free baking blend (I’ve had good luck with Bob’s Red Mill). The texture will be slightly different but still delicious.
Equipment Needed
You don’t need a professional bakery setup for these cookies. Here’s what you’ll actually use:
- Heavy-Bottomed Saucepan (2-3 quart): Light-colored is best so you can see the butter change color. Stainless steel or enameled cast iron work great. Avoid non-stick—it’s harder to see the browning.
- Stand Mixer or Hand Mixer: A stand mixer with the paddle attachment makes creaming the butter and sugars effortless. A hand mixer works fine too—just be prepared to hold it for a few minutes.
- Large Mixing Bowl: For combining dry ingredients. Glass, ceramic, or stainless steel—doesn’t matter.
- Medium Mixing Bowl: For whisking dry ingredients together.
- Whisk: For combining flour, baking soda, baking powder, and salt.
- Spatula: Silicone is best for scraping down the sides of the bowl and folding in chocolate chips.
- Cookie Scoop (2-tablespoon size): Ensures uniform cookies. If you don’t have one, use two spoons—it’s less precise but works.
- Baking Sheets (2): Heavy-duty aluminum sheets work best. Avoid dark non-stick sheets—they cause cookies to brown too quickly on the bottom.
- Parchment Paper or Silicone Baking Mats: Parchment is easier for cleanup. Silicone mats work well too but may produce slightly less spread.
- Cooling Rack: Essential for letting cookies cool evenly. If you don’t have one, let them cool on the baking sheet for 5 minutes, then transfer to a plate.
- Kitchen Scale (optional but recommended): For precise measurements. Baking is science, and a scale makes it easier to replicate results.
Preparation Method
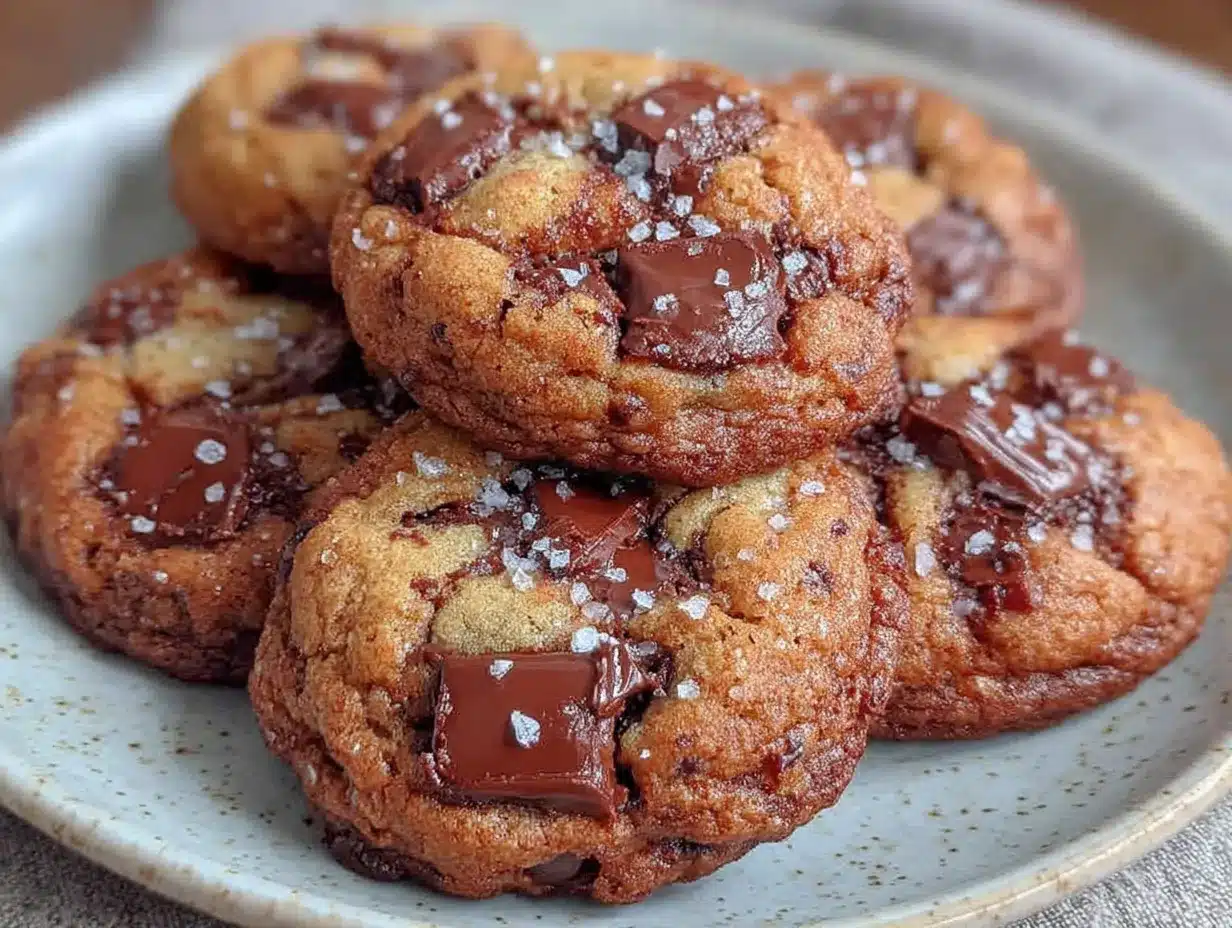
Let’s get to the good part. Follow these steps carefully, and you’ll have cookies that taste like they came from a fancy bakery—but better, because you made them.
Step 1: Brown the Butter
Place the butter pieces in your heavy-bottomed saucepan over medium heat. Stir occasionally with a spatula or wooden spoon as it melts. The butter will foam up, then subside. Keep stirring—you’re looking for the milk solids at the bottom to turn a deep amber color, like the color of a new penny. This takes about 5-8 minutes. The moment it smells nutty and toasty, remove it from the heat immediately. Pour it into a heat-safe bowl (including all the brown bits—that’s where the flavor lives) and let it cool for 10-15 minutes. Don’t skip the cooling—hot butter will cook your eggs.
Step 2: Mix Dry Ingredients
In a medium bowl, whisk together the all-purpose flour, baking soda, baking powder, and salt. Set aside. This step ensures even distribution of leaveners and salt throughout the dough.
Step 3: Cream Butter and Sugars
In the bowl of your stand mixer (or a large bowl if using a hand mixer), combine the cooled brown butter, brown sugar, and granulated sugar. Beat on medium speed for 2-3 minutes until the mixture looks light and fluffy—almost like wet sand. Scrape down the sides and bottom of the bowl with a spatula halfway through. The mixture should be smooth and slightly aerated.
Step 4: Add Eggs and Vanilla
Add the room temperature eggs one at a time, beating well after each addition (about 30 seconds each). Add the vanilla extract and beat until combined. The mixture should look smooth and glossy. Scrape down the bowl again to make sure everything is incorporated.
Step 5: Combine Wet and Dry
With the mixer on low speed, gradually add the dry ingredients. Mix until just combined—you should see a few streaks of flour remaining. Overmixing at this stage develops gluten and makes tough cookies. Stop the mixer and fold in the chocolate chips with a spatula. The dough will be soft and slightly sticky—that’s perfect.
Step 6: Chill the Dough (Optional but Recommended)
Cover the bowl with plastic wrap and refrigerate for at least 30 minutes, or up to 48 hours. Chilling solidifies the butter, which means less spread and thicker cookies. It also allows the flavors to meld. If you’re in a rush, you can skip this step, but your cookies will spread more. For best results, give it at least 30 minutes.
Step 7: Preheat and Prepare
Preheat your oven to 350°F (175°C). Line two baking sheets with parchment paper or silicone mats. While the oven heats, scoop the dough into 2-tablespoon balls (about 1.5 ounces each). Place them 2 inches apart on the prepared sheets—they will spread.
Step 8: Bake
Bake one sheet at a time on the center rack for 10-12 minutes. The edges should be golden brown and set, but the centers will look slightly underdone and puffy. That’s exactly what you want for soft-baked cookies. If you prefer crispier cookies, bake for 12-14 minutes. The cookies will continue to set as they cool.
Step 9: Cool
Let the cookies cool on the baking sheet for 5 minutes. This allows them to set without breaking apart. Then transfer them to a cooling rack to cool completely. If you’re impatient like me, you can eat one warm—just be careful, the chocolate will be molten.
Cooking Tips & Techniques
I’ve made these cookies probably fifty times by now, and I’ve learned a few things the hard way. Here’s what I wish someone had told me.
Don’t Walk Away from the Butter: Browning butter is like watching a pot of water boil—except it goes from perfect to burnt in about 30 seconds. Stay at the stove, keep stirring, and trust your nose. The moment it smells nutty and toasty, it’s done. I once ruined a batch because I answered a text. Never again.
Use a Light-Colored Pan: Dark pans make it nearly impossible to see the butter change color. If you only have dark pans, use a stainless steel or enameled one. Trust me on this.
Room Temperature Eggs Matter: Cold eggs will seize the brown butter, creating a greasy dough. If you forget to take them out early, place them in a bowl of warm water for 5 minutes. They’ll be room temp in no time.
Weigh Your Flour: If you have a kitchen scale, use it. Flour volume is notoriously inconsistent. 280 grams is 280 grams, whether you scoop or spoon. If you’re measuring by volume, fluff the flour first, then spoon it into the cup and level it off.
Chill the Dough: I know it’s tempting to skip this step, but chilling makes a real difference. The cookies spread less, puff up more, and have a better texture. Even 30 minutes helps. If you’re planning ahead, the dough can chill for up to 48 hours—the flavor actually improves.
Bake One Sheet at a Time: Your oven works best with one sheet at a time on the center rack. Two sheets means uneven baking—one will be done before the other. If you’re in a rush, rotate the sheets halfway through and swap their positions.
Underbake Slightly: The key to soft-baked cookies is taking them out when the centers still look slightly underdone. They’ll continue to set on the hot baking sheet. If you wait until they look fully done, they’ll be overbaked and crispy.
Variations & Adaptations
One of the best things about this recipe is how adaptable it is. Here are some variations I’ve tried and loved:
Chocolate Lover’s Dream: Swap 1/2 cup of the semi-sweet chips for dark chocolate chunks or chopped bittersweet chocolate. The deeper chocolate flavor pairs beautifully with the nutty brown butter. I’ve also added a handful of white chocolate chips for contrast—decadent but worth it.
Nutty Delight: Add 1/2 cup of toasted pecans or walnuts, chopped. Toast them in a dry skillet over medium heat for 3-4 minutes until fragrant, then let them cool before folding into the dough. The crunch adds a lovely texture contrast.
Sea Salt Finish: Sprinkle a pinch of flaky sea salt (like Maldon) on top of each cookie right after they come out of the oven. The salt cuts through the sweetness and enhances the brown butter flavor. It’s a small touch that makes a big difference.
Gluten-Free Version: Replace the all-purpose flour with a 1:1 gluten-free baking blend. I’ve used Bob’s Red Mill with good results. The texture will be slightly more delicate, but the flavor is still amazing. Add an extra tablespoon of milk or water if the dough seems dry.
Vegan Version: Use vegan butter (I like Miyoko’s) and follow the same browning process. Replace the eggs with flax eggs (2 tablespoons ground flaxseed mixed with 5 tablespoons water, let sit for 5 minutes). The cookies will be slightly less chewy but still delicious.
Double Chocolate: Replace 1/4 cup of the flour with unsweetened cocoa powder. Use dark chocolate chips instead of semi-sweet. The result is a rich, fudgy cookie that’s perfect for serious chocolate lovers.
Serving & Storage Suggestions
These cookies are at their best when they’re still slightly warm, with the chocolate gooey and the edges crisp. But they’re pretty amazing at room temperature too.
Serving Temperature: Serve at room temperature or slightly warm. If you’re reheating leftovers, pop them in a 300°F (150°C) oven for 3-5 minutes. The microwave works too, but it can make them chewy rather than soft.
What to Serve With: A cold glass of milk is the classic pairing, and for good reason. But these cookies also go beautifully with a scoop of vanilla ice cream (try it—warm cookie, cold ice cream, pure magic). For a grown-up version, serve with a glass of bourbon or a dark stout beer. The nutty notes in the brown butter complement the caramel and vanilla flavors in bourbon perfectly.
Storage: Store cookies in an airtight container at room temperature for up to 5 days. Place a slice of bread in the container to keep them soft—the cookies will absorb moisture from the bread. Change the bread every day or two.
Freezing: These cookies freeze beautifully. You can freeze the baked cookies in a freezer-safe bag for up to 3 months. Thaw at room temperature or reheat directly from frozen in a 300°F oven for 5-7 minutes. Even better: freeze the dough balls on a baking sheet, then transfer to a bag. Bake from frozen, adding 2-3 minutes to the baking time. Fresh cookies anytime!
Flavor Development: These cookies actually taste better the next day. The flavors meld and deepen overnight. If you can resist eating them all on day one, you’ll be rewarded on day two.
Nutritional Information & Benefits
Let’s be real—these are cookies, not health food. But they’re made with real ingredients, and that counts for something. Here’s a rough estimate per cookie (based on 24 cookies):
Calories: 220 | Fat: 12g | Saturated Fat: 7g | Cholesterol: 35mg | Sodium: 150mg | Carbohydrates: 28g | Fiber: 1g | Sugar: 18g | Protein: 3g
Ingredient Benefits:
- Butter: Provides vitamin A and healthy fats. Brown butter adds a depth of flavor that means you can use less sugar overall.
- Dark Chocolate: Rich in antioxidants and flavonoids. The darker the chocolate, the more benefits—but semi-sweet is a good balance of flavor and health.
- Eggs: Good source of protein and B vitamins.
- Brown Sugar: Contains molasses, which provides trace minerals like calcium and potassium.
Dietary Considerations: This recipe contains gluten, dairy, and eggs. For gluten-free or vegan options, see the variations section above. If you’re watching your sugar intake, these are definitely a treat—but they’re made with real ingredients, not processed junk.
FAQs
Can I use salted butter instead of unsalted?
Yes, but reduce the added salt to 1/2 teaspoon. The salt in salted butter varies by brand, so it’s better to control the salt level yourself. If you only have salted butter, it’ll still work—just adjust accordingly.
Why did my cookies spread too much?
Several possible reasons: the butter was too warm when you mixed it, the dough wasn’t chilled long enough, or your baking soda is old. Make sure the brown butter is cooled to room temperature (not warm) before mixing. Chill the dough for at least 30 minutes. And check your baking soda’s freshness—it should fizz when dropped in vinegar.
Can I make the dough ahead of time?
Absolutely. The dough can be refrigerated for up to 48 hours. In fact, the flavor improves as it sits. You can also freeze the dough balls for up to 3 months—just bake from frozen, adding 2-3 minutes to the baking time.
How do I get that perfect soft-baked texture?
The key is underbaking slightly. Take the cookies out when the edges are set and golden, but the centers still look puffy and slightly underdone. They’ll continue to cook on the hot baking sheet as they cool. Also, using brown butter reduces the water content, which helps create that soft, chewy texture.
Can I use different types of chocolate?
Definitely. Semi-sweet is classic, but milk chocolate makes them sweeter, dark chocolate gives a richer flavor, and white chocolate adds a creamy sweetness. You can also use chocolate chunks or chopped chocolate bars for those nice pools of melted chocolate. Mix and match to your heart’s content.
Conclusion
These Soft-Baked Brown Butter Chocolate Chip Cookies have become my go-to for a reason. They’re simple enough for a Tuesday night but special enough for a holiday cookie exchange. The brown butter adds a depth of flavor that makes people stop and ask, “What’s different about these cookies?” And the soft-baked texture? It’s exactly what a chocolate chip cookie should be—tender, chewy, and utterly satisfying.
I’ve shared this recipe with friends, family, and coworkers, and it’s never let me down. It’s forgiving enough for beginners but rewarding enough for experienced bakers. And honestly? It’s just fun to make. There’s something satisfying about watching butter transform into something nutty and golden, then turning it into cookies that disappear in minutes.
So go ahead—brown that butter. Make a mess. Eat one straight off the baking sheet (I won’t tell). And when you’re done, come back and tell me how they turned out. Did you add nuts? Swap the chocolate? Forget to chill the dough? I want to hear about it. Drop a comment below, or tag me in your photos. Happy baking!
P.S. If you’re looking for more quick and satisfying recipes, check out my Aglio e Olio Pasta for a savory counterpart to these sweet treats. And if you’re in the mood for something equally comforting but different, my Creamy Butter Chicken is a weeknight favorite that never disappoints.
Pin This Recipe!
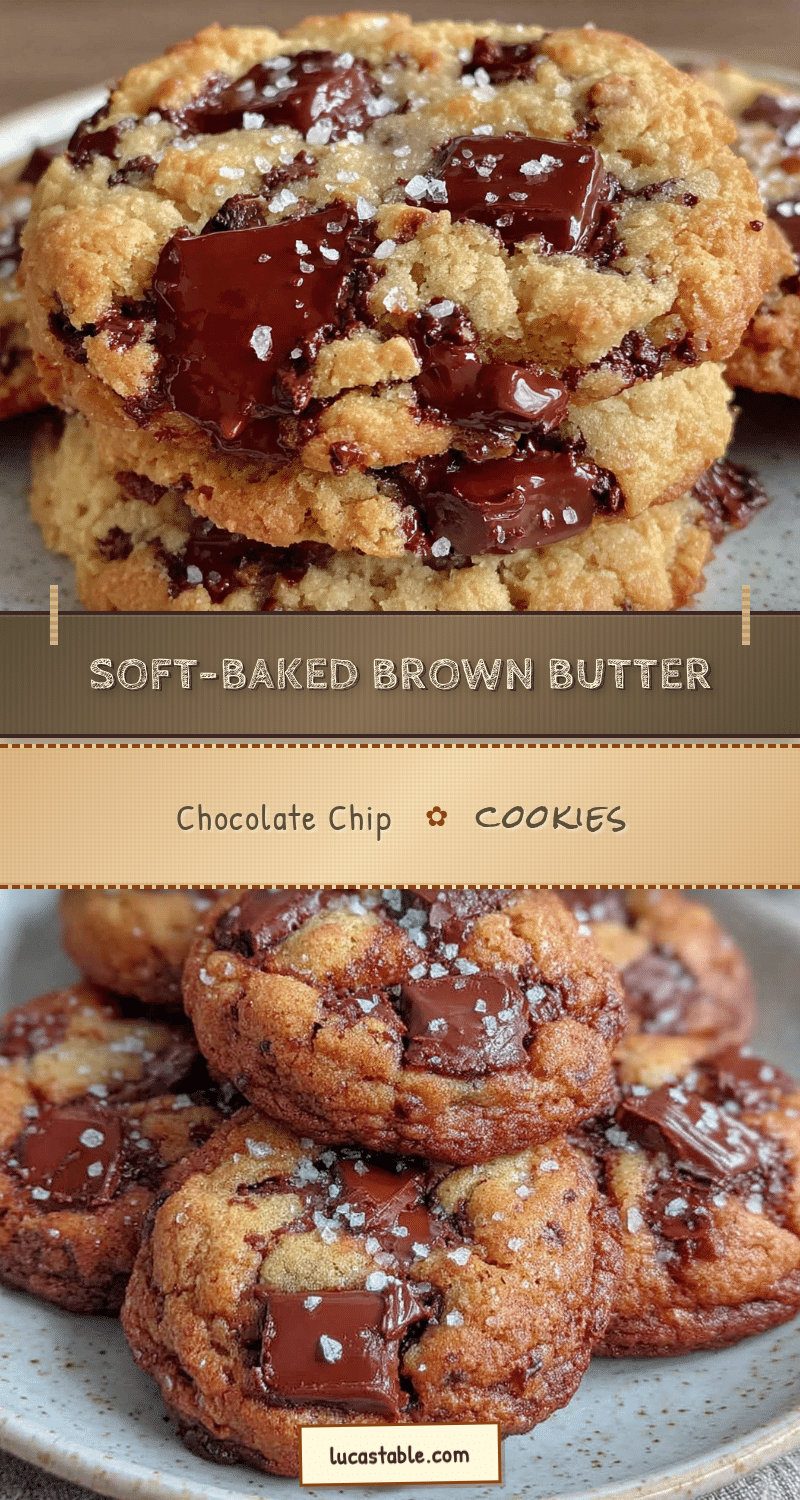
Soft-Baked Brown Butter Chocolate Chip Cookies
These soft-baked brown butter chocolate chip cookies are nutty, chewy, and utterly irresistible. With a simple technique and everyday ingredients, they deliver bakery-quality results every time.
- Prep Time: 15 minutes
- Cook Time: 12 minutes
- Total Time: 30 minutes
- Yield: 24 cookies 1x
- Category: Dessert
- Cuisine: American
Ingredients
- 1 cup (2 sticks / 226g) unsalted butter
- 1 cup (200g) packed brown sugar (light or dark)
- 1/2 cup (100g) granulated sugar
- 2 1/4 cups (280g) all-purpose flour
- 2 large eggs, room temperature
- 2 teaspoons (10ml) pure vanilla extract
- 1 teaspoon (5g) baking soda
- 1/2 teaspoon (2g) baking powder
- 1 teaspoon (6g) salt (flaky sea salt preferred, or 3/4 teaspoon table salt)
- 2 cups (340g) semi-sweet chocolate chips
Instructions
- Brown the butter: Place butter pieces in a heavy-bottomed saucepan over medium heat. Stir occasionally as it melts. The butter will foam, then subside. Continue stirring until the milk solids turn deep amber (color of a new penny) and it smells nutty and toasty, about 5-8 minutes. Immediately remove from heat and pour into a heat-safe bowl, including all brown bits. Let cool for 10-15 minutes.
- Mix dry ingredients: In a medium bowl, whisk together flour, baking soda, baking powder, and salt. Set aside.
- Cream butter and sugars: In a stand mixer bowl (or large bowl with hand mixer), combine cooled brown butter, brown sugar, and granulated sugar. Beat on medium speed for 2-3 minutes until light and fluffy, scraping down sides halfway through.
- Add eggs and vanilla: Add room temperature eggs one at a time, beating well after each addition (about 30 seconds each). Add vanilla extract and beat until combined. Scrape down bowl again.
- Combine wet and dry: With mixer on low speed, gradually add dry ingredients. Mix until just combined—a few streaks of flour should remain. Fold in chocolate chips with a spatula. Dough will be soft and slightly sticky.
- Chill dough (optional but recommended): Cover bowl with plastic wrap and refrigerate for at least 30 minutes, up to 48 hours.
- Preheat and prepare: Preheat oven to 350°F (175°C). Line two baking sheets with parchment paper or silicone mats. Scoop dough into 2-tablespoon balls (about 1.5 ounces each) and place 2 inches apart on prepared sheets.
- Bake: Bake one sheet at a time on center rack for 10-12 minutes. Edges should be golden brown and set, centers slightly underdone and puffy. For crispier cookies, bake 12-14 minutes.
- Cool: Let cookies cool on baking sheet for 5 minutes, then transfer to a cooling rack to cool completely.
Notes
Don’t walk away from the butter while browning—it goes from perfect to burnt in about 30 seconds. Use a light-colored pan to see the color change. Room temperature eggs are important to prevent seizing the brown butter. Weighing flour ensures accuracy. Chilling the dough is recommended for thicker cookies. Bake one sheet at a time for even results. Underbake slightly for soft-baked texture.
Nutrition
- Serving Size: 1 cookie
- Calories: 220
- Sugar: 18
- Sodium: 150
- Fat: 12
- Saturated Fat: 7
- Carbohydrates: 28
- Fiber: 1
- Protein: 3
Keywords: brown butter chocolate chip cookies, soft-baked cookies, easy cookie recipe, chocolate chip cookies, homemade cookies


