My daughter handed me a candy corn three weeks before Halloween and said, “Mom, what if this was a Rice Krispie Treat?” And honestly, I froze for a second. Not because it was a bad idea—but because it was so obvious I couldn’t believe I hadn’t thought of it myself. She stood there with orange-stained fingers, waiting for an answer, and I just started laughing. That’s how these Easy Candy Corn Rice Krispie Treats were born. Right there in my kitchen, on a random Tuesday afternoon, with no occasion whatsoever.
The first batch came out looking like a happy accident. The layers weren’t perfectly straight, and the white section had a few butter smears (note to self: clean the spatula between layers). But you know what? Nobody cared. My kid ate three of them before dinner and asked if we could make them for her class party. That’s when I knew this wasn’t just a fun idea—it was a keeper.
These treats aren’t complicated. They use the same basic ingredients as the classic version, just separated and colored to look like everyone’s favorite controversial Halloween candy. The whole thing takes about 15 minutes of active time, plus a little patience while the layers set. And let me tell you, watching someone bite into one and see those three distinct layers? That never gets old.
I’ve made these for Halloween parties, school bake sales, and even a friend’s “Friendsgiving” because she insisted they were too cute to wait for October. They travel well, they’re impossible to mess up, and they disappear faster than anything else on the dessert table. If you’ve ever wanted a no-bake treat that looks impressive without requiring any actual skill, this is it.
Why You’ll Love This Recipe
Let me be real with you—I’ve tested a lot of Rice Krispie Treat variations over the years. Some were disasters (looking at you, burnt marshmallow batch from 2019). But these Easy Candy Corn Rice Krispie Treats? They earned a permanent spot in my rotation. Here’s why you’ll feel the same way:
- 15 Minutes Active Time: From melting butter to pressing the last layer, you’re done before your preheated oven would even be ready. This is genuinely one of the fastest desserts I make.
- No-Bake, No-Fuss: No oven required, no complicated techniques. If you can melt marshmallows, you can make these. My 8-year-old helps with the whole process now.
- Pantry-Friendly Ingredients: Besides candy corn (which you probably already have if it’s fall), everything else is a standard pantry staple. Butter, marshmallows, Rice Krispies cereal, and yellow food coloring.
- Perfect for Any Fall Occasion: Halloween parties, Thanksgiving dessert tables, classroom treats, or just because it’s October and you want something festive. These fit everywhere.
- Crowd-Pleasing Visuals: The three-layer look is genuinely impressive. People always ask how I got the layers so clean, and I just smile and say “patience” like I’m some kind of pastry chef.
- Kid-Approved, Adult-Devoured: My neighbor, who claims to hate candy corn, ate four of these in one sitting. The marshmallow-cereal base somehow makes the candy corn flavor feel nostalgic rather than controversial.
What makes this recipe different from other layered treats I’ve tried is the technique. Instead of trying to pour warm marshmallow mixture over already-set layers (which always ends up messy), I press each layer individually and let it cool slightly before adding the next. It takes a little more time, but the results are worth it. No bleeding colors, no mixed-up layers, just clean, photogenic stripes every time.
What Ingredients You Will Need
This recipe uses simple, humble ingredients that come together to create something genuinely special. Most of these are probably already in your kitchen, which is exactly how I like my desserts to start.
- 6 tablespoons unsalted butter: This is the foundation. I use salted butter in a pinch, but unsalted gives you more control over the final flavor. Cut it into pieces so it melts evenly. (Pro tip: I’ve tested this with both salted and unsalted, and honestly, if you only have salted, just skip adding any extra salt later.)
- 1 (10 oz) bag marshmallows: Standard-size marshmallows work best here. Mini marshmallows melt faster, but they also tend to clump. I use Jet-Puffed because that’s what my mom always bought, and old habits die hard.
- 6 cups Rice Krispies cereal: Don’t substitute with generic crispy rice cereal if you can help it. The texture and crunch are noticeably different with off-brands. I learned this the hard way during a particularly sad batch in 2021.
- Yellow and orange gel food coloring: Gel coloring is non-negotiable here. Liquid food coloring will make your marshmallow mixture too wet, and the layers won’t hold their shape. I use Wilton brand, but any gel works. You’ll need yellow for the middle layer and orange for the bottom layer. (The top layer stays white.)
- 1/2 cup candy corn: This is optional but highly recommended. I press some into the top layer for decoration, and sometimes I mix a handful into the orange layer for extra texture. If you’re a candy corn purist, go ahead and skip this—the treats are still delicious without it.
- Non-stick cooking spray: For greasing your spatula, your hands, and your baking dish. Marshmallow mixture sticks to everything, and I mean everything. Don’t skip this, or you’ll be picking cereal off your counter for days.
I’ve made this recipe with vegan butter and vegan marshmallows for a dairy-free friend, and it worked beautifully. The texture was slightly softer, but the layers still held. If you’re going that route, just know that the setting time might be a little longer.
Equipment Needed
You don’t need fancy equipment for these Easy Candy Corn Rice Krispie Treats, which is part of why I love making them so much. Here’s what you’ll need:
- 8×8 inch baking dish: This is the perfect size for getting thick, satisfying layers. A 9×9 works too, but your treats will be slightly thinner. I line mine with parchment paper, leaving overhang on two sides for easy lifting.
- Large microwave-safe bowl: You’ll be melting butter and marshmallows in this, then stirring in cereal. Make sure it’s big enough to hold everything without spilling over the sides. I learned that lesson when I used a too-small bowl and ended up with marshmallow on my microwave ceiling.
- Silicone spatula: A rubber or silicone spatula is essential for folding the cereal into the marshmallow mixture without crushing it. Metal spoons will break the cereal into tiny pieces.
- Small bowls for separating ingredients: You’ll need three separate bowls for dividing the marshmallow mixture into layers. I use cereal bowls, nothing fancy.
- Measuring cups and spoons: Standard set for measuring butter, cereal, and food coloring.
- Parchment paper: Lining your dish with parchment makes lifting out the finished treats effortless. Without it, you’ll be fighting to get the first piece out, and it will look like a crime scene.
- Sharp knife: For cutting clean slices after the treats have set. A serrated knife works best for cutting through the layers without squishing them.
If you don’t have an 8×8 dish, you can use a 9×13, but your layers will be much thinner—think candy corn slices rather than candy corn bricks. I’ve also made these in a loaf pan for extra-thick, almost cake-like treats. Whatever you use, just make sure to grease it well.
Preparation Method
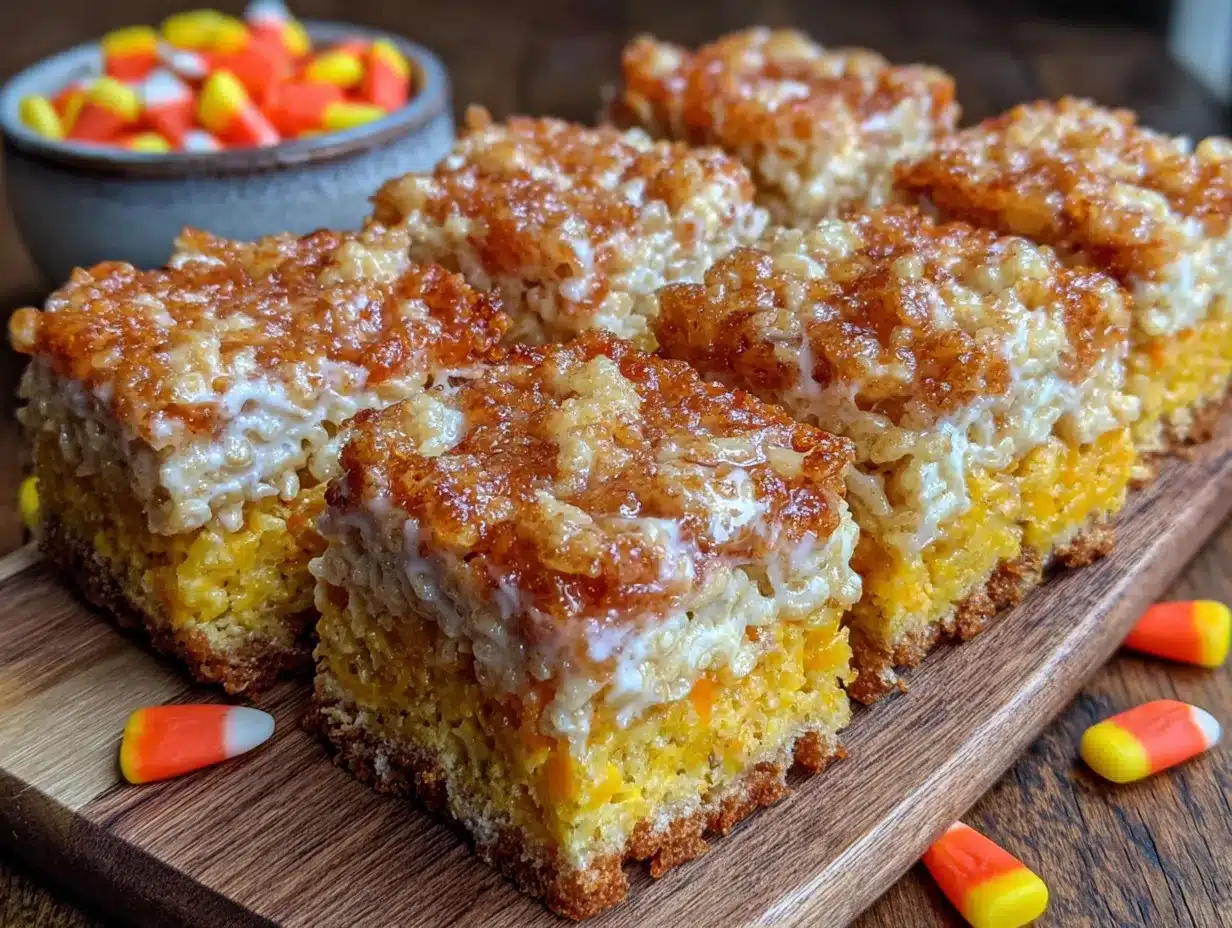
Okay, let’s get into the actual process. I’m going to walk you through this step by step, including all the little things I’ve learned from making these about twenty times. Trust me, following these details makes a difference.
Step 1: Prepare Your Pan and Ingredients
Line your 8×8 baking dish with parchment paper, leaving overhang on two opposite sides. Spray the parchment lightly with non-stick cooking spray. Measure out your 6 cups of Rice Krispies cereal and set aside. Have your gel food coloring ready—yellow and orange. Cut your butter into tablespoon-sized pieces so it melts evenly.
Step 2: Melt the Butter and Marshmallows
Place the 6 tablespoons of butter in your large microwave-safe bowl and microwave for 30 seconds, or until mostly melted. Add the entire 10-ounce bag of marshmallows and stir to coat with butter. Microwave in 30-second intervals, stirring between each, until the marshmallows are fully melted and smooth. This usually takes about 2 minutes total. Don’t overheat—marshmallows can seize up if they get too hot, and then you’re stuck with a rubbery mess.
Step 3: Divide the Mixture
This is the most important step for getting clean layers. Divide the melted marshmallow mixture evenly into three separate bowls. Each bowl should have roughly the same amount. I use a kitchen scale for accuracy, but eyeballing it works too—just make sure each portion looks equal. Work quickly here because the mixture starts to set as it cools.
Step 4: Color the Layers
To the first bowl (this will be your bottom layer), add orange gel food coloring. Start with a small amount—about 1/4 teaspoon—and stir until the color is even. Add more if needed to get a deep, vibrant orange. To the second bowl (the middle layer), add yellow gel food coloring, again starting with a small amount and building up. Leave the third bowl white. This is your top layer.
Step 5: Add Cereal to Each Layer
Work with one bowl at a time. Add 2 cups of Rice Krispies cereal to the orange mixture and fold gently with your spatula until the cereal is evenly coated. Don’t stir too aggressively or you’ll crush the cereal. Pour this mixture into your prepared pan and press it into an even layer. I use a greased spatula or greased hands to press it down firmly. Set the pan aside and let this layer cool for 5-7 minutes before adding the next layer.
Step 6: Repeat with Yellow and White Layers
Once the orange layer has set slightly (it should be firm but still warm), repeat the process with the yellow mixture. Add 2 cups of cereal, fold gently, and press it evenly on top of the orange layer. Let it cool for another 5-7 minutes. Finally, repeat with the white mixture—add the remaining 2 cups of cereal, fold, and press on top. If you’re using candy corn for decoration, press a few pieces gently into the top layer now, while it’s still warm and sticky.
Step 7: Let the Treats Set Completely
Allow the finished treats to cool at room temperature for at least 30 minutes before cutting. If you’re in a hurry, you can pop them in the refrigerator for 15 minutes, but room temperature setting gives you a better texture. Once set, use the parchment overhang to lift the entire block out of the pan and onto a cutting board.
Step 8: Cut and Serve
Use a sharp serrated knife to cut the treats into squares or rectangles. A clean cut comes from slicing with a sawing motion rather than pressing straight down. Wipe the knife clean between cuts for the neatest edges. I usually get 16 decent-sized squares from one batch, but you can cut them smaller for parties or larger for serious snacking.
Cooking Tips & Techniques
After making these Easy Candy Corn Rice Krispie Treats more times than I care to count, I’ve picked up a few tricks that make the process smoother and the results better. Let me share the ones that matter most.
The Biggest Mistake: Rushing the Layers
I know you want to see those three colors stacked up as fast as possible. But if you add the next layer while the previous one is still too warm, the colors will bleed together, and you’ll end up with a muddy middle. I’ve done this. More than once. Give each layer a solid 5-7 minutes to set before adding the next. It’s the difference between clean stripes and a mess.
Keep Your Spatula Greased
Marshmallow mixture sticks to everything, including your spatula. Keep a small bowl of water or a spray bottle of non-stick spray nearby and re-grease your spatula between each layer. This also helps when pressing the mixture into the pan—nothing sticks, and you get a smoother surface.
Use Gel Food Coloring, Not Liquid
I cannot stress this enough. Liquid food coloring will make your marshmallow mixture too wet, and the layers won’t hold their shape. Gel coloring gives you vibrant colors without adding excess moisture. Plus, a little goes a long way—you’ll use maybe 1/4 teaspoon per layer.
Room Temperature Ingredients Work Best
Cold butter takes longer to melt, and cold marshmallows can seize up in the microwave. Leave your butter out for 15 minutes before starting, and make sure your marshmallows are at room temperature. It makes the melting process smoother and more predictable.
Don’t Overmix the Cereal
When you fold the cereal into the marshmallow mixture, do it gently. Overmixing crushes the cereal into tiny pieces, and your treats will have a dense, almost sandy texture instead of that classic crispy crunch. Fold just until the cereal is coated, then stop.
Press, Don’t Smash
When pressing the mixture into the pan, use gentle, even pressure. If you smash it down too hard, the treats become dense and hard to bite. You want them to hold together but still have some airiness. Think firm but gentle, like you’re tucking someone into bed.
Variations & Adaptations
One of the best things about this recipe is how easy it is to adapt. I’ve played around with different flavors and colors, and here are some variations that actually worked.
Halloween Sprinkle Explosion
After pressing the top white layer, sprinkle Halloween-themed jimmies or nonpareils over the surface. The colors pop against the white marshmallow, and it adds a little extra crunch. My kids go crazy for this version.
Chocolate Candy Corn Treats
Melt 1/2 cup of chocolate chips and drizzle it over the finished treats. Let the chocolate set before cutting. The combination of marshmallow, cereal, and chocolate is honestly dangerous. I made this for a potluck and came home with an empty dish.
Peanut Butter Swirl
Add 2 tablespoons of peanut butter to the melted marshmallow mixture before dividing it into layers. Swirl it in gently—don’t fully combine it. You’ll get ribbons of peanut butter running through each layer. This is my husband’s favorite version.
Thanksgiving Leftover Treats
Swap the orange and yellow layers for brown and white, and call them “Pumpkin Pie” treats. Use brown gel food coloring for the bottom layer, leave the middle white, and add a sprinkle of cinnamon to the top. Perfect for November when candy corn feels a little out of season.
Gluten-Free Adaptation
Rice Krispies are naturally gluten-free (check the box to confirm), so this recipe is already gluten-free as written. If you’re serving someone with celiac disease, make sure your marshmallows are also certified gluten-free. Some brands use wheat starch in their manufacturing process.
Vegan Version
Use vegan butter and vegan marshmallows (Dandies is a reliable brand). The texture will be slightly softer, and the setting time might be a little longer, but the layers still hold beautifully. I’ve tested this twice, and both times the treats disappeared just as fast as the regular version.
Serving & Storage Suggestions
These treats are best served at room temperature, which is convenient because that’s exactly how they’ll be after they’ve set. Here’s everything you need to know about serving and storing them.
Serving Temperature and Presentation
Serve these on a platter or cake stand, layered with a few extra candy corn pieces scattered around for visual appeal. They look especially festive on a Halloween-themed plate or a simple white platter that lets the colors stand out. For parties, I cut them into small squares and arrange them in a pyramid pattern—it looks impressive with zero effort.
What to Serve With Them
These treats are sweet enough on their own, but they pair beautifully with a cold glass of milk or a hot cup of coffee. For Halloween parties, I set them out alongside a bowl of popcorn or pretzels for a sweet-and-salty contrast. If you’re feeling extra festive, serve them with a scoop of vanilla ice cream—the temperature contrast is fantastic.
Storage Instructions
Store leftover treats in an airtight container at room temperature for up to 5 days. Layer them between sheets of parchment paper to prevent sticking. Do not refrigerate them—the cold temperature will make the marshmallow mixture hard and the cereal stale. Trust me on this. I refrigerated a batch once, and they came out tasting like sad, soggy disappointment.
Freezer Instructions
These treats freeze surprisingly well. Wrap individual squares tightly in plastic wrap, then place them in a freezer-safe bag or container. They’ll keep for up to 3 months. To thaw, leave them at room temperature for about 30 minutes. The texture won’t be quite as fresh as day one, but they’re still delicious.
How Flavors Develop
These treats are actually best on day two. The marshmallow and cereal have a chance to meld together, and the texture becomes perfectly chewy. Day one is good, but day two is where the magic happens. I’ve learned to make them a day ahead whenever possible.
Nutritional Information & Benefits
Let’s be honest—these are a treat, not a health food. But here’s what you’re working with per square (based on 16 squares per batch):
- Calories: Approximately 180-200 per square
- Total Fat: 7-8g (mostly from butter)
- Carbohydrates: 28-30g
- Sugar: 18-20g
- Protein: 1-2g
- Sodium: 150-170mg
Potential Allergens: This recipe contains dairy (butter). It is gluten-free (check cereal and marshmallow labels to confirm). It does not contain nuts or eggs, but check your specific brand of marshmallows if cross-contamination is a concern.
Health Considerations: While these aren’t exactly a superfood, there’s something to be said for the joy of a homemade treat made with real ingredients. No preservatives, no artificial flavors (beyond the food coloring), and no high-fructose corn syrup if you choose your marshmallows carefully. Plus, making them at home means you control the portion sizes—one square is satisfying, and it’s easy to stop there.
I like to think of these as a “sometimes food,” in the words of Cookie Monster. They’re for celebrations, for classroom parties, for those days when you just need something bright and cheerful. And honestly? A little bit of joy is good for you.
Conclusion
These Easy Candy Corn Rice Krispie Treats have become a staple in my kitchen for a reason. They’re fast enough for a last-minute school party, impressive enough for a Halloween gathering, and simple enough that my kids can help make them without any meltdowns (well, except for the marshmallow kind).
What I love most about this recipe is how it takes something familiar—the classic Rice Krispie Treat—and gives it a playful twist that feels special without being complicated. You don’t need fancy equipment or advanced skills. You just need a little patience between layers and a willingness to get your hands a bit sticky. And honestly, that’s the kind of recipe I want in my life.
I’d love to hear how these turn out for you. Did you add candy corn to the top? Did you try a different color combination? Did your kids eat three before dinner like mine did? Drop a comment below and let me know. And if you’re looking for another quick and fun dessert, you might enjoy my quick aglio e olio pasta for a savory counterpoint, or these crispy fish tacos for a completely different kind of weeknight win.
Happy Halloween (or Happy Tuesday, no judgment here)!
Frequently Asked Questions
Can I use liquid food coloring instead of gel?
I don’t recommend it. Liquid food coloring adds too much moisture to the marshmallow mixture, which makes the layers soft and prone to bleeding. Gel coloring gives you vibrant colors without changing the texture. If liquid is all you have, use it sparingly and expect slightly less defined layers.
Why did my layers bleed together?
This usually happens when you add the next layer too soon. Each layer needs 5-7 minutes to set before you add the next one. If the bottom layer is still warm and sticky, the colors will mix. Patience is the secret ingredient here.
Can I make these ahead of time?
Absolutely. These treats are actually better on day two, when the marshmallow and cereal have had time to meld. Make them a day ahead, store them in an airtight container at room temperature, and they’ll be perfect for your event. Just don’t refrigerate them.
How do I cut clean squares without smushing the layers?
Use a sharp serrated knife and cut with a gentle sawing motion rather than pressing straight down. Wipe the knife clean between cuts to prevent marshmallow residue from dragging through the layers. If your treats are sticking to the knife, spray it lightly with non-stick cooking spray.
Can I double this recipe?
Yes, but use a 9×13 pan instead of an 8×8. Double all the ingredients, and follow the same layering process. The layers will be slightly thinner, but the treats will still hold together beautifully. Just make sure your microwave-safe bowl is big enough to hold double the marshmallows!
Pin This Recipe!
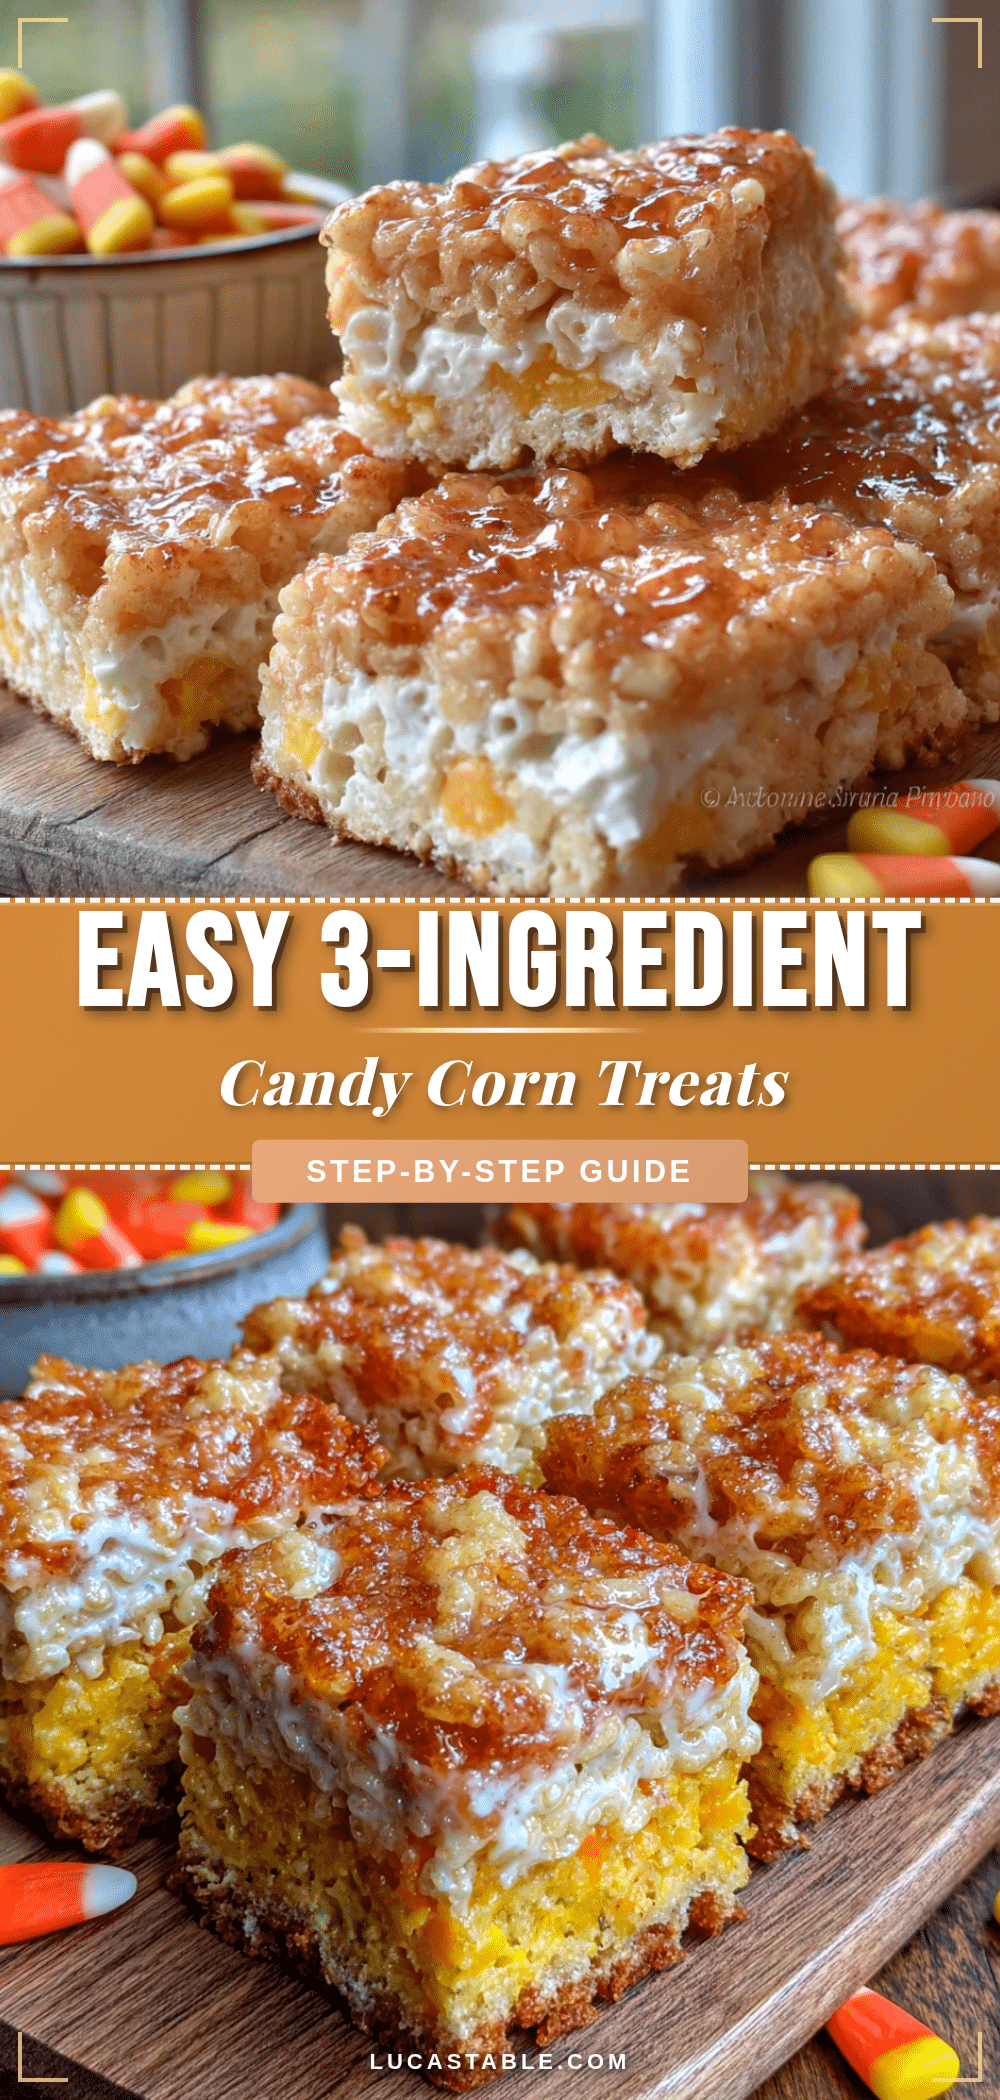
Easy Candy Corn Rice Krispie Treats: Best 15-Minute Recipe
These no-bake treats feature three colorful layers of marshmallow-cereal goodness, inspired by classic candy corn. Perfect for Halloween parties, school bake sales, or any fall occasion, they come together in just 15 minutes of active time.
- Prep Time: 15 minutes
- Cook Time: 5 minutes
- Total Time: 50 minutes (includes cooling)
- Yield: 16 servings 1x
- Category: Dessert
- Cuisine: American
Ingredients
- 6 tablespoons unsalted butter
- 1 (10 oz) bag marshmallows
- 6 cups Rice Krispies cereal
- Yellow and orange gel food coloring
- 1/2 cup candy corn (optional, for decoration)
- Non-stick cooking spray
Instructions
- Line an 8×8 inch baking dish with parchment paper, leaving overhang on two opposite sides. Spray the parchment lightly with non-stick cooking spray. Measure out 6 cups of Rice Krispies cereal and set aside.
- Place 6 tablespoons of butter in a large microwave-safe bowl and microwave for 30 seconds, or until mostly melted. Add the entire 10-ounce bag of marshmallows and stir to coat with butter. Microwave in 30-second intervals, stirring between each, until the marshmallows are fully melted and smooth (about 2 minutes total).
- Divide the melted marshmallow mixture evenly into three separate bowls.
- To the first bowl (bottom layer), add orange gel food coloring. Start with about 1/4 teaspoon and stir until the color is even. Add more if needed for a deep orange. To the second bowl (middle layer), add yellow gel food coloring, starting with a small amount and building up. Leave the third bowl white (top layer).
- Work with one bowl at a time. Add 2 cups of Rice Krispies cereal to the orange mixture and fold gently until the cereal is evenly coated. Pour into the prepared pan and press into an even layer using a greased spatula or greased hands. Let cool for 5-7 minutes.
- Repeat with the yellow mixture: add 2 cups of cereal, fold gently, and press evenly on top of the orange layer. Let cool for another 5-7 minutes.
- Repeat with the white mixture: add the remaining 2 cups of cereal, fold, and press on top. If using candy corn for decoration, press a few pieces gently into the top layer while still warm.
- Allow the finished treats to cool at room temperature for at least 30 minutes (or refrigerate for 15 minutes if in a hurry). Use the parchment overhang to lift the block out of the pan onto a cutting board.
- Use a sharp serrated knife to cut into squares or rectangles, using a sawing motion and wiping the knife clean between cuts. Makes about 16 squares.
Notes
Use gel food coloring, not liquid, to avoid excess moisture. Let each layer set for 5-7 minutes before adding the next to prevent colors from bleeding. Store in an airtight container at room temperature for up to 5 days; do not refrigerate. These treats freeze well for up to 3 months.
Nutrition
- Serving Size: 1 square
- Calories: 190
- Sugar: 19
- Sodium: 160
- Fat: 7.5
- Saturated Fat: 4.5
- Carbohydrates: 29
- Protein: 1.5
Keywords: candy corn, Rice Krispie treats, Halloween, no-bake, fall dessert, easy, kid-friendly


