I burned butternut squash three times before I finally figured out how to get it right. Not just a little charred around the edges—I mean blackened, smoking, set-off-the-smoke-alarm burned. The first time, I was rushing. The second time, I got distracted by my phone. The third time, I just plain didn’t care anymore. But somewhere between that third failure and a particularly cold November evening, I stumbled onto something that changed everything. I had a half-used squash sitting on my counter, a stick of butter I needed to use up, and a bottle of maple syrup that was about to expire. I figured I had nothing left to lose.
So I browned the butter first—something I’d never bothered with before. I let it foam and bubble and turn that deep amber color that smells like toasted nuts and caramel all at once. I whisked in the maple syrup, tossed in the squash cubes, and spread everything on a sheet pan. And when it came out of the oven, I nearly cried. The edges were caramelized, the centers were tender, and that brown butter-maple glaze had turned into something almost candy-like. This Crispy Maple Brown Butter Butternut Squash recipe is the result of those burned batches and that one perfect pan. It’s the side dish I now make for every holiday dinner, every Sunday roast, and every time I want to feel like I’ve actually got my act together in the kitchen.
Honestly, I think that’s why this recipe stuck with me. It wasn’t love at first bite—it was love after frustration, after learning, after finally getting it right. And that makes every forkful taste a little sweeter.
Why You’ll Love This Recipe
Let me tell you why this Crispy Maple Brown Butter Butternut Squash has become my most-requested side dish. It’s not just because it tastes incredible—though it does—but because it solves so many problems at once.
- Quick & Easy: From start to finish, you’re looking at about 35 minutes. The oven does most of the work, and you only need one sheet pan. Perfect for those nights when you want something impressive without spending hours in the kitchen.
- Simple Ingredients: You probably already have butter, maple syrup, salt, and pepper in your kitchen. The only special purchase is a butternut squash, and those are available year-round now. No fancy grocery store runs needed.
- Perfect for Holidays and Weeknights: This dish straddles that line beautifully. It’s elegant enough for Thanksgiving dinner but simple enough for a Tuesday night alongside some crispy lemon butter salmon.
- Crowd-Pleaser: I’ve served this to picky kids, skeptical in-laws, and hardcore vegetable haters. Every single one of them went back for seconds. The caramelized edges and sweet-savory flavor combo is basically irresistible.
- Unbelievably Delicious: The texture here is what gets people. The outside gets all crispy and almost crunchy, while the inside stays creamy and tender. That contrast, plus the nutty brown butter and sweet maple—it’s next-level comfort food.
What makes this recipe different from all the other roasted squash recipes out there? It’s the technique. Most recipes tell you to toss everything together and throw it in the oven. But browning the butter first, then whisking in the maple syrup, creates a glaze that caramelizes at a higher temperature. You get those crispy, almost burnt edges (in a good way) without drying out the squash. I tested this six different ways—changing temperatures, oil ratios, cooking times—and this method won every single time.
This is the kind of dish that makes you close your eyes after the first bite. It’s comfort food reimagined—healthier than you’d expect, faster than you’d think, but with the same soul-soothing satisfaction. Perfect for impressing guests without stress, or turning a simple weeknight dinner into something memorable.
What Ingredients You Will Need
This recipe uses simple, wholesome ingredients to deliver bold flavor and satisfying texture without the fuss. Most of these are pantry staples or easily found at any grocery store.
- Butternut Squash (1 medium, about 2-2.5 lbs): Look for one that feels heavy for its size with a firm, unblemished skin. I prefer squash with a longer neck because it’s easier to peel and has fewer seeds. You’ll need about 4-5 cups of cubed squash.
- Unsalted Butter (4 tablespoons, 1/2 stick): Use unsalted so you can control the salt level. I recommend using a good-quality butter here—the flavor really matters since we’re browning it. Kerrygold or any European-style butter works beautifully.
- Pure Maple Syrup (3 tablespoons): Please don’t use pancake syrup here. Real maple syrup makes a huge difference in flavor and how it caramelizes. Grade A dark amber is my go-to for cooking because it has a stronger maple flavor that holds up to the brown butter.
- Salt (1/2 teaspoon, plus more to taste): I use fine sea salt for even distribution. Flaky sea salt for finishing is optional but highly recommended—that little crunch at the end is magic.
- Black Pepper (1/4 teaspoon, freshly ground): Freshly ground pepper adds a subtle warmth that complements the sweetness. Don’t skip it—it balances the dish perfectly.
- Cinnamon (1/4 teaspoon, optional): This is my secret ingredient. Just a tiny bit adds warmth without screaming “dessert.” Leave it out if you want a purely savory dish.
- Fresh Thyme (4-5 sprigs, optional but lovely): The earthy, slightly floral notes of thyme pair beautifully with brown butter and maple. I add a few sprigs to the pan before roasting, then remove them before serving.
- Red Pepper Flakes (1/4 teaspoon, optional): For those who like a little heat. The tiny kick contrasts nicely with the sweet maple and nutty butter.
For substitutions: You can use ghee instead of butter for a dairy-free option (though you’ll lose some of the browning flavor). Honey can replace maple syrup in a pinch, but reduce the amount to 2 tablespoons since honey is sweeter. If you can’t find butternut squash, delicata or acorn squash work well—just adjust cooking times since they cook faster.
Equipment Needed
You don’t need a fancy kitchen to make this recipe. Here’s what you’ll actually use:
- Large Sheet Pan (18×13 inches or similar): A rimmed baking sheet is essential—it catches any glaze that bubbles over and prevents spills. I use a half-sheet pan and it works perfectly. Avoid non-stick pans if possible; dark metal pans help with browning.
- Medium Skillet or Small Saucepan: For browning the butter. A light-colored pan helps you see when the butter turns amber. I use a stainless steel skillet, but any pan works.
- Chef’s Knife: A sharp 8-inch chef’s knife makes cutting through squash much easier and safer. Dull knives are more dangerous than sharp ones—trust me on this.
- Vegetable Peeler: A good Y-shaped peeler is my favorite for removing squash skin. It’s faster and gives you more control than a standard peeler.
- Cutting Board: Use a large, stable cutting board. I prefer wood or bamboo because they’re gentler on knife blades.
- Mixing Bowl: For tossing the squash with the glaze. Any medium bowl works.
- Spatula or Wooden Spoon: For stirring the butter as it browns. A silicone spatula is great for scraping every last bit of that liquid gold onto the squash.
- Parchment Paper or Aluminum Foil: Lining the pan makes cleanup ridiculously easy. I’m a parchment paper fan myself—it’s non-stick and doesn’t react with the maple syrup.
If you don’t have a sheet pan, a large baking dish works—just don’t overcrowd the squash. You want them in a single layer with space between pieces for proper caramelization.
Preparation Method
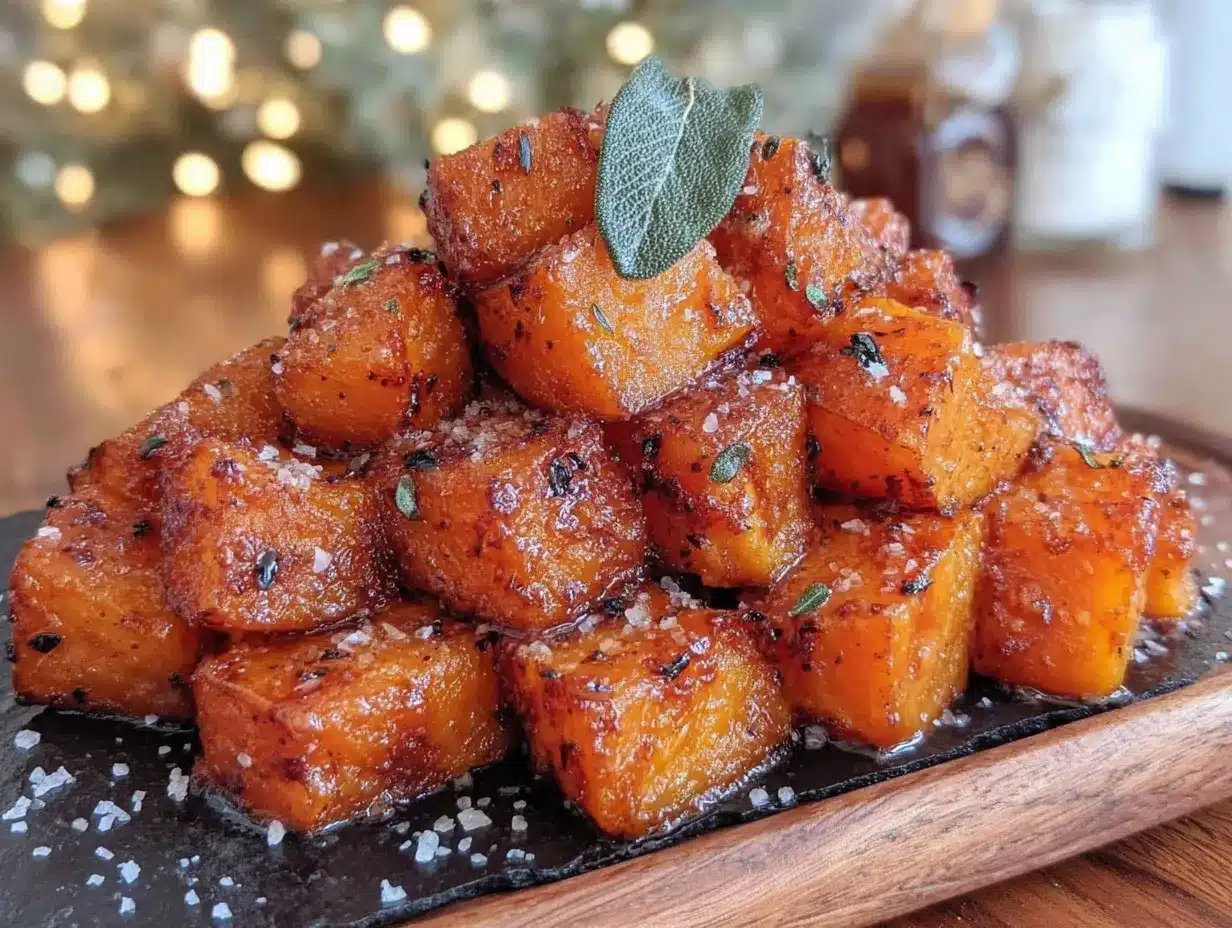
Alright, let’s get cooking. This method might seem simple, but each step matters. Follow along and you’ll get those perfect crispy edges every time.
- Preheat Your Oven to 425°F (220°C): Get the oven hot before you start prepping. A hot oven is crucial for caramelization. Place your rack in the middle position. Line your sheet pan with parchment paper or foil for easy cleanup.
- Prepare the Butternut Squash: Cut off both ends of the squash with your chef’s knife—about 1/2 inch from each tip. Stand the squash upright on the flat end you just cut. Carefully slice down the center to split it in half lengthwise. Scoop out the seeds and stringy bits with a spoon (save the seeds for roasting later if you’re feeling ambitious). Use your vegetable peeler to remove the skin completely. Then cut the squash into 3/4-inch cubes. Try to make them uniform in size so they cook evenly. You should end up with about 4-5 cups of cubes.
- Brown the Butter: Place your skillet or saucepan over medium heat. Add the 4 tablespoons of butter. Let it melt completely, swirling the pan occasionally. The butter will start to foam and bubble—that’s the water evaporating. Keep watching. After 3-4 minutes, the foam will subside and you’ll see tiny brown specks forming at the bottom of the pan. The butter will smell nutty and toasty. As soon as it turns a deep amber color (think the color of a brown paper bag), remove it from the heat immediately. Don’t walk away—brown butter can go from perfect to burnt in seconds.
- Make the Glaze: While the butter is still hot, whisk in the 3 tablespoons of maple syrup, 1/2 teaspoon salt, 1/4 teaspoon pepper, and 1/4 teaspoon cinnamon (if using). The mixture will bubble up—that’s normal. Whisk until smooth and combined. Taste it. You should get sweet, salty, nutty, and a tiny bit warm from the pepper. Adjust salt if needed.
- Combine and Toss: Place the cubed squash in your mixing bowl. Pour the warm brown butter-maple glaze over the top. Toss gently with a spatula or your hands until every piece is coated. Don’t be shy—really get in there. The glaze should cling to each cube.
- Arrange on the Sheet Pan: Spread the glazed squash in a single layer on your prepared sheet pan. Make sure there’s space between each piece—if they’re touching, they’ll steam instead of caramelize. If your pan is too small, use two pans or work in batches. Add the fresh thyme sprigs (if using) scattered around the pan.
- Roast for 25-30 Minutes: Place the pan in the preheated oven. Roast for 15 minutes, then remove the pan and flip each piece with a spatula. This is important—flipping ensures even browning. Return to the oven and roast for another 10-15 minutes. The squash is done when the edges are deeply caramelized and crispy, and a fork slides easily into the center. The glaze should be bubbling and thickened around the edges.
- Rest and Serve: Remove from the oven and let the squash rest on the pan for 2-3 minutes. This allows the caramelized coating to set. Transfer to a serving dish, remove the thyme sprigs, and sprinkle with a pinch of flaky sea salt and red pepper flakes if desired. Serve immediately while the edges are still crispy.
Pro tip: If you want extra crispy edges, turn on the broiler for the last 1-2 minutes of cooking. Watch it like a hawk—it can burn fast. This trick gives you those almost-burnt, candy-like bits that are everyone’s favorite part.
Cooking Tips & Techniques
I’ve made this Crispy Maple Brown Butter Butternut Squash more times than I can count, and I’ve learned a few things the hard way. Here’s what I want you to know before you start.
Don’t skip browning the butter. I know it’s an extra step, but it’s the heart of this dish. Brown butter adds a nutty, toasty depth that regular melted butter just can’t match. The Maillard reaction (fancy term for browning) creates hundreds of new flavor compounds. It’s what transforms this from “good roasted squash” to “I can’t stop eating this” squash.
Watch the butter like a hawk. I burned my first batch of brown butter because I thought I had time to check my email. I didn’t. Brown butter goes from perfect to acrid in about 30 seconds. The moment you see those brown specks and smell that nutty aroma, pull it off the heat. Transfer it to a different pan if you’re worried about carryover cooking.
Cut your squash uniformly. I know it’s tedious, but uneven cubes mean some pieces will be burnt while others are still raw. Aim for 3/4-inch cubes—small enough to cook quickly but big enough to stay tender inside. If you’re struggling with cutting squash, microwave it whole for 2-3 minutes first. It softens the skin and makes cutting much easier.
Don’t overcrowd the pan. This is the number one mistake people make with roasted vegetables. If the squash pieces are touching or overlapping, they’ll steam instead of caramelize. You’ll end up with soft, soggy squash instead of crispy, caramelized goodness. Use two pans if you need to, or roast in batches.
Flip halfway through. I’ve forgotten to do this, and the difference is noticeable. Flipping ensures both sides get exposed to the hot pan surface, creating those crispy edges all around. Use a thin metal spatula for best results.
Let it rest. I know you want to eat it right away, but giving it 2-3 minutes on the pan lets the caramelized coating firm up. If you try to move it immediately, the glaze might stick to the pan and you’ll lose those crispy bits.
Variations & Adaptations
One of the best things about this recipe is how adaptable it is. Here are some variations I’ve tried and loved.
- Savory Herb Version: Skip the cinnamon and add 2 teaspoons of fresh rosemary (chopped) and 1 teaspoon of fresh sage (chopped) along with the thyme. The earthy herbs balance the sweetness beautifully. This version is incredible alongside roasted chicken or pork.
- Spicy Maple Version: Add 1/2 teaspoon of cayenne pepper or 1 teaspoon of chili powder to the glaze. The heat cuts through the sweetness and adds a wonderful complexity. I serve this version with savory Mongolian beef for a sweet-and-spicy combo that’s unforgettable.
- Vegan Adaptation: Substitute the butter with coconut oil or vegan butter. Brown the coconut oil the same way—it won’t brown exactly like butter, but it adds a subtle nuttiness. Use maple syrup as is. The texture will be slightly different but still delicious.
- Winter Squash Swap: Try this with delicata squash (no need to peel—the skin is edible and gets crispy), acorn squash, or even pumpkin. Delicata cooks faster (about 20 minutes), so check it earlier. Acorn squash has a slightly earthier flavor that pairs wonderfully with the maple.
- Balsamic Maple Version: Replace 1 tablespoon of maple syrup with 1 tablespoon of balsamic vinegar. The acidity cuts through the richness and adds a tangy depth. This is my go-to version for holiday dinners because it feels a little more sophisticated.
I once made a version with added chopped pecans halfway through roasting—they toasted in the oven and added a wonderful crunch. Just toss them in during the last 5-7 minutes so they don’t burn.
Serving & Storage Suggestions
This dish is best served hot, straight from the oven, when the edges are at their crispiest. But here’s how to handle it for different situations.
Serving Temperature: Serve immediately at 425°F fresh from the oven. The contrast between the hot, caramelized exterior and the tender interior is at its peak within the first 10 minutes. If you’re serving at a buffet, keep it warm in a low oven (200°F) for up to 30 minutes—the edges will soften slightly but it’ll still be delicious.
Presentation Ideas: Transfer to a warm serving platter. Sprinkle with flaky sea salt, fresh thyme leaves, and maybe a drizzle of extra maple syrup right before serving. A scatter of pomegranate seeds adds beautiful color and a pop of tartness that cuts through the richness. For holiday tables, I serve it in a rustic wooden bowl or a white ceramic dish that lets the golden-orange color shine.
Complementary Dishes: This squash pairs beautifully with roasted chicken, pork tenderloin, or turkey. It’s also fantastic alongside crispy chicken parmesan for a sweet-savory contrast. For a vegetarian meal, serve it over a bed of arugula with crumbled goat cheese and toasted walnuts. A glass of dry Riesling or a light Pinot Noir complements the sweetness beautifully.
Storage Instructions: Store leftovers in an airtight container in the refrigerator for up to 4 days. The squash will soften as it sits, but the flavor actually deepens overnight. To reheat, spread on a sheet pan and warm in a 375°F oven for 5-7 minutes. The microwave works in a pinch but will make the squash soggy.
Freezing: I don’t recommend freezing this dish. The texture changes significantly—the squash becomes mushy and the glaze separates. Make it fresh for best results.
Make-Ahead Tip: You can peel and cube the squash up to 2 days in advance. Store the cubes in an airtight container in the refrigerator. You can also brown the butter and mix it with the maple syrup up to 3 days ahead—just reheat gently before using.
Nutritional Information & Benefits
Let’s talk about what’s actually in this dish, beyond the deliciousness.
Estimated Nutritional Values (per serving, about 1 cup):
- Calories: 185
- Total Fat: 9g
- Saturated Fat: 5.5g
- Carbohydrates: 27g
- Fiber: 4g
- Sugar: 12g (naturally occurring plus added maple syrup)
- Protein: 2g
- Sodium: 290mg
- Vitamin A: 457% of Daily Value
- Vitamin C: 35% of Daily Value
- Potassium: 582mg
Health Benefits: Butternut squash is packed with vitamin A (in the form of beta-carotene), which supports eye health and immune function. It’s also a good source of vitamin C, potassium, and fiber. The maple syrup provides natural sweetness with a lower glycemic impact than refined sugar. Brown butter contains butyrate, a fatty acid that supports gut health. This dish is naturally gluten-free and can be made vegan with simple substitutions.
Dietary Considerations: This recipe is vegetarian, gluten-free, and nut-free. For a vegan version, substitute coconut oil or vegan butter for the butter. For a lower-sugar version, reduce the maple syrup to 1.5 tablespoons—the natural sweetness of the squash will still shine through.
Potential Allergens: Dairy (from butter). If you’re lactose intolerant, the browning process breaks down some of the lactose, but it’s not completely lactose-free. Use ghee or clarified butter for a low-lactose option.
Conclusion
This Crispy Maple Brown Butter Butternut Squash has become my go-to recipe for so many reasons. It’s simple enough for a Tuesday night but impressive enough for Thanksgiving. It uses ingredients I almost always have on hand. And honestly, it’s just so, so good. Those caramelized edges, that nutty-sweet glaze, the tender squash inside—it’s comfort food that feels a little bit special without requiring a lot of effort.
I hope you give this recipe a try, and I hope you make it your own. Add a pinch of cayenne if you like heat. Throw in some pecans for crunch. Serve it alongside your favorite protein or pile it on a salad. The beauty of this dish is how adaptable it is while still being absolutely delicious at its core.
If you make this, I’d love to hear about it. Drop a comment below and tell me how it turned out, what variations you tried, or just say hi. And if you’re looking for more easy, delicious side dishes, check out our quick beef tacos or that honey mustard chicken for a full meal that comes together fast.
Happy cooking, friends. May your butter always brown perfectly and your squash always get crispy edges.
Frequently Asked Questions
Can I make this recipe ahead of time for a holiday dinner?
You can prep everything ahead—peel and cube the squash up to 2 days in advance, and brown the butter with maple syrup up to 3 days ahead. But for the crispiest results, roast the squash just before serving. If you need to reheat, spread on a sheet pan and warm at 375°F for 5-7 minutes.
Why is my butternut squash not getting crispy?
The most common reasons are overcrowding the pan (pieces should have space between them), not using enough heat (425°F is crucial), or not flipping halfway through. Also, make sure your squash is dry before adding the glaze—excess moisture prevents caramelization.
Can I use frozen butternut squash?
I don’t recommend it. Frozen squash releases a lot of water as it thaws, which will steam instead of caramelize. You’ll end up with soggy, mushy squash. Fresh squash is worth the extra effort here.
How do I store leftovers and how long do they last?
Store in an airtight container in the refrigerator for up to 4 days. Reheat in a 375°F oven for 5-7 minutes to restore some crispiness. The microwave works but will make the squash softer. I don’t recommend freezing this dish.
Can I use honey instead of maple syrup?
Yes, but reduce the amount to 2 tablespoons since honey is sweeter than maple syrup. The flavor will be different—honey has floral notes while maple is more woody and caramel-like—but it still works beautifully. Just watch the cooking time since honey can burn faster than maple syrup.
Pin This Recipe!
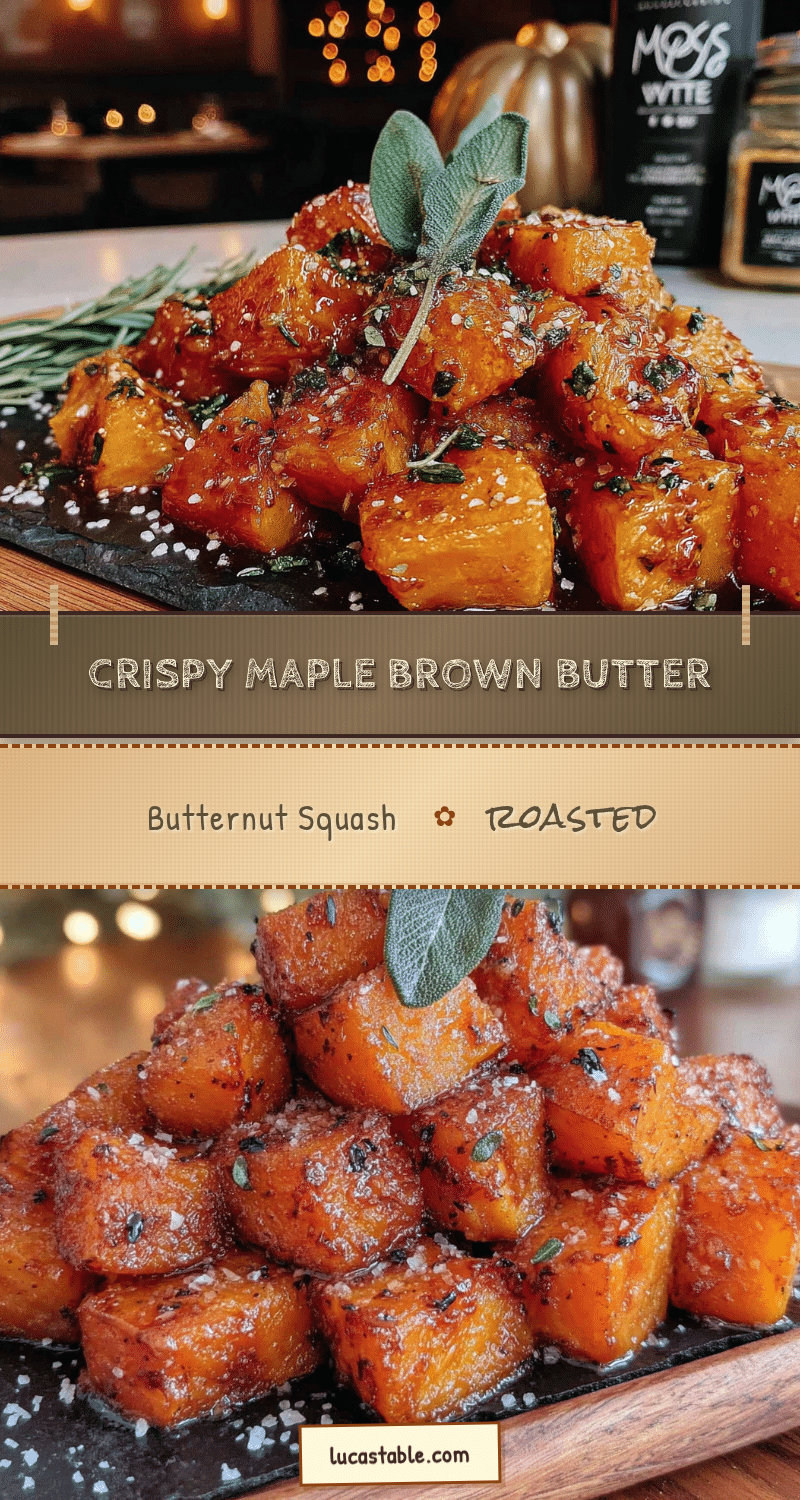
Crispy Maple Brown Butter Butternut Squash

This Crispy Maple Brown Butter Butternut Squash is a quick and easy side dish with caramelized edges and a tender center, thanks to a nutty brown butter-maple glaze. Perfect for holidays or weeknights, it’s a crowd-pleaser that uses simple ingredients.
- Prep Time: 15 minutes
- Cook Time: 30 minutes
- Total Time: 45 minutes
- Yield: 4 servings 1x
- Category: Side Dish
- Cuisine: American
Ingredients
- 1 medium butternut squash (about 2–2.5 lbs), peeled and cubed into 3/4-inch pieces (about 4–5 cups)
- 4 tablespoons unsalted butter
- 3 tablespoons pure maple syrup
- 1/2 teaspoon fine sea salt, plus more to taste
- 1/4 teaspoon freshly ground black pepper
- 1/4 teaspoon cinnamon (optional)
- 4–5 sprigs fresh thyme (optional)
- 1/4 teaspoon red pepper flakes (optional)
Instructions
- Preheat your oven to 425°F (220°C). Line a large sheet pan with parchment paper or aluminum foil.
- Prepare the butternut squash: Cut off both ends, stand upright, and slice in half lengthwise. Scoop out seeds and stringy bits. Peel the skin completely, then cut into 3/4-inch cubes.
- Brown the butter: In a medium skillet or small saucepan over medium heat, melt the butter. Swirl occasionally. After 3-4 minutes, the butter will foam and then subside, with brown specks forming at the bottom. When it turns a deep amber color and smells nutty, remove from heat immediately.
- Make the glaze: Whisk the maple syrup, salt, pepper, and cinnamon (if using) into the hot brown butter until smooth.
- Combine and toss: Place the cubed squash in a mixing bowl. Pour the warm glaze over the top and toss gently until every piece is coated.
- Arrange on the sheet pan: Spread the glazed squash in a single layer with space between each piece. Scatter fresh thyme sprigs (if using) around the pan.
- Roast for 25-30 minutes: Roast for 15 minutes, then flip each piece with a spatula. Return to the oven and roast for another 10-15 minutes, until edges are deeply caramelized and a fork slides easily into the center.
- Rest and serve: Remove from the oven and let rest on the pan for 2-3 minutes. Transfer to a serving dish, remove thyme sprigs, and sprinkle with flaky sea salt and red pepper flakes (if desired). Serve immediately.
Notes
For extra crispy edges, turn on the broiler for the last 1-2 minutes of cooking, watching carefully to avoid burning. You can prep the squash cubes up to 2 days in advance and store in the refrigerator. The brown butter-maple glaze can be made up to 3 days ahead and reheated gently before using.
Nutrition
- Serving Size: 1 cup
- Calories: 185
- Sugar: 12
- Sodium: 290
- Fat: 9
- Saturated Fat: 5.5
- Carbohydrates: 27
- Fiber: 4
- Protein: 2
Keywords: roasted butternut squash, maple brown butter squash, crispy squash, holiday side dish, easy vegetable side


