That first bite—the one where the cheese stretches in a long, unbroken ribbon from a pepper wrapped in pale, ghostly bandages—still makes my kids shriek with laughter every single time. It was a rainy Tuesday in late October, and I was staring into the fridge, completely uninspired by the usual ground beef and bell peppers staring back at me. Halloween was four days away, and the pressure was on to make something that felt festive without requiring a costume budget or a trip to the store for weird ingredients.
I had a bag of mini sweet peppers, some leftover rice, and a block of mozzarella. The idea just clicked—what if the peppers looked like mummies? A quick slice here, a strategic wrap of crescent dough there, and two little olive eyes peeking out. Honestly, it was one of those kitchen accidents that works out better than anything you actually plan. The kids didn’t just eat dinner; they played with it first, and then devoured every last bandage.
These spooky mummy stuffed peppers are now our official Halloween dinner tradition. They’re fun, they’re filling, and they let you serve something genuinely delicious that also doubles as table decor. No tricks here—just a really good meal that happens to look like it crawled out of a tomb.
Why You’ll Love This Recipe
I’ve tested this recipe about six times now, and each batch taught me something new. The first batch had too much dough, the second needed more seasoning, and the third? Perfect. Here’s why I keep coming back to these spooky mummy stuffed peppers, and why I think you will too:
- Quick & Easy: From start to table in about 35 minutes. That’s faster than ordering pizza on a busy weeknight.
- Simple Ingredients: You probably already have ground beef, rice, cheese, and spices in your kitchen. The crescent dough is the only “special” thing, and it’s in the refrigerated section of any grocery store.
- Perfect for Halloween Dinner: Whether you’re hosting a spooky party or just feeding the family before trick-or-treating, these peppers are the main event.
- Crowd-Pleaser: I’ve served these to picky kids, skeptical adults, and even a few self-proclaimed “not into Halloween food” folks. They all went back for seconds.
- Unbelievably Delicious: The combo of savory beef, melted cheese, and flaky, buttery dough is next-level comfort food. The fact that it looks like a mummy is just icing on the cake.
What makes this recipe different from the hundreds of other stuffed pepper recipes out there? It’s the texture. The crescent dough gets golden and crispy while the peppers stay tender, and the filling stays juicy. It’s not just another version—it’s the best version. This is the kind of meal that makes you close your eyes after the first bite. It’s comfort food reimagined for Halloween—fun, festive, and full of soul-soothing satisfaction.
What Ingredients You Will Need
This spooky mummy stuffed peppers recipe uses simple, wholesome ingredients to deliver big flavor and that perfect Halloween vibe without any fuss. Most of these are pantry staples, so you’re probably already set.
- Mini sweet peppers (12-15 peppers) – Look for firm, brightly colored peppers. Red, orange, and yellow work best. Green ones can be a bit bitter.
- Ground beef (1 lb / 450g) – I prefer 80/20 blend for juiciness. You can substitute ground turkey or chicken if you want a leaner option.
- Cooked white rice (1 cup / 180g) – Leftover rice works perfectly here. Brown rice or cauliflower rice are great alternatives.
- Shredded mozzarella cheese (1 cup / 120g) – Use low-moisture mozzarella for the best melt. Fresh mozzarella will make the filling too watery.
- Refrigerated crescent roll dough (1 can, 8 oz / 226g) – Pillsbury is my go-to brand. You’ll use about half the can for the bandages.
- Black olives (for eyes) – Sliced black olives make perfect mummy eyes. You’ll need about 24 slices.
- Onion (1 small, diced) – Yellow or white onion works fine.
- Garlic (2 cloves, minced) – Fresh garlic is best, but jarred minced garlic works in a pinch.
- Tomato sauce (1/2 cup / 120ml) – Adds moisture and richness to the filling.
- Italian seasoning (1 teaspoon) – A blend of oregano, basil, and rosemary.
- Salt and black pepper (to taste)
- Olive oil (1 tablespoon) – For sautéing the onion and garlic.
- Egg wash (1 egg beaten with 1 tablespoon water) – For brushing the dough so it gets that beautiful golden color.
I recommend using Pillsbury crescent rolls for the dough—they roll out thin and even, which is crucial for making those delicate mummy bandages. For the cheese, Sargento or Kraft block mozzarella shredded fresh at home melts way better than pre-shredded bags, which have anti-caking agents that prevent smooth melting. If you’re looking for a gluten-free option, use gluten-free crescent dough or puff pastry sheets.
Equipment Needed
You don’t need a lot of fancy tools for these spooky mummy stuffed peppers. Here’s what you’ll want to have on hand:
- Baking sheet (rimmed) – A standard 13×18 inch sheet pan works perfectly. Line it with parchment paper for easy cleanup.
- Large skillet or frying pan – For cooking the filling. A 12-inch non-stick pan is ideal.
- Sharp knife and cutting board – You’ll be slicing peppers and olives, so a good chef’s knife makes the job easier.
- Small bowl – For the egg wash.
- Pastry brush – For brushing the dough. A silicone brush is my favorite—it doesn’t shed bristles.
- Mixing spoon – A wooden spoon or silicone spatula works great for stirring the filling.
- Pizza cutter or sharp knife – For cutting the crescent dough into thin strips. A pizza cutter makes it so much faster and cleaner.
If you don’t have a pastry brush, you can use a paper towel dipped in egg wash and gently dab it on the dough. It’s not as pretty, but it works. And if you don’t have a pizza cutter, a sharp knife does the job—just be patient and cut slowly so the dough doesn’t tear.
Preparation Method
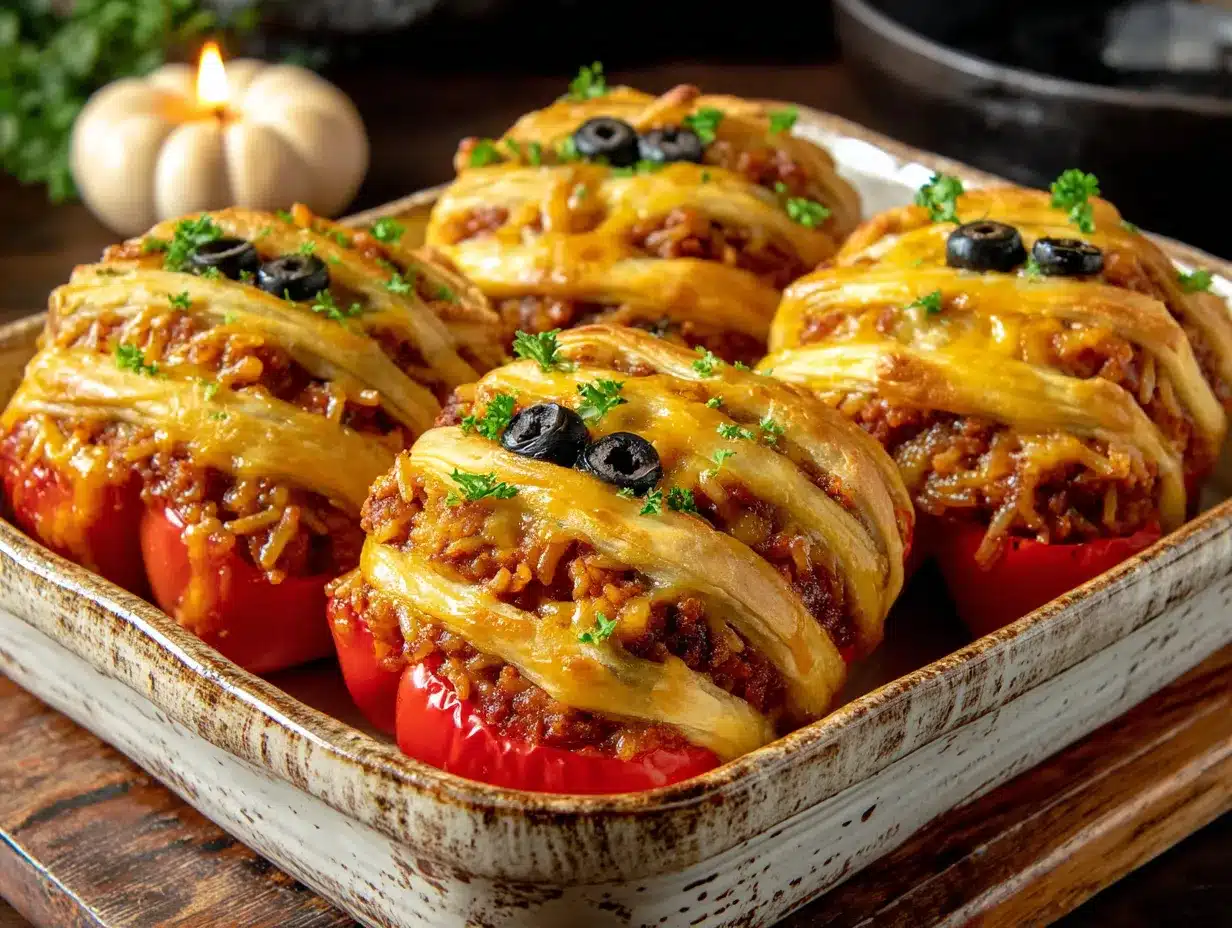
Let’s get these spooky mummy stuffed peppers ready for their Halloween debut. Follow these steps, and you’ll have a dinner that’s both delicious and adorable.
- Preheat your oven to 375°F (190°C). Line a rimmed baking sheet with parchment paper. This makes cleanup a breeze—trust me, you’ll thank yourself later.
- Prepare the peppers. Wash and dry 12-15 mini sweet peppers. Using a sharp knife, cut a slit lengthwise down one side of each pepper, being careful not to cut all the way through. You want to create a pocket. Gently remove the seeds and membranes with your fingers or a small spoon. Set them aside.
- Cook the filling. Heat 1 tablespoon of olive oil in a large skillet over medium heat. Add the diced onion and cook for 3-4 minutes until it’s translucent and fragrant. Add the minced garlic and cook for another 30 seconds—don’t let it burn. Add the ground beef, breaking it up with a wooden spoon. Cook until browned, about 6-8 minutes. Drain any excess fat if needed.
- Season the filling. Stir in the cooked rice, tomato sauce, Italian seasoning, 1/2 cup of the shredded mozzarella, and salt and pepper to taste. Cook for 2-3 minutes until everything is well combined and the cheese is melted. Remove from heat and let it cool slightly—this makes stuffing the peppers much easier.
- Stuff the peppers. Using a small spoon, carefully fill each pepper with the beef and rice mixture. Don’t overstuff—you want the filling to be snug but not bulging out. Place the stuffed peppers on the prepared baking sheet, cut-side up.
- Make the mummy bandages. Open the can of crescent roll dough and unroll it onto a clean cutting board. Pinch the perforated seams together to create one solid sheet of dough. Using a pizza cutter or sharp knife, cut the dough into thin strips about 1/4 inch wide. You should get about 20-24 strips from one can.
- Wrap the mummies. Take 2-3 strips of dough and wrap them around each stuffed pepper, crossing them over the top to create that mummy bandage look. Leave a small gap near the top of the pepper where the eyes will go. Don’t wrap too tightly—the dough will puff up as it bakes, and you want the bandages to look loose and spooky.
- Add the eyes. Place two sliced black olive pieces in the gap you left at the top of each pepper. Press them gently into the filling so they stay in place.
- Brush with egg wash. In a small bowl, beat 1 egg with 1 tablespoon of water. Using a pastry brush, gently brush the egg wash over the dough strips. This gives them that beautiful golden-brown color.
- Bake. Place the baking sheet in the preheated oven and bake for 18-22 minutes, until the dough is golden brown and the peppers are tender. The filling should be hot and bubbly.
- Rest and serve. Let the mummy peppers cool on the baking sheet for 5 minutes before serving. This allows the filling to set and prevents burns—the cheese inside is molten hot.
At step 6, when you’re cutting the dough strips, you’ll notice the dough is pretty stretchy. If it tears, just press it back together—it’s very forgiving. And at step 10, look for the dough to be a deep golden brown, not just pale. That’s how you know it’s perfectly cooked.
Cooking Tips & Techniques
I’ve made these spooky mummy stuffed peppers more times than I can count, and I’ve learned a few things the hard way. Here’s what I wish someone had told me the first time.
Don’t overstuff the peppers. I know it’s tempting to pack in as much filling as possible, but if you overstuff, the pepper won’t close properly and the filling will spill out during baking. Aim for a generous but snug fill. You want the pepper to hold its shape.
Let the filling cool before stuffing. This is a game-changer. If you try to stuff hot filling into delicate peppers, the peppers will steam and soften too quickly, making them hard to handle. Let the filling sit for 5-10 minutes after cooking. It’s still warm, but much easier to work with.
Cut the dough strips thin but not too thin. I made the mistake of cutting my strips too thin the first time—they broke apart in the oven and looked more like spiderwebs than mummy bandages. Aim for about 1/4 inch wide. That’s the sweet spot between delicate and sturdy.
Use a rimmed baking sheet. The filling can release some liquid as it bakes, and if you’re using a flat cookie sheet, that liquid will run everywhere. A rimmed sheet catches everything and keeps your oven clean.
Double the recipe if you’re feeding a crowd. These peppers disappear fast. I made a single batch for a Halloween party last year, and they were gone in 15 minutes. For a party, make at least 24 peppers. They’re the first thing to go, every time.
Timing tip: You can prep the filling and wash the peppers a day ahead. Store them separately in the fridge, then assemble and bake on the day you’re serving. This makes Halloween dinner stress-free—just wrap, bake, and serve.
Variations & Adaptations
One of the best things about this spooky mummy stuffed peppers recipe is how flexible it is. Here are some variations I’ve tried and loved.
Vegetarian Version: Swap the ground beef for a plant-based meat substitute or use a mixture of black beans, corn, and quinoa. I made this for a vegetarian friend last Halloween, and she said it was the best stuffed pepper she’d ever had. Just add an extra 1/2 cup of cooked rice to keep the filling hearty.
Spicy Mummy Peppers: Add 1 teaspoon of chili powder and 1/2 teaspoon of cayenne pepper to the filling. You can also use pepper jack cheese instead of mozzarella for an extra kick. My husband loves this version—he says it’s like a jalapeño popper and a stuffed pepper had a Halloween baby.
Cheese Lovers’ Version: Mix 1/4 cup of cream cheese into the filling along with the mozzarella. It makes the filling extra creamy and indulgent. Top each pepper with a small cube of cheddar before wrapping with dough for a gooey surprise.
Gluten-Free Adaptation: Use gluten-free crescent dough or puff pastry sheets. I’ve tested this with Schär brand gluten-free puff pastry, and it works beautifully. Just roll it out a bit thinner than usual before cutting into strips.
Air Fryer Method: If you don’t want to heat up the oven, these work great in an air fryer. Cook at 350°F (175°C) for 12-15 minutes, checking halfway through. The dough gets extra crispy this way. I actually prefer the air fryer version for smaller batches—it’s faster and the texture is incredible.
Low-Carb Version: Skip the rice and double the meat. Use a low-carb tortilla cut into strips instead of crescent dough for the bandages. It’s not as flaky, but it still looks spooky and tastes great.
Serving & Storage Suggestions
These spooky mummy stuffed peppers are best served warm, right out of the oven, when the cheese is still stretchy and the dough is perfectly crispy. But they’re also surprisingly good at room temperature, which makes them perfect for parties.
Serving Temperature: Serve them hot, but let them rest for 5 minutes first. The filling holds heat really well, so they’ll stay warm for a good 20 minutes on the table. If you’re serving at a party, arrange them on a platter with a small bowl of marinara sauce for dipping—the kids love it.
What to Serve With Them: A simple green salad with a tangy vinaigrette cuts through the richness of the cheese and beef. For a heartier meal, serve them alongside some quick and flavorful fried rice or a bowl of quick 15-minute shrimp scampi for a surf-and-turf Halloween feast. For a lighter option, roasted broccoli or a simple tomato soup works beautifully.
Storage Instructions: Store leftover peppers in an airtight container in the refrigerator for up to 3 days. The dough will soften slightly, but they’re still delicious. To reheat, place them in a 350°F (175°C) oven for 8-10 minutes, or in the air fryer at 325°F (160°C) for 5 minutes. The microwave works in a pinch, but the dough won’t be crispy.
Freezer Instructions: You can freeze these peppers before or after baking. To freeze before baking, assemble the peppers on a baking sheet and freeze until solid, then transfer to a freezer bag. Bake straight from frozen, adding 5-7 minutes to the cooking time. To freeze after baking, let them cool completely, then wrap individually in plastic wrap and store in a freezer bag for up to 2 months. Reheat directly from frozen in a 350°F (175°C) oven for 15 minutes.
Flavor Development: Honestly, these peppers taste even better the next day. The flavors meld together overnight, and the filling becomes even more savory and delicious. If you can resist eating them all on Halloween night, save a few for the next day’s lunch—you’ll thank me.
Nutritional Information & Benefits
Per serving (2 stuffed peppers): Approximately 380 calories, 22g protein, 28g carbohydrates, 18g fat, 8g saturated fat, 75mg cholesterol, 680mg sodium, 3g fiber, 6g sugar. These values are estimates and will vary based on specific ingredients and portion sizes.
These spooky mummy stuffed peppers aren’t just fun—they’re actually pretty nutritious. The mini sweet peppers are packed with vitamin C—one pepper provides more than 100% of your daily needs. They’re also rich in beta-carotene, which supports eye health and immune function. The ground beef provides high-quality protein and essential B vitamins, including B12, which is crucial for energy production.
If you’re watching your carb intake, this recipe is easy to adapt. Use cauliflower rice instead of white rice, and you’ll cut the carbs by about 15 grams per serving. For a lower-fat option, use ground turkey or chicken breast instead of beef. The recipe is naturally gluten-free if you use gluten-free dough, and dairy-free if you substitute the cheese with a plant-based alternative.
Potential allergens include dairy (cheese), gluten (crescent dough), and eggs (egg wash). Always check your ingredient labels if you’re cooking for someone with allergies.
Conclusion
These spooky mummy stuffed peppers are everything I want in a Halloween dinner—they’re fun, they’re festive, and they’re genuinely delicious. No gimmicks, no weird ingredients, no hours of prep. Just a really good meal that happens to look like it came straight out of a haunted kitchen.
I love that this recipe lets you be creative. You can make the bandages as messy or as neat as you want. You can use different colored peppers for a “rainbow of mummies” effect. You can even let the kids help wrap the dough—it’s a great way to get them excited about dinner. And honestly? Watching their faces light up when they see the mummies on their plate is worth every second of prep.
So go ahead—give these a try. Make them for Halloween dinner, make them for a spooky party, or make them just because you want a fun Tuesday night meal. And when you do, come back and tell me how they turned out. I’d love to hear about your mummy variations, your kids’ reactions, or any creative twists you came up with. Drop a comment below, share a photo on Pinterest, or tag me in your Halloween dinner spread. Happy haunting, and happy eating!
Frequently Asked Questions
Can I use large bell peppers instead of mini sweet peppers?
You can, but the cooking time will be different. Large bell peppers need about 10-15 minutes longer in the oven. You’ll also need more dough strips to wrap them. I recommend sticking with mini sweet peppers for the best mummy-to-bandage ratio and faster cooking time.
Can I make these spooky mummy stuffed peppers ahead of time?
Absolutely. You can prep the filling and wash the peppers up to 2 days ahead. Store them separately in the fridge, then assemble and bake on the day you’re serving. You can also fully assemble the peppers (without the egg wash) and refrigerate for up to 24 hours before baking. Brush with egg wash right before they go in the oven.
My crescent dough keeps tearing when I wrap the peppers. What am I doing wrong?
This usually happens when the dough is too cold. Let the crescent dough sit at room temperature for 10-15 minutes before cutting it into strips. Cold dough is brittle and tears easily. Also, make sure you’re cutting the strips about 1/4 inch wide—too thin, and they’ll break. If a strip does tear, just press it back together—the dough is very forgiving.
Can I use a different type of dough for the bandages?
Yes! Puff pastry works beautifully, though it’s a bit richer. Pizza dough can work in a pinch, but it won’t get as crispy. For a gluten-free option, use gluten-free crescent dough or gluten-free puff pastry. You can even use strips of low-carb tortilla for a completely different texture—just brush them with oil and bake until crispy.
How do I keep the olive eyes from falling off during baking?
Press the olive slices gently into the filling so they’re slightly embedded. You can also add a tiny dab of cream cheese or a small piece of shredded mozzarella under each olive to help them stick. If they still fall off during baking (it happens sometimes), just press them back on as soon as the peppers come out of the oven—the residual heat will help them stay in place.
Pin This Recipe!
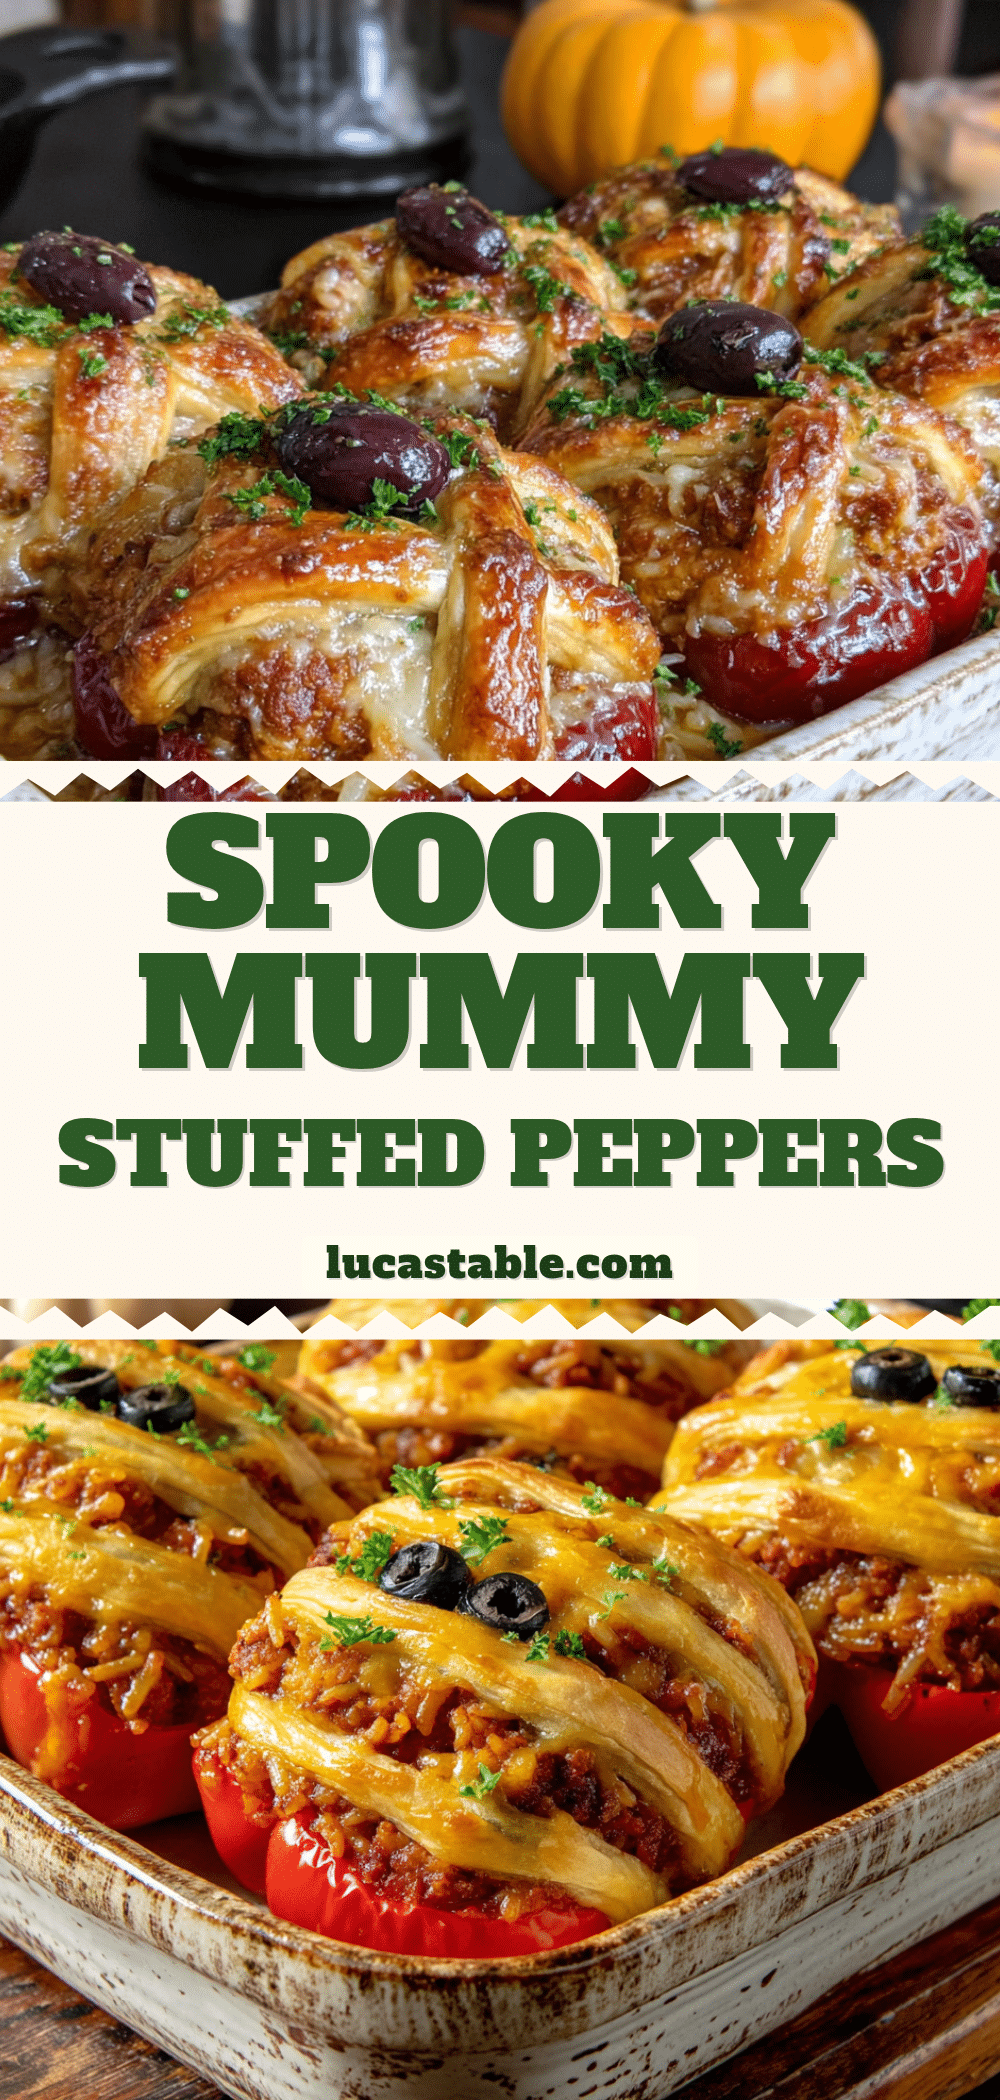
Spooky Mummy Stuffed Peppers: Easy Halloween Dinner Recipe
These spooky mummy stuffed peppers are a fun and festive Halloween dinner that’s quick, easy, and delicious. Mini sweet peppers are stuffed with a savory beef and rice filling, wrapped in crescent dough bandages, and baked until golden and crispy.
- Prep Time: 15 minutes
- Cook Time: 20 minutes
- Total Time: 35 minutes
- Yield: 6 servings (2 peppers per serving) 1x
- Category: Main Course
- Cuisine: American
Ingredients
- 12–15 mini sweet peppers
- 1 lb (450g) ground beef (80/20 blend)
- 1 cup (180g) cooked white rice
- 1 cup (120g) shredded low-moisture mozzarella cheese
- 1 can (8 oz / 226g) refrigerated crescent roll dough
- 24 slices black olives (for eyes)
- 1 small onion, diced
- 2 cloves garlic, minced
- 1/2 cup (120ml) tomato sauce
- 1 teaspoon Italian seasoning
- Salt and black pepper to taste
- 1 tablespoon olive oil
- 1 egg beaten with 1 tablespoon water (for egg wash)
Instructions
- Preheat oven to 375°F (190°C). Line a rimmed baking sheet with parchment paper.
- Wash and dry 12-15 mini sweet peppers. Cut a slit lengthwise down one side of each pepper to create a pocket, being careful not to cut all the way through. Remove seeds and membranes. Set aside.
- Heat 1 tablespoon olive oil in a large skillet over medium heat. Add diced onion and cook for 3-4 minutes until translucent. Add minced garlic and cook for 30 seconds.
- Add ground beef, breaking it up with a wooden spoon. Cook until browned, about 6-8 minutes. Drain excess fat if needed.
- Stir in cooked rice, tomato sauce, Italian seasoning, 1/2 cup shredded mozzarella, and salt and pepper to taste. Cook for 2-3 minutes until well combined and cheese is melted. Remove from heat and let cool slightly.
- Using a small spoon, fill each pepper with the beef and rice mixture. Place stuffed peppers on prepared baking sheet, cut-side up.
- Open crescent roll dough and unroll onto a clean cutting board. Pinch perforated seams together to create one solid sheet. Cut dough into thin strips about 1/4 inch wide (about 20-24 strips).
- Take 2-3 strips of dough and wrap around each stuffed pepper, crossing over the top to create mummy bandages. Leave a small gap near the top for eyes.
- Place two sliced black olive pieces in the gap at the top of each pepper, pressing gently into the filling.
- Brush dough strips with egg wash (1 egg beaten with 1 tablespoon water).
- Bake for 18-22 minutes, until dough is golden brown and peppers are tender.
- Let cool on baking sheet for 5 minutes before serving.
Notes
Let the filling cool before stuffing to prevent peppers from softening. Cut dough strips about 1/4 inch wide for best results. For a gluten-free version, use gluten-free crescent dough or puff pastry. For a vegetarian version, substitute ground beef with plant-based meat or black beans and quinoa.
Nutrition
- Serving Size: 2 stuffed peppers
- Calories: 380
- Sugar: 6
- Sodium: 680
- Fat: 18
- Saturated Fat: 8
- Carbohydrates: 28
- Fiber: 3
- Protein: 22
Keywords: Halloween dinner, stuffed peppers, mummy peppers, easy Halloween recipe, spooky dinner, kid-friendly Halloween


