I was standing in the baking aisle of our local grocery store last Tuesday, staring at a box of instant chocolate pudding mix, when the weirdest thing happened. A kid ran past me, laughing, and the sound—that specific, unguarded giggle—hit me like a time machine. Suddenly I was seven years old at my neighbor Mrs. Kowalski’s kitchen table, and she was handing me a plastic cup filled with crushed Oreos, chocolate pudding, and a gummy worm poking out the top like it was trying to escape. I honestly hadn’t thought about those dirt cups in twenty years. But standing there, holding that pudding box, I could still feel the cool plastic cup in my hands and hear Mrs. Kowalski saying, “Go ahead, dig in—it’s supposed to look messy.”
I bought the pudding mix, obviously. And the Oreos. And the gummy worms. My cart looked like a seven-year-old had planned a heist. Let me tell you, I got some looks from the other shoppers, but I didn’t care. I was on a mission to recreate that exact feeling—not just the taste, but the whole vibe of sitting at that cluttered kitchen table with the afternoon sun coming through the window, feeling like I was getting away with something because we were eating dessert before dinner. Mrs. Kowalski wasn’t even my grandmother, you know? She was just the lady next door who let me help her bake and never once told me I was making a mess.
That’s the thing about these Easy Chocolate Halloween Dirt Cups with Gummy Worms. They’re not fancy. They’re not complicated. But they carry that specific magic of childhood Halloween parties and school bake sales and those rare moments when adults let you eat something ridiculous just because it makes you happy. I’ve made these dirt cups every Halloween since that day in the grocery store, and I’m not gonna lie—I still get the same giddy feeling when I stick that first gummy worm into the pudding. Maybe you’ve been there too, chasing a memory through a grocery store aisle. If you have, these dirt cups are exactly what you need.
Why You’ll Love This Recipe
Look, I’ve tested a lot of Halloween desserts over the years. Some are gorgeous but take forever. Others are quick but taste like an afterthought. These Easy Chocolate Halloween Dirt Cups with Gummy Worms hit that sweet spot where easy meets impressive, and I’m not just saying that because I’m biased toward anything involving Oreos.
- Quick & Easy: We’re talking 15 minutes of active prep time, max. I timed myself last week while my kids were doing homework, and I had four cups assembled before they finished one math worksheet. Perfect for those weeknights when you promised a Halloween treat but forgot until 7 PM.
- Simple Ingredients: Chocolate pudding mix, Oreos, gummy worms, and some whipped topping. That’s it. You probably already have half of these in your pantry, and if you don’t, one quick trip down the baking aisle covers everything.
- Perfect for Halloween Parties: These are the first thing to disappear at every classroom party, neighborhood gathering, or family dinner I’ve brought them to. Kids go nuts for them, and adults secretly love them too—they just pretend they’re eating them for the kids’ sake.
- Crowd-Pleaser: I’ve made these for picky eaters, kids with food allergies (with simple swaps), and grown adults who claim they don’t like sweets. Every single person has asked for the recipe. Every. Single. Time.
- Unbelievably Delicious: Here’s the thing—this isn’t just pudding with cookie crumbs on top. The texture combo of silky chocolate pudding, crunchy Oreo “dirt,” and chewy gummy worms is honestly addictive. I always make extra because someone inevitably eats one before the party even starts.
What makes these different from every other dirt cup recipe out there? It’s the little things I figured out through trial and error. Like crushing the Oreos just right so they look like actual soil, not gravel. Or layering the pudding and crumbs so every bite has that perfect ratio of creamy to crunchy. I’ve made this recipe at least thirty times over the past few years, and I’ve dialed in every detail so you don’t have to learn the hard way. These aren’t just Halloween treats—they’re the kind of dessert that makes people close their eyes after the first bite and go, “Oh, that’s good.”
What Ingredients You Will Need
This recipe uses simple, everyday ingredients to create something that looks way more impressive than the effort it takes. Most of these are pantry staples you might already have, especially if you’ve got a kid who’s obsessed with Oreos (and honestly, who doesn’t?).
For the Chocolate Pudding Base
- 1 (3.9-ounce) box instant chocolate pudding mix — I prefer Jell-O brand for the smoothest texture, but store brands work fine too. Make sure you get instant pudding, not cook-and-serve. Instant sets up in about 5 minutes, which is the whole point of this recipe.
- 2 cups cold whole milk — Whole milk gives the richest, creamiest pudding. I’ve used 2% in a pinch, and it works, but the texture is slightly thinner. For a dairy-free version, oat milk or full-fat coconut milk are your best bets—almond milk tends to be too watery.
- 1/2 cup whipped topping, thawed — Cool Whip is the classic choice here. It adds a lightness to the pudding that makes it feel like a mousse. If you’re feeling fancy, you can whip your own heavy cream with a little powdered sugar, but honestly? I almost never bother.
For the “Dirt” Layer
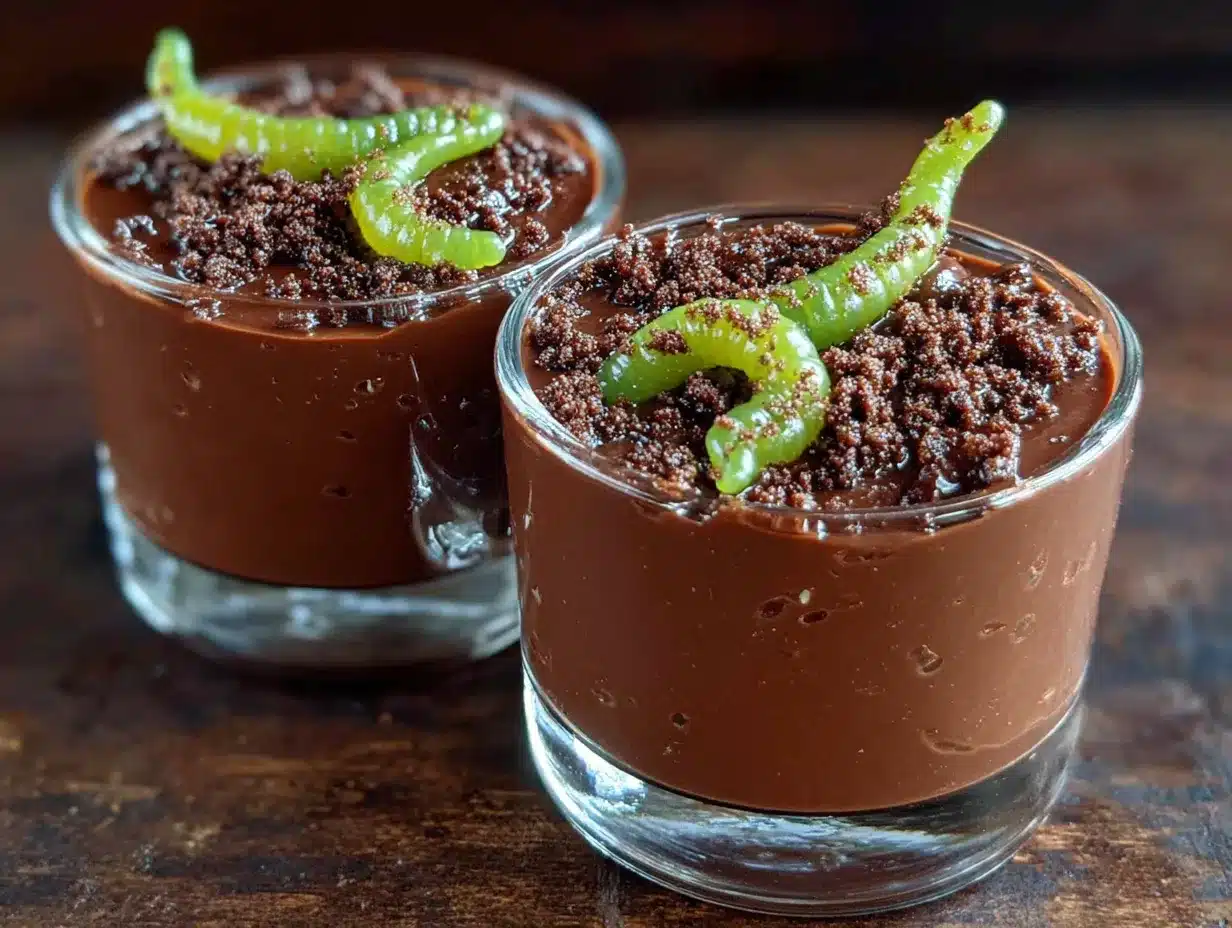
- 1 (14.3-ounce) package chocolate sandwich cookies — Oreos are the gold standard here, obviously. You’ll use the whole cookie, cream filling included. The cream helps the crumbs clump together slightly, which makes them look more like real dirt. I’ve tested this with generic store brands, and they work fine, but Oreos have that specific chocolate flavor that really makes the recipe sing.
- 2 tablespoons melted unsalted butter — This is optional, but I’ve found it helps the cookie crumbs hold together better and adds a subtle richness. If you’re skipping it, no judgment—the recipe works without it too.
For the Halloween Decorations
- 1 (5-ounce) bag gummy worms — Get the bright, colorful ones for maximum Halloween vibes. I like the sour gummy worms because the tangy flavor contrasts nicely with the sweet pudding, but regular ones work great too. Look for the bags with mixed colors for the most dramatic effect.
- Optional decorations: Halloween-themed sprinkles, candy eyeballs, or crushed candy corn for extra flair. I’ve also used those little plastic tombstone decorations you can find at party stores for an even spookier look.
A quick note on ingredient selection: When you’re picking your gummy worms, look for ones that are soft and chewy, not hard and stale. Fresh gummy worms make a huge difference in the final texture. And for the Oreos, I know it’s tempting to get the double-stuf ones, but regular Oreos actually work better here—the filling-to-cookie ratio is more balanced for making realistic-looking dirt.
Equipment Needed
You don’t need much for this recipe, which is honestly my favorite thing about it. Here’s what you’ll need:
- 6 to 8 small clear cups or glasses — Clear cups are essential for showing off the layers. I use 8-ounce plastic cups from the party store, but small mason jars, juice glasses, or even repurposed yogurt containers work great. The visual is half the fun, so go with clear if you can.
- 2 medium mixing bowls — One for the pudding, one for the cookie crumbs. Any bowls you have will work.
- Whisk or electric mixer — A whisk works fine for instant pudding, but an electric mixer makes it come together faster and smoother. I usually just whisk by hand because it’s one less thing to wash.
- Food processor or zip-top bag and rolling pin — For crushing the Oreos. A food processor gives you the most consistent texture, but a zip-top bag and a rolling pin (or even a heavy skillet) work perfectly. There’s something satisfying about smashing the cookies yourself, honestly.
- Measuring cups and spoons — Basic set will do.
- Small spatula or spoon — For layering the pudding and crumbs.
I’ve made these dirt cups in a hotel room with a plastic knife and a coffee mug before—not my finest moment, but it worked. The point is, don’t let missing equipment stop you. If you have a bowl and a spoon, you’re basically there.
Preparation Method
Alright, let’s make some dirt cups. I’ve broken this down into clear steps so you can follow along without any confusion. Trust me, if I can do this while my kids are asking me seventeen questions about why worms live in dirt, you can definitely handle it.
- Make the chocolate pudding (5 minutes): In your medium mixing bowl, whisk together the instant chocolate pudding mix and 2 cups of cold milk. Whisk vigorously for about 2 minutes until the mixture thickens and starts to set. You’ll feel it getting heavier as you whisk—that’s the magic of instant pudding at work. Let it sit for 5 minutes to fully set up. Pro tip: Make sure your milk is really cold. I pull mine straight from the fridge and don’t let it sit out. Warm milk won’t thicken properly, and nobody wants runny dirt cups.
- Fold in the whipped topping (2 minutes): Once the pudding has set, gently fold in 1/2 cup of thawed whipped topping using a spatula. Fold, don’t stir—you want to keep the airiness. This step makes the pudding lighter and fluffier, almost like a mousse. I learned this trick from a pastry chef friend, and it makes a huge difference. The pudding goes from “okay” to “oh wow” with this one simple step.
- Crush the Oreos (3 minutes): While the pudding is setting, crush your Oreos. If you’re using a food processor, pulse them until they resemble coarse sand—about 10-15 pulses. You want some small chunks for texture, but mostly fine crumbs. If you’re using the zip-top bag method, put the cookies in the bag, seal it, and go to town with your rolling pin. This is the most fun step, honestly. Let your inner five-year-old out for a minute. If you’re using the optional melted butter, drizzle it over the crumbs and toss with a fork until evenly distributed.
- Layer the cups (5 minutes): Now comes the fun part. Spoon about 2 tablespoons of crushed Oreos into the bottom of each cup. This forms the first “dirt” layer. Gently press it down with the back of your spoon to create a solid base. Then spoon or pipe the chocolate pudding mixture on top, filling each cup about three-quarters full. Leave some room at the top for the final dirt layer and your gummy worms. I use a piping bag or a zip-top bag with the corner snipped off for a cleaner look, but a spoon works just fine.
- Add the gummy worms (2 minutes): Here’s where the magic happens. Take 2-3 gummy worms and gently push them into the pudding so they’re partially buried. Let the ends stick out like the worms are trying to escape. I like to arrange them at different angles for a more dramatic effect—some diving straight in, others wiggling their way up. This is where you can get creative and have some fun.
- Top with the final dirt layer (2 minutes): Sprinkle the remaining crushed Oreos over the top of each cup, covering the pudding completely. You want a thick, even layer that looks like freshly turned soil. Don’t skimp here—the dirt layer is what sells the illusion. Leave a few gummy worm heads poking through the top for that classic dirt cup look.
- Chill and serve (30 minutes minimum): Pop the cups in the refrigerator for at least 30 minutes before serving. This allows the layers to set and the flavors to meld together. If you’re making these ahead of time, they’ll keep in the fridge for up to 2 days. Just wait to add the gummy worms until right before serving if you’re making them more than a few hours ahead—the worms can get a little soggy if they sit in the pudding too long.
A few things I’ve learned the hard way: Don’t overmix the pudding. Stop whisking as soon as it starts to thicken, or you’ll end up with a grainy texture. And for the love of all things chocolate, taste the pudding before you assemble the cups. I once made a batch with milk that was on the verge of turning, and let me tell you, that was a sad, sad kitchen experiment. Always check your ingredients first.
Cooking Tips & Techniques
After making these Easy Chocolate Halloween Dirt Cups with Gummy Worms more times than I care to count, I’ve picked up a few tricks that make the process smoother and the results better. Let me share what I’ve learned so you don’t have to make the same mistakes I did.
Crush your Oreos strategically. The texture of your “dirt” matters more than you’d think. If you crush the cookies too fine, they turn into dust that doesn’t look like real soil. Too coarse, and you’ve got gravel, not dirt. Aim for a mix of fine crumbs and tiny pebbles. I’ve found that pulsing the cookies in a food processor in short bursts gives me the most control. About 12 pulses is my sweet spot, but every food processor is different, so keep an eye on it.
Don’t skip the chilling step. I know it’s tempting to serve these right away—trust me, I’ve been there. But the texture is so much better after the cups have had time to chill. The pudding firms up, the cookie crumbs soften slightly, and everything melds together into this cohesive, creamy, crunchy masterpiece. I’ve served them immediately before, and while they’re still good, they’re not great. Give them at least 30 minutes in the fridge. Your patience will be rewarded.
Pipe the pudding for cleaner layers. This was a game-changer for me. Instead of spooning the pudding into the cups, transfer it to a piping bag or a zip-top bag with the corner snipped off. This gives you way more control over the layering, and you won’t get pudding smeared all over the sides of the cups. Clear cups show everything, so clean layers make a huge visual difference. I learned this after my first few attempts looked like a mud fight in a cup.
Make extra dirt. I always crush more Oreos than I think I’ll need. There’s nothing worse than running out of dirt halfway through topping your cups, and leftover cookie crumbs are never a problem—they make an excellent ice cream topping or yogurt stir-in. I usually crush about 1.5 packages of Oreos just to be safe, and I’ve never regretted having extra.
One mistake I’ll never make again: I once tried to assemble these in a hurry and didn’t let the pudding set properly before adding the worms. The worms sank straight to the bottom, and I ended up with dirt cups that looked more like gummy worm graves than Halloween treats. Let the pudding set for a few minutes before you add the worms—it gives them something to grip onto so they stay in place.
Variations & Adaptations
One of the best things about this recipe is how easily it adapts to different tastes, dietary needs, and occasions. I’ve experimented with quite a few variations over the years, and here are my favorites.
Peanut Butter Dirt Cups: Add 2 tablespoons of creamy peanut butter to the pudding mixture before folding in the whipped topping. The peanut butter adds a salty-savory note that pairs beautifully with the chocolate. My kids go crazy for this version, and honestly, so do I. Just make sure your peanut butter is well-stirred and at room temperature so it incorporates smoothly.
Gluten-Free Version: Use gluten-free chocolate sandwich cookies (I like the Kinnikinnick brand) and double-check that your pudding mix is certified gluten-free. Most instant pudding mixes are gluten-free, but it’s always worth checking the label. Everything else in the recipe is naturally gluten-free, so this swap is super easy.
Dairy-Free Version: Swap the whole milk for full-fat oat milk or canned coconut milk, and use a dairy-free whipped topping like CocoWhip. The texture will be slightly different—coconut milk gives a subtle coconut flavor that’s actually really nice with the chocolate—but it’s still delicious. I’ve served this version to dairy-free friends, and they’ve all given it two thumbs up.
Spooky Spider Cups: Instead of gummy worms, use gummy spiders or place a chocolate spider ring on top of each cup. You can also add candy eyeballs to the sides of the cups for a creepy effect. I did this for a Halloween party last year, and the kids lost their minds over the eyeballs staring at them while they ate.
Pumpkin Patch Dirt Cups: For a fall twist, replace the gummy worms with candy pumpkins or candy corn. You can also add a pinch of pumpkin pie spice to the pudding mixture for extra seasonal flavor. This version is perfect for Thanksgiving or fall-themed parties.
I’ve also tried making these with chocolate mousse instead of pudding, and while it’s undeniably delicious, it’s also way more work. For a weeknight treat, stick with the instant pudding. Save the mousse for when you’re trying to impress someone.
Serving & Storage Suggestions
These Easy Chocolate Halloween Dirt Cups with Gummy Worms are best served cold, right out of the refrigerator. The contrast between the cold, creamy pudding and the crunchy cookie dirt is part of what makes them so satisfying. I like to serve them on a tray lined with festive napkins or a Halloween-themed tablecloth for maximum presentation points.
How to serve: Give each person their own cup with a small spoon. These are meant to be eaten directly from the cup—no plates needed, which means less cleanup. If you’re serving them at a party, arrange the cups on a platter and let guests grab their own. I’ve also made mini versions in shot glasses for adult Halloween parties, and they were a huge hit.
What to serve with them: These dirt cups are rich enough to stand alone, but if you’re building a Halloween dessert spread, they pair beautifully with pumpkin cupcakes, caramel apples, or a bowl of mixed Halloween candy. For a drink pairing, cold milk is the classic choice, but a warm apple cider or hot chocolate works great too.
Storage instructions: Store any leftover dirt cups in the refrigerator, covered with plastic wrap or with the lids on if your cups have them. They’ll keep for up to 3 days, though the cookie crumbs will soften over time. I actually prefer them on day two when the crumbs have had a chance to meld with the pudding—it creates this almost cake-like texture that’s really lovely.
Freezer instructions: You can freeze these for up to 1 month, but I don’t recommend it. The pudding gets icy and the texture suffers. If you absolutely must make them ahead, assemble everything except the gummy worms and the top dirt layer, freeze, and add those elements after thawing in the refrigerator overnight.
Reheating (not that you’d want to): These are meant to be served cold, so don’t even think about microwaving them. If they’ve been in the fridge too long and the pudding seems too firm, let them sit at room temperature for 10-15 minutes before serving.
One thing I’ve noticed: The flavors actually get better after a day in the fridge. The chocolate deepens, the cookie crumbs absorb some moisture from the pudding, and everything comes together into this perfect, cohesive dessert. So if you can, make these a day ahead. Your future self will thank you.
Nutritional Information & Benefits
Let’s be real—these are a treat, not a health food. But that doesn’t mean they can’t fit into a balanced diet, especially when you’re making them for a special occasion like Halloween. Here’s the approximate nutritional breakdown for one serving (based on 8 servings per recipe):
- Calories: Approximately 320-350 per cup
- Total Fat: 14g
- Saturated Fat: 7g
- Carbohydrates: 48g
- Sugar: 34g
- Protein: 5g
- Calcium: 8% of daily value
- Iron: 10% of daily value
On the plus side, the milk in the pudding provides calcium and vitamin D, and the cocoa in the chocolate pudding contains antioxidants called flavonoids. The Oreos? Well, they provide joy, which I’m pretty sure counts as a nutrient. I always tell my kids that Halloween is about balance—eat your veggies at dinner, and enjoy your dirt cups for dessert. It’s all about moderation.
If you’re watching your sugar intake, you can use sugar-free pudding mix and reduced-fat Oreos to cut down on calories and sugar. The texture will be slightly different, but it’s a decent compromise. For a lower-carb option, you can also use a sugar-free pudding mix and skip the Oreos entirely, using crushed nuts or sugar-free chocolate cookies instead.
Allergen note: This recipe contains dairy (milk, whipped topping) and wheat (Oreos). It may also contain traces of soy and peanuts depending on the brands you use. Always check labels if you’re serving someone with food allergies.
Conclusion
These Easy Chocolate Halloween Dirt Cups with Gummy Worms are more than just a dessert—they’re a little time machine back to the best parts of childhood. Every time I make them, I think about Mrs. Kowalski’s messy kitchen table and that feeling of pure, uncomplicated joy. And honestly? That’s what Halloween should be about. Not the perfect costumes or the fancy decorations, but those small, silly moments that make you feel like a kid again.
I hope you give these a try, whether you’re making them for a classroom party, a neighborhood gathering, or just because you had a rough week and need something ridiculous and delicious in your life. Don’t be afraid to make them your own—swap in different candies, experiment with the flavors, and let your inner child take the lead. That’s the whole point, really.
If you make these Easy Chocolate Halloween Dirt Cups with Gummy Worms, I’d love to hear about it. Drop a comment below and tell me how they turned out, or share your own twist on the recipe. And if you’re looking for more Halloween fun, check out our spooky Halloween desserts collection for more ideas. Happy Halloween, friends—now go make some dirt!
Frequently Asked Questions
Can I make these dirt cups ahead of time?
Absolutely! You can assemble them up to 2 days in advance. Just wait to add the gummy worms until right before serving so they don’t get soggy. Store the assembled cups covered in the refrigerator.
Can I use homemade pudding instead of instant?
You can, but it changes the texture and takes more time. Homemade pudding tends to be thinner, so you’ll need to chill it longer before layering. I’d recommend sticking with instant pudding for the best results with the least effort.
How many cups does this recipe make?
This recipe makes 6 to 8 cups, depending on the size of your cups. I usually get 8 cups when using standard 8-ounce cups. If you’re using smaller cups like shot glasses for a party, you can easily get 12 to 16 mini servings.
Can I use a different type of cookie for the dirt?
Sure! Chocolate wafer cookies, gluten-free chocolate cookies, or even crushed chocolate graham crackers work well. The key is using a chocolate cookie that crushes into a fine, soil-like texture. Avoid anything with large chunks or hard fillings.
My pudding didn’t set properly. What went wrong?
This usually happens for one of three reasons: your milk wasn’t cold enough, you used cook-and-serve pudding instead of instant, or you didn’t whisk it long enough. Make sure your milk is straight from the fridge, double-check the package to confirm it’s instant pudding, and whisk for the full 2 minutes. If all else fails, pop the mixture in the freezer for 10 minutes to help it set up faster.
Pin This Recipe!
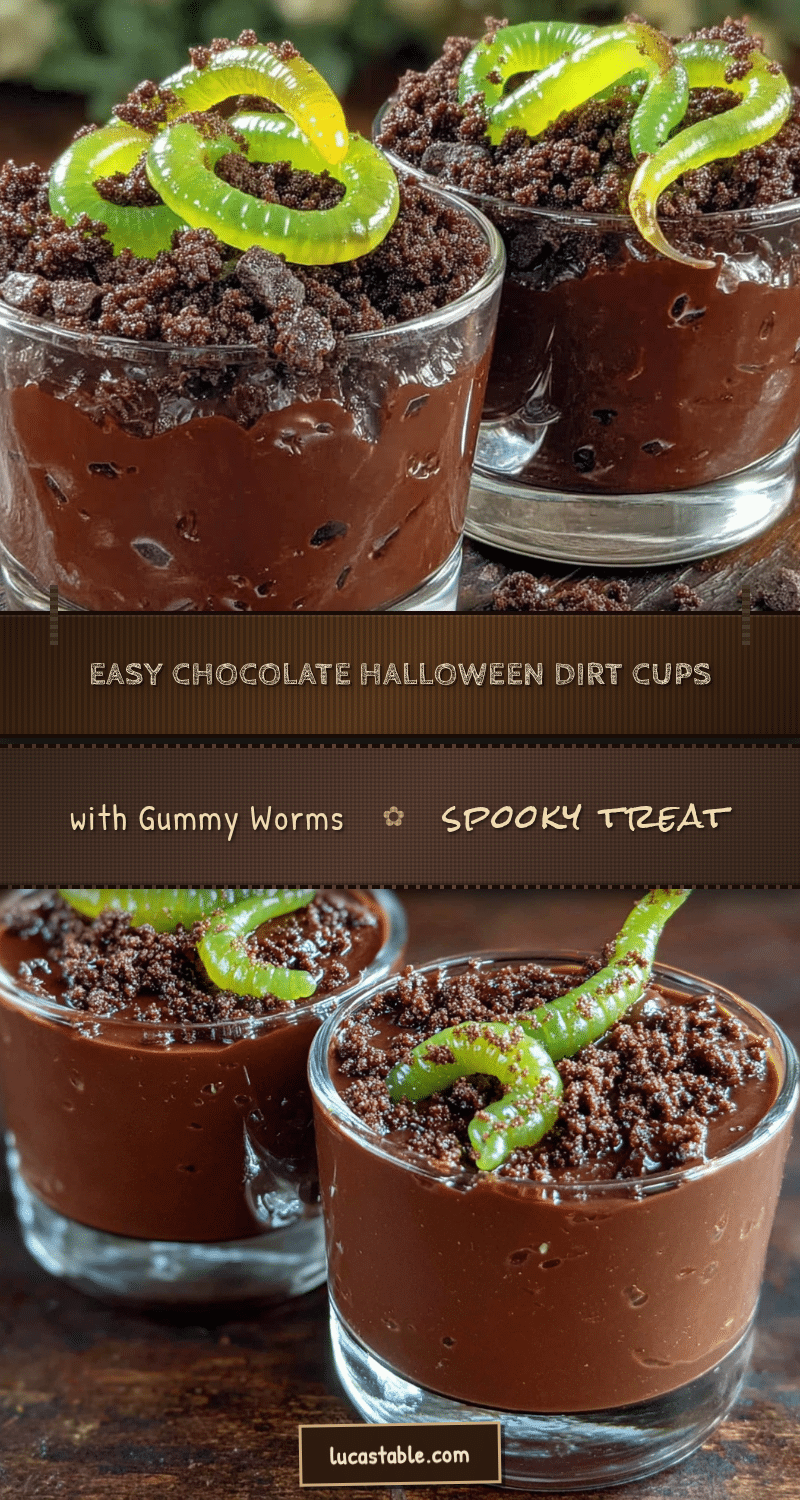
Easy Chocolate Halloween Dirt Cups with Gummy Worms
These Easy Chocolate Halloween Dirt Cups with Gummy Worms are a quick, no-bake dessert that combines creamy chocolate pudding, crunchy Oreo ‘dirt,’ and chewy gummy worms for a fun and spooky treat. Perfect for Halloween parties, they come together in just 15 minutes of active prep time.
- Prep Time: 15 minutes
- Cook Time: 0 minutes
- Total Time: 45 minutes (includes 30 minutes chilling)
- Yield: 8 servings 1x
- Category: Dessert
- Cuisine: American
Ingredients
- 1 (3.9-ounce) box instant chocolate pudding mix
- 2 cups cold whole milk
- 1/2 cup whipped topping, thawed
- 1 (14.3-ounce) package chocolate sandwich cookies (e.g., Oreos)
- 2 tablespoons melted unsalted butter (optional)
- 1 (5-ounce) bag gummy worms
- Optional: Halloween-themed sprinkles, candy eyeballs, or crushed candy corn for decoration
Instructions
- Make the chocolate pudding: In a medium mixing bowl, whisk together the instant chocolate pudding mix and 2 cups of cold milk. Whisk vigorously for about 2 minutes until the mixture thickens and starts to set. Let it sit for 5 minutes to fully set up.
- Fold in the whipped topping: Once the pudding has set, gently fold in 1/2 cup of thawed whipped topping using a spatula. Fold, don’t stir, to keep the airiness.
- Crush the Oreos: While the pudding is setting, crush the Oreos in a food processor until they resemble coarse sand (about 10-15 pulses). Alternatively, place them in a zip-top bag and crush with a rolling pin. If using, drizzle the melted butter over the crumbs and toss with a fork until evenly distributed.
- Layer the cups: Spoon about 2 tablespoons of crushed Oreos into the bottom of each cup. Gently press down with the back of a spoon to create a solid base. Then spoon or pipe the chocolate pudding mixture on top, filling each cup about three-quarters full.
- Add the gummy worms: Take 2-3 gummy worms and gently push them into the pudding so they are partially buried, with ends sticking out.
- Top with the final dirt layer: Sprinkle the remaining crushed Oreos over the top of each cup, covering the pudding completely. Leave a few gummy worm heads poking through.
- Chill and serve: Refrigerate the cups for at least 30 minutes before serving. For best results, chill for up to 2 days, but add gummy worms just before serving if making ahead.
Notes
For best results, use cold milk straight from the fridge. Instant pudding is essential—do not use cook-and-serve. Crush Oreos to a mix of fine crumbs and tiny pebbles for realistic ‘dirt.’ Pipe the pudding for cleaner layers. Make extra Oreo crumbs to avoid running out. Let pudding set before adding worms to prevent them from sinking. Store leftovers covered in the refrigerator for up to 3 days; flavors improve after a day.
Nutrition
- Serving Size: 1 cup
- Calories: 335
- Sugar: 34
- Sodium: 380
- Fat: 14
- Saturated Fat: 7
- Carbohydrates: 48
- Fiber: 1
- Protein: 5
Keywords: Halloween dessert, dirt cups, chocolate pudding, Oreo dirt, gummy worms, no-bake dessert, easy Halloween treat


