The Tuesday before Thanksgiving, standing in the checkout line at the hardware store of all places, the woman behind me started talking about hot chocolate. Not just any hot chocolate—she was describing a setup she’d done for her grandkids that apparently turned her kitchen into what she called “the most popular room in the house.” I was there buying a new shovel because mine had snapped in half during an overly ambitious attempt to move wet leaves, and honestly, I was just trying to get home before the rain started. But there I was, holding a broken shovel handle, listening to a complete stranger explain how she’d laid out little bowls of marshmallows, crushed candy canes, and these tiny chocolate chips on a tray, and how her grandchildren had stood there in complete awe like she’d performed actual magic. She laughed and said, “It’s the simplest thing, but they act like I invented Christmas.” I bought the shovel, went home, and immediately started planning our own version. That hardware store conversation stayed with me for weeks, and by the time December rolled around, I had turned our breakfast bar into a full-blown hot cocoa station that my kids still talk about. Maybe you’ve been there—standing in an unexpected place, overhearing something that completely changes how you think about a regular Tuesday or a holiday gathering. That’s exactly what this kid-friendly hot cocoa bar is all about: taking something simple and turning it into a memory without spending a fortune or stressing yourself out.
Why You’ll Love This Recipe
Let me tell you why this hot cocoa bar setup has become our family’s favorite winter tradition. I’ve tested this approach over three different holiday seasons now, tweaking it based on what my kids actually reach for versus what looks pretty on Pinterest. Here’s what makes it work:
- Budget-Friendly Fun: You don’t need fancy ingredients or expensive equipment. Most of these toppings are pantry staples or dollar store finds. I spent under $15 on our first setup and it lasted through three separate cocoa nights.
- Minimal Prep Time: Everything comes together in about 15 minutes. Seriously. While the milk heats up, you arrange the toppings. That’s it.
- Picky Eater Approved: My youngest refuses to eat anything with “bits” in it, but she’ll happily build her own cup of cocoa with exactly the toppings she wants. The control factor is huge for kids.
- Customizable for Any Occasion: We’ve done this for snow days, birthday parties, Christmas Eve, and even a rainy Saturday in March. The toppings change with the season, but the joy stays the same.
- Leftovers Never Go to Waste: Extra marshmallows and sprinkles get sealed in zip-top bags and used for baking or the next cocoa session. Nothing gets thrown away.
What makes this different from every other hot cocoa bar you’ve seen online? It’s designed for real families with real budgets and real messes. I’m not suggesting you arrange everything on a tiered tray with handwritten chalkboard labels—unless you want to, of course. But I’ve learned that kids actually prefer a slightly chaotic setup where they can grab what they want without feeling like they’re ruining a display. This is comfort food made accessible, affordable, and genuinely fun for everyone at the table.
What Ingredients You Will Need
This recipe uses simple, everyday ingredients to create a hot cocoa experience that feels special without requiring a trip to a specialty store. Most of these items are probably already in your kitchen, which is exactly how I like to keep things when feeding a family on a budget.
The Base Cocoa
- 1 gallon whole milk (or 2% if that’s what you have—I’ve used both and honestly, the kids don’t notice)
- 1 cup heavy cream (adds richness; you can skip this and use all milk to save money)
- 1 cup unsweetened cocoa powder (I prefer Ghirardelli for its smooth flavor, but store brand works fine)
- ¾ cup granulated sugar (adjust based on your family’s sweetness preference)
- 1 teaspoon vanilla extract (pure vanilla makes a difference here, but imitation works in a pinch)
- ¼ teaspoon salt (just a pinch to balance the sweetness)
Toppings Bar
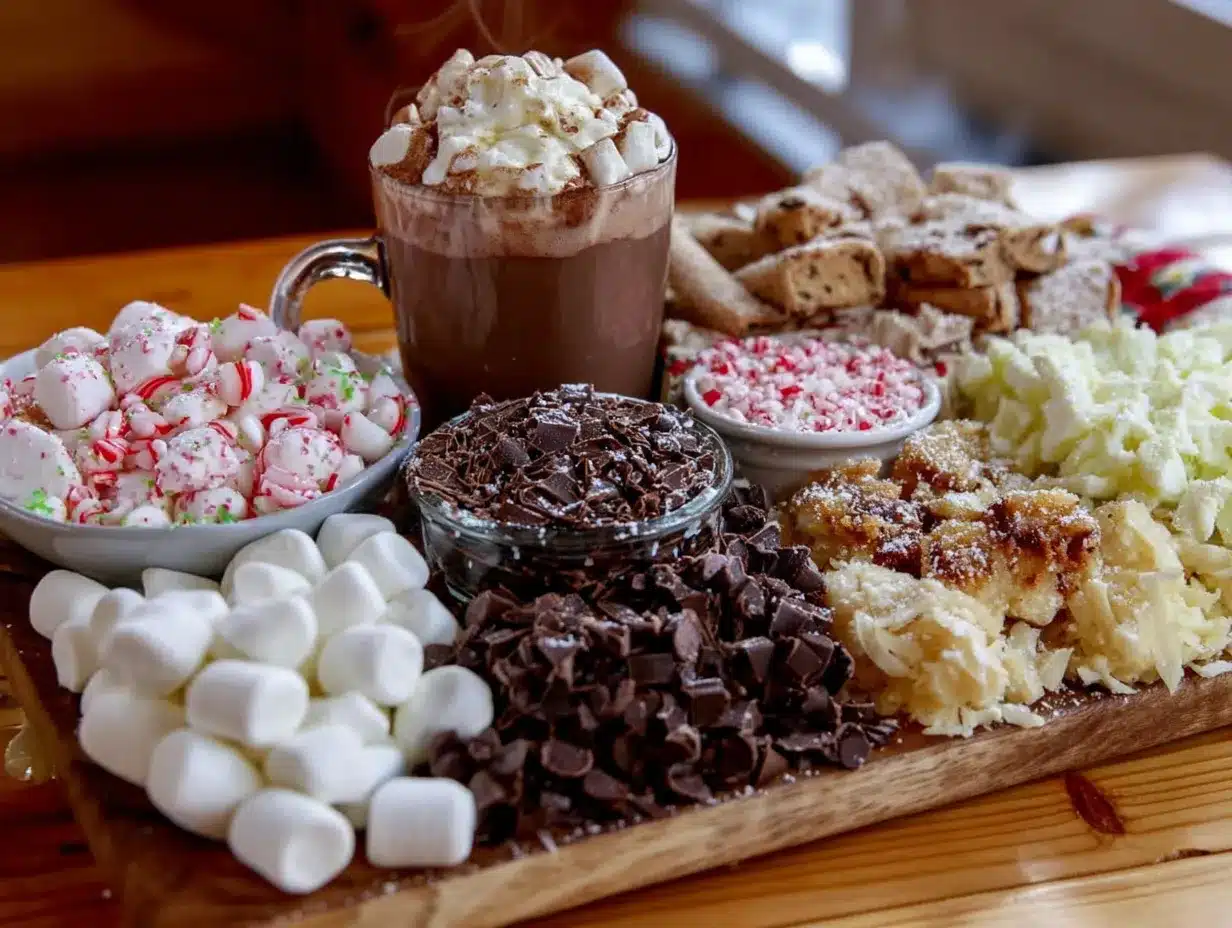
- Mini marshmallows (the classic—get the big bag from the baking aisle, it’s cheaper)
- Whipped cream (homemade or store-bought; I use Reddi-wip for convenience on busy nights)
- Chocolate shavings or mini chocolate chips (milk chocolate or semi-sweet, whatever your crew prefers)
- Crushed candy canes (about 6 candy canes, smashed in a zip-top bag with a rolling pin—the kids love helping with this part)
- Rainbow sprinkles (the long jimmies work better than round sprinkles, they don’t dissolve as fast)
- Caramel sauce (for drizzling—look for the squeeze bottle kind, it’s less messy)
Optional Add-Ins
- Cinnamon sticks (for stirring, adds a subtle warmth)
- Peppermint extract (a few drops in the cocoa pot for a holiday twist)
- Crushed graham crackers (tastes like s’mores—my kids go crazy for this combo)
- Toffee bits (Heath bar bits add a buttery crunch)
- Coconut flakes (toasted or plain, for a tropical surprise)
A quick note on ingredient selection: When I’m buying cocoa powder, I look for the Dutch-processed kind if I can find it on sale. It’s darker and richer, which means you can use a little less and still get that deep chocolate flavor. But honestly, regular unsweetened cocoa powder works perfectly fine, especially when you’re loading up the toppings. Don’t let the “perfect” ingredient stop you from making this tonight.
Equipment Needed
You don’t need much fancy equipment for this setup, which is part of why I love it. Here’s what I use:
- Large pot or Dutch oven (at least 4-quart capacity—I use my old enameled cast iron pot because it holds heat well)
- Whisk (a silicone whisk won’t scratch your pot and is easier to clean)
- Small bowls or ramekins (for the toppings—I use the mismatched ones from the back of my cabinet)
- Mugs (heatproof glass mugs let the kids see their creations, but ceramic works just fine)
- Ladle (for serving, especially helpful if you have little hands reaching in)
- Tray or baking sheet (to corral the toppings and catch spills—I use a half-sheet pan lined with parchment)
- Small tongs or spoons (for each topping to keep things somewhat sanitary)
If you don’t have a Dutch oven, any large pot will do. I’ve made this in a cheap stockpot from the grocery store and it turned out just fine. For the toppings, I’ve used everything from mason jars to cleaned-out yogurt containers. Honestly, the less precious you are about the setup, the more the kids will enjoy it. My best tip: use a rimmed baking sheet as your base. It catches the inevitable sprinkles that go flying and makes cleanup take about thirty seconds.
Preparation Method
Here’s how I put this whole thing together. I’ve broken it down into steps that even a tired parent can manage on a Wednesday night.
- Make the cocoa base (10 minutes): Pour the milk and heavy cream into your large pot. Heat over medium heat, stirring occasionally, until it’s warm but not boiling—you want steam rising but no bubbles breaking the surface. This usually takes about 5-7 minutes. If you get distracted (I definitely have), just watch for that first ring of tiny bubbles around the edge of the pot.
- Add the dry ingredients: In a separate small bowl, whisk together the cocoa powder, sugar, and salt. This step matters—if you dump the cocoa powder directly into the hot milk, you’ll end up with lumpy cocoa. Ask me how I know. Slowly whisk this dry mixture into the warm milk, a little at a time, until everything is smooth and fully incorporated.
- Finish with vanilla: Remove the pot from heat and stir in the vanilla extract. Give it a taste test here. Too bitter? Add another tablespoon of sugar. Too sweet? A pinch more salt will balance it out. This is your chance to adjust before anyone else starts drinking.
- Keep it warm: Transfer the cocoa to a slow cooker set on warm, or leave it in the pot on the stove over the lowest possible heat. If using the stove, stir every 10 minutes or so to prevent a skin from forming on top. (My kids actually fight over the skin, so I sometimes leave it on purpose.)
- Set up the toppings bar (5 minutes): While the cocoa is staying warm, arrange your small bowls on the baking sheet. Fill each bowl with a different topping. I put the marshmallows and whipped cream at the front because those are the most popular. The candy canes and sprinkles go in the back because they’re messier.
- Let everyone build their own cup: Give each person a mug and let them ladle their own cocoa. Then send them to the toppings bar. I’ve learned to let my kids go first and make a mess—the cocoa wipes up easily, and their joy is worth the extra cleanup.
- Serve immediately: This is best enjoyed right away while the toppings are still crunchy and the cocoa is piping hot. Have napkins ready because chocolate mustaches are inevitable.
One thing I’ve learned the hard way: don’t make the cocoa too hot for little kids. I let it cool for a few minutes before letting my youngest pour her own cup. She burned her tongue once and refused to touch hot chocolate for three months. Patience pays off here.
Cooking Tips & Techniques
After setting up this hot cocoa bar probably twenty times over the past few winters, I’ve collected some tricks that make the whole thing run smoother. Here’s what I wish someone had told me:
Double the batch if you have more than four people. I learned this the first time my kids invited friends over after school. One batch disappeared in about twelve minutes. Now I always make a double batch and keep it in the slow cooker on warm. It stays perfect for hours and the kids can help themselves.
Crush candy canes inside a zip-top bag. Don’t try to chop them with a knife—they’ll fly everywhere. Put them in a sturdy bag, seal it, and let the kids smash them with a rolling pin or the bottom of a measuring cup. This is honestly one of the most fun parts for them, and it keeps the mess contained.
Use a separate spoon for each topping. I thought I could get away with one spoon and just wipe it off between toppings. Turns out, kids don’t care about cross-contamination, and within five minutes, the marshmallows had sprinkles in them and the sprinkles had marshmallow bits. Separate spoons save the chaos.
Make the cocoa ahead of time. You can prepare the base a day in advance and keep it in the fridge. Just reheat it slowly on the stove or in the slow cooker. The flavor actually gets better overnight as the cocoa powder fully hydrates. I’ve done this for birthday parties and it saved me so much stress.
Don’t skip the salt. I know it sounds weird, but that tiny pinch of salt makes the chocolate taste more chocolatey. My mother-in-law taught me this trick years ago, and I’ve never made cocoa without it since. It’s one of those small things that makes a big difference.
Keep a damp cloth nearby. Someone will spill something. It’s not a matter of if, but when. Having a cloth ready means you can wipe it up immediately before it becomes a sticky mess that attracts every ant in the neighborhood.
Variations & Adaptations
One of the best things about this hot cocoa bar is how easy it is to change up based on what you have or who’s coming over. Here are some ways I’ve adapted it over the years:
Dairy-Free Version: Use oat milk or almond milk instead of whole milk, and swap the heavy cream for canned coconut cream. The coconut cream actually adds a lovely subtle flavor that pairs beautifully with chocolate. My sister-in-law is dairy-free, and she says this version is even better than the original.
Spiced Hot Chocolate: Add a cinnamon stick, a star anise, and a pinch of cayenne pepper to the milk while it heats. Remove the spices before serving. This is my go-to for adult gatherings—it feels fancy without any extra effort. I serve it with a bowl of cinnamon sticks and star anise for garnish.
S’mores Cocoa Bar: Add crushed graham crackers, mini marshmallows, and chocolate shavings. Toast the marshmallows under the broiler for 30 seconds if you want that campfire flavor. My kids request this version for every sleepover, and honestly, I don’t blame them.
Mexican Hot Chocolate: Stir in 1 teaspoon of cinnamon and a pinch of chili powder to the cocoa base. Serve with a side of whipped cream and a sprinkle of cinnamon on top. This is my personal favorite when I’m making a cup just for myself after the kids go to bed.
White Chocolate Peppermint: Use white chocolate chips melted into the milk instead of cocoa powder. Add a drop of peppermint extract and top with crushed candy canes. This feels extra special for Christmas morning and uses ingredients I usually have leftover from holiday baking.
Budget-Friendly Tips: If you’re feeding a crowd on a tight budget, skip the heavy cream and use all milk. Buy store-brand marshmallows and cocoa powder. Dollar stores often carry sprinkles and candy canes for a fraction of the grocery store price. The kids won’t know the difference, and your wallet will thank you.
Serving & Storage Suggestions
This hot cocoa is best served immediately while it’s hot and the toppings are still fresh. I like to set everything out about 15 minutes before people arrive so the cocoa is hot and the toppings are ready to go. For presentation, I arrange the mugs in a stack and let everyone grab their own.
If you have leftover cocoa, pour it into an airtight container and refrigerate for up to 3 days. To reheat, pour it into a pot and warm it over medium-low heat, whisking occasionally. You can also microwave individual cups for 45 seconds, stirring halfway through. The texture might separate slightly, but a good whisk brings it right back together.
Leftover toppings can be stored in their original containers or zip-top bags. Crushed candy canes will last for weeks in a sealed bag at room temperature. I keep a “cocoa toppings” bin in my pantry now so we can throw together a bar in five minutes whenever the mood strikes.
The flavors actually develop nicely overnight. The cocoa gets richer and more chocolatey as it sits. Some of my family members prefer day-old cocoa because it’s smoother and more intense. I’ve also frozen the cocoa base in ice cube trays and used the cubes to make iced mochas later—not that the kids need to know about that.
Nutritional Information & Benefits
Here’s the honest truth about this hot cocoa: it’s a treat, not a health food. But that doesn’t mean it’s completely without value. A standard 8-ounce serving made with whole milk contains about 250-300 calories, depending on how heavy-handed you are with the toppings. You’re getting about 8 grams of protein from the milk, plus calcium and vitamin D.
The cocoa powder itself is surprisingly nutritious—it’s packed with antioxidants called flavonoids that can help reduce inflammation and improve heart health. Dark chocolate has more of these, so if you want to boost the health factor, use a higher-quality cocoa powder.
If you’re watching sugar intake, you can reduce the sugar in the base to ½ cup and rely on the toppings for sweetness. My husband does this for himself, and he says it still tastes great. For a lower-calorie option, use skim milk and skip the whipped cream. But honestly? This is a treat meant for joy, not for counting every calorie. I let my kids load up their cups however they want and save the nutrition talk for another meal.
Potential allergens include dairy (milk and cream) and, depending on your toppings, gluten (in some sprinkles and graham crackers). Check labels if you’re serving guests with allergies. I always keep a dairy-free option available because you never know who might show up.
Conclusion
This kid-friendly hot cocoa bar has become one of those traditions I never knew we needed until we tried it. It started with a random conversation in a hardware store, and now it’s the thing my kids ask for when the first snowflake falls or when they’re feeling a little blue on a gray winter afternoon. It’s not fancy or complicated, and that’s exactly why it works. You can throw it together with stuff you already have, let the kids go wild with toppings, and end up with a kitchen full of chocolate-smeared smiles and genuine laughter. That’s the kind of magic that doesn’t require a perfect setup or a big budget—just a pot of warm cocoa and a willingness to let things get a little messy. I’d love to hear how your family makes it their own. Drop a comment below and tell me your favorite topping combination or the funniest thing that happened during your cocoa bar night. And if you’re looking for another warm drink to cozy up with, don’t miss our homemade chai tea concentrate or our easy slow cooker apple cider for more cold-weather comfort.
Frequently Asked Questions
Can I make this hot cocoa bar ahead of time for a party?
Absolutely. Make the cocoa base up to two days in advance and store it in the fridge. Reheat it in a slow cooker on warm setting about an hour before guests arrive. Set up the toppings bar just before everyone gets there so the marshmallows don’t get stale.
How do I keep the cocoa warm for a long event?
A slow cooker on the warm setting is your best friend here. It keeps the cocoa at the perfect temperature for hours without burning it. Stir it every 30 minutes or so to prevent a skin from forming. If you don’t have a slow cooker, a large thermos works well for smaller gatherings.
What if my child has a dairy allergy?
Use oat milk or coconut milk as the base. Both work beautifully and are widely available. Skip the whipped cream or use a coconut-based whipped topping. Most dark chocolate cocoa powders are dairy-free, but always check the label to be safe.
Can I use hot chocolate mix instead of making it from scratch?
Yes, and I won’t judge you for it. Use about ½ cup of your favorite mix per cup of hot milk. The toppings bar works the same way regardless of what base you use. Sometimes I use mix when I’m in a hurry, and it’s still a hit with the kids.
How much cocoa should I make per person?
Plan for about 1.5 cups per person if it’s the main drink, or 1 cup if you’re serving it alongside other treats. For a family of four, I make a double batch (about 8 cups total) and usually have just enough left over for one more cup the next morning.
Pin This Recipe!
Kid-Friendly Hot Cocoa Bar Easy DIY Setup

A simple, budget-friendly hot cocoa bar setup that turns a regular winter day into a memorable family activity. With a rich homemade cocoa base and a variety of toppings, kids can build their own perfect cup.
- Prep Time: 15 minutes
- Cook Time: 10 minutes
- Total Time: 25 minutes
- Yield: 8 servings 1x
- Category: Beverage
- Cuisine: American
Ingredients
- 1 gallon whole milk (or 2%)
- 1 cup heavy cream (optional, can use all milk)
- 1 cup unsweetened cocoa powder (preferably Dutch-processed)
- 3/4 cup granulated sugar (adjust to taste)
- 1 teaspoon vanilla extract (pure or imitation)
- 1/4 teaspoon salt
- Mini marshmallows (for topping)
- Whipped cream (homemade or store-bought)
- Chocolate shavings or mini chocolate chips
- 6 candy canes, crushed (for topping)
- Rainbow sprinkles (jimmies preferred)
- Caramel sauce (for drizzling)
- Cinnamon sticks (optional, for stirring)
- Peppermint extract (optional, a few drops)
- Crushed graham crackers (optional)
- Toffee bits (optional)
- Coconut flakes (optional, toasted or plain)
Instructions
- Make the cocoa base: Pour the milk and heavy cream into a large pot. Heat over medium heat, stirring occasionally, until warm but not boiling (steam rising, no bubbles). This takes about 5-7 minutes.
- In a separate small bowl, whisk together the cocoa powder, sugar, and salt. Slowly whisk this dry mixture into the warm milk, a little at a time, until smooth and fully incorporated.
- Remove the pot from heat and stir in the vanilla extract. Taste and adjust sweetness or salt as needed.
- Transfer the cocoa to a slow cooker set on warm, or leave it in the pot on the stove over the lowest possible heat. Stir every 10 minutes to prevent a skin from forming.
- Set up the toppings bar: Arrange small bowls on a rimmed baking sheet. Fill each bowl with a different topping. Place marshmallows and whipped cream at the front, messier toppings like candy canes and sprinkles in the back.
- Let everyone build their own cup: Give each person a mug and let them ladle their own cocoa, then visit the toppings bar.
- Serve immediately while hot and toppings are fresh. Have napkins ready.
Notes
Double the batch for more than 4 people. Crush candy canes inside a zip-top bag with a rolling pin. Use separate spoons for each topping to avoid cross-contamination. Make the cocoa base a day ahead for better flavor. Keep a damp cloth nearby for spills. For little kids, let the cocoa cool slightly before serving to avoid burns.
Nutrition
- Serving Size: 1 cup (8 ounces)
- Calories: 275
- Sugar: 28
- Sodium: 180
- Fat: 12
- Saturated Fat: 7
- Carbohydrates: 35
- Fiber: 2
- Protein: 8
Keywords: hot cocoa, hot chocolate, kids, winter, holiday, toppings bar, DIY, family-friendly


