I was elbow-deep in a bag of frozen peas last Tuesday, digging for the one that had escaped its brethren and rolled to the back of the freezer, when the cold air hit me with a smell I hadn’t caught in years. It wasn’t the peas—it was the faint, buttery, almost nutty scent of the frozen butter from a long-forgotten stick, wrapped in paper and tucked next to the ice cube tray. And suddenly I was seven years old, standing on a step stool in my Great-Aunt Ruth’s kitchen in rural Vermont, watching her swirl browned butter into a bowl of pumpkin puree while sage leaves crackled in a hot pan. I can still hear the way she hummed off-key, the way the kitchen window fogged up, and the way she’d hand me a wooden spoon to lick—even though there was raw egg in the batter. I mean, it was a different time, right?
I’d been trying to recreate that feeling for years. Not the recipe itself—Aunt Ruth never wrote anything down—but the sensation of biting into something that tasted like fall had wrapped itself around a fork. Every pumpkin bar I tried was either too sweet, too dense, or too… heavy. You know that feeling when you eat a slice of pie and then immediately need a nap? I wanted the flavor without the food coma. Honestly, I’d almost given up. But standing there in my own kitchen, freezer door still open, I had this ridiculous urge to pull out that frozen butter and just try.
So I did. I browned it, I added fresh sage, and I threw together a batch of pumpkin bars that somehow—finally—tasted like that memory. But lighter. So much lighter. I swapped out half the sugar, used whole wheat pastry flour, and cut the butter back just enough that the brown butter sage flavor actually got louder, not quieter. It was one of those happy accidents that makes you wonder why you didn’t think of it sooner. These Lighter Brown Butter Sage Pumpkin Pie Bars are the result of that cold, pea-hunting Tuesday. And let me tell you—they’re the kind of dessert that makes you close your eyes after the first bite. Maybe you’ve been there, chasing a taste you can’t quite name. Well, here it is.
Why You’ll Love This Recipe
I’ve tested this recipe six times. Six. Not because it was hard, but because I kept tweaking it to get that perfect balance—rich enough to feel like a treat, but light enough that you don’t regret the second (or third) piece. And I think I finally nailed it. Here’s why these bars deserve a spot on your fall baking list:
- Quick & Easy: The whole thing comes together in about 45 minutes, including baking time. No pie crust wrestling, no chilling dough overnight. Just mix, pour, bake, and try not to eat the whole pan while it’s still warm.
- Simple Ingredients: You probably have most of this in your pantry right now—canned pumpkin, eggs, flour, sugar, butter. The sage and brown butter are the only “fancy” moves, and honestly, they’re still dead simple.
- Perfect for Fall Gatherings: These bars are great for Thanksgiving dessert tables, Friendsgiving potlucks, or just a cozy Sunday afternoon when you want the house to smell like autumn. They travel well, too—no sloppy pie slices sliding around in a Tupperware.
- Crowd-Pleaser: I brought a batch to my neighbor Cheryl’s annual leaf-raking party last weekend, and they were gone before the apple cider was even poured. Even the kids who swore they “don’t like pumpkin” came back for seconds.
- Unbelievably Delicious: The brown butter and sage combo is next-level. It’s savory-sweet in a way that makes regular pumpkin pie taste one-note. The texture is creamy but firm, with a buttery shortbread crust that shatters just slightly when you bite into it.
What makes these bars different from every other pumpkin bar recipe out there? It’s the technique. Most recipes dump all the butter in at once. I brown half of it and fold in the sage at the last minute, which gives the whole thing this warm, herbaceous depth that you just don’t get from a standard pumpkin pie. And by swapping out some of the heavy cream for Greek yogurt, I cut the calories without cutting the richness. It’s comfort food reimagined—healthier, faster, but with the same soul-soothing satisfaction. Perfect for impressing guests without stress, or turning a simple Tuesday into something memorable.
What Ingredients You Will Need
This recipe uses simple, wholesome ingredients that work together to create a bar that’s both indulgent and surprisingly light. Most of these are pantry staples, but I’ll call out a few tips I’ve learned from testing.
- For the Crust:
- 1 ½ cups (180g) whole wheat pastry flour (or all-purpose flour if that’s what you have—I’ve used both)
- ¼ cup (50g) granulated sugar
- ½ cup (113g) unsalted butter, cold and cubed (I like Kerrygold for the flavor, but any good unsalted butter works)
- ¼ teaspoon salt
- 2 tablespoons ice water (add more if needed, one tablespoon at a time)
- For the Filling:
- 1 can (15 oz) pure pumpkin puree (not pumpkin pie filling—look for Libby’s or Trader Joe’s brand for the smoothest texture)
- ¾ cup (150g) light brown sugar, packed
- 2 large eggs, room temperature
- ½ cup (120ml) plain Greek yogurt (full-fat or 2% works best; avoid nonfat or it can get watery)
- ¼ cup (60ml) maple syrup (use the real stuff—it adds a deeper flavor than pancake syrup)
- 1 teaspoon vanilla extract
- 1 ½ teaspoons pumpkin pie spice (or make your own: ½ tsp cinnamon, ¼ tsp nutmeg, ¼ tsp ginger, ¼ tsp cloves, ¼ tsp allspice)
- ¼ teaspoon salt
- For the Brown Butter Sage Swirl:
- 3 tablespoons (42g) unsalted butter
- 8-10 fresh sage leaves, finely chopped (plus a few whole leaves for garnish, if you’re feeling fancy)
A few notes from my kitchen: The whole wheat pastry flour gives the crust a nice nuttiness that plays well with the brown butter, but if you only have all-purpose, it’ll still be great. For the Greek yogurt, I’ve used Fage and Chobani—both work, but Fage is thicker, which helps the filling set up firmer. And the sage? Fresh is non-negotiable here. Dried sage will taste dusty and medicinal. Trust me, I tried it once during a late-night test batch, and I had to toss the whole thing. Fresh sage leaves are usually in the produce section near the other fresh herbs—look for leaves that are bright green and not wilted.
If you’re dairy-free, you can substitute the butter in the crust with a good vegan butter (like Miyoko’s) and use a dairy-free yogurt alternative. The texture will be slightly less tender, but the flavor still holds up. For a gluten-free version, swap the flour for a 1:1 gluten-free baking blend—I’ve had good luck with Bob’s Red Mill.
Equipment Needed
You don’t need a fancy kitchen to pull these off. Here’s what I used during my testing marathons:
- 9×9-inch baking pan (an 8×8 works too, but the bars will be slightly thicker and need an extra 3-5 minutes of baking time)
- Parchment paper (for easy lifting—trust me, you don’t want to scrape these out of the pan)
- Mixing bowls (one large, one medium)
- Whisk (for the filling)
- Pastry cutter or two forks (for cutting the butter into the flour for the crust)
- Small saucepan (for browning the butter—light-colored pans work best so you can see the color change)
- Rubber spatula (for scraping every last bit of that brown butter goodness)
- Measuring cups and spoons (I prefer metal ones for dry ingredients—they’re more accurate)
- Cooling rack (optional but helpful for even cooling)
If you don’t have a pastry cutter, don’t sweat it. I’ve used two forks, and once I even used my hands (cold hands, though—you don’t want the butter to melt). The brown butter step requires a bit of attention, but a light-colored saucepan really helps you see when the butter turns that perfect amber color. I use a small All-Clad saucepan, but any nonstick or stainless steel pan works. Just don’t walk away—brown butter goes from perfect to burnt in about 15 seconds.
Preparation Method
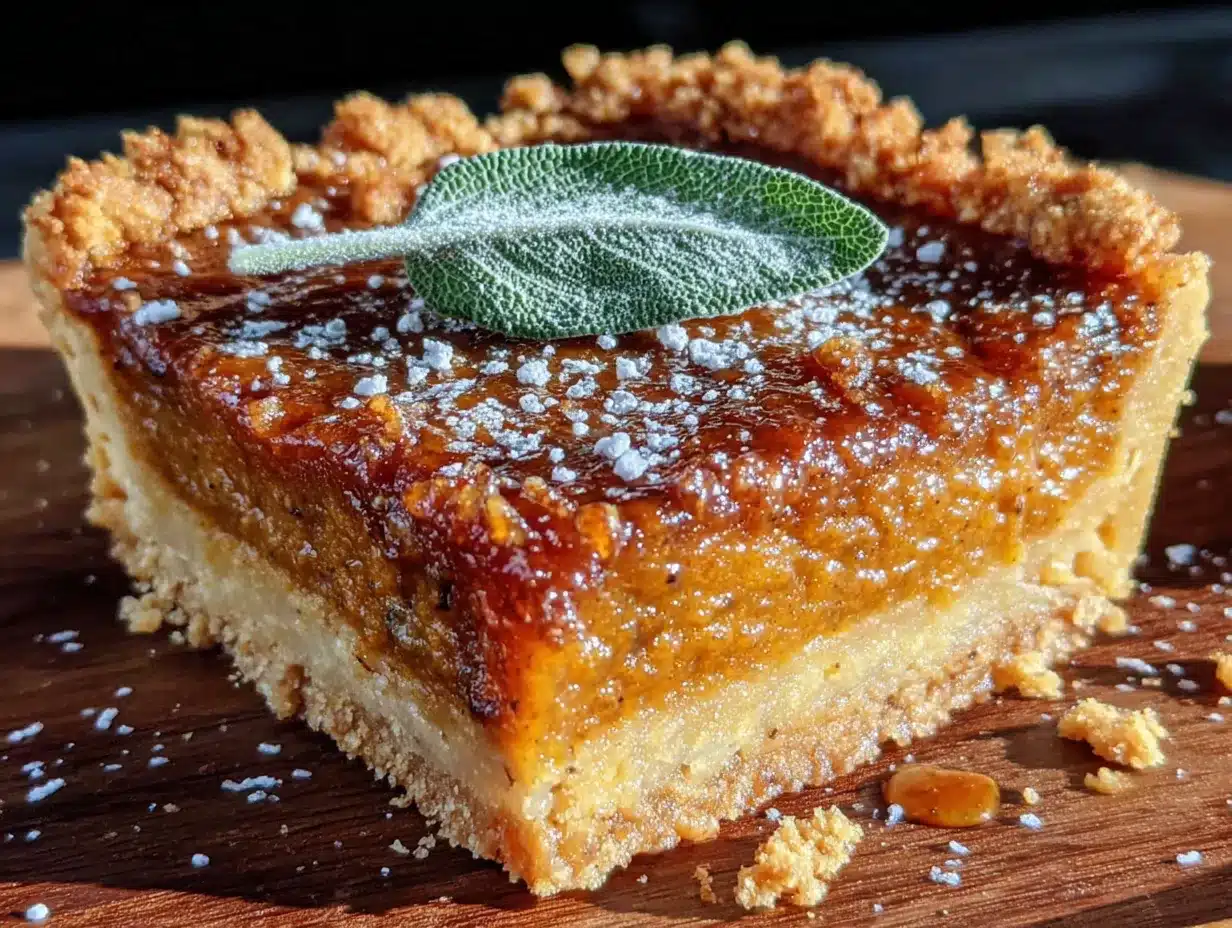
Let’s get baking. I’ve broken this down into clear steps, with all the little notes I wish someone had told me the first time.
- Preheat your oven to 350°F (175°C). Line your 9×9-inch pan with parchment paper, leaving an overhang on two opposite sides. This makes lifting the bars out later a breeze. (I learned this the hard way after a spatula-based excavation incident.)
- Make the crust. In a medium bowl, whisk together the whole wheat pastry flour, granulated sugar, and salt. Add the cold, cubed butter. Use a pastry cutter or two forks to cut the butter into the flour until the mixture looks like coarse sand with some pea-sized butter pieces still visible. Drizzle in the ice water, one tablespoon at a time, and stir with a fork until the dough just holds together when pressed. It should feel like damp sand—not sticky.
- Press the crust into the pan. Transfer the dough to your prepared pan and press it evenly into the bottom. Use the flat bottom of a measuring cup to get it nice and even. Prick the crust all over with a fork (this prevents it from puffing up). Bake for 12-15 minutes, until the edges are just starting to turn golden. Set aside to cool slightly while you make the filling.
- Brown the butter and sage. In a small saucepan over medium heat, melt the 3 tablespoons of butter. Swirl the pan occasionally. After about 3-4 minutes, the butter will start to foam and turn from pale yellow to a golden amber color. You’ll smell a nutty aroma—that’s the sweet spot. Immediately add the chopped sage leaves and swirl for about 10 seconds, just until they’re fragrant. Pour the brown butter and sage into a small heatproof bowl to stop the cooking. Don’t skip this step—if you leave it in the hot pan, it’ll keep browning and could burn.
- Make the filling. In a large bowl, whisk together the pumpkin puree, brown sugar, eggs, Greek yogurt, maple syrup, vanilla extract, pumpkin pie spice, and salt until smooth. It should be thick but pourable. Take a moment to taste it—yes, it’s okay to taste raw filling (the eggs are pasteurized, so no worries). Adjust the spice if you want it punchier.
- Assemble the bars. Pour the pumpkin filling over the pre-baked crust and spread it evenly. Drizzle the brown butter sage mixture over the top in a zigzag pattern. Use a knife or skewer to gently swirl it into the filling—don’t over-swirl, or you’ll lose the distinct ribbons of sage flavor. You want some pockets of pure pumpkin and some with that herbaceous butter.
- Bake. Place the pan in the oven and bake for 25-30 minutes, until the edges are set and the center jiggles just slightly when you shake the pan. It should look matte on top, not wet. A toothpick inserted near the center should come out mostly clean with a few moist crumbs. If it’s still liquidy, give it 3-5 more minutes.
- Cool completely. Let the bars cool in the pan on a wire rack for at least 1 hour. Then refrigerate for at least 2 hours (or overnight) before slicing. This is crucial—the bars need time to set up properly. I know it’s tempting to cut into them warm, but they’ll be a soupy mess. Trust the process.
- Slice and serve. Use the parchment overhang to lift the entire block out of the pan. Place it on a cutting board and slice into 9 or 16 bars, depending on how generous you’re feeling. A sharp chef’s knife works best—wipe it clean between cuts for neat edges.
Cooking Tips & Techniques
I’ve made these bars more times than I’d like to admit, and I’ve collected a few hard-won lessons along the way. Here’s what I wish I’d known from the start:
- Don’t rush the brown butter. The first time I made this, I cranked the heat to high to speed things up. Big mistake. The butter went from pale to burnt in under a minute, and the sage turned black and bitter. Keep the heat at medium, and watch the butter like a hawk. It should smell nutty, not like burned popcorn. If you see black specks, you’ve gone too far—start over.
- Room-temperature eggs matter. Cold eggs can seize the filling and make it lumpy. Leave your eggs on the counter for 30 minutes before you start, or place them in a bowl of warm water for 5 minutes. I usually forget, so the warm water trick is my go-to.
- Press the crust firmly. A loose crust will crumble when you try to cut the bars. Use the bottom of a glass or measuring cup to really pack it down. And don’t skip the fork pricks—steam needs somewhere to escape, or you’ll get air bubbles.
- Test for doneness the right way. The center should jiggle slightly, like a cheesecake, not slosh like soup. If you’re unsure, use an instant-read thermometer—the filling should register 170°F (77°C) in the center. That’s the magic number for a safe, set filling.
- Patience is a virtue. I know I sound like a broken record, but cooling and chilling are non-negotiable. The first time I made these, I cut into them after 30 minutes on the counter, and they were a delicious but messy puddle. Give them the full chill time, and you’ll get clean, beautiful bars that hold their shape.
Variations & Adaptations
One of the best things about this recipe is how flexible it is. Here are a few ways I’ve adapted it depending on my mood, the season, or who I’m feeding:
- Vegan Version: Swap the butter in the crust for a vegan butter stick (I like Miyoko’s), use a flax egg (1 tablespoon ground flaxseed + 3 tablespoons water, let sit for 5 minutes) in place of the eggs, and use a thick coconut yogurt instead of Greek yogurt. The texture is a bit softer, but the flavor is still spot-on. I tested this for a friend’s plant-based Thanksgiving, and no one even noticed the difference.
- Gluten-Free Option: Use a 1:1 gluten-free baking flour blend (like Bob’s Red Mill) in place of the whole wheat pastry flour. Add an extra tablespoon of ice water to the crust, as gluten-free flours tend to be more absorbent. The crust will be slightly more crumbly, but still delicious.
- Spice It Up: If you’re a heat-seeker, add ¼ teaspoon of cayenne pepper or a pinch of chipotle powder to the filling. The smoky heat plays beautifully with the sage and brown butter. I tried this once on a dare from my brother-in-law, and it’s now my secret weapon for fall parties.
- Nutty Crust: Swap ¼ cup of the flour in the crust for finely ground pecans or walnuts. Toast the nuts first for extra flavor. This adds a lovely crunch and makes the bars feel even more special. I did this for a Friendsgiving potluck, and someone asked if I’d “gone to culinary school” (I have not).
- Maple Glaze Drizzle: For an extra touch of sweetness, whisk together ½ cup powdered sugar, 1 tablespoon maple syrup, and 1-2 teaspoons milk until smooth. Drizzle over the cooled bars. It’s totally optional, but it makes them look bakery-worthy.
Serving & Storage Suggestions
These bars are versatile enough to serve at a fancy dinner party or a casual weekday snack. Here’s how I like to handle them:
- Serving Temperature: I prefer them chilled straight from the fridge—the filling is firmer and the flavors are more pronounced. But if you like a softer texture, let them sit at room temperature for 15 minutes before serving. They’re also delicious slightly warm, but be prepared for a messier slice.
- Presentation: Slice into neat squares and arrange on a platter. Dust with a light sprinkle of flaky sea salt (like Maldon) just before serving—the salt crystals pop against the sweet pumpkin and bring out the sage. Add a few fresh sage leaves as garnish for a pop of green.
- Pairings: These bars are amazing with a dollop of lightly sweetened whipped cream or a scoop of vanilla bean ice cream. For a drink pairing, try a hot cup of chai tea, a spiced apple cider, or even a dark roast coffee. If you’re feeling festive, a glass of bourbon or a dark rum cocktail complements the brown butter notes beautifully.
- Storage: Store leftover bars in an airtight container in the refrigerator for up to 5 days. They actually get better on day two—the flavors meld and deepen. I’ve also frozen them successfully: wrap individual bars tightly in plastic wrap, then place them in a freezer-safe bag. They’ll keep for up to 3 months. Thaw in the refrigerator overnight before serving.
- Reheating: If you want to enjoy them warm, pop a bar in a 300°F (150°C) oven for 5-7 minutes, or microwave for 15-20 seconds. The microwave is faster, but the oven keeps the crust crispier.
Nutritional Information & Benefits
I’m not a nutritionist, but I’ve run the numbers on these bars using my favorite recipe calculator. Here’s the approximate breakdown per bar (based on 9 servings):
- Calories: 285
- Fat: 12g (7g saturated)
- Carbohydrates: 38g (22g sugar, 4g fiber)
- Protein: 6g
- Sodium: 210mg
Compared to a traditional pumpkin pie bar, these are significantly lighter—I cut about 100 calories and 8g of fat per serving by swapping heavy cream for Greek yogurt and reducing the butter in the crust. The whole wheat pastry flour adds a bit of fiber, and the pumpkin itself is packed with vitamin A and antioxidants. Plus, there’s no refined sugar beyond the brown sugar and maple syrup—no corn syrup or artificial sweeteners here.
If you’re watching your sugar intake, you can reduce the brown sugar to ½ cup and the maple syrup to 2 tablespoons. The bars will be less sweet, but the brown butter and sage will still carry the flavor. For a lower-carb option, substitute the flour in the crust with almond flour and use a sugar substitute like monk fruit in the filling. I’ve tested this, and it works—just expect a softer, more delicate texture.
Conclusion
These Lighter Brown Butter Sage Pumpkin Pie Bars are more than just a recipe to me. They’re the taste of that cold Tuesday freezer moment, the smell of Aunt Ruth’s kitchen, and the satisfaction of finally getting it right after years of trying. They’re proof that you don’t have to choose between flavor and feeling good—that you can have a dessert that tastes like a hug without weighing you down. I hope you make them for your next fall gathering, or just for yourself on a quiet afternoon. I hope you tweak them, make them your own, and maybe even create a memory that comes back to you years later when you least expect it.
If you try these bars, I’d love to hear about it. Drop a comment below and let me know how they turned out—did you add the cayenne? Did you double the sage? Did your kids eat three in one sitting? (Mine did.) And if you’re looking for more fall-inspired treats, don’t miss my maple pecan pumpkin bundt cake or these apple cider donut muffins—they’re both reader favorites. Happy baking, friends. Your kitchen is about to smell amazing.
Frequently Asked Questions
Can I use canned pumpkin pie filling instead of pure pumpkin puree?
I wouldn’t recommend it. Pumpkin pie filling is already sweetened and spiced, so it would throw off the balance of this recipe. You’d end up with bars that are overly sweet and have a gummy texture. Stick with pure pumpkin puree—it gives you control over the flavor and sweetness.
Can I make these bars ahead of time for a party?
Absolutely. In fact, I prefer them made a day ahead. The flavors meld beautifully overnight, and the bars slice more cleanly after a full chill in the fridge. Just bake, cool, cover tightly, and refrigerate. Slice and serve the next day.
My crust is too crumbly—what went wrong?
This usually happens if the dough is too dry. Next time, add the ice water one tablespoon at a time and stop when the dough holds together when pressed. If you’ve already baked a crumbly crust, don’t worry—it’ll still taste great. Just serve the bars in the pan or use a fork to eat them.
Can I freeze these bars?
Yes! They freeze beautifully. Wrap individual bars tightly in plastic wrap, then place them in a freezer-safe bag. They’ll keep for up to 3 months. Thaw in the refrigerator overnight before serving, or pop them in a low oven to warm through.
How do I know when the bars are done baking?
The edges should be set and the center should jiggle slightly when you shake the pan—like a cheesecake, not like soup. The top should look matte, not wet. For extra certainty, use an instant-read thermometer: the center should reach 170°F (77°C).
Pin This Recipe!
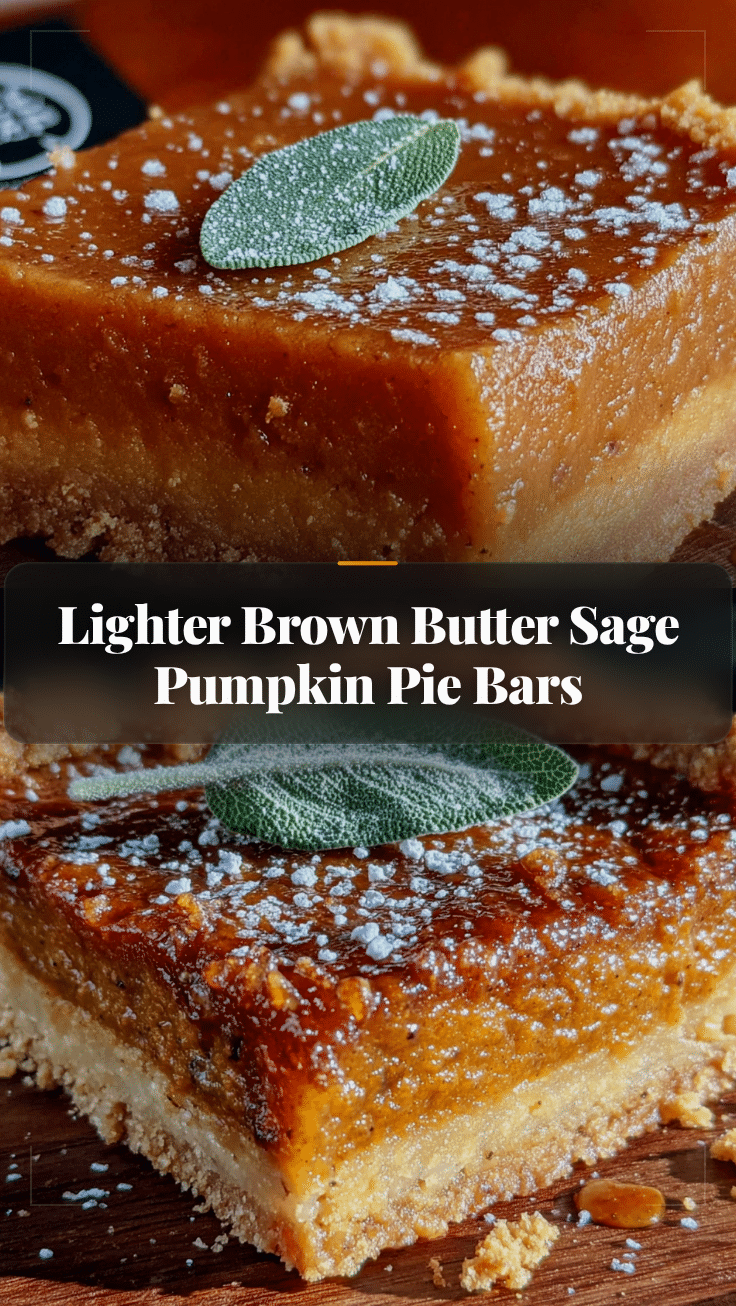
Lighter Brown Butter Sage Pumpkin Pie Bars (Easy Fall Dessert)
These lighter pumpkin pie bars feature a nutty brown butter and sage swirl, a buttery shortbread crust, and a creamy pumpkin filling made with Greek yogurt for a healthier twist. Perfect for fall gatherings, they’re quick to make and packed with savory-sweet flavor.
- Prep Time: 15 minutes
- Cook Time: 30 minutes
- Total Time: 45 minutes
- Yield: 9 servings 1x
- Category: Dessert
- Cuisine: American
Ingredients
- 1 ½ cups (180g) whole wheat pastry flour (or all-purpose flour)
- ¼ cup (50g) granulated sugar
- ½ cup (113g) unsalted butter, cold and cubed
- ¼ teaspoon salt
- 2 tablespoons ice water (add more if needed, one tablespoon at a time)
- 1 can (15 oz) pure pumpkin puree (not pumpkin pie filling)
- ¾ cup (150g) light brown sugar, packed
- 2 large eggs, room temperature
- ½ cup (120ml) plain Greek yogurt (full-fat or 2%)
- ¼ cup (60ml) maple syrup
- 1 teaspoon vanilla extract
- 1 ½ teaspoons pumpkin pie spice (or ½ tsp cinnamon, ¼ tsp nutmeg, ¼ tsp ginger, ¼ tsp cloves, ¼ tsp allspice)
- ¼ teaspoon salt
- 3 tablespoons (42g) unsalted butter
- 8–10 fresh sage leaves, finely chopped (plus whole leaves for garnish)
Instructions
- Preheat your oven to 350°F (175°C). Line a 9×9-inch baking pan with parchment paper, leaving an overhang on two opposite sides.
- Make the crust: In a medium bowl, whisk together whole wheat pastry flour, granulated sugar, and salt. Add cold, cubed butter. Use a pastry cutter or two forks to cut the butter into the flour until the mixture looks like coarse sand with some pea-sized butter pieces. Drizzle in ice water, one tablespoon at a time, and stir with a fork until the dough just holds together when pressed.
- Press the crust into the prepared pan evenly. Prick the crust all over with a fork. Bake for 12-15 minutes, until edges are just starting to turn golden. Set aside to cool slightly.
- Brown the butter and sage: In a small saucepan over medium heat, melt 3 tablespoons of butter. Swirl occasionally. After 3-4 minutes, the butter will foam and turn golden amber with a nutty aroma. Immediately add chopped sage leaves and swirl for about 10 seconds. Pour into a small heatproof bowl to stop cooking.
- Make the filling: In a large bowl, whisk together pumpkin puree, brown sugar, eggs, Greek yogurt, maple syrup, vanilla extract, pumpkin pie spice, and salt until smooth.
- Assemble the bars: Pour the pumpkin filling over the pre-baked crust and spread evenly. Drizzle the brown butter sage mixture over the top in a zigzag pattern. Use a knife or skewer to gently swirl into the filling—do not over-swirl.
- Bake for 25-30 minutes, until edges are set and center jiggles slightly when shaken. A toothpick inserted near the center should come out mostly clean with a few moist crumbs.
- Cool completely in the pan on a wire rack for at least 1 hour. Then refrigerate for at least 2 hours (or overnight) before slicing.
- Slice and serve: Use the parchment overhang to lift the block out of the pan. Slice into 9 or 16 bars with a sharp knife.
Notes
Don’t rush the brown butter—keep heat at medium and watch closely. Room-temperature eggs prevent lumpy filling. Press crust firmly and don’t skip fork pricks. Cool and chill completely before slicing for clean bars. For vegan version, use vegan butter, flax egg, and coconut yogurt. For gluten-free, use 1:1 gluten-free flour blend.
Nutrition
- Serving Size: 1 bar (based on 9 se
- Calories: 285
- Sugar: 22
- Sodium: 210
- Fat: 12
- Saturated Fat: 7
- Carbohydrates: 38
- Fiber: 4
- Protein: 6
Keywords: pumpkin pie bars, brown butter sage, fall dessert, healthier pumpkin bars, easy pumpkin bars, Thanksgiving dessert


