I was standing in the spice aisle of our local grocery store last Tuesday when it hit me — that warm, almost nutty smell coming from the little bakery section near the checkout. And suddenly I was seven years old, sitting at my Aunt Margie’s kitchen table, watching her brown butter on the stove for the first time. She’d let me stir it, and I remember thinking the color change was like magic, like watching liquid gold turn into something even better. I didn’t even know what snickerdoodles were back then, but that smell? It stuck with me.
Aunt Margie passed away a few years ago, and I’ve been chasing that feeling ever since. You know that thing where you taste something and it’s not just the flavor, it’s the whole moment — the cracked vinyl chair you were sitting on, the way the afternoon light came through the kitchen window, the sound of her humming while she worked? That’s what I wanted to recreate. Not just a cookie, but a feeling. Something that makes you slow down and breathe.
Honestly, it took me a few tries to get these right. I burned the butter twice (the smoke alarm is very sensitive, let me tell you), and the first batch came out flat and sad. But when I finally nailed it — that perfect balance of nutty brown butter, warm pumpkin, and a cinnamon-sugar coating that cracks just a little when you bite into it — I knew I had something special. These Cozy Brown Butter Pumpkin Snickerdoodle Cookies aren’t just another fall recipe. They’re the cookie I make when I need to feel close to her, and they’re the cookie I make when I want my own kids to have that same memory someday.
Why You’ll Love This Recipe
These aren’t your average snickerdoodles, I promise you that. After testing this recipe about six times (my family was very patient, bless them), I can confidently say these are the best pumpkin snickerdoodles I’ve ever made. Here’s why they’re worth every minute in the kitchen:
- Quick & Easy : From start to finish, you’re looking at about 30 minutes. The dough comes together fast, and there’s no chilling required — which honestly surprised me, because I usually expect pumpkin cookies to be fussy.
- Simple Ingredients : You probably have most of this in your pantry already. Butter, sugar, flour, pumpkin puree, and spices. No weird specialty ingredients that you’ll use once and then forget about.
- Perfect for Family Baking : My kids helped me roll these into balls and coat them in the cinnamon-sugar mixture. It’s messy in the best way, and it’s the kind of activity that makes everyone happy.
- Crowd-Pleaser : I brought these to a neighborhood potluck last month, and they were gone in twenty minutes. Someone actually asked me if I’d consider selling them. (I won’t, but it was flattering.)
- Unbelievably Delicious : The brown butter adds this deep, nutty richness that pairs perfectly with the pumpkin and warm spices. The texture is soft and chewy in the middle with slightly crisp edges — exactly what a snickerdoodle should be.
What makes these different from every other pumpkin cookie recipe out there? It’s the brown butter technique. I know it sounds fancy, but honestly, it’s just butter cooked until it turns golden and smells like toasted nuts. That one step transforms the whole cookie, giving it a complexity that regular butter just can’t match. And the pumpkin keeps them incredibly moist without making them cakey. It’s the best of both worlds.
Look, I’m not saying these cookies will change your life. But I am saying that when you take that first bite and the cinnamon-sugar coating cracks a little, and you get that warm, nutty, pumpkin-spiced flavor — you might close your eyes for a second. And that’s really what good food is supposed to do, isn’t it?
What Ingredients You Will Need
This recipe uses simple, wholesome ingredients that come together to create something truly special. Most of these are pantry staples, and the ones that aren’t are easy to find at any grocery store. Here’s what you’ll need:
For the Cookies
- 1 cup (2 sticks) unsalted butter — I recommend using a good quality butter like Kerrygold or Land O’Lakes for the best brown butter flavor. The higher fat content makes a real difference.
- 1 cup (200g) granulated sugar — Regular white sugar works perfectly here. It helps create that slightly crisp edge.
- 1/2 cup (100g) packed light brown sugar — Adds moisture and a touch of molasses flavor that pairs beautifully with the pumpkin. (You can use dark brown sugar if that’s what you have, but the flavor will be a bit stronger.)
- 1/2 cup (120g) pumpkin puree — Make sure you’re using pure pumpkin puree, not pumpkin pie filling. The pie filling has added sugar and spices that will throw off the balance. I like Libby’s brand, but any 100% pure pumpkin works.
- 1 large egg — Room temperature is best, but honestly, if you forget to take it out of the fridge, it’ll still work fine. I’ve done it both ways.
- 1 teaspoon vanilla extract — Pure vanilla extract adds a warmth that artificial vanilla just can’t match. I know it’s pricier, but it really does make a difference here.
- 2 cups (250g) all-purpose flour — Spoon and level your flour for the most accurate measurement. Scooping directly from the bag can pack in too much flour and make your cookies dry.
- 1 teaspoon baking soda — This helps the cookies spread just enough while staying soft in the middle.
- 1/2 teaspoon cream of tartar — This is the secret ingredient that gives snickerdoodles their signature tangy flavor. Don’t skip it! (If you don’t have it, you can substitute with 1 teaspoon of lemon juice, but the texture will be slightly different.)
- 1/2 teaspoon salt — I use fine sea salt. It balances the sweetness and enhances all the warm spices.
- 1 teaspoon ground cinnamon — The backbone of the spice blend. I prefer Saigon cinnamon for its stronger, sweeter flavor.
- 1/2 teaspoon ground nutmeg — Freshly grated is amazing if you have it, but pre-ground works perfectly fine.
- 1/2 teaspoon ground ginger — Adds a little warmth and depth. Don’t skip it — it’s subtle but important.
- 1/4 teaspoon ground cloves — Just a tiny bit goes a long way. It rounds out the pumpkin spice flavor beautifully.
For the Cinnamon-Sugar Coating
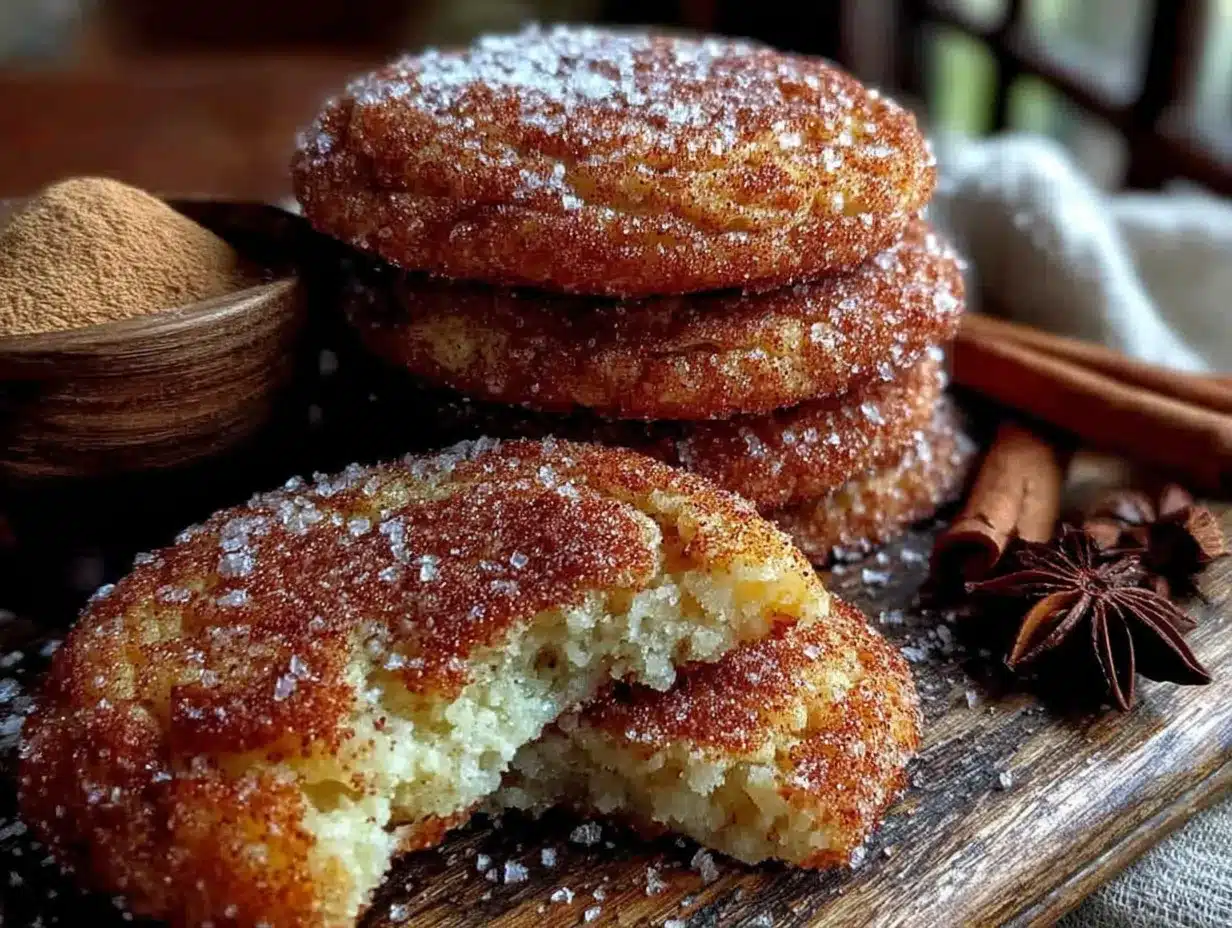
- 1/4 cup (50g) granulated sugar — For that crackly, sparkly coating.
- 1 tablespoon ground cinnamon — I like to use a little more cinnamon than traditional snickerdoodle recipes because it pairs so well with the pumpkin.
One thing I’ve learned from making these over and over: the quality of your pumpkin puree matters more than you’d think. Some brands are more watery than others, which can affect the texture of your dough. If your pumpkin puree looks a little loose, you can blot it with a paper towel before adding it to the butter mixture. It’s a small step that makes a big difference.
Equipment Needed
You don’t need a fancy kitchen to make these cookies. Here’s what I use and what you can substitute if you don’t have it:
- Large skillet or saucepan — For browning the butter. I use a light-colored stainless steel pan because it makes it easier to see the color change. (I learned this the hard way after burning butter in a dark nonstick pan twice.)
- Mixing bowls — One medium and one large. Nothing fancy — I’ve used the same set of Pyrex bowls for fifteen years.
- Whisk — For combining the dry ingredients. A fork works in a pinch.
- Electric hand mixer or stand mixer — You can definitely mix these by hand with a wooden spoon, but a mixer makes it easier to cream the butter and sugar properly. (I’ve done both — the mixer is faster, but hand-mixing is totally doable.)
- Baking sheets — Two standard half-sheet pans work well. If you only have one, just let it cool completely between batches.
- Parchment paper or silicone baking mat — This prevents sticking and makes cleanup so much easier. I prefer parchment paper because it’s disposable, but silicone mats work great too.
- Cookie scoop or tablespoon — For consistent-sized cookies. I use a 1.5-tablespoon scoop, but a regular spoon works fine.
- Cooling rack — Helps the cookies cool evenly and prevents soggy bottoms. If you don’t have one, you can transfer them to a plate lined with paper towels.
My best advice? Invest in a good cookie scoop. I bought a cheap one from the grocery store years ago, and it broke after three uses. I finally splurged on a nice OXO one, and it’s still going strong. Sometimes spending a little more upfront saves you money in the long run.
Preparation Method
Alright, let’s make some cookies! I’ve broken this down into clear steps so you can follow along easily. Take your time with the brown butter — it’s the most important part, and rushing it will only lead to burnt butter and sad cookies.
Step 1: Brown the Butter
Place the 1 cup of unsalted butter in a light-colored skillet or saucepan over medium heat. Let it melt completely, stirring occasionally with a spatula or wooden spoon. Once melted, the butter will start to foam and bubble. Keep stirring gently — you’ll see little brown specks forming at the bottom of the pan. This is the milk solids toasting, and it’s exactly what you want. The butter will smell nutty and fragrant when it’s done. This takes about 5-7 minutes. As soon as it turns a golden amber color and smells like toasted nuts, remove it from the heat immediately and pour it into a heatproof bowl. Let it cool for about 10 minutes. (Don’t leave it in the hot pan, or it’ll keep cooking and could burn.)
Step 2: Mix the Wet Ingredients
In a large mixing bowl, combine the cooled brown butter with 1 cup granulated sugar and 1/2 cup packed light brown sugar. Beat with an electric mixer on medium speed for about 2 minutes, until the mixture looks smooth and slightly lighter in color. Add the 1/2 cup pumpkin puree, 1 large egg, and 1 teaspoon vanilla extract. Mix on low speed until everything is combined. The mixture might look a little separated at first — that’s normal. Keep mixing until it comes together into a smooth, glossy batter.
Step 3: Combine the Dry Ingredients
In a separate medium bowl, whisk together 2 cups all-purpose flour, 1 teaspoon baking soda, 1/2 teaspoon cream of tartar, 1/2 teaspoon salt, 1 teaspoon ground cinnamon, 1/2 teaspoon ground nutmeg, 1/2 teaspoon ground ginger, and 1/4 teaspoon ground cloves. Make sure everything is evenly distributed — nobody wants a pocket of baking soda in their cookie.
Step 4: Combine Wet and Dry
Gradually add the dry ingredients to the wet mixture, mixing on low speed or folding with a spatula. Mix just until the flour disappears — overmixing will make the cookies tough. The dough will be soft and slightly sticky, which is exactly what you want. If it feels too wet to handle, you can refrigerate it for 15 minutes, but honestly, I’ve never needed to.
Step 5: Prepare the Coating
In a small bowl, stir together 1/4 cup granulated sugar and 1 tablespoon ground cinnamon. Set aside.
Step 6: Shape and Coat the Cookies
Preheat your oven to 350°F (175°C). Line two baking sheets with parchment paper. Using a cookie scoop or a tablespoon, scoop out portions of dough (about 1.5 tablespoons each). Roll each portion into a smooth ball between your palms. Then roll each ball in the cinnamon-sugar mixture until fully coated. Place them on the prepared baking sheets, spacing them about 2 inches apart — they will spread a little.
Step 7: Bake
Bake for 10-12 minutes, or until the edges are set and the tops look slightly cracked. The centers will still look a little soft and puffy — that’s good. They’ll continue to set as they cool. If you overbake them, they’ll be dry, so keep an eye on them. Let the cookies cool on the baking sheet for 5 minutes before transferring them to a wire rack to cool completely. This resting time is important — it lets them firm up without becoming hard.
One thing I always tell people: don’t be tempted to flatten the dough balls before baking. They’ll spread naturally in the oven, and flattening them will make the cookies too thin and crispy. Trust the process!
Cooking Tips & Techniques
After making these cookies more times than I care to count, I’ve picked up a few tricks that make the process smoother and the results more consistent. Here’s what I’ve learned:
Watch the butter like a hawk. I know I’ve said this already, but it’s worth repeating. Brown butter can go from perfect to burnt in about 30 seconds. The first time I tried this, I walked away to answer my phone, and by the time I came back, the butter was smoking and smelled like a campfire. Not great. Stay at the stove, keep stirring, and watch for that amber color and nutty aroma.
Use room temperature ingredients. I know, I know — everyone says this. But it really does matter here. A cold egg can seize the brown butter and make the dough lumpy. If you forget to take your egg out of the fridge, just place it in a bowl of warm water for 5 minutes. Works like a charm.
Don’t overmix the dough. This is probably the most common mistake I see with cookie recipes. Once you add the flour, mix just until it’s incorporated. Overmixing develops the gluten and makes your cookies tough and cakey instead of soft and chewy.
Test your oven temperature. I’ve had ovens that run hot and ovens that run cold, and they all lie about their actual temperature. An oven thermometer is a cheap investment that pays off in consistently baked cookies. If your cookies are browning too fast on the bottom, your oven is probably too hot.
Batch baking strategy. If you’re making a double batch (and honestly, you should), bake one sheet at a time on the center rack. Baking two sheets at once can lead to uneven cooking. I learned this the hard way when one batch came out perfect and the other was still raw in the middle.
Let them cool properly. I know it’s tempting to grab a cookie right out of the oven, but they need that 5-minute rest on the baking sheet to set properly. If you try to move them too soon, they’ll fall apart. Trust me — I’ve made that mistake more than once.
Variations & Adaptations
One of the best things about this recipe is how adaptable it is. I’ve tried several variations over the past few months, and here are my favorites:
Gluten-Free Version: Swap the all-purpose flour with a 1:1 gluten-free baking flour blend. I’ve had good luck with Bob’s Red Mill and King Arthur brands. The texture will be slightly more tender, but they’re still delicious. Just make sure your blend contains xanthan gum for structure.
Dairy-Free Option: Use vegan butter for the brown butter step. I’ve tried this with Miyoko’s and Earth Balance, and both worked well. Just keep in mind that vegan butter browns a little differently — it takes a bit longer and doesn’t get as dark. Watch it carefully.
Spice It Up: If you love a stronger pumpkin spice flavor, add an extra 1/2 teaspoon of cinnamon and a pinch of cardamom to the dry ingredients. I tried this once when I was feeling adventurous, and it was amazing. The cardamom adds this floral, almost citrusy note that’s really lovely.
Add Some Texture: Fold in 1/2 cup of chopped pecans or walnuts after mixing the dough. The crunch is a nice contrast to the soft cookie. I did this for a holiday cookie exchange, and they were a hit.
Make Them Smaller: If you’re baking for a crowd or want more cookies, use a smaller scoop (about 1 tablespoon) and bake for 8-10 minutes. You’ll get about 36 cookies instead of 24.
Pumpkin-Free Version: Believe it or not, you can leave out the pumpkin puree and increase the butter by 2 tablespoons. The cookies won’t have that pumpkin flavor, but the brown butter and spices will still shine. They’re basically elevated snickerdoodles.
My personal favorite variation? I add a teaspoon of orange zest to the wet ingredients. It brightens up the pumpkin flavor and makes the cookies taste even more autumnal. Just make sure you zest the orange before juicing it — trust me, it’s much harder the other way around.
Serving & Storage Suggestions
These cookies are best served slightly warm, when the edges are still a little crisp and the center is soft and tender. Let them cool on the baking sheet for 5 minutes, then transfer to a wire rack. If you can wait another 5 minutes after that, you’ll be rewarded with the perfect texture.
For a cozy fall presentation, arrange the cookies on a wooden board or a pretty plate and dust them with a little extra cinnamon sugar. They pair beautifully with a cup of hot apple cider, a chai latte, or even a cold glass of milk. I’ve also been known to crumble one over vanilla ice cream for a quick dessert — it’s dangerous how good that is.
Storage Instructions: Store the cookies in an airtight container at room temperature for up to 5 days. Place a slice of bread in the container to keep them soft — the cookies will absorb the moisture from the bread, and it works like magic. (Just replace the bread slice every couple of days.)
Freezer Instructions: These cookies freeze beautifully. You can freeze the baked cookies in a single layer on a baking sheet, then transfer them to a freezer-safe bag for up to 3 months. To thaw, let them sit at room temperature for about 30 minutes. You can also freeze the unbaked dough balls — just place them on a baking sheet, freeze until solid, then transfer to a bag. When you’re ready to bake, add 2-3 minutes to the baking time.
Reheating Tips: If you want that fresh-from-the-oven experience, pop a cookie in the microwave for 10 seconds. For a crispier edge, reheat in a 300°F oven for 3-4 minutes.
One thing I’ve noticed: these cookies actually get better on day two. The flavors meld together, and the pumpkin and spices become more pronounced. So don’t worry if you have leftovers — they’ll still be delicious.
Nutritional Information & Benefits
Let’s be real — these are cookies, not health food. But they do have a few redeeming qualities worth mentioning. Here’s the approximate nutritional breakdown per cookie (based on 24 cookies):
| Nutrient | Amount per Cookie |
|---|---|
| Calories | 175 |
| Total Fat | 9g |
| Saturated Fat | 5g |
| Carbohydrates | 23g |
| Sugar | 14g |
| Protein | 2g |
| Fiber | 1g |
| Sodium | 95mg |
The pumpkin puree adds vitamin A and fiber, which is a nice bonus. The cinnamon and other spices have antioxidant properties and can help regulate blood sugar. And the brown butter? Well, it adds flavor, and that’s good for the soul.
Dietary Considerations: This recipe contains gluten, dairy, and eggs. For gluten-free or dairy-free options, check the variations section above. These cookies are nut-free as written, but if you add nuts, be sure to inform anyone with allergies.
My take on this? Life is too short to skip dessert. Enjoy these cookies in moderation, savor every bite, and don’t stress about the numbers. Food is about joy, connection, and making memories — and these cookies deliver on all three.
Conclusion
These Cozy Brown Butter Pumpkin Snickerdoodle Cookies are everything I love about fall baking. They’re warm, comforting, and full of flavor — the kind of cookie that makes you want to curl up with a blanket and a good book. The brown butter adds a depth that regular snickerdoodles just can’t match, and the pumpkin keeps them soft and tender without being cakey.
What I love most about this recipe is how forgiving it is. Even if you’re not a confident baker, these cookies turn out well. The dough is easy to work with, the instructions are straightforward, and the results are consistently delicious. Plus, they make your kitchen smell absolutely incredible — like a pumpkin spice candle, but better.
I’d love to hear how these turn out for you! Did you try any of the variations? Did your family love them as much as mine does? Leave a comment below and let me know. And if you have your own twist on this recipe, please share it — I’m always looking for new ideas to try.
Until next time, happy baking, and don’t forget to save one for yourself before they disappear!
Frequently Asked Questions
Can I use pumpkin pie filling instead of pumpkin puree?
No, I don’t recommend it. Pumpkin pie filling has added sugar, spices, and sometimes thickeners that will throw off the balance of this recipe. Stick with 100% pure pumpkin puree for the best results. Libby’s is my go-to brand, but any store brand works fine as long as it’s pure pumpkin.
Why did my cookies turn out flat?
Flat cookies usually happen for one of three reasons: your butter was too warm when you mixed the dough, you used too much sugar, or your baking soda is old. Make sure your brown butter has cooled to room temperature before mixing, and check the expiration date on your baking soda. If it’s been sitting in your pantry for more than six months, it might be time for a fresh box.
Can I make the dough ahead of time?
Absolutely! You can prepare the dough, shape it into balls, and refrigerate them for up to 48 hours before baking. Just cover the dough balls tightly with plastic wrap. When you’re ready to bake, roll them in the cinnamon-sugar coating and add 1-2 minutes to the baking time. The flavors actually develop more if the dough rests overnight.
How do I know when the brown butter is done?
Look for three signs: the butter will turn a golden amber color, you’ll see tiny brown specks forming at the bottom of the pan, and it will smell nutty and fragrant — like toasted hazelnuts. The whole process takes about 5-7 minutes over medium heat. Don’t walk away from the stove, and remove it from the heat as soon as it reaches that color.
Can I double this recipe?
Yes, and I highly recommend it! These cookies freeze beautifully, so a double batch means you’ll have cookies on hand for weeks. Just make sure you brown the butter in batches — trying to brown 2 cups of butter at once can lead to uneven cooking. And bake one sheet at a time for the most consistent results.
Pin This Recipe!
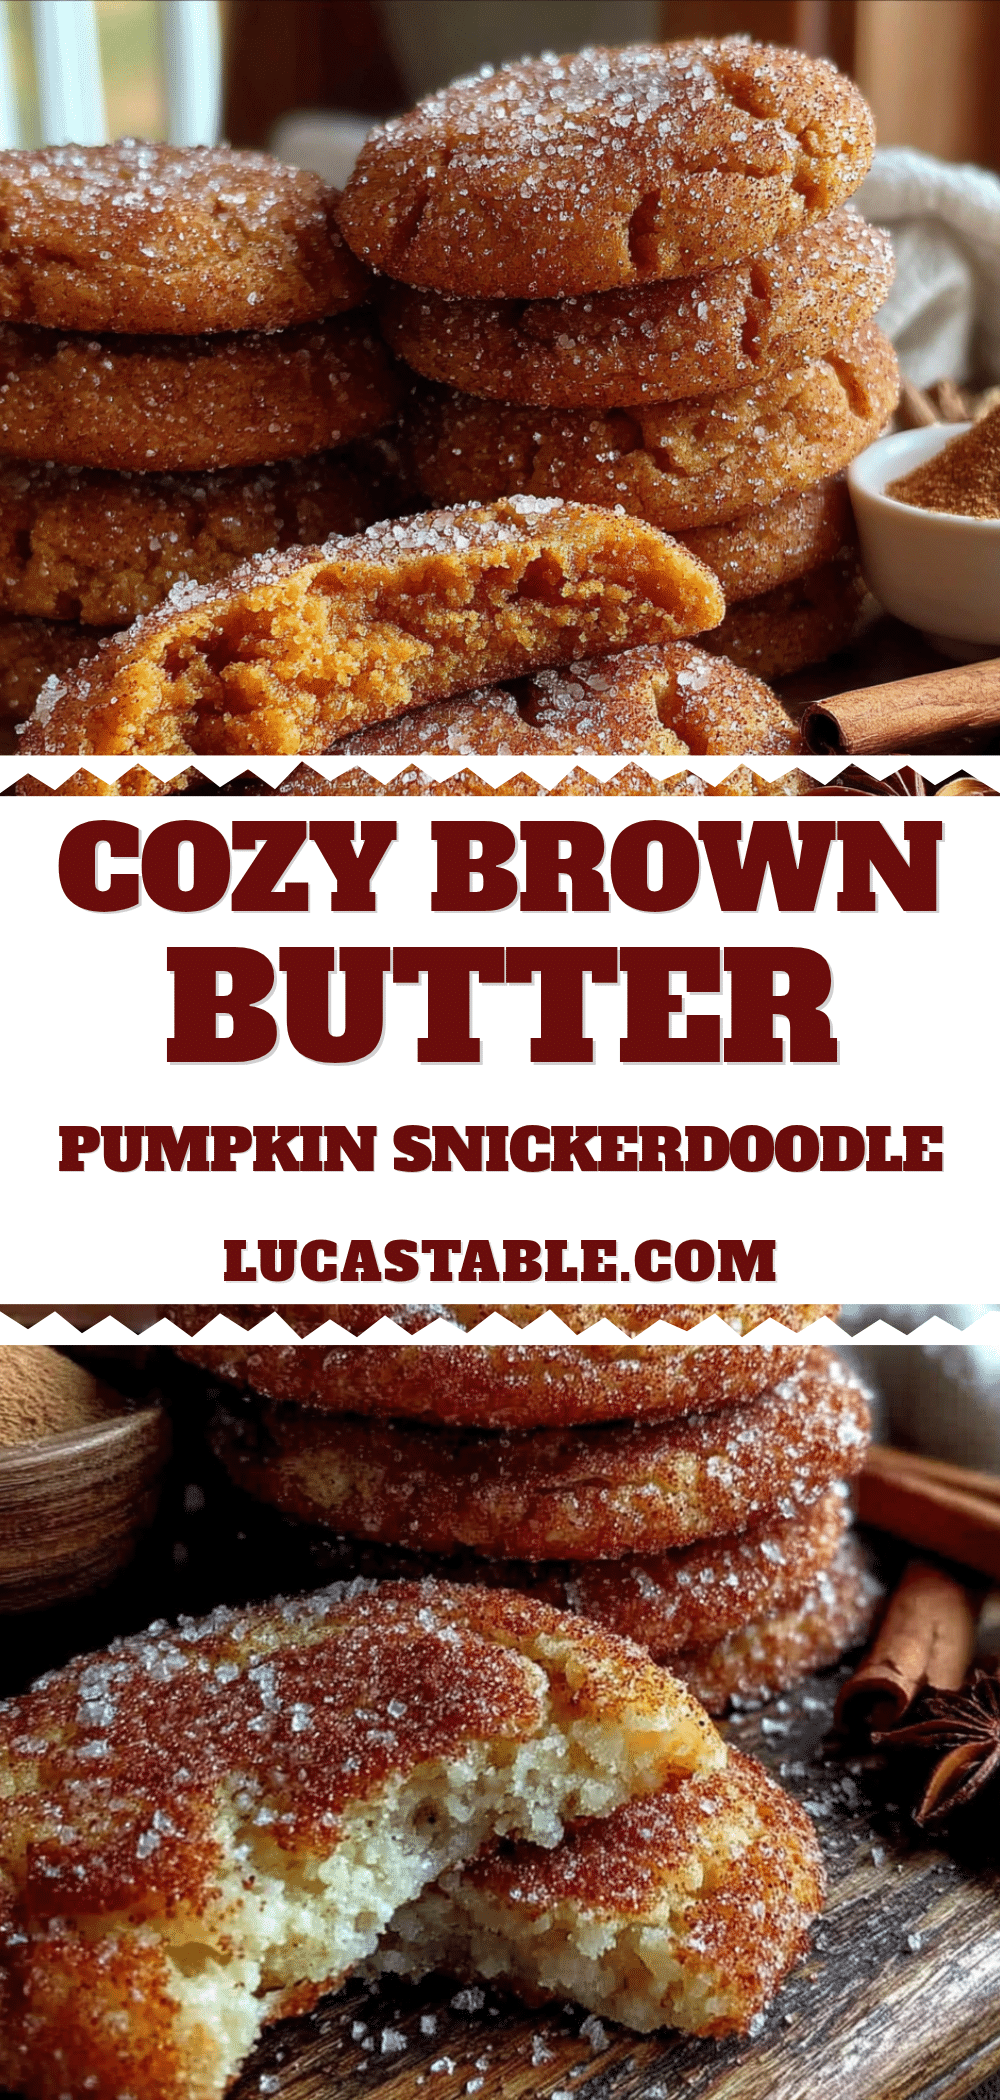
Cozy Brown Butter Pumpkin Snickerdoodle Cookies
These Cozy Brown Butter Pumpkin Snickerdoodle Cookies combine nutty brown butter, warm pumpkin, and a cinnamon-sugar coating for a soft, chewy fall treat that’s quick and easy to make.
- Prep Time: 15 minutes
- Cook Time: 12 minutes
- Total Time: 27 minutes
- Yield: 24 cookies 1x
- Category: Dessert
- Cuisine: American
Ingredients
- 1 cup (2 sticks) unsalted butter
- 1 cup (200g) granulated sugar
- 1/2 cup (100g) packed light brown sugar
- 1/2 cup (120g) pumpkin puree
- 1 large egg
- 1 teaspoon vanilla extract
- 2 cups (250g) all-purpose flour
- 1 teaspoon baking soda
- 1/2 teaspoon cream of tartar
- 1/2 teaspoon salt
- 1 teaspoon ground cinnamon
- 1/2 teaspoon ground nutmeg
- 1/2 teaspoon ground ginger
- 1/4 teaspoon ground cloves
- 1/4 cup (50g) granulated sugar (for coating)
- 1 tablespoon ground cinnamon (for coating)
Instructions
- Brown the butter: Place 1 cup unsalted butter in a light-colored skillet or saucepan over medium heat. Melt completely, stirring occasionally. Continue cooking until butter turns golden amber and smells nutty, about 5-7 minutes. Remove from heat immediately and pour into a heatproof bowl. Let cool for 10 minutes.
- Mix wet ingredients: In a large bowl, combine cooled brown butter, 1 cup granulated sugar, and 1/2 cup packed light brown sugar. Beat with an electric mixer on medium speed for 2 minutes until smooth. Add 1/2 cup pumpkin puree, 1 large egg, and 1 teaspoon vanilla extract. Mix on low until combined and smooth.
- Combine dry ingredients: In a separate medium bowl, whisk together 2 cups all-purpose flour, 1 teaspoon baking soda, 1/2 teaspoon cream of tartar, 1/2 teaspoon salt, 1 teaspoon ground cinnamon, 1/2 teaspoon ground nutmeg, 1/2 teaspoon ground ginger, and 1/4 teaspoon ground cloves.
- Combine wet and dry: Gradually add dry ingredients to wet mixture, mixing on low or folding with a spatula until just combined. Dough will be soft and slightly sticky.
- Prepare coating: In a small bowl, stir together 1/4 cup granulated sugar and 1 tablespoon ground cinnamon.
- Shape and coat: Preheat oven to 350°F (175°C). Line two baking sheets with parchment paper. Scoop dough (about 1.5 tablespoons each) and roll into balls. Roll each ball in cinnamon-sugar mixture until fully coated. Place on prepared baking sheets, spacing 2 inches apart.
- Bake: Bake for 10-12 minutes, until edges are set and tops look slightly cracked. Centers will still be soft. Let cool on baking sheet for 5 minutes, then transfer to a wire rack to cool completely.
Notes
Watch the butter carefully to avoid burning. Use room temperature ingredients for best results. Do not overmix the dough. Let cookies cool on baking sheet for 5 minutes before transferring. Cookies keep in an airtight container at room temperature for up to 5 days; freeze for up to 3 months.
Nutrition
- Serving Size: 1 cookie
- Calories: 175
- Sugar: 14
- Sodium: 95
- Fat: 9
- Saturated Fat: 5
- Carbohydrates: 23
- Fiber: 1
- Protein: 2
Keywords: brown butter, pumpkin, snickerdoodle, cookies, fall, pumpkin spice, easy, no chill


