It was 11:47 PM on a random Wednesday, and I had a very specific problem. I wanted a pumpkin bar—that soft, spiced, almost cake-like bar with a thick blanket of cream cheese frosting—but I definitely did not want a full 9×13 pan of them sitting on my counter for the next three days. I mean, let’s be real. I live alone, and a full batch of pumpkin bars is a dangerous thing for someone with my lack of self-control. I didn’t have a full can of pumpkin left either—just about a cup scraped from the bottom of a can I’d used for something else. But I had that half-block of cream cheese, a little maple syrup, and this weird, stubborn idea that I could make it work. Honestly, I was too tired to talk myself out of it.
So I pulled out my little 8×8 pan—the one that always feels a bit neglected next to its bigger siblings—and I just went for it. I scaled everything down in my head, eyeballing the spices and hoping the math was right. There was a moment, around the 15-minute mark, when the whole apartment smelled like a fall candle had exploded, and I knew I was onto something. I didn’t even wait for them to cool completely before slathering on that maple cream cheese frosting. I mean, I tried to wait. I really did. But the frosting was sliding off in these thick, glossy ribbons, and the bars were still warm, and honestly, who among us has that kind of patience?
That first bite was a revelation. It was everything a pumpkin bar should be—soft, tender, perfectly spiced—but it was just enough. Not a mountain of leftovers, not a pan you have to pawn off on coworkers. Just a small, perfect moment of fall on a plate. And that is why this recipe stuck with me. It’s not about a big holiday gathering or a fancy brunch. It’s about a quiet Wednesday night when you wanted something cozy, and you figured out how to make it work with what you had. Maybe you’ve been there too. You just want one good thing, not a whole bakery. These Perfect Small-Batch Pumpkin Bars with Maple Cream Cheese Frosting are exactly that.
Why You’ll Love This Recipe
Let me tell you, after testing this recipe about four times in one week—my poor waistline—I can confidently say this is the best small-batch pumpkin bar you will ever make. It’s not just another pumpkin dessert. It’s the one that solves a very real problem: you want something incredible, but you don’t need a crowd to feed. Here’s why it works so well:
- Perfectly Sized: This recipe fits an 8×8 pan, giving you exactly 9 generous bars. No more, no less. It’s ideal for a quiet weekend treat, a small dinner party, or when you just need a little fall comfort without the commitment.
- Simple Pantry Ingredients: You don’t need a specialty grocery run. Canned pumpkin, basic spices, a block of cream cheese—chances are you have most of this in your kitchen right now. I’ve made it with both name-brand pumpkin and store-brand, and it works beautifully every time.
- Perfect for Hosting: If you’re having people over, these bars are a showstopper. They look fancy with that swoopy maple frosting, but they come together in under an hour. You can even bake them the night before and frost them right before guests arrive. They make you look like you tried way harder than you actually did.
- Crowd-Pleaser: I brought these to a small Friendsgiving once, and they disappeared before the main course even hit the table. The combination of warm pumpkin spices and that rich, tangy maple frosting is just irresistible. Both kids and adults go back for seconds.
- Unbelievably Tender: The secret here is using a bit of oil alongside the butter, which keeps these bars incredibly soft for days. They don’t dry out like some pumpkin recipes tend to do. The texture is almost cake-like but denser, with that perfect crumb.
This isn’t just another version of a pumpkin bar. I tested the ratios obsessively to get that perfect balance of moisture and fluff. The maple cream cheese frosting is the real star—it’s not too sweet, with just enough tang to cut through the rich pumpkin. It’s the kind of dessert that makes you close your eyes after the first bite. Honestly, it’s comfort food reimagined for real life: smaller, faster, but with the same soul-soothing satisfaction.
What Ingredients You Will Need
This recipe uses simple, wholesome ingredients to deliver that bold pumpkin flavor and incredibly tender texture. Most of these are pantry staples, which makes this perfect for those spontaneous fall baking urges. Let me walk you through each one and share a few tips I’ve learned along the way.
For the Pumpkin Bars
- All-Purpose Flour (1 cup / 120g): This gives the bars structure without making them too dense. I prefer Gold Medal or King Arthur for consistent results. Spoon and level your flour—don’t scoop straight from the bag, or you’ll end up with dry bars. I learned that the hard way on my first test batch.
- Granulated Sugar (1/2 cup / 100g): Just enough sweetness to balance the pumpkin. You can reduce this to 1/3 cup if you prefer a less sweet bar, but I find half a cup is the sweet spot.
- Light Brown Sugar (1/4 cup / 50g, packed): This adds moisture and a subtle molasses flavor that pairs beautifully with the pumpkin. Make sure it’s packed firmly into the measuring cup. If you’re out of brown sugar, you can substitute 1/4 cup white sugar mixed with 1 teaspoon of molasses.
- Canned Pumpkin Purée (3/4 cup / 170g): Not pumpkin pie filling—make sure you grab 100% pumpkin purée. I like Libby’s, but store brands work fine too. If you have leftover pumpkin from another recipe, this is a great way to use it up. The moisture content can vary slightly between brands, so don’t worry if yours seems a bit wetter.
- Vegetable Oil (1/4 cup / 60ml): This is my secret for tender bars. Oil stays liquid at room temperature, which keeps the bars soft even after they cool. You can use melted coconut oil or canola oil instead.
- Unsalted Butter (2 tablespoons / 28g, melted): A little butter adds that rich flavor that oil alone can’t provide. If you only have salted butter, just reduce the added salt by 1/4 teaspoon.
- Large Egg (1, at room temperature): The egg binds everything together and adds richness. Take it out of the fridge about 30 minutes before you start baking. In a hurry? Place the egg in a bowl of warm water for 5 minutes.
- Vanilla Extract (1 teaspoon): Pure vanilla extract makes a difference here. Imitation works in a pinch, but the real stuff adds a depth that complements the maple frosting.
- Pumpkin Pie Spice (1 teaspoon): You can use store-bought, but I prefer to make my own blend: 1/2 teaspoon cinnamon, 1/4 teaspoon ginger, 1/8 teaspoon nutmeg, and a pinch of cloves. It gives you more control over the flavor profile.
- Cinnamon (1/2 teaspoon): Because you can never have too much cinnamon in a pumpkin recipe. I use Ceylon cinnamon for a milder, sweeter flavor, but Cassia works perfectly too.
- Baking Powder (1/2 teaspoon): This helps the bars rise and gives them a light texture. Make sure it’s fresh—test it by dropping a little in hot water; if it fizzes, it’s good.
- Baking Soda (1/4 teaspoon): Works with the acidity in the pumpkin to create a tender crumb. Don’t skip it, even though it’s a small amount.
- Salt (1/4 teaspoon): Balances the sweetness and enhances all the warm spices. I use fine sea salt for baking.
For the Maple Cream Cheese Frosting
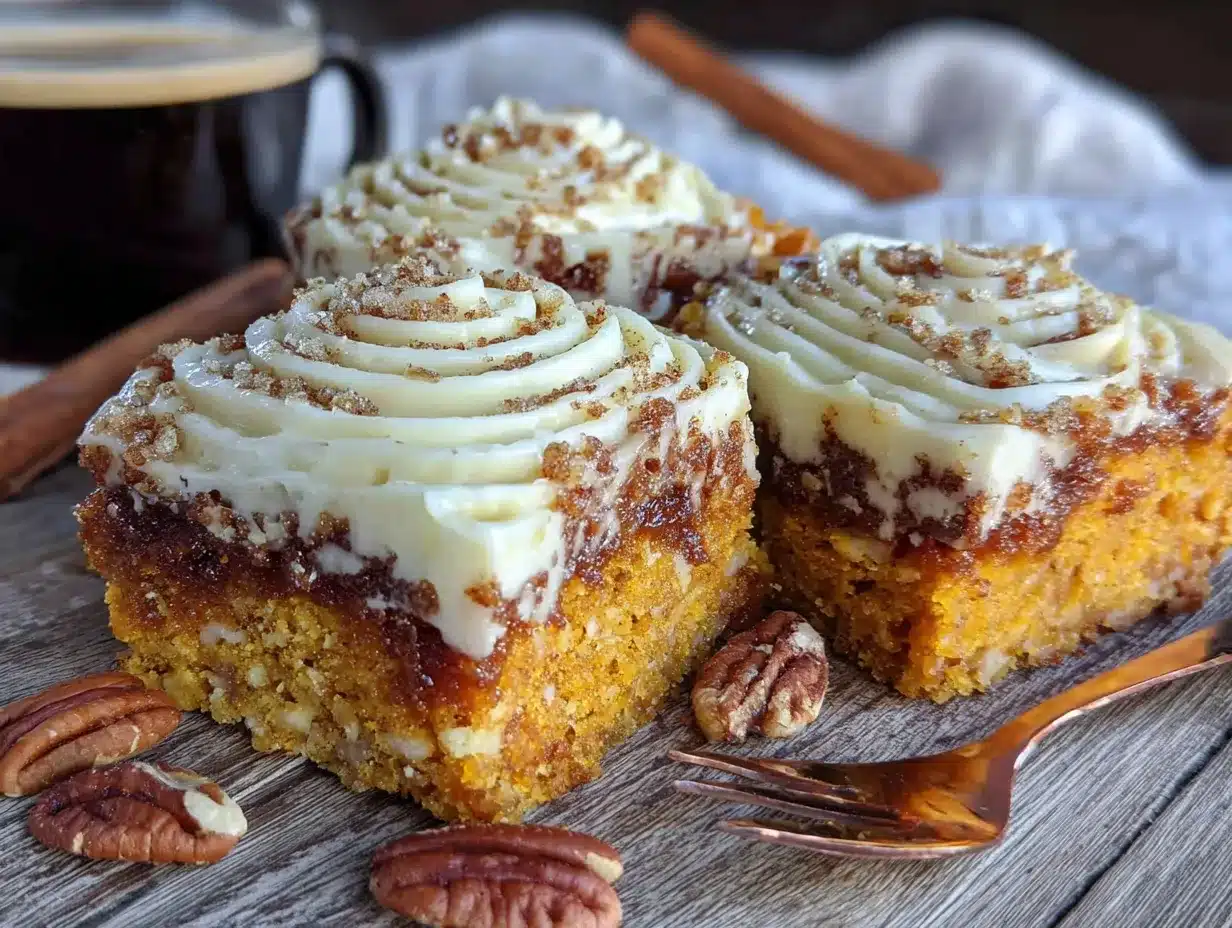
- Cream Cheese (4 oz / 113g, softened): Use full-fat block cream cheese, not the spreadable kind in a tub. Philadelphia is my go-to. It needs to be truly softened to room temperature—about an hour on the counter—or your frosting will be lumpy.
- Unsalted Butter (2 tablespoons / 28g, softened): Adds richness and helps the frosting hold its shape. Make sure it’s soft but not melty.
- Powdered Sugar (1 cup / 120g, sifted): Sifting is non-negotiable here. Lumps in your frosting are nobody’s friend. If you’re in a rush, you can whisk it vigorously instead.
- Pure Maple Syrup (2 tablespoons / 30ml): This is the star of the frosting. Use real maple syrup, not pancake syrup. Grade A dark amber has a stronger flavor that stands up beautifully to the cream cheese. I’ve tried this with Grade A light amber, and it’s good, but the dark amber is truly special.
- Vanilla Extract (1/2 teaspoon): Rounds out the maple flavor without overpowering it.
- Pinch of Salt: Just a tiny pinch to cut the sweetness and make the maple flavor pop.
Equipment Needed
You don’t need a fancy bakery setup for these Perfect Small-Batch Pumpkin Bars. Here’s what you’ll need:
- 8×8 Inch Baking Pan: This is the star of the show. A metal pan gives you slightly crisper edges, while glass or ceramic works beautifully too. I use a basic metal one from Wilton, and it’s never let me down. If you only have a 9×9 pan, your bars will be a bit thinner and may bake a few minutes faster.
- Parchment Paper: Line your pan with parchment paper, leaving some overhang on two sides. This creates “handles” that let you lift the entire batch out cleanly. It’s a game-changer for cutting neat bars.
- Mixing Bowls: You’ll need two medium bowls—one for dry ingredients and one for wet. I prefer glass or stainless steel because they don’t retain odors.
- Whisk and Spatula: A whisk for combining dry ingredients and a rubber spatula for folding everything together. Don’t overmix the batter—a spatula helps you be gentle.
- Hand Mixer or Stand Mixer: For the frosting, you really want an electric mixer. You can do it by hand with a whisk, but your arm will thank you for using a mixer. I use my trusty hand mixer for this small batch.
- Cooling Rack: Essential for letting the bars cool completely before frosting. If you frost them while they’re warm, the frosting will melt into a puddle. Trust me on this one.
- Offset Spatula: Not strictly necessary, but it makes spreading the frosting look effortless. A butter knife works fine too.
Preparation Method
Alright, let’s make these Perfect Small-Batch Pumpkin Bars. The process is straightforward, but I’ll walk you through every step with the little tricks I’ve picked up along the way.
- Preheat and Prep Your Pan. Preheat your oven to 350°F (175°C). While it’s heating, line your 8×8 pan with parchment paper. Cut a piece long enough to hang over two opposite sides—this will be your lifting handle. Lightly grease the exposed sides of the pan with a little butter or non-stick spray.
- Whisk the Dry Ingredients. In a medium bowl, whisk together 1 cup all-purpose flour, 1/2 teaspoon baking powder, 1/4 teaspoon baking soda, 1/4 teaspoon salt, 1 teaspoon pumpkin pie spice, and 1/2 teaspoon cinnamon. Whisking aerates the flour and distributes the leaveners evenly. Set this aside.
- Mix the Wet Ingredients. In a separate larger bowl, whisk together 1/2 cup granulated sugar and 1/4 cup packed light brown sugar. Add 1/4 cup vegetable oil and 2 tablespoons melted unsalted butter, and whisk until smooth. It should look like a thick, glossy paste. Add 1 large egg and 1 teaspoon vanilla extract, and whisk until fully combined. The mixture will be smooth and slightly pale.
- Add the Pumpkin. Pour in 3/4 cup canned pumpkin purée and whisk until everything is completely incorporated. The batter will look thinner than you might expect—that’s totally normal. Don’t panic. It should be a beautiful, deep orange color and smell amazing already.
- Combine Wet and Dry. Pour the dry ingredients into the wet ingredients. Use a rubber spatula to fold them together gently. Stir just until you no longer see streaks of flour. A few small lumps are fine—overmixing will make the bars tough. The batter will be thick and slightly fluffy.
- Bake the Bars. Pour the batter into your prepared pan and spread it into an even layer with your spatula. Bake for 22-25 minutes, or until a toothpick inserted in the center comes out clean or with a few moist crumbs. The edges will be pulling away from the pan slightly, and the top will be set and lightly golden. My oven runs hot, so I start checking at 20 minutes.
- Cool Completely. Place the pan on a wire rack and let the bars cool in the pan for about 10 minutes. Then use the parchment paper handles to lift the entire block of bars out of the pan and onto the rack. Let them cool completely—this takes about 1 hour. I know it’s tempting, but do not frost them while they’re warm. The frosting will slide right off.
- Make the Frosting. While the bars are cooling, make the maple cream cheese frosting. In a medium bowl, beat 4 oz softened cream cheese and 2 tablespoons softened butter together until smooth and fluffy—about 2 minutes with a hand mixer. There should be no lumps. Add 1 cup sifted powdered sugar, 2 tablespoons pure maple syrup, 1/2 teaspoon vanilla extract, and a pinch of salt. Beat on low speed until combined, then increase to medium-high and beat for 1-2 minutes until light and fluffy. If it’s too thick, add a teaspoon of milk. Too thin? Add a little more powdered sugar.
- Frost and Serve. Once the bars are completely cool, spread the frosting evenly over the top. Use your offset spatula to create swoops and swirls—it makes them look bakery-fancy. For neat slices, chill the frosted bars in the fridge for 20 minutes before cutting. Use a sharp knife and wipe it clean between cuts for the prettiest bars.
Cooking Tips & Techniques
After making these Perfect Small-Batch Pumpkin Bars about five times in two weeks—my coworkers were thrilled, by the way—I’ve gathered a few tips that make a real difference.
Don’t Overmix the Batter. This is probably the most common mistake with pumpkin bars. It’s so easy to keep stirring, trying to get that perfectly smooth batter. But overmixing develops the gluten, which makes your bars tough and rubbery instead of tender. Stop mixing as soon as the flour disappears. A few lumps are your friends here. I once got distracted and overmixed a batch, and they came out more like hockey pucks than pumpkin bars. Learn from my failure.
Room Temperature Ingredients Matter. I know, I know—every recipe says this, but it’s true. A cold egg or cold cream cheese can seize up your batter or frosting. For the bars, the egg and pumpkin should be at room temperature. For the frosting, the cream cheese and butter absolutely must be soft. If you forgot to take them out, here’s a trick: cut the cream cheese into small cubes and let it sit for 15 minutes. For the egg, place it in a bowl of warm water for 5 minutes.
Toast Your Spices for Extra Depth. This is a little trick I picked up from a pastry chef friend. Before adding your spices to the flour, toast them in a dry pan over medium heat for about 30 seconds until fragrant. It wakes up the essential oils and makes the pumpkin flavor sing. Just watch them closely—burnt spices are bitter and will ruin your batch.
Chill Before Cutting. I cannot stress this enough. If you try to cut these bars right after frosting, you’ll end up with a sticky mess. Pop the whole pan in the fridge for at least 20 minutes. The frosting sets up, and you get clean, beautiful slices. I use a long chef’s knife, run it under hot water, wipe it dry, and make one clean cut. Wipe the blade between each cut. It takes an extra minute, but your bars will look professional.
Use a Kitchen Scale for Accuracy. If you have one, use it. Measuring flour by weight is much more accurate than scooping. I’ve tested this recipe with both methods, and the scale version consistently gives better texture. A cup of flour can vary by 20-30 grams depending on how you scoop it. That’s a big difference in a small batch.
Variations & Adaptations
One of the best things about these Perfect Small-Batch Pumpkin Bars is how adaptable they are. Here are some variations I’ve tried and loved:
Gluten-Free Version: Substitute the all-purpose flour with 1 cup of a good gluten-free baking blend that contains xanthan gum. I’ve had excellent results with Bob’s Red Mill 1-to-1 Baking Flour. The texture is slightly more delicate, but the flavor is spot-on. Bake for the same amount of time, but check a few minutes early.
Dairy-Free Adaptation: Use a dairy-free butter substitute (like Miyoko’s or Earth Balance) in both the bars and the frosting. For the cream cheese, use a dairy-free alternative like Kite Hill or Tofutti. The frosting will be slightly softer, so you may need to chill it longer before serving. I’ve made this for a friend with dairy allergies, and she said it was the best pumpkin dessert she’d had in years.
Extra Spiced Version: If you love a bold pumpkin spice flavor, double the spices in the recipe. Add an extra 1/2 teaspoon cinnamon, 1/4 teaspoon ginger, and a pinch of cloves. You can also add a pinch of black pepper—it sounds weird, but it actually enhances the other spices. I tried this on a whim one rainy Sunday, and it was incredible.
Pecan Praline Topping: Before baking, sprinkle 1/2 cup chopped pecans over the batter. After frosting, drizzle with a simple caramel sauce. It adds a wonderful crunch and takes these bars into full dessert territory. I did this for a Thanksgiving potluck, and people literally asked for the recipe.
Lower Sugar Option: Reduce the granulated sugar to 1/3 cup and the brown sugar to 2 tablespoons. The bars will be less sweet, but the pumpkin and spice flavors will shine through more. The frosting will still provide plenty of sweetness, so you won’t miss it. I’ve made this version for my dad, who watches his sugar intake, and he loved it.
Serving & Storage Suggestions
These Perfect Small-Batch Pumpkin Bars are versatile enough for any occasion. Here’s how to serve and store them like a pro.
Serving Temperature: I prefer these bars slightly chilled. The frosting firms up beautifully, and the pumpkin flavor seems more pronounced when they’re cold. But they’re also amazing at room temperature—the texture is softer and more cake-like. If you’re serving them at a gathering, take them out of the fridge about 15 minutes before serving to take the chill off.
Presentation Tips: For a dinner party, cut the bars into neat squares and arrange them on a cake stand or wooden board. Dust the tops with a little extra cinnamon or a drizzle of maple syrup. A sprinkle of flaky sea salt on the frosting is also stunning—it adds a savory note that balances the sweetness. I served these at a small Friendsgiving last year, and the salt trick got so many compliments.
What to Serve Alongside: These bars pair beautifully with a hot cup of coffee or chai latte. For a dessert spread, serve them alongside vanilla ice cream or a dollop of whipped cream. If you’re hosting a brunch, they go wonderfully with a savory quiche or a simple green salad to balance the sweetness.
Storage Instructions: Store the frosted bars in an airtight container in the refrigerator for up to 5 days. The flavors actually meld and improve after a day or two. If you’re storing them for longer, freeze the unfrosted bars. Wrap the cooled, unfrosted block tightly in plastic wrap, then foil, and freeze for up to 3 months. When you’re ready to serve, thaw overnight in the fridge, then make the frosting fresh. Trust me—fresh frosting is always worth the extra step.
Reheating Tips: If you prefer warm bars, microwave an individual serving for about 10-15 seconds. The frosting will soften but won’t melt completely. You can also warm them in a 300°F oven for 5 minutes, but watch them closely. I don’t recommend reheating the whole batch at once—the frosting doesn’t recover well from being fully melted.
Nutritional Information & Benefits
While these Perfect Small-Batch Pumpkin Bars are definitely a treat, they do have some redeeming qualities. Here’s a rough breakdown per bar (based on 9 servings):
- Calories: Approximately 280-320 calories per bar
- Fat: 16-18g (mostly from the butter, oil, and cream cheese)
- Carbohydrates: 34-38g
- Sugar: 24-28g
- Protein: 3-4g
- Fiber: 1-2g
Health Highlights: Pumpkin is packed with vitamin A, which is great for eye health and immune function. It’s also a good source of fiber and antioxidants. The cream cheese frosting provides a small amount of calcium and protein. Of course, this is still a dessert, so enjoy it in moderation. But I love that I’m getting a little nutritional boost from the pumpkin while satisfying my sweet tooth.
Dietary Considerations: This recipe contains gluten, dairy, and eggs. For gluten-free or dairy-free options, check the variations section above. The bars are vegetarian-friendly. If you’re watching your sugar intake, the lower-sugar variation is a great option—it cuts the sugar by about a third without sacrificing flavor.
I personally love that these bars feel indulgent but aren’t over-the-top. They’re the kind of dessert that makes you feel good about treating yourself. And honestly, after a long week, don’t we all deserve a little pumpkin bar moment?
Conclusion
These Perfect Small-Batch Pumpkin Bars with Maple Cream Cheese Frosting have become my go-to fall dessert for a reason. They solve the very real problem of wanting something incredible without committing to a full pan of leftovers. The bars are tender, perfectly spiced, and that maple frosting is honestly the stuff of dreams. It’s tangy, sweet, and just a little bit fancy without being fussy.
I love that this recipe is forgiving enough for a beginner but impressive enough for a dinner party. You can make it your own—add pecans, dial up the spice, or keep it simple. The best part? You get exactly nine bars, which means you can enjoy a few and share the rest without feeling like you’re drowning in pumpkin desserts. Or you can keep them all for yourself. I won’t judge.
If you make these Perfect Small-Batch Pumpkin Bars, I’d love to hear about it. Drop a comment below and tell me how they turned out. Did you try a variation? Did you eat all nine in one sitting? No shame here. Tag me in your photos on social media—I love seeing your baking wins. And if you have a friend who’s always looking for small-batch recipes, share this post with them. Happy baking, friends. Here’s to cozy fall moments and just the right amount of pumpkin.
Frequently Asked Questions
Can I use fresh pumpkin instead of canned?
Yes, you can! Roast a small sugar pumpkin, scoop out the flesh, and purée it until smooth. Just be aware that fresh pumpkin purée has a higher water content than canned. You may need to drain it in a cheesecloth-lined strainer for about an hour to remove excess moisture. If you skip this step, your bars might be too wet and dense.
Can I double this recipe for a 9×13 pan?
Absolutely. Simply double all the ingredients and bake in a greased 9×13 pan. The baking time will increase to about 28-32 minutes. Keep an eye on it and test with a toothpick. You’ll get about 24 bars from a double batch—perfect for a larger gathering.
Why did my frosting turn out runny?
Runny frosting usually happens for one of two reasons: your cream cheese or butter was too soft (almost melted), or you added too much maple syrup. Make sure your cream cheese and butter are softened but still cool to the touch. If your frosting is too thin, pop it in the fridge for 15 minutes to firm up, then try again. You can also beat in a little more powdered sugar, a tablespoon at a time.
Can I freeze these bars with the frosting?
I don’t recommend it. The cream cheese frosting can become grainy or weepy after thawing. Instead, freeze the unfrosted bars for up to 3 months. When you’re ready to enjoy them, thaw in the fridge overnight and make a fresh batch of frosting. It takes just 5 minutes, and the results are much better.
How do I make these bars more pumpkin-flavored?
If you want a stronger pumpkin flavor, you can increase the pumpkin purée to a full cup (about 230g). Keep in mind that this will make the batter wetter, so you may need to bake them for an extra 3-5 minutes. You can also add a tablespoon of pumpkin butter for an extra concentrated pumpkin punch. I’ve done this, and it’s delicious.
Pin This Recipe!
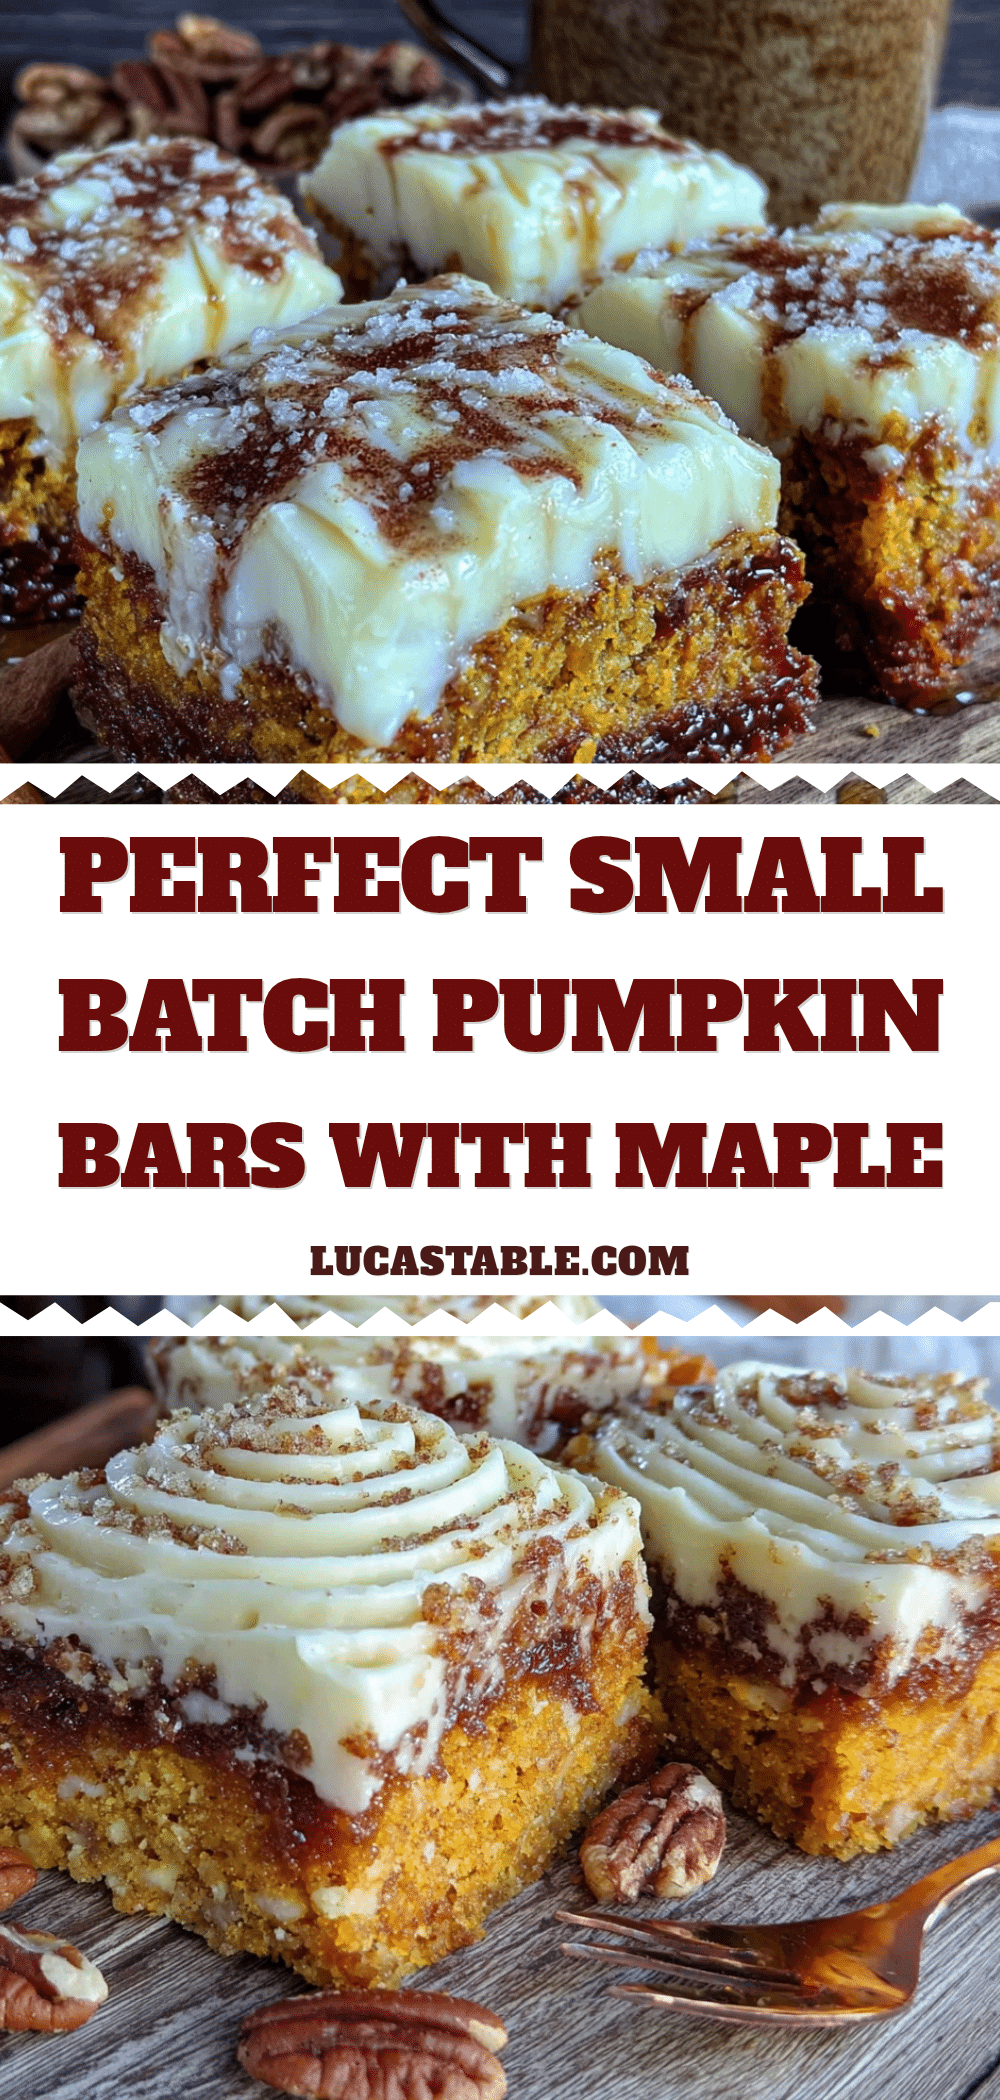
Perfect Small-Batch Pumpkin Bars with Maple Frosting
Soft, spiced pumpkin bars with a rich maple cream cheese frosting, perfectly sized for a small batch in an 8×8 pan. Ideal for a cozy fall treat without the leftovers.
- Prep Time: 15 minutes
- Cook Time: 25 minutes
- Total Time: 1 hour 40 minutes
- Yield: 9 bars 1x
- Category: Dessert
- Cuisine: American
Ingredients
- 1 cup (120g) all-purpose flour
- 1/2 cup (100g) granulated sugar
- 1/4 cup (50g) packed light brown sugar
- 3/4 cup (170g) canned pumpkin purée
- 1/4 cup (60ml) vegetable oil
- 2 tablespoons (28g) unsalted butter, melted
- 1 large egg, at room temperature
- 1 teaspoon vanilla extract
- 1 teaspoon pumpkin pie spice
- 1/2 teaspoon cinnamon
- 1/2 teaspoon baking powder
- 1/4 teaspoon baking soda
- 1/4 teaspoon salt
- 4 oz (113g) cream cheese, softened
- 2 tablespoons (28g) unsalted butter, softened
- 1 cup (120g) powdered sugar, sifted
- 2 tablespoons (30ml) pure maple syrup
- 1/2 teaspoon vanilla extract
- Pinch of salt
Instructions
- Preheat oven to 350°F (175°C). Line an 8×8 inch baking pan with parchment paper, leaving overhang on two sides. Lightly grease exposed sides.
- In a medium bowl, whisk together flour, baking powder, baking soda, salt, pumpkin pie spice, and cinnamon.
- In a larger bowl, whisk together granulated sugar and brown sugar. Add oil and melted butter, whisk until smooth. Add egg and vanilla, whisk until combined.
- Add pumpkin purée and whisk until fully incorporated.
- Pour dry ingredients into wet ingredients. Fold with a rubber spatula until just combined; do not overmix.
- Pour batter into prepared pan and spread evenly. Bake for 22-25 minutes, until a toothpick inserted in center comes out clean or with a few moist crumbs.
- Cool in pan on a wire rack for 10 minutes, then lift out using parchment handles and cool completely on rack (about 1 hour).
- For frosting: Beat softened cream cheese and butter together until smooth and fluffy (about 2 minutes). Add sifted powdered sugar, maple syrup, vanilla, and salt. Beat on low until combined, then on medium-high for 1-2 minutes until light and fluffy.
- Spread frosting over completely cooled bars. For neat slices, chill in fridge for 20 minutes before cutting. Use a sharp knife, wiping clean between cuts.
Notes
Don’t overmix the batter to avoid tough bars. Use room temperature ingredients for best results. Chill bars before cutting for clean slices. For gluten-free, use a 1-to-1 gluten-free flour blend. For dairy-free, use dairy-free butter and cream cheese alternatives.
Nutrition
- Serving Size: 1 bar
- Calories: 300
- Sugar: 26
- Sodium: 180
- Fat: 17
- Saturated Fat: 7
- Carbohydrates: 36
- Fiber: 1.5
- Protein: 3.5
Keywords: pumpkin bars, small batch, maple frosting, cream cheese frosting, fall dessert, pumpkin dessert


