I was digging through my junk drawer last Tuesday — you know, the one that’s become a black hole for takeout menus, dead pens, and that one key I’m terrified to throw away — when a faint whiff of vinegar hit me. It wasn’t from the drawer itself (thank goodness). It was from my hands. I’d peeled a hard-boiled egg that morning for a quick lunch, and the smell had clung to my skin all day. And suddenly, I was seven years old, standing on a stepstool in my Aunt Rita’s tiny yellow kitchen, watching her pull a platter of deviled eggs out of the fridge for a Halloween block party. She’d arranged them on a bed of curly kale, and each one had a black olive spider perched right on top. I remember thinking they were the most magical, slightly terrifying things I’d ever seen. I was too scared to eat one — the spiders looked too real. She laughed and said, “They bite back, honey. With paprika.” I ate three.
That memory hit me so hard I almost dropped the phone I was holding. Honestly, I hadn’t thought about those eggs in years. Aunt Rita passed away when I was in college, and that yellow kitchen got remodeled into something gray and modern. But that smell — that sharp, briny, eggy smell — brought her right back into the room with me. I mean, isn’t it funny how the brain works? You can’t remember where you put your keys five minutes ago, but a scent from thirty years back plays like a high-definition movie in your head. Maybe you’ve been there, too. Standing in your kitchen, frozen by a memory that hits you out of nowhere.
So I decided then and there: I was going to make those deviled eggs. Not for a party. Not for the kids. For me. But here’s the thing — I’m a busy person, and I don’t have time for fussy recipes that take all afternoon. I needed a version that was quick, easy, and still had that same spooky, delightful look. So I got to work, testing and tweaking until I had a recipe that comes together in about 20 minutes of active time. The olive spiders are dead simple — no carving, no sculpting, no special tools. Just a knife and a steady hand. And let me tell you, when you set that platter down at your Halloween gathering, people are going to lose it. I mean, they’re going to absolutely lose it. This is the recipe that stayed with me, and now I’m passing it on to you.
Why You’ll Love This Recipe
Let’s be real for a second. Halloween party food can be a total drag. You’ve got the store-bought cookies, the sad veggie tray, and the one person who brings a Jell-O mold that nobody touches. These Quick Halloween Deviled Eggs with Olive Spiders? They’re the hero of the snack table. And I’m not just saying that because I’m biased. I’ve tested this recipe four times in the last two weeks — once for my skeptical neighbor, once for a work potluck, and twice just for myself (don’t judge). Every single time, they disappeared first.
- Quick & Easy : These come together in under 30 minutes total, with only about 20 minutes of hands-on work. Perfect for those last-minute Halloween plans or when you realize the party starts in an hour.
- Simple Ingredients : You probably already have eggs, mayo, and mustard in your kitchen. The only special item is a can of whole black olives, which are dirt cheap and available at any grocery store.
- Perfect for Halloween Parties : They’re creepy, cute, and totally conversation-starting. Kids and adults both go nuts for the olive spiders. I’ve seen grown men squeal (in a good way).
- Crowd-Pleaser : Deviled eggs are universally loved, and the spooky twist makes them even more fun. I’ve never brought a plate of these home with leftovers. Not once.
- Unbelievably Delicious : The creamy, tangy filling paired with the briny olive spiders is a flavor combo that just works. It’s comfort food with a Halloween makeover.
What makes this recipe different from every other deviled egg out there? It’s the attention to detail without the stress. The olive spiders aren’t just slapped on — they’re positioned to look like they’re crawling. The filling is extra smooth because I blend it just a little longer than most recipes call for. And the paprika? I use smoked paprika instead of regular. It adds this subtle, smoky depth that makes people go, “Wait, what’s in this?” It’s not just another Halloween snack. It’s your best version of a classic.
This recipe isn’t just good — it’s the kind that makes you close your eyes after the first bite. It’s comfort food reimagined for the spookiest night of the year. Faster, easier, but with the same soul-soothing satisfaction. Perfect for impressing guests without stress, or turning a simple snack into something memorable.
What Ingredients You Will Need
This recipe uses simple, everyday ingredients to create something that looks way more complicated than it actually is. The beauty is in the presentation, not the shopping list. Here’s what you’ll need:
For the Deviled Eggs
- 6 large eggs (room temperature works best for even cooking — if you forgot to take them out, soak them in warm water for 5 minutes)
- 3 tablespoons mayonnaise (I prefer Hellmann’s for its creamy texture, but any brand works)
- 1 teaspoon yellow mustard (adds that classic tang and a hint of color)
- 1 teaspoon white vinegar (brightens the flavor — don’t skip this!)
- 1/4 teaspoon salt (fine sea salt dissolves better than kosher here)
- 1/8 teaspoon black pepper (freshly ground if you have it)
- 1/2 teaspoon smoked paprika (plus extra for garnish — this is my secret weapon)
For the Olive Spiders
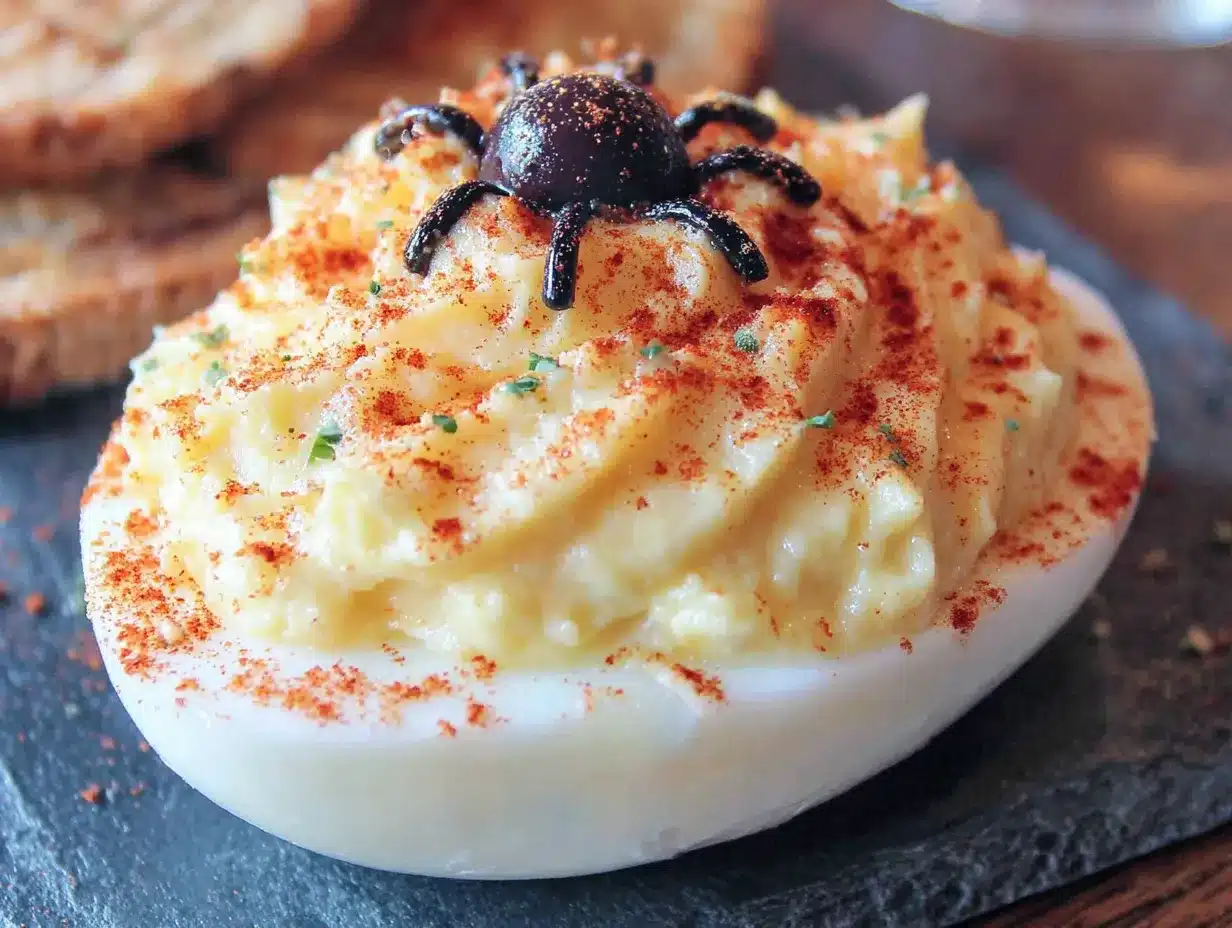
- 1 can (6 ounces) whole black olives (look for jumbo or colossal size — they’re easier to work with and look more spider-like)
- 1 tablespoon cream cheese, softened (optional, but helps the spider bodies stick to the eggs)
That’s it. Seven ingredients for the filling, plus olives and a tiny bit of cream cheese. I told you it was simple. The smoked paprika is the one ingredient I’d really encourage you to seek out. Regular paprika works fine, but smoked adds this subtle campfire note that makes the filling taste more complex. It’s like the difference between a plain potato chip and a gourmet one — you notice it even if you can’t name it.
For the olives, I’ve tried this with regular sized ones, and honestly, they’re a pain. The legs are too short and the body is too small. You want jumbo or colossal black olives. I’ve found the store brand works just as well as the fancy ones here — you’re going to cut them up anyway. Just make sure they’re pitted. Nobody wants to bite into a spider and find a pit. Trust me on that one.
If you’re dairy-free, you can skip the cream cheese. The spiders will still stick, just not quite as firmly. A tiny dab of mayonnaise works as a substitute, but use it sparingly so it doesn’t get greasy. For a gluten-free option, this recipe is naturally gluten-free, so you’re good to go. No substitutions needed.
Equipment Needed
You don’t need any fancy gadgets for this recipe. I’ve made these in a borrowed kitchen with a dull knife and a fork, and they still turned out great. But having the right tools makes the process smoother and faster.
- A medium saucepan with a lid — for boiling the eggs. Any size works, but you want enough room for the eggs to sit in a single layer without crowding.
- A sharp paring knife — this is key for cutting the olives into spider shapes. A dull knife will squish them. I use my trusty Victorinox, which cost me about twelve bucks and has lasted years.
- A cutting board — preferably a small one dedicated to prep work. I use a flexible plastic one that makes it easy to transfer the cut olives.
- A small mixing bowl — for mashing the yolks and mixing the filling. Any bowl works, but a narrower one is easier to work with.
- A fork or potato masher — for breaking up the yolks. A fork does the job, but a potato masher makes it even faster and gives you a smoother texture.
- A piping bag or zip-top bag — for filling the egg whites neatly. A zip-top bag with the corner snipped off works perfectly and costs nothing.
- A serving platter — something flat that shows off the spiders. A white platter makes the colors pop.
If you don’t have a piping bag, honestly, just use a small spoon. It’s a little messier, but the spiders cover up any imperfections. I’ve done it both ways, and nobody noticed the difference once the spiders were on. If you’re making these for a party, I’d recommend using the zip-top bag method — it’s faster and gives you more control.
Preparation Method
Alright, let’s get into the nitty-gritty. This recipe has two main parts — the deviled eggs and the olive spiders. I’ll walk you through each step, including the little tricks I’ve learned from my testing sessions. Total active time is about 20 minutes, plus about 12 minutes for boiling the eggs and a few minutes for cooling.
Step 1: Hard-Boil the Eggs
Place your 6 eggs in a single layer in a medium saucepan. Cover them with cold water by about an inch. Put the lid on and bring the water to a rolling boil over high heat. As soon as it reaches a full boil, turn off the heat completely and let the eggs sit in the hot water, covered, for exactly 12 minutes. This method gives you perfectly cooked yolks — firm but not chalky, with no green ring around the outside. I learned this trick from a chef friend, and I’ve never gone back to the old way.
While the eggs are sitting, fill a large bowl with ice water. After 12 minutes, use a slotted spoon to transfer the eggs to the ice bath. Let them cool for at least 5 minutes. This stops the cooking process and makes them way easier to peel. I’ve forgotten this step before, and let me tell you, peeling hot eggs is a nightmare. The shells stick, the whites tear, and you end up with ugly eggs. Don’t skip the ice bath.
Step 2: Peel and Halve the Eggs
Gently tap each egg on the counter to crack the shell all over, then roll it between your palms to loosen the membrane. Start peeling from the wide end — there’s usually an air pocket there that makes it easier. Rinse the peeled eggs under cold water to remove any tiny shell fragments. Pat them dry with a paper towel.
Using a sharp knife, slice each egg in half lengthwise. Carefully pop out the yolks into a small mixing bowl. Place the white halves on your serving platter, cut side up. Don’t worry if a few of the whites tear — the filling will cover it up. I’ve had entire eggs fall apart on me, and I just used the pieces for a quick egg salad sandwich later. No stress.
Step 3: Make the Filling
Add the mayonnaise, yellow mustard, white vinegar, salt, black pepper, and smoked paprika to the bowl with the yolks. Use a fork to mash everything together until it’s relatively smooth. Then switch to a small whisk or spatula and stir vigorously for about 30 seconds. You want the mixture to be creamy and uniform, with no lumps of yolk. If it seems too thick, add a tiny splash of water or extra mayo. If it’s too thin, add a pinch more salt and stir.
Taste the filling. Adjust the seasoning if needed — maybe a little more mustard for tang, or another pinch of salt. This is your chance to make it perfect. I always add just a little more smoked paprika here because I love that smoky flavor. Remember, the filling should be slightly stronger than you think it needs to be, because the plain egg white will balance it out.
Step 4: Fill the Egg Whites
Spoon the filling into a piping bag or a zip-top bag. If using a zip-top bag, snip off about 1/4 inch from one corner. Pipe the filling into each egg white half, mounding it slightly. You want a nice, generous amount — not too skimpy, but not overflowing. If you’re using a spoon, just dollop the filling in and smooth it with the back of the spoon. It doesn’t have to be perfect.
Once all the whites are filled, sprinkle a light dusting of smoked paprika over the tops. This adds color and flavor. Don’t go overboard — you want a subtle red-orange dusting, not a thick layer.
Step 5: Make the Olive Spiders
Drain the can of whole black olives and pat them dry with a paper towel. This is important — wet olives are slippery and hard to cut. Lay an olive on your cutting board. Using a sharp paring knife, slice it in half lengthwise. One half will be the spider’s body. The other half — set it aside for another use (or just eat it, I won’t tell).
Now, take the body half and place it cut-side down on the board. Make 4 thin, parallel cuts lengthwise on each side of the olive, creating the spider’s legs. Don’t cut all the way through — leave about 1/4 inch intact at the top of the olive so the legs stay attached. Gently fan out the legs with your fingers so they look like a spider crawling. Repeat with the remaining olives. You’ll need one olive half per egg half, so for 6 eggs (12 halves), you’ll use 6 whole olives.
This part takes a little practice. My first spider looked more like a squished bug than a spider. But by the third one, I had the hang of it. The key is using a sharp knife and making confident cuts. Don’t saw back and forth — just press down firmly and smoothly.
Step 6: Assemble the Spiders on the Eggs
If you’re using cream cheese, dab a tiny amount on the bottom of each spider body. Place one spider on top of each filled egg half, positioning it so the legs are spread out and touching the egg white. Gently press down so it sticks. The cream cheese acts like glue, keeping the spiders in place even if the platter gets jostled.
Arrange the finished deviled eggs on your serving platter. You can add some curly kale or lettuce underneath for a spooky “graveyard” look if you want. I like to put a few extra olives scattered around the platter to look like stray spiders crawling away. It’s a fun detail that always gets a laugh.
Cooking Tips & Techniques
I’ve made these Quick Halloween Deviled Eggs with Olive Spiders about a dozen times now, and I’ve learned a few things the hard way. Let me save you some trouble.
Perfect hard-boiled eggs every time: The biggest mistake people make is boiling eggs too long. That green ring around the yolk? That’s overcooked sulfur. My method — bring to a boil, turn off heat, let sit 12 minutes — gives you a creamy, bright yellow yolk every single time. If you’re at high altitude, add 2 minutes to the sitting time. If you’re using extra-large eggs, add 1 minute.
Peeling without the pain: Older eggs peel easier than fresh ones. If your eggs are super fresh (like from a farmer’s market), they’ll be harder to peel. Try adding a teaspoon of baking soda to the boiling water — it raises the pH and helps loosen the shells. Also, peeling under running cold water helps wash away tiny shell fragments.
The olive spider technique: Here’s where I messed up the first few times. I was cutting the legs too thick, and they looked like fat stubs instead of spindly spider legs. You want thin, delicate cuts. Also, don’t cut the legs too close to the bottom of the olive — leave enough “body” so the spider doesn’t fall apart. If a leg breaks off, just press it back into place. The cream cheese will hold it.
Make ahead strategy: You can boil and peel the eggs up to 3 days in advance. Store them in a covered container in the fridge. You can also make the filling up to 2 days ahead and keep it in a piping bag in the fridge. But don’t assemble the spiders until right before serving. The olives dry out and the legs get brittle after a few hours. I learned this the hard way when I made them the night before a party and the spiders looked sad and shriveled by morning.
Timing and multitasking: While the eggs are boiling and cooling, use that time to cut the olives and make the filling. It’s only about 15 minutes of active work, but planning your steps makes it feel even faster. I usually boil the eggs first, then while they’re cooling, I prep the olives and mix the filling. By the time the eggs are cool enough to peel, everything else is ready to go.
Variations & Adaptations
One of the best things about this recipe is how easy it is to customize. Here are some variations I’ve tried and loved:
Spicy Southwest Version: Add 1 tablespoon of finely chopped pickled jalapeños to the filling, and swap the smoked paprika for chili powder. Top each spider with a tiny sliver of jalapeño for an extra kick. I made this version for a Halloween potluck at work, and it was gone in 10 minutes. The heat pairs surprisingly well with the briny olives.
Bacon Lover’s Twist: Crumble 2 strips of crispy bacon into the filling before piping. The smoky, salty flavor complements the olives perfectly. I tried this on a whim one night when I had leftover bacon, and honestly, it might be my favorite version now. Just make sure the bacon is finely crumbled so it doesn’t clog your piping bag.
Dairy-Free Adaptation: Skip the cream cheese for the spiders — use a tiny dab of mashed avocado instead. It’s green, but nobody will see it under the olive. For the filling, use vegan mayonnaise. The texture will be slightly different, but the flavor is still great. I tested this for a friend with dairy allergies, and she said it was the best deviled egg she’d had in years.
Different Spider Colors: If you want to mix things up, use kalamata olives instead of black ones. They have a slightly different flavor — fruitier and more complex — and the dark purple color is gorgeous against the yellow filling. Just be warned, kalamata olives are softer and harder to cut into legs. You’ll need a very sharp knife and a gentle touch.
Mini Spider Bites: For a party appetizer, use quail eggs instead of chicken eggs. They’re smaller, so you’ll need more of them, but they look adorable. The olive spiders will be tiny, too — use small olives and cut them into even smaller pieces. This is a fun option for fancy Halloween parties or bridal showers with a spooky theme.
Serving & Storage Suggestions
These deviled eggs are best served chilled, right out of the fridge. The filling firms up nicely when cold, and the olive spiders stay crisp. I like to arrange them on a white platter with some dark purple kale or red leaf lettuce underneath — it creates a spooky, dramatic look that’s perfect for Halloween.
For a complete Halloween spread, serve these alongside other spooky snacks like spooky pumpkin hummus with veggie “bones,” or a bowl of mummy sausage rolls for a savory, filling option. The combination of creamy deviled eggs and warm, flaky sausage rolls is absolutely unbeatable for a party menu.
If you’re serving these at a party, keep the platter covered with plastic wrap until guests arrive. Deviled eggs can dry out if left uncovered for too long. I’ve also found that placing the platter on a bed of ice helps keep them cold and fresh for longer, especially if you’re hosting an outdoor event.
Storage: Leftover deviled eggs (if you have any!) can be stored in an airtight container in the refrigerator for up to 2 days. The olive spiders might soften a little, but they’ll still taste great. I don’t recommend freezing them — the texture of the filling changes and becomes watery when thawed.
Reheating: You don’t need to reheat these. They’re meant to be served cold. If you’ve stored them and they seem a little dry, you can refresh them with a tiny sprinkle of smoked paprika before serving.
One thing I’ve noticed: the flavors actually get better after a few hours in the fridge. The mustard and vinegar mellow out, and the smoked paprika becomes more pronounced. So if you can make these a few hours ahead of your party, they’ll taste even better. Just don’t add the spiders until right before serving.
Nutritional Information & Benefits
Let’s be honest — deviled eggs aren’t exactly health food. But they’re not junk food either. Here’s a rough breakdown per serving (2 deviled egg halves with one olive spider):
- Calories: Approximately 180-200
- Protein: 12 grams
- Fat: 14 grams (mostly healthy fats from eggs and olive oil)
- Carbohydrates: 3 grams
- Fiber: 1 gram
- Sugar: 1 gram
Eggs are a fantastic source of high-quality protein, containing all nine essential amino acids. They’re also rich in choline, which supports brain health, and lutein, which is good for your eyes. The olives add healthy monounsaturated fats and a dose of vitamin E, an antioxidant that helps protect your cells from damage.
This recipe is naturally gluten-free and low-carb, making it a great option for people following keto or paleo diets. It’s also relatively low in sugar and contains no artificial ingredients. The main allergens to be aware of are eggs and dairy (from the mayonnaise and optional cream cheese). If you’re serving these at a party, it’s a good idea to label them clearly so guests with allergies can make informed choices.
From a wellness perspective, I love that these deviled eggs are a satisfying, protein-packed snack that doesn’t leave you reaching for more food an hour later. They’re perfect for a Halloween party where you want to enjoy yourself without overindulging. Plus, the portion control is built in — two halves is a perfect serving size.
Conclusion
These Quick Halloween Deviled Eggs with Olive Spiders are more than just a party snack. They’re a little piece of nostalgia, a conversation starter, and a genuinely delicious bite of food. Whether you’re making them for a kids’ Halloween party, a grown-up costume bash, or just because you want to feel a little spooky on a Tuesday night, they deliver every single time.
I love this recipe because it honors the memory of my Aunt Rita’s kitchen while being practical enough for my busy life. It’s proof that you don’t need hours of prep time or fancy ingredients to create something memorable. Sometimes the best recipes are the simplest ones — just eggs, olives, and a little bit of love.
So go ahead and give these a try. Make them your own — add some bacon, throw in some jalapeños, or keep them classic. However you make them, I promise they’ll be the hit of your Halloween spread. And if you come up with a fun variation, I’d love to hear about it. Drop a comment below and let me know how your spiders turned out. Did anyone scream? Did the kids love them? Share your Halloween food stories — I’m all ears.
Happy Halloween, and happy cooking! Remember, the spiders don’t bite. But they might just steal the show.
Frequently Asked Questions
Can I make these deviled eggs a day ahead of time?
Yes, but with one important caveat. You can boil, peel, and fill the eggs up to 24 hours in advance. Store them in an airtight container in the fridge. However, wait to add the olive spiders until just before serving. The olives dry out and the legs become brittle after a few hours in the fridge. I learned this the hard way when I made them the night before a party and the spiders looked sad by morning.
How do I get perfectly smooth deviled egg filling?
The secret is to mash the yolks thoroughly before adding any wet ingredients. I use a fork to break them up into a fine crumb, then add the mayo and mustard. For an extra-smooth texture, you can push the yolk mixture through a fine-mesh sieve. It takes an extra minute but gives you a silky, lump-free filling that pipes beautifully.
Can I use a different type of olive for the spiders?
Absolutely! Kalamata olives work great and add a slightly different flavor profile — fruitier and more complex. Just be aware that they’re softer than regular black olives, so they’re a bit trickier to cut into legs. You’ll need a very sharp knife and a gentle touch. Green olives stuffed with pimentos also work, but they’re firmer and the legs will be more pronounced.
How long do the olive spiders take to make?
Once you get the hang of it, each spider takes about 30 seconds to cut. For a batch of 12 deviled eggs (using 6 whole olives), you’re looking at about 5 to 7 minutes of cutting time. The first one might take a minute, but you’ll get faster quickly. I usually cut all the olives first, then assemble the spiders on the eggs.
Can I make these without a piping bag?
Definitely! A small spoon works perfectly fine. Just dollop the filling into each egg white half and smooth it with the back of the spoon. The olive spiders cover up any imperfections, so nobody will notice if the filling isn’t perfectly swirled. I’ve made these both ways, and honestly, the spoon method is faster and creates less cleanup.
Pin This Recipe!
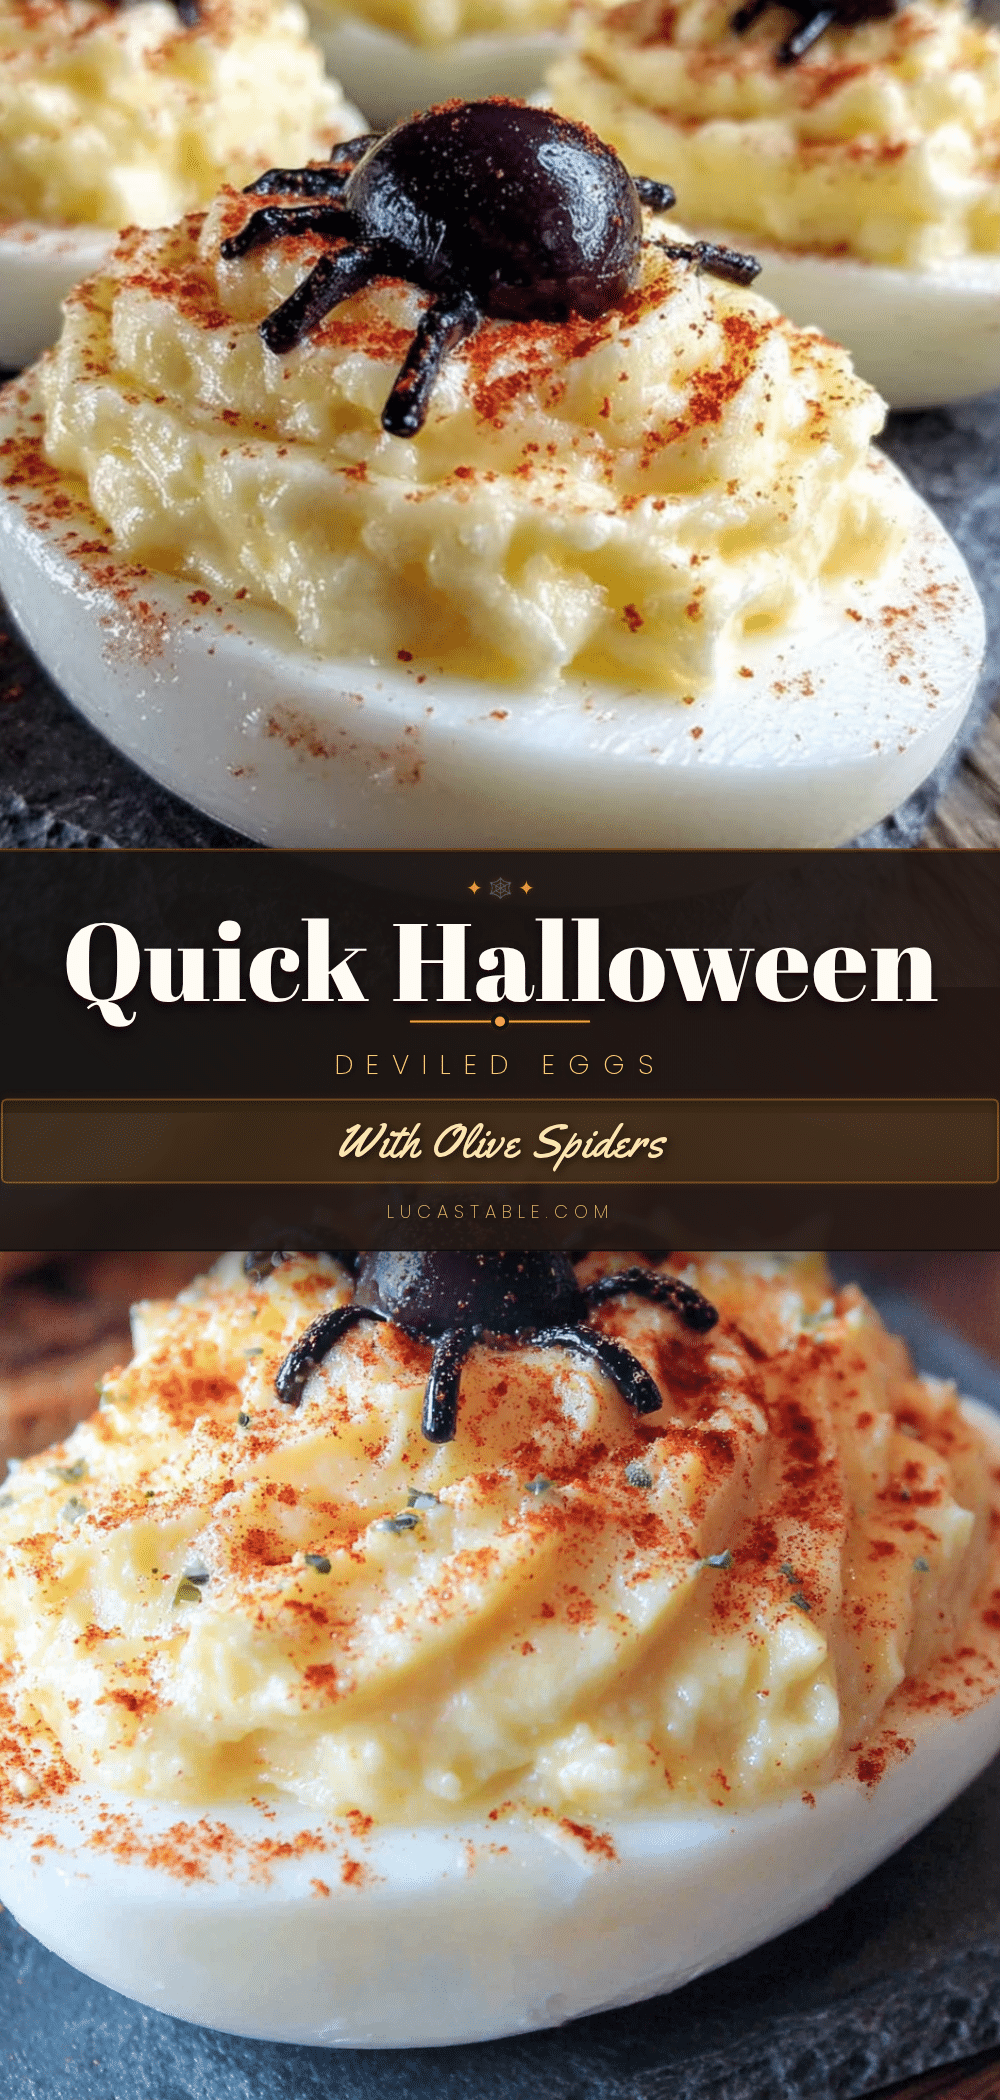
Quick Halloween Deviled Eggs: Easy Olive Spider Recipe
These Quick Halloween Deviled Eggs with Olive Spiders are a spooky, nostalgic twist on a classic appetizer. They come together in under 30 minutes with simple ingredients, making them the perfect creepy-cute addition to any Halloween party.
- Prep Time: 20 minutes
- Cook Time: 12 minutes
- Total Time: 32 minutes
- Yield: 12 deviled egg halves (6 servings of 2 halves each) 1x
- Category: Appetizer
- Cuisine: American
Ingredients
- 6 large eggs
- 3 tablespoons mayonnaise
- 1 teaspoon yellow mustard
- 1 teaspoon white vinegar
- 1/4 teaspoon salt
- 1/8 teaspoon black pepper
- 1/2 teaspoon smoked paprika (plus extra for garnish)
- 1 can (6 ounces) whole black olives (jumbo or colossal)
- 1 tablespoon cream cheese, softened (optional)
Instructions
- Place eggs in a single layer in a medium saucepan. Cover with cold water by about an inch. Cover and bring to a rolling boil over high heat. As soon as it reaches a full boil, turn off the heat and let eggs sit in the hot water, covered, for exactly 12 minutes.
- While eggs sit, fill a large bowl with ice water. After 12 minutes, transfer eggs to the ice bath using a slotted spoon. Let cool for at least 5 minutes.
- Gently tap each egg to crack the shell, then peel under cold running water. Pat dry. Slice each egg in half lengthwise. Pop out yolks into a small bowl. Place whites on a serving platter, cut side up.
- Add mayonnaise, yellow mustard, white vinegar, salt, black pepper, and smoked paprika to the yolks. Mash with a fork until smooth, then stir vigorously with a whisk or spatula for about 30 seconds until creamy. Adjust seasoning to taste.
- Spoon filling into a piping bag or zip-top bag. Snip off 1/4 inch from the corner. Pipe filling into each egg white half, mounding slightly. Sprinkle with additional smoked paprika.
- Drain olives and pat dry. Using a sharp paring knife, slice each olive in half lengthwise. Place one half cut-side down on a cutting board. Make 4 thin, parallel cuts lengthwise on each side of the olive to create legs, leaving about 1/4 inch intact at the top. Gently fan out the legs. Repeat with remaining olives.
- If using cream cheese, dab a tiny amount on the bottom of each spider body. Place one spider on top of each filled egg half, pressing gently to adhere. Arrange on a serving platter. Serve chilled.
Notes
For best results, use older eggs for easier peeling. Add a teaspoon of baking soda to the boiling water if eggs are very fresh. The olive spiders can be made ahead, but assemble them on the eggs just before serving to prevent the olives from drying out. The filling can be made up to 2 days in advance and stored in a piping bag in the fridge. Smoked paprika adds a subtle smoky depth; regular paprika can be substituted if needed.
Nutrition
- Serving Size: 2 deviled egg halves
- Calories: 190
- Sugar: 1
- Sodium: 350
- Fat: 14
- Saturated Fat: 3
- Carbohydrates: 3
- Fiber: 1
- Protein: 12
Keywords: Halloween deviled eggs, olive spiders, spooky appetizer, easy Halloween recipe, deviled eggs with olives, Halloween party food


