The neighborhood Halloween block party was in six hours and I’d completely forgotten. I mean, completely. I was standing in my kitchen at 2 PM, staring at a calendar I’d somehow ignored for three weeks, with a sinking feeling in my stomach. Everyone else would be bringing those elaborate themed desserts you see on cooking shows—you know, the ones that look like they took three days to assemble. I had a stick of butter, some flour, and a bag of chocolate chips I’d bought for a different recipe entirely. Not exactly winning material.
I called my sister in a mild panic. “What do I do? I have nothing!” She laughed—the kind of laugh that says “I told you so” without actually saying it. Then she said something that stuck: “Just make cookies. People love cookies. And if you’re feeling fancy, drizzle some chocolate on top in a web pattern. It’ll look like you tried.”
Honestly, I thought she was crazy. But I had no better ideas, so I grabbed the butter and started creaming it with sugar before I could talk myself out of it. The whole thing came together in a blur of flour, vanilla, and desperate hope. I piped the ganache in those shaky spider web patterns while the cookies were still warm, not really believing it would work.
Here’s the thing—I showed up late, cookies slightly lopsided, ganache webs a little crooked. And they disappeared in twenty minutes. A neighbor actually asked me for the recipe, and I had to pretend I’d planned it all along. These spooky spider web cookies with chocolate ganache became my accidental Halloween tradition. Maybe you’ve been there—the scramble, the panic, the recipe that saves you anyway. That’s what this is. And honestly? They taste even better when you’re not trying so hard.
Why You’ll Love This Recipe
Let me tell you why these cookies are different from every other Halloween dessert you’ve seen. I’ve tested this recipe at least seven times across three different ovens, and I can tell you with confidence—it works every single time.
- Quick & Easy: From start to finish, these come together in under 45 minutes. That includes chilling time. Perfect for last-minute Halloween parties or when you just need something impressive fast.
- Simple Ingredients: You probably have everything in your pantry right now. Butter, sugar, flour, cocoa powder, chocolate chips, cream. No weird specialty items or trips to three different stores.
- Perfect for Halloween Gatherings: These cookies are built for parties, potlucks, trick-or-treat events, or just making your kitchen feel festive. The spider web design looks complicated but takes maybe five minutes to pipe.
- Crowd-Pleaser: I’ve brought these to kid-heavy events and adult dinner parties. Same result every time—people grab two or three before they realize what they’re doing.
- Unbelievably Delicious: The cookie base is soft and fudgy, almost brownie-like. The chocolate ganache on top adds this rich, creamy layer that makes every bite feel indulgent.
What makes these spooky spider web cookies different from the rest? It’s the texture. Most Halloween cookies are either too crunchy or too cakey. These hit that perfect middle ground—soft centers with slightly crisp edges, topped with a ganache that sets just firm enough to hold the web pattern but stays soft when you bite into it. I spent three batches getting the flour-to-fat ratio exactly right, and it was worth every crumb.
This recipe isn’t just good—it’s the kind that makes you close your eyes after the first bite. It’s comfort food with a spooky twist, easy enough for a weeknight but pretty enough to brag about. Perfect for impressing guests without the stress, or turning a simple Tuesday into something memorable.
What Ingredients You Will Need
This recipe uses simple, everyday ingredients to create something that looks way fancier than it actually is. Here’s what you’ll need to gather before you start.
For the Cookie Base
- Unsalted butter, 1 cup (226g), softened to room temperature (I prefer Kerrygold for the richness, but any good-quality butter works)
- Granulated sugar, ¾ cup (150g) (adds sweetness and helps create those slightly crispy edges)
- Light brown sugar, ¾ cup (150g), packed (adds moisture and a subtle molasses flavor that complements the chocolate)
- Large eggs, 2, at room temperature (cold eggs can seize the butter mixture, so let them sit out for 30 minutes first)
- Pure vanilla extract, 2 teaspoons (use real vanilla, not imitation—it makes a difference in the final flavor)
- All-purpose flour, 2 ¼ cups (280g) (spoon and level your flour—don’t scoop directly from the bag or you’ll end up with dry cookies)
- Unsweetened cocoa powder, ½ cup (45g) (I use Dutch-process for a darker color and richer flavor, but natural cocoa works too)
- Baking soda, 1 teaspoon
- Salt, ½ teaspoon (don’t skip this—it balances the sweetness and enhances the chocolate)
For the Chocolate Ganache
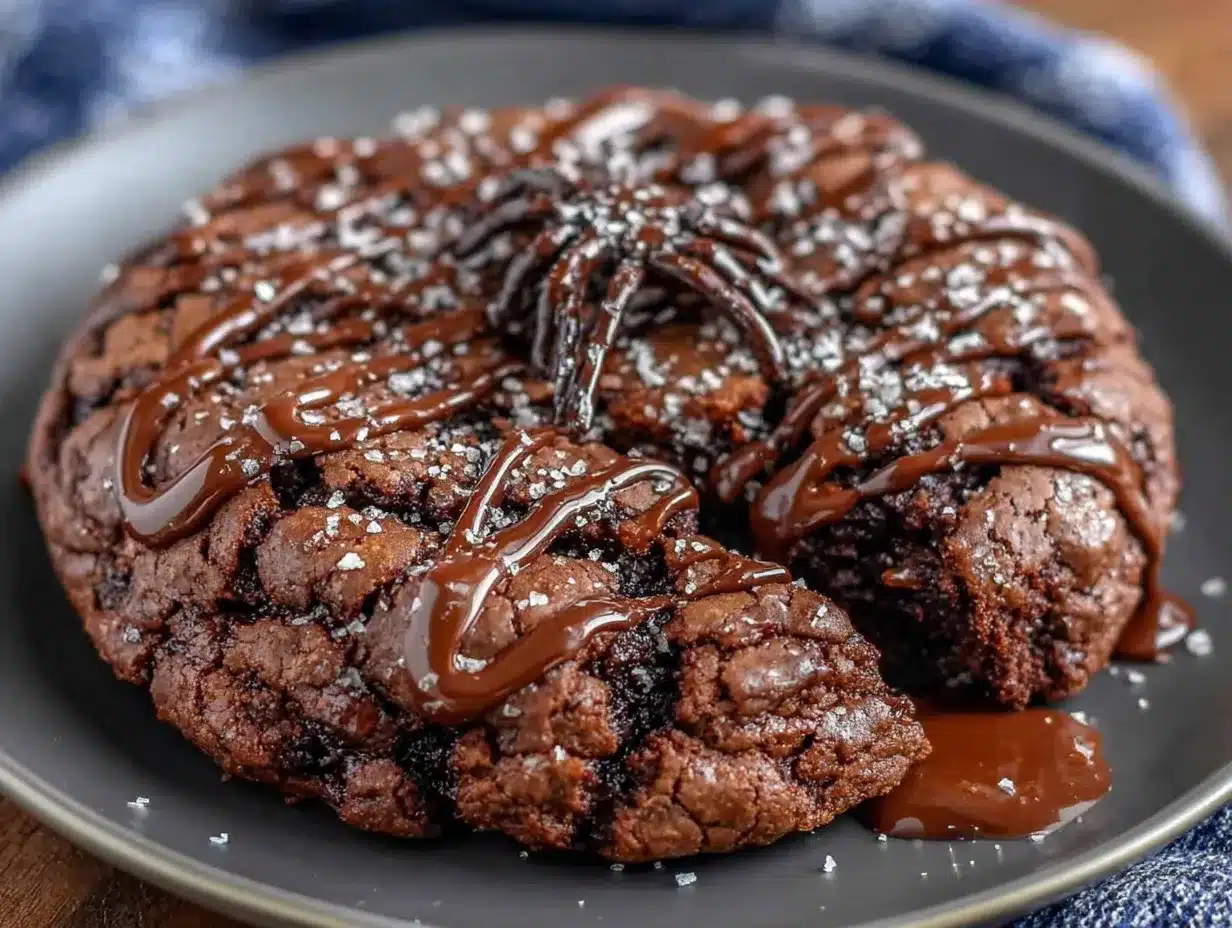
- Semi-sweet chocolate chips, 1 cup (175g) (use a good brand like Ghirardelli or Guittard for the smoothest melt)
- Heavy cream, ½ cup (120ml) (full-fat is essential here—low-fat cream won’t set properly)
- Unsalted butter, 2 tablespoons (28g), softened (adds shine and makes the ganache easier to pipe)
For the Spider Web Decoration
- White chocolate chips, ¼ cup (45g) (for the web pattern—you could also use melted white candy melts)
- Small black candy eyes, optional (the kind you find at craft stores or baking sections around Halloween)
A few quick notes on ingredients. If you’re dairy-free, you can substitute the butter with a good vegan butter stick (not margarine) and use coconut cream instead of heavy cream. The texture will be slightly different but still delicious. For the cocoa powder, I really recommend Dutch-process if you can find it—it gives the cookies that deep, dark color that makes the white spider webs pop.
When it comes to chocolate chips for the ganache, don’t use the cheapest bag you find. I learned this the hard way. Cheap chocolate chips often have stabilizers that prevent them from melting smoothly. Spend the extra dollar or two—your ganache will be silky and beautiful instead of grainy and frustrating.
And here’s a little tip I picked up from years of cookie-making—if your eggs are cold, place them in a bowl of warm water for five minutes before using. Room-temperature eggs emulsify into the butter mixture much better, giving you a smoother, more uniform dough.
Equipment Needed
You don’t need fancy equipment for these cookies, which is part of why I love this recipe so much. Here’s what you’ll want to have on hand:
- Electric mixer (stand mixer or hand mixer—both work fine; I’ve made these with a hand mixer in a tiny apartment kitchen and they turned out great)
- Large mixing bowls (at least two—one for wet ingredients, one for dry)
- Baking sheets (two if you have them, so you can rotate batches)
- Parchment paper or silicone baking mats (parchment is cheaper and works just as well)
- Cookie scoop (a 1.5-tablespoon scoop gives you consistent sizes; if you don’t have one, use two spoons)
- Cooling rack (essential for letting the cookies cool evenly before adding ganache)
- Small piping bag or zip-top bag (for the spider web pattern)
- Microwave-safe bowl (for melting the ganache ingredients)
- Whisk (for smoothing the ganache)
If you don’t have a piping bag, don’t worry. A zip-top bag with a tiny corner snipped off works perfectly. I’ve done it that way more times than I can count. Just make sure the hole is small—you can always cut it bigger, but you can’t fix a hole that’s too large.
For the baking sheets, I recommend light-colored aluminum pans. Dark non-stick pans can cause the bottoms of your cookies to brown too quickly. If that’s all you have, just reduce your baking time by a minute or two.
Preparation Method
Alright, let’s make some cookies. I’ll walk you through every step so you know exactly what to expect.
Step 1: Make the Cookie Dough (10 minutes)
In a large bowl, cream together the softened butter, granulated sugar, and brown sugar until light and fluffy. This takes about 3-4 minutes with an electric mixer on medium speed. You’re looking for a color change—it should go from pale yellow to almost ivory, and the texture should look like soft clouds. Scrape down the sides of the bowl halfway through.
Add the eggs one at a time, beating well after each addition. Then mix in the vanilla extract. The mixture might look slightly curdled at this point—that’s normal, especially if your eggs were a little cold. Don’t panic.
In a separate bowl, whisk together the flour, cocoa powder, baking soda, and salt. This ensures the leavening agents are evenly distributed so you don’t end up with one cookie that rises too much and another that’s flat.
Gradually add the dry ingredients to the wet mixture, mixing on low speed until just combined. Stop when you can’t see any more streaks of flour. Overmixing at this stage develops gluten and makes tough cookies. I speak from experience—I ruined a batch by walking away while the mixer was running. Set a timer if you need to.
Step 2: Chill the Dough (30 minutes minimum)
Cover the bowl with plastic wrap and refrigerate for at least 30 minutes. This step is non-negotiable. Chilling solidifies the fat, which means your cookies will spread less and stay thick and fudgy. I’ve skipped this step before out of impatience, and the cookies turned into flat, sad discs. Learn from my mistakes.
While the dough chills, preheat your oven to 350°F (175°C) and line two baking sheets with parchment paper.
Step 3: Shape and Bake (12-14 minutes)
Scoop the chilled dough into 1.5-tablespoon portions (about the size of a walnut) and place them 2 inches apart on the prepared baking sheets. I usually get 24-26 cookies from this recipe.
Bake for 12-14 minutes. At 12 minutes, the cookies will look slightly underdone in the center—that’s what you want. They’ll continue to set as they cool on the baking sheet. If you bake them until they look fully done, they’ll be dry and crumbly. The edges should be set and the tops should look slightly cracked.
Let the cookies cool on the baking sheet for 5 minutes, then transfer them to a cooling rack to cool completely. Don’t rush this—if you add ganache to warm cookies, it’ll slide right off.
Step 4: Make the Ganache (5 minutes)
Place the semi-sweet chocolate chips in a heat-safe bowl. Heat the heavy cream in the microwave for 45-60 seconds until it’s steaming but not boiling. Pour the hot cream over the chocolate chips and let it sit for 2 minutes without stirring. This gentle heat is what gives you a smooth, shiny ganache instead of a grainy mess.
After 2 minutes, whisk gently starting from the center and working outward until the mixture is completely smooth. Add the softened butter and whisk until incorporated. The butter adds shine and makes the ganache slightly softer, which makes piping easier.
Step 5: Decorate with Spider Webs (10 minutes)
Once the cookies are completely cool, spread a thin layer of ganache over each one, leaving a small border around the edges. Let the ganache set for about 5 minutes—it should be slightly firm but not hard.
Melt the white chocolate chips in the microwave in 20-second intervals, stirring between each, until smooth. Transfer to a small piping bag or zip-top bag and snip off a tiny corner.
Here’s the spider web technique: Pipe a small circle of white chocolate in the center of each cookie. Then pipe a spiral outward from the center. While the white chocolate is still wet, drag a toothpick from the center outward through the spiral, then repeat going from the outside inward. This creates the web pattern. Wipe the toothpick clean between each drag for the cleanest lines.
If you’re using candy eyes, press two small ones onto each cookie while the ganache is still tacky. They’ll stick as it sets.
Let the ganache and white chocolate set completely before serving, about 30 minutes at room temperature or 15 minutes in the refrigerator.
Cooking Tips & Techniques
After making these spooky spider web cookies more times than I can count, I’ve picked up a few tricks that make the process smoother and the results better.
Don’t skip the chill time. I know I said this already, but I’m saying it again because it’s that important. Warm cookie dough spreads like melted butter—because that’s basically what it is. Chilled dough holds its shape and gives you those thick, soft centers that everyone loves.
Use a cookie scoop for consistent sizes. This isn’t just about presentation—it’s about even baking. When all your cookies are the same size, they’ll all be done at the same time. No more pulling out a tray where half are perfect and half are overdone.
Test your ganache consistency. The ganache should be thick enough to hold its shape when piped but soft enough to spread easily. If it’s too thin, let it cool for a few more minutes. If it’s too thick, add a teaspoon of warm cream and stir. I’ve had batches go both ways, and the fix is always simple.
Practice the spider web on parchment first. Before you start decorating the actual cookies, pipe a few test webs on a piece of parchment paper. This lets you get a feel for the pressure and speed without ruining a cookie. Plus, you get to eat the test webs as a snack.
Work in small batches. Don’t try to decorate all 24 cookies at once. Work with 6-8 at a time, doing the ganache layer first, then the web pattern. If you try to do everything at once, the ganache will set before you can pipe the webs.
One mistake I made early on—I used too much white chocolate for the webs. A little goes a long way. You want thin, delicate lines, not thick globs. If your white chocolate is too thick, add a tiny splash of coconut oil or vegetable oil to thin it out.
Variations & Adaptations
This recipe is surprisingly flexible. Here are some ways I’ve adapted it over the years.
Gluten-Free Version
Substitute the all-purpose flour with a 1:1 gluten-free baking flour blend. I’ve used King Arthur’s Measure for Measure blend with great results. Add an extra tablespoon of milk to the dough since gluten-free flours tend to absorb more moisture. The texture will be slightly more tender, but the spider web pattern works just the same.
Vegan Adaptation
Use vegan butter sticks (not tub margarine) and replace each egg with a flax egg (1 tablespoon ground flaxseed mixed with 3 tablespoons water, left to sit for 5 minutes). For the ganache, use full-fat coconut cream instead of heavy cream and vegan chocolate chips. The cookies will be a bit more delicate, so handle them gently.
Peanut Butter Spider Webs
For a flavor twist, add ½ cup of creamy peanut butter to the cookie dough along with the butter. Reduce the granulated sugar by ¼ cup to balance the sweetness. The peanut butter adds a savory note that pairs beautifully with the chocolate ganache.
Different Web Colors
Instead of white chocolate, try using colored candy melts for the web pattern. Orange webs on dark chocolate cookies look amazing for Halloween. Green or purple work well too. Just make sure the candy melts are the kind that set firm at room temperature.
Mini Cookie Version
Use a teaspoon scoop instead of a tablespoon scoop for bite-sized cookies. Reduce baking time to 8-10 minutes. These are perfect for party platters or cookie exchanges where people want to try multiple treats.
I tried the peanut butter version last year for a friend who “doesn’t like plain chocolate cookies” (I know, I don’t understand her either). She ate six and asked for the recipe. So if you’re feeding picky eaters, that’s a solid option.
Serving & Storage Suggestions
These spooky spider web cookies are best served at room temperature, which lets the ganache soften slightly and the cookie base stay fudgy. If you’ve refrigerated them, let them sit out for 15-20 minutes before serving.
For presentation, arrange them on a dark platter or black cake stand to make the white spider webs pop. A dusting of powdered sugar around the edges of the platter looks like cobwebs and adds to the Halloween vibe. I’ve also placed them on a bed of crushed chocolate cookies to look like “dirt”—it’s a little extra, but it gets compliments.
These cookies pair beautifully with a cold glass of milk, a hot coffee, or—if you’re serving adults—a dark stout beer or a bourbon old fashioned. The bitterness of the beer or whiskey balances the sweetness of the chocolate.
Storage: Store the decorated cookies in an airtight container at room temperature for up to 5 days. Layer them between sheets of parchment paper so the spider web patterns don’t smudge. Don’t stack them too high—the ganache is soft enough that heavy stacking can flatten the webs.
Freezer instructions: You can freeze the undecorated cookies for up to 3 months. Place them in a single layer on a baking sheet and freeze until solid, then transfer to a freezer bag. When you’re ready to serve, thaw at room temperature, then make the ganache and decorate. I’ve done this for Halloween parties when I wanted to prep ahead, and nobody could tell the difference.
The ganache-decorated cookies don’t freeze well—the moisture from thawing can make the white chocolate webs bleed and smudge. If you need to freeze, do it before decorating.
One thing I love about these cookies—the flavors actually improve after a day. The chocolate deepens, the cookie softens slightly, and everything melds together. Day-old cookies are almost better than fresh ones. If you can wait that long.
Nutritional Information & Benefits
Here’s the honest truth: these are cookies. They’re a treat, not a health food. But knowing what’s in them helps you enjoy them mindfully.
| Nutrient | Per Cookie (based on 24 cookies) |
|---|---|
| Calories | 195 |
| Total Fat | 11g |
| Saturated Fat | 7g |
| Cholesterol | 35mg |
| Sodium | 95mg |
| Total Carbohydrates | 24g |
| Dietary Fiber | 1.5g |
| Sugars | 16g |
| Protein | 3g |
On the positive side, dark chocolate contains antioxidants called flavonoids, which can support heart health. The cocoa powder in these cookies provides a small amount of iron and magnesium. And making them at home means you control exactly what goes in—no preservatives, no artificial flavors, no weird stabilizers.
If you’re watching your sugar intake, you can reduce the granulated sugar by ¼ cup without significantly affecting the texture. The cookies will be slightly less sweet, but the chocolate ganache adds enough sweetness to compensate.
These cookies contain dairy, eggs, and wheat. For allergen-friendly versions, check the variations section above.
Conclusion
These spooky spider web cookies with chocolate ganache started as a panic-induced last-minute recipe, and now they’re the Halloween treat I look forward to making every year. They’re proof that you don’t need complicated techniques or specialty ingredients to create something that looks and tastes impressive.
What I love most about this recipe is how forgiving it is. The dough comes together quickly, the ganache is nearly impossible to mess up, and the spider web pattern hides any imperfections beautifully. Even your crooked lines will look intentional—like a real spider made them.
I hope you give these a try, whether you’re scrambling for a last-minute party contribution or planning ahead for your Halloween celebration. Customize them however you like—different colors, different add-ins, different decorations. That’s the beauty of a simple recipe. It becomes yours.
If you make these, I’d love to hear how they turned out. Drop a comment below and let me know if your spider webs were as wobbly as mine were that first time. And if you have a last-minute party save story, I’d love to hear that too. We’ve all been there.
Happy Halloween, and happy baking!
Frequently Asked Questions
Can I make the dough ahead of time?
Absolutely. The cookie dough can be refrigerated for up to 3 days before baking. Just wrap it tightly in plastic wrap so it doesn’t dry out. You can also freeze the dough balls for up to 3 months—bake directly from frozen, adding 2-3 minutes to the baking time.
Why did my cookies spread too much?
This usually happens when the dough isn’t chilled long enough or the butter was too soft when you started. Make sure your butter is softened but still cool to the touch, and don’t skip the 30-minute chill time. If your kitchen is warm, chill the dough for a full hour.
Can I use milk chocolate instead of semi-sweet for the ganache?
You can, but the ganache will be much sweeter and won’t set as firmly. If you prefer milk chocolate, reduce the sugar in the cookie dough by 2 tablespoons to balance the overall sweetness. White chocolate ganache also works but needs a different cream-to-chocolate ratio—use ⅓ cup cream to 1 cup white chocolate chips.
How do I get clean spider web lines?
Use a toothpick or a thin skewer, and wipe it clean after each drag through the white chocolate. If the white chocolate starts to thicken while you’re working, microwave it for 5-10 seconds to thin it out again. Work quickly but carefully—speed comes with practice.
Can I skip the white chocolate web pattern?
Sure! The cookies are delicious with just the chocolate ganache. You could also drizzle the white chocolate randomly over the top for a simpler look, or sprinkle with crushed candy cane or Halloween sprinkles instead. The spider web is optional—it’s just for the spooky effect.
Pin This Recipe!
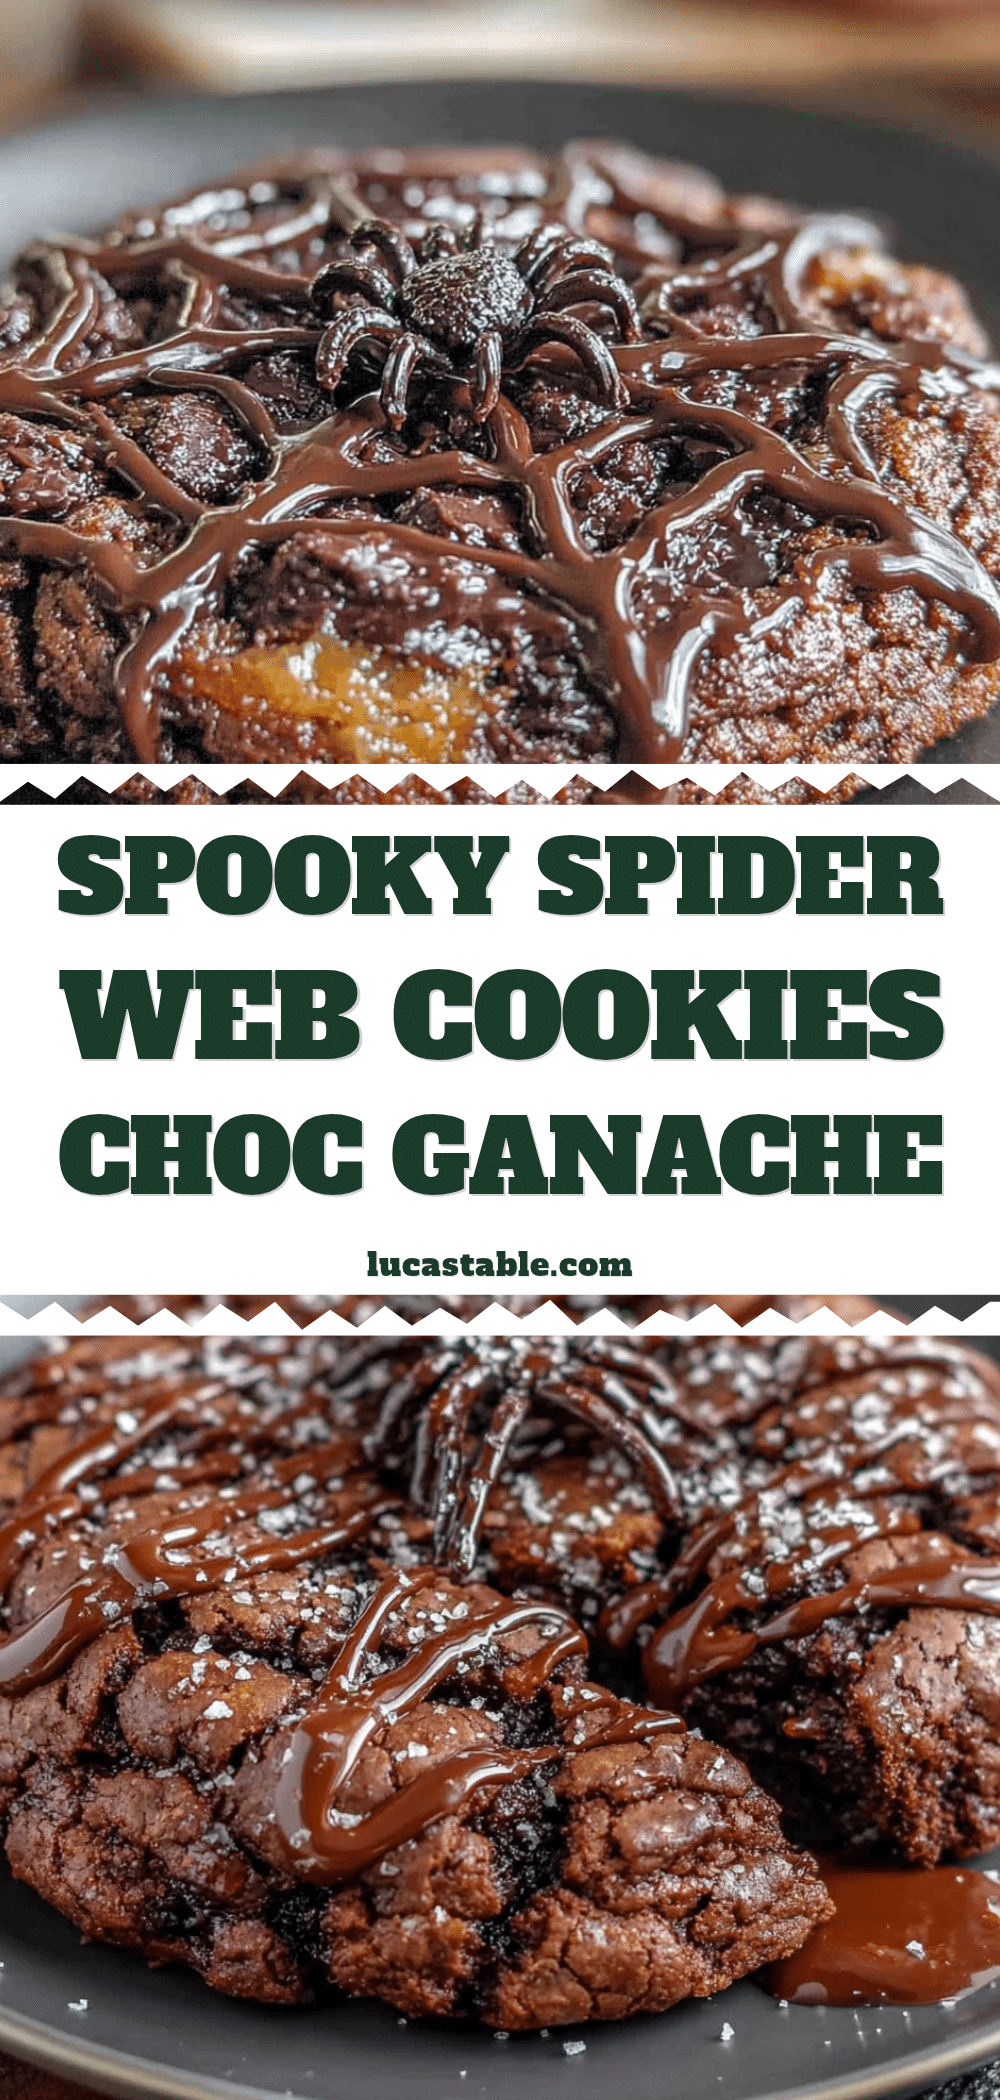
Spooky Spider Web Cookies with Easy Chocolate Ganache

These spooky spider web cookies with chocolate ganache are a quick and easy Halloween treat that looks impressive but comes together in under 45 minutes. Soft, fudgy chocolate cookies topped with a rich ganache and a white chocolate spider web pattern are perfect for last-minute parties or festive gatherings.
- Prep Time: 15 minutes
- Cook Time: 12-14 minutes
- Total Time: 45 minutes
- Yield: 24 cookies 1x
- Category: Dessert
- Cuisine: American
Ingredients
- 1 cup (226g) unsalted butter, softened
- ¾ cup (150g) granulated sugar
- ¾ cup (150g) light brown sugar, packed
- 2 large eggs, at room temperature
- 2 teaspoons pure vanilla extract
- 2 ¼ cups (280g) all-purpose flour
- ½ cup (45g) unsweetened cocoa powder (Dutch-process preferred)
- 1 teaspoon baking soda
- ½ teaspoon salt
- 1 cup (175g) semi-sweet chocolate chips
- ½ cup (120ml) heavy cream
- 2 tablespoons (28g) unsalted butter, softened (for ganache)
- ¼ cup (45g) white chocolate chips
- Small black candy eyes (optional)
Instructions
- In a large bowl, cream together the softened butter, granulated sugar, and brown sugar until light and fluffy, about 3-4 minutes. Scrape down the sides halfway through.
- Add the eggs one at a time, beating well after each addition. Mix in the vanilla extract.
- In a separate bowl, whisk together the flour, cocoa powder, baking soda, and salt.
- Gradually add the dry ingredients to the wet mixture, mixing on low speed until just combined. Do not overmix.
- Cover the bowl with plastic wrap and refrigerate for at least 30 minutes. Meanwhile, preheat the oven to 350°F (175°C) and line two baking sheets with parchment paper.
- Scoop the chilled dough into 1.5-tablespoon portions (about the size of a walnut) and place them 2 inches apart on the prepared baking sheets.
- Bake for 12-14 minutes. The cookies should look slightly underdone in the center. Let them cool on the baking sheet for 5 minutes, then transfer to a cooling rack to cool completely.
- Place the semi-sweet chocolate chips in a heat-safe bowl. Heat the heavy cream in the microwave for 45-60 seconds until steaming but not boiling. Pour the hot cream over the chocolate chips and let it sit for 2 minutes without stirring.
- Whisk gently until smooth, then add the softened butter and whisk until incorporated.
- Once the cookies are completely cool, spread a thin layer of ganache over each one, leaving a small border around the edges. Let the ganache set for about 5 minutes.
- Melt the white chocolate chips in the microwave in 20-second intervals, stirring between each, until smooth. Transfer to a small piping bag or zip-top bag and snip off a tiny corner.
- Pipe a small circle of white chocolate in the center of each cookie, then pipe a spiral outward from the center. While the white chocolate is still wet, drag a toothpick from the center outward through the spiral, then repeat going from the outside inward to create the web pattern. Wipe the toothpick clean between each drag.
- If using candy eyes, press two onto each cookie while the ganache is still tacky.
- Let the ganache and white chocolate set completely before serving, about 30 minutes at room temperature or 15 minutes in the refrigerator.
Notes
Don’t skip the chill time—it prevents the cookies from spreading too much. For the ganache, use full-fat heavy cream for proper setting. If the white chocolate thickens while piping, microwave for 5-10 seconds to thin it out. The cookies can be stored in an airtight container at room temperature for up to 5 days. Undecorated cookies can be frozen for up to 3 months.
Nutrition
- Serving Size: 1 cookie
- Calories: 195
- Sugar: 16
- Sodium: 95
- Fat: 11
- Saturated Fat: 7
- Carbohydrates: 24
- Fiber: 1.5
- Protein: 3
Keywords: Halloween cookies, spider web cookies, chocolate ganache cookies, easy Halloween dessert, spooky cookies, chocolate cookies, last-minute Halloween treat


