It was 11:47 PM on a random Wednesday in October, and I had a very specific craving for something festive but also… healthy? I didn’t have any carving pumpkins or fancy cookie cutters, but I had a massive watermelon that was taking up way too much space in my fridge and a bag of clementines that were about to go bad. The idea just arrived, fully formed, like a weird late-night revelation: what if I made a fruit platter that looked like a pumpkin? Not a carved one, but the actual shape of the thing. I grabbed my sharpest knife, cleared the kitchen counter, and started cutting. Honestly, I was a little delirious from lack of sleep, but something about the quiet hour made me trust my instincts more than I usually do during the day.
I won’t lie to you—the first attempt was a bit of a mess. The watermelon kept wobbling, and I definitely cut my thumb on a rogue clementine peel (those little buggers are sharp). But once I got the basic shape down, something clicked. The orange slices became the “ribs” of the pumpkin, the green grapes formed the stem, and suddenly I had this beautiful, edible centerpiece that looked way harder to make than it actually was. I texted a photo to my sister at midnight—she thought I’d bought it from some fancy catering company. That’s when I knew I was onto something.
This is the kind of recipe that makes you look like a total rockstar at a party without actually breaking a sweat. Maybe you’ve been there—staring at a party platter of sad, store-bought veggie trays and thinking, “I could do better.” Well, you absolutely can. And you can do it with fruit that’s probably already in your kitchen.
Why You’ll Love This Recipe
Let me tell you why this pumpkin-shaped fruit tray has become my go-to for every fall gathering, from casual potlucks to slightly more formal dinner parties. I’ve tested this thing at six different events now, and it never fails to get the exact same reaction—people literally stop talking to take photos of it.
- Surprisingly Simple: Despite looking like something from a professional food stylist’s kitchen, this comes together in about 30 minutes. I’m not a trained chef—I’m just someone who figured out the trick to getting that perfect pumpkin shape.
- No Special Equipment: You don’t need any fancy pumpkin-shaped molds or cookie cutters. Just a good knife, a cutting board, and whatever fruit you’ve got lying around. I’ve made this with everything from honeydew to pineapple.
- Perfect for Fall Gatherings: This is the dish that says “I put thought into this” without you having to spend hours in the kitchen. It’s ideal for Halloween parties, Thanksgiving potlucks, or even just a fun weekend brunch with friends.
- Crowd-Pleaser for All Ages: Kids love the novelty, adults appreciate the healthy option, and everyone wants to know how you did it. I’ve seen grown men argue over who gets the last cantaloupe ball.
- Naturally Gluten-Free & Vegan: No one has to worry about dietary restrictions—this is just straight-up fruit, done in the most visually stunning way possible.
What makes this recipe different from the average fruit platter is the presentation. It’s not just fruit on a plate—it’s a conversation starter. The first time I brought this to a Friendsgiving, someone actually asked me if I’d taken a professional class. I laughed and said, “No, I just really love fruit and was bored at midnight.”
This platter is comfort food reimagined—healthier, faster, but with the same soul-soothing satisfaction of a homemade dessert. Perfect for impressing guests without stress, or turning a simple snack into something memorable.
What Ingredients You Will Need
This recipe uses simple, wholesome ingredients to deliver a stunning visual effect and satisfying flavor without any fuss. Most of these are pantry staples during fall, but I’ve included swaps for whatever you have on hand.
- 1 large watermelon (seedless works best—about 8-10 pounds, oblong shape preferred for the pumpkin base)
- 2-3 cantaloupes or honeydew melons (for scooping into balls—I recommend getting the melon salad recipe inspiration from my other post for using up the scraps)
- 1-2 pineapples (for cutting into fun shapes—the yellow color adds gorgeous contrast)
- 2 cups green grapes (seedless, washed and dried—these become the “stem” and leaf details)
- 3-4 clementines or mandarin oranges (peeled and separated—adds the classic pumpkin rib look)
- 1 cup blueberries (optional, for filling gaps and adding color contrast)
- 1 cup strawberries (hulled and halved—the red adds a pop against the orange tones)
- Fresh mint leaves (for garnish—makes it look professionally styled)
- 1 pomegranate (optional, the seeds look like little jewels scattered around)
- Edible flowers (optional, for that extra “wow” factor at fancy events)
Ingredient Tips from My Kitchen: I’ve learned the hard way that watermelon shape matters more than you’d think. Look for one that’s naturally more oval than round—it makes the pumpkin silhouette much easier to achieve. For the melon balls, I swear by the OXO melon baller—it’s like $8 and makes perfectly round scoops every time. If you’re shopping at a farmer’s market, ask the vendor to help you pick a watermelon that’s symmetrical on one side.
Substitution Guidance: Use honeydew instead of cantaloupe if that’s what’s available. Swap grapes for kiwi slices if you want more green. In summer, fresh berries work beautifully instead of pomegranate seeds. The beauty of this recipe is its flexibility—the only non-negotiable is the watermelon base.
Equipment Needed
You don’t need a professional kitchen to pull this off. Here’s what I use every time I make this platter:
- Large cutting board (sturdy, non-slip—I use a bamboo one that was $15 at Target)
- Sharp chef’s knife (8-inch is perfect—dull knives are dangerous with watermelon)
- Melon baller (the $8 OXO one is my favorite, but any brand works)
- Small cookie cutters (leaf shapes, stars, or mini pumpkins—totally optional but fun)
- Large serving platter or cutting board (at least 16 inches wide to fit the watermelon)
- Paper towels (for patting fruit dry—wet fruit slides around and looks messy)
- Toothpicks (for securing the stem and any decorative elements)
- Small paring knife (for detail work on the watermelon face or stem)
Pro tip from someone who’s made this eight times: invest in a good melon baller. The cheap plastic ones break halfway through your second cantaloupe. And if you don’t have a large enough platter, a clean cutting board wrapped in plastic wrap works perfectly—I’ve done it for potlucks more times than I care to admit.
Preparation Method
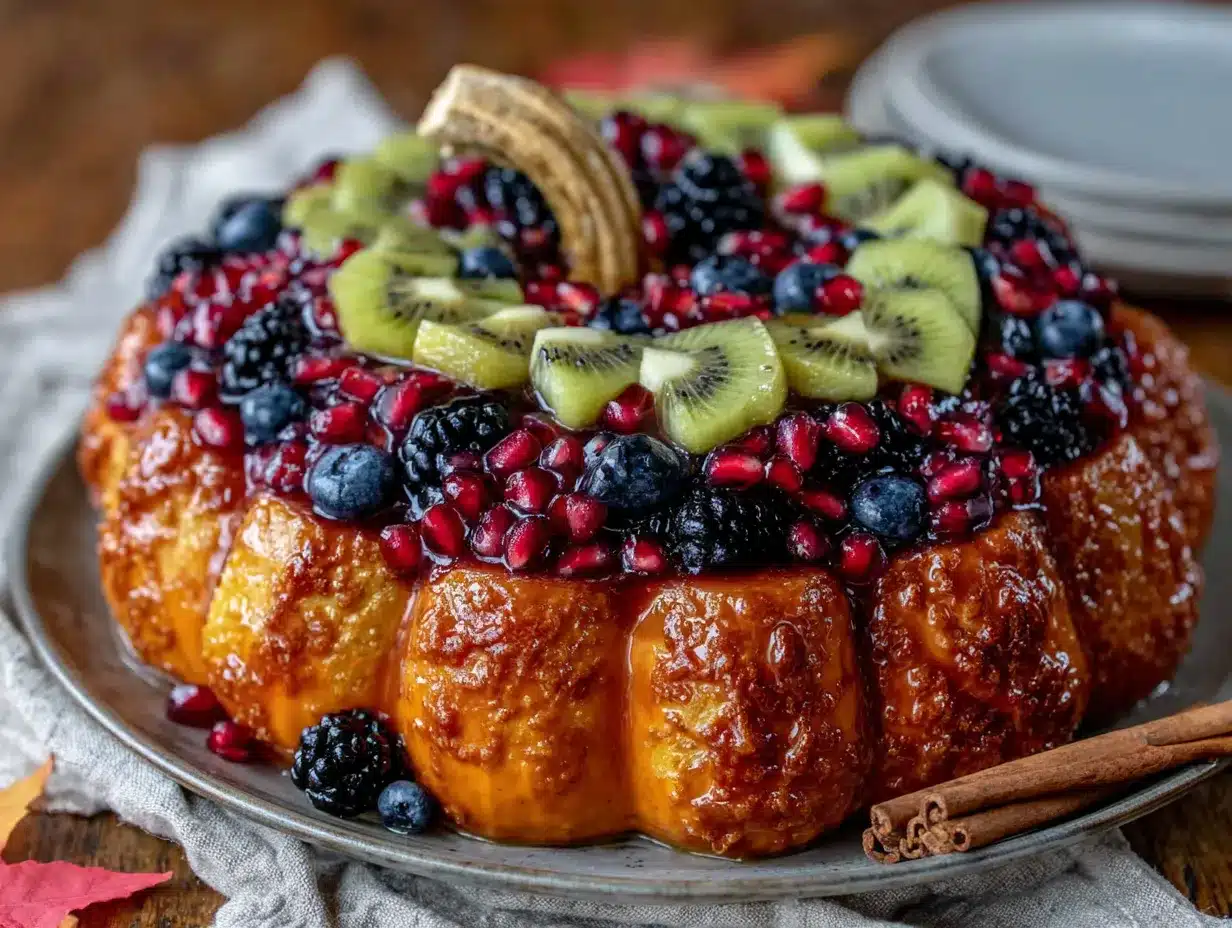
Alright, let’s get into the nitty-gritty. I’ve broken this down into steps that even a beginner can follow. Trust me—if I can do this at 11 PM on a Wednesday, you can do it for your party.
- Prepare the Watermelon Base (10 minutes)
Wash your watermelon thoroughly. Using your sharp chef’s knife, cut off the top quarter of the watermelon—this creates a flat surface for the “pumpkin” top. Save this piece for later. Now, carefully slice a thin piece off the bottom so it sits flat on your platter without wobbling. You want it stable—trust me, a rolling watermelon is a disaster waiting to happen. - Carve the Pumpkin Shape (15 minutes)
This is where the magic happens. Using your paring knife, start carving vertical grooves into the watermelon, mimicking the natural ridges of a pumpkin. Make them about 1-2 inches deep and evenly spaced—I usually do 6-8 grooves around the whole fruit. Don’t stress about perfection; the fruit will fill in any uneven spots. The grooves should be deepest at the top and taper toward the bottom. - Scoop the Melon Balls (10 minutes)
Cut your cantaloupes and honeydew in half, scoop out the seeds, and go to town with your melon baller. You want a mix of orange and green balls—aim for about 2 cups total. Pro tip: if the melon baller sticks, dip it in cold water between scoops. I learned this after a particularly frustrating session that ended with me eating half the cantaloupe out of spite. - Cut the Pineapple Shapes (5 minutes)
Slice your pineapple into 1/2-inch thick rounds, then use your cookie cutters to make stars, leaves, or small pumpkins. No cookie cutters? Just cut the pineapple into small triangles or diamonds—they look just as festive. - Prepare the Clementine Ribs (5 minutes)
Peel your clementines and separate them into individual segments. These will sit in the grooves of your watermelon to create the classic pumpkin “rib” look. If your clementines are too small, use two per groove. - Assemble the Platter (10 minutes)
Place your carved watermelon in the center of your serving platter. Start by arranging the clementine segments in the grooves you carved—they should curve naturally with the shape. Next, fill the top area around the “stem” with your green grapes, creating a leafy effect. Scatter the melon balls, pineapple shapes, blueberries, and strawberries around the base of the watermelon, covering the entire platter. The fruit should look abundant and overflowing—this is a “more is more” situation. - Add the Stem and Details (5 minutes)
Take a small cluster of green grapes and attach them to the top center of your watermelon using toothpicks. This becomes your pumpkin stem. Arrange fresh mint leaves around the stem to look like pumpkin leaves. If you’re using pomegranate seeds, scatter them like little jewels across the platter—they catch the light beautifully. - Final Touches (5 minutes)
Step back and look at your creation. Fill any bare spots with extra fruit. The key is to make it look abundant and intentional. Add edible flowers if you’re feeling fancy. Pat any wet fruit dry with paper towels—this prevents the colors from bleeding together.
Sensory Check: At this point, your kitchen should smell like a fruit stand exploded in the best way. The watermelon should feel firm but give slightly when you press the grooves. The colors should be vibrant—orange, green, red, and purple creating a gorgeous fall palette.
Cooking Tips & Techniques
I’ve made this platter enough times to have a few tricks up my sleeve. Here’s what I wish someone had told me before my first attempt:
The Watermelon Stability Trick: If your watermelon is still wobbly after cutting the bottom, slice a thin piece of cantaloupe and place it under the wobbling side. No one will see it, and your pumpkin won’t roll off the table mid-party. I learned this after a particularly embarrassing incident at a Halloween party where my creation rolled onto the floor.
The Timing Game: Here’s how I multitask for parties—carve the watermelon base the night before and store it wrapped in plastic in the fridge. The morning of the event, cut all your other fruit and store each type in separate containers. Assemble the platter about 1-2 hours before guests arrive. This way, the fruit stays fresh and you’re not frantically cutting as people walk through the door.
Common Mistake Alert: Don’t over-carve your grooves. I once got carried away and made them too deep, and the watermelon basically split in half. Aim for 1-2 inches deep max. Also, avoid using overly ripe watermelon—it’s too soft to hold its shape. You want one that’s ripe but still firm.
The Color Balance Secret: The most visually stunning platters have a good mix of colors. If your fruit selection is limited, focus on orange (clementines, cantaloupe) and green (grapes, honeydew) as your base, then add one contrast color like red (strawberries) or purple (blueberries). The eye is drawn to that pop of contrast.
My Biggest Failure: The second time I made this, I used a seedless watermelon that was actually not seedless (long story involving a mislabeled grocery store find). I spent 20 minutes picking seeds out of the carved grooves. Now I always cut a small test piece before committing to the whole carving process.
Variations & Adaptations
One of the best things about this recipe is how adaptable it is. Here are some variations I’ve tried and loved:
- Halloween Spooky Version: Instead of a cheerful pumpkin, carve a small face into the watermelon before adding the fruit. Use blackberries for eyes and a strawberry slice for a mischievous grin. My nephew’s friends went absolutely wild for this version.
- Winter Holiday Twist: Swap the clementines for blood oranges and add star-shaped pineapple pieces. Use white grapes instead of green for a wintery look. I made this for Christmas brunch and it was gone in 20 minutes.
- Low-Sugar Option: Focus on berries, green grapes, and honeydew. Skip the pineapple and watermelon, and use cucumber slices as the “ribs” instead of clementines. Still looks festive, but much lower in natural sugars.
- Tropical Pumpkin: Use mango, papaya, and dragon fruit instead of traditional fall fruits. The colors are even more vibrant, and it’s perfect for a summer gathering that’s masquerading as fall.
- Mini Pumpkin Platters: Use individual mini watermelons (the personal-sized ones) for each guest. Everyone gets their own pumpkin! This is amazing for kids’ parties or intimate dinner parties.
I once tried a savory version using cheese cubes and vegetables arranged in the same pumpkin shape—it worked surprisingly well for a Super Bowl party. The technique is the same; just swap the fruit for your favorite party snacks.
Serving & Storage Suggestions
This platter is best served chilled, straight from the fridge. I recommend taking it out about 15 minutes before guests arrive to let the chill soften slightly—cold fruit has the best texture and flavor.
Presentation Tips: Place the platter on a slightly elevated surface, like a cake stand or a stack of books covered with a cloth. This makes it a centerpiece rather than just another dish on the table. I always put it near the entrance so guests see it first—it sets the tone for the whole party.
What to Serve Alongside: This pairs beautifully with a yogurt dip (I mix Greek yogurt with a little honey and cinnamon), or a simple chocolate fondue for dipping. For drinks, sparkling apple cider or a crisp white wine complements the fruit without overpowering it.
Storage Instructions: If you have leftovers (unlikely, but possible), remove the watermelon base from the platter and wrap it tightly in plastic wrap. Store the loose fruit in separate airtight containers. Everything will keep for 1-2 days in the fridge. The watermelon base can last up to 3 days if wrapped well.
Reheating: This is fruit—no reheating needed! But if it’s been sitting out for a while, a quick 10-minute chill in the fridge will revive it nicely.
Flavor Development: Honestly, this platter looks best right after assembly. The fruit will release some juice over time, so if you’re making it more than 2 hours ahead, keep the watermelon base separate and add the loose fruit just before serving. The colors stay vibrant longer this way.
Nutritional Information & Benefits
This is one of those rare recipes that’s both stunning and genuinely good for you. Here’s the approximate nutritional breakdown for a generous serving (about 1 cup of mixed fruit):
- Calories: 80-120 (depending on fruit mix)
- Carbohydrates: 20-28g (natural sugars from fruit)
- Fiber: 2-4g
- Vitamin C: 60-80% of your daily needs (hello, immune support!)
- Vitamin A: 30-50% from cantaloupe and watermelon
- Potassium: 200-300mg
- Hydration: 90%+ water content—this is basically edible hydration
Health Benefits: Watermelon is rich in lycopene, an antioxidant that supports heart health. Cantaloupe is packed with beta-carotene for eye health. Berries provide anthocyanins that fight inflammation. And clementines give you a solid dose of immune-boosting vitamin C.
Dietary Considerations: This platter is naturally gluten-free, vegan, dairy-free, nut-free, and soy-free. The only potential allergen is if someone has a specific fruit allergy (citrus or melon allergies are rare but exist). Always label your platter if you’re bringing it to a potluck where you don’t know everyone’s dietary needs.
From a wellness perspective, this is the kind of recipe that makes healthy eating feel like a celebration. It’s proof that you don’t need sugar or processed ingredients to create something special. I love that I can serve this at a party and feel good about what people are eating.
Conclusion
Look, I’m not going to pretend this recipe will change your life. But it might change your party game. There’s something deeply satisfying about watching people’s faces light up when they see a fruit platter that looks like a pumpkin. It’s unexpected, it’s beautiful, and it’s genuinely fun to make.
I’ve made this platter for Halloween parties, Thanksgiving dinners, fall brunches, and even a baby shower (with the pumpkin shape adapted to a “baby bump” theme). Every single time, someone asks for the recipe. And every single time, I get to say, “It’s just fruit and a knife—you can totally do this.”
So here’s my challenge to you: make this for your next gathering. Don’t stress about perfection—the first time I made it, the grooves were uneven and the stem fell off twice. But you know what? Everyone still loved it. They loved the effort, the creativity, and the fact that it was healthy without being boring.
If you make this platter, I’d love to hear about it! Drop a comment below telling me what fruits you used, or tag me in your photos if you share them online. Did you add a twist? Did your guests freak out? Did the stem fall off and you had to MacGyver it back on? I want to hear all of it. Happy hosting, friends—you’ve got this!
Frequently Asked Questions
How far in advance can I make this fruit platter?
You can carve the watermelon base up to 24 hours ahead if you wrap it tightly in plastic wrap. But for the best visual effect, assemble the whole platter no more than 2-3 hours before serving. The fruit stays fresher and the colors don’t bleed together.
What if I can’t find an oblong watermelon?
No worries! A round watermelon works too—it just looks more like a round pumpkin. You can emphasize the pumpkin shape by making the grooves deeper and adding more fruit around the base to create a wider silhouette. I’ve used round watermelons plenty of times and they still look fantastic.
Can I use frozen fruit for this platter?
I wouldn’t recommend it. Frozen fruit releases a lot of water as it thaws, which will make your platter soggy and the colors will run together. Stick with fresh fruit for the best visual effect. If you’re in a pinch, thaw frozen fruit completely and pat it very dry before using.
How do I transport this to a party?
This is actually easier than you’d think! Assemble the platter on a large, flat cutting board that fits in your car. Cover it loosely with plastic wrap (don’t press it against the fruit—you’ll mess up the arrangement). Drive carefully and avoid sharp turns. I’ve transported this to six different parties without major incident—just one minor grape avalanche that was easily fixed.
What’s the best way to clean the watermelon after carving?
After your party, scrape any leftover fruit into the compost or trash. Rinse the watermelon shell with cold water and mild soap, then let it air dry. You can compost the watermelon shell if you have a compost pile—it breaks down beautifully. Just make sure to remove any toothpicks first!
Pin This Recipe!
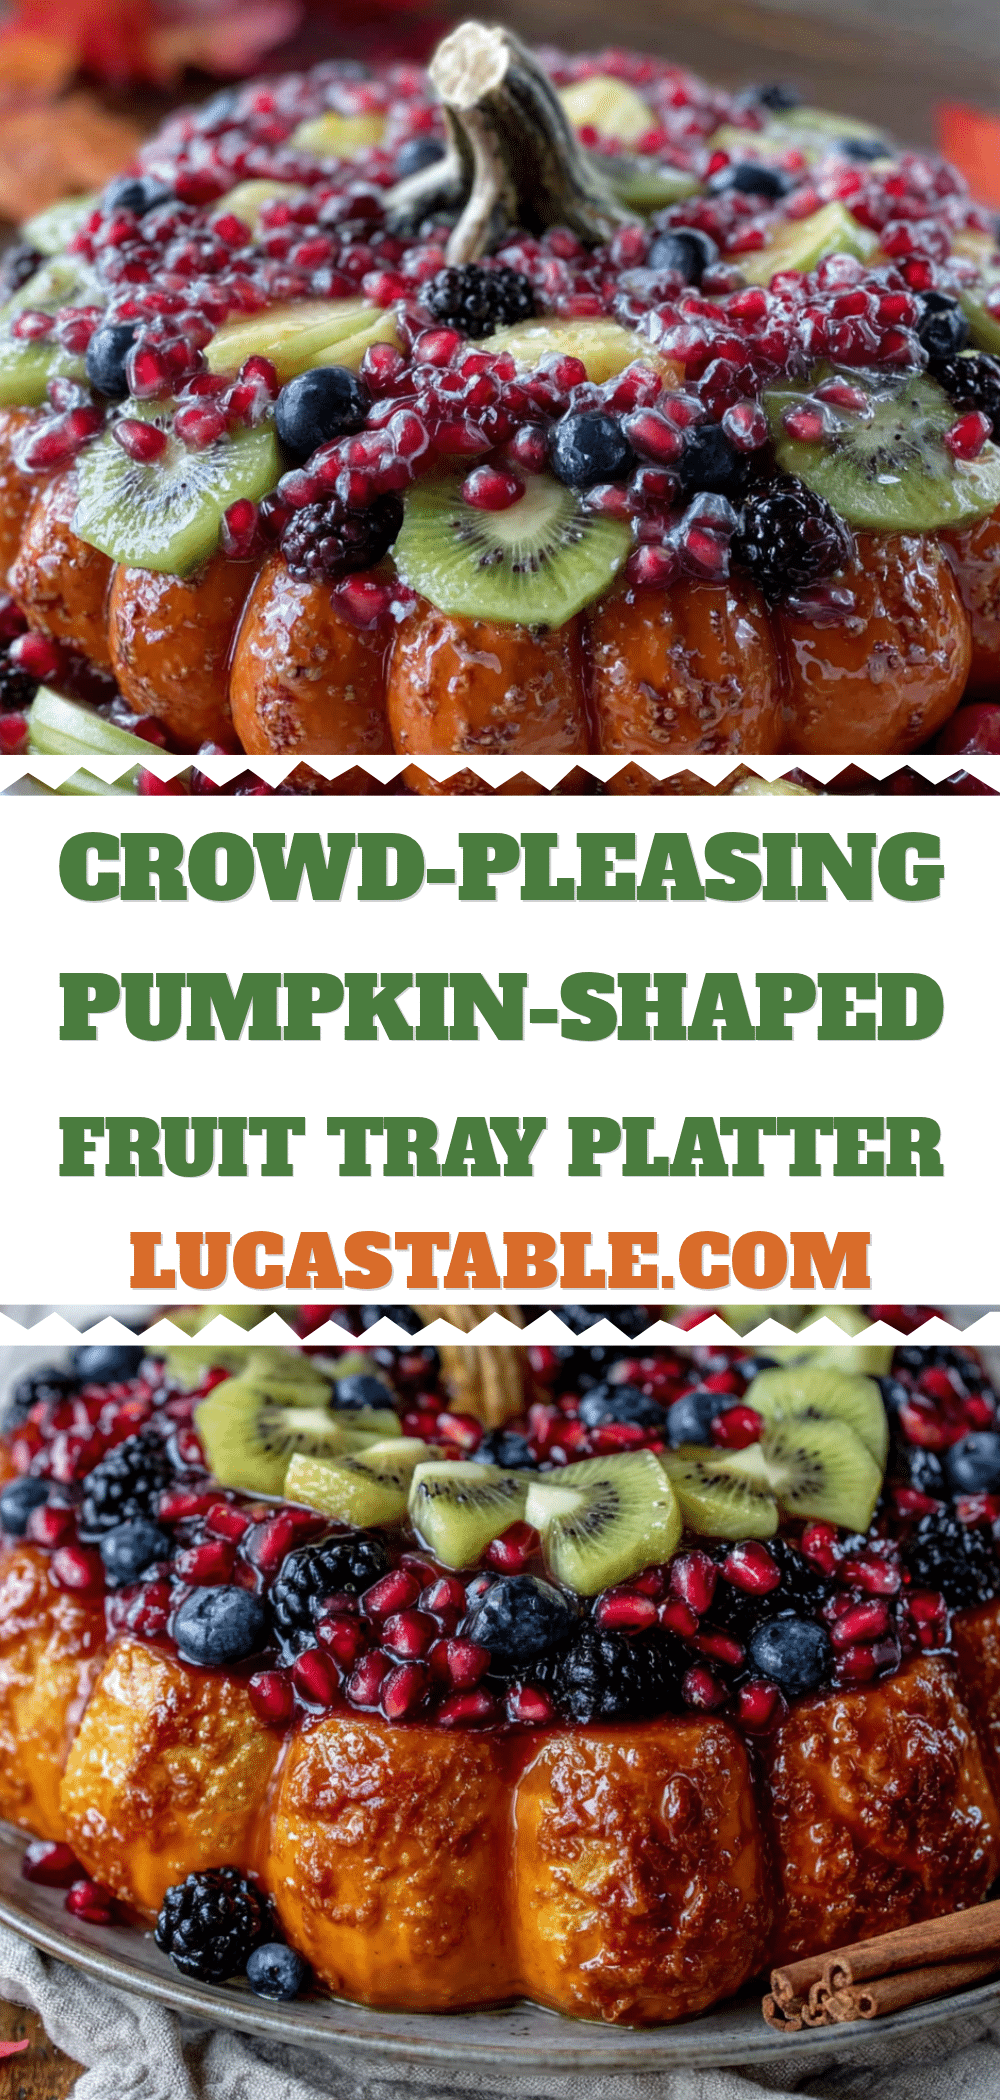
Best Easy Pumpkin-Shaped Fruit Tray Platter
A stunning and healthy fruit platter shaped like a pumpkin, perfect for fall gatherings. Made with fresh fruit and no special equipment, it’s a conversation starter that looks way harder than it actually is.
- Prep Time: 30 minutes
- Cook Time: 0 minutes
- Total Time: 30 minutes
- Yield: 8-10 servings 1x
- Category: Appetizer
- Cuisine: American
Ingredients
- 1 large watermelon (seedless, about 8–10 pounds, oblong shape preferred)
- 2–3 cantaloupes or honeydew melons
- 1–2 pineapples
- 2 cups green grapes (seedless)
- 3–4 clementines or mandarin oranges
- 1 cup blueberries (optional)
- 1 cup strawberries (hulled and halved)
- Fresh mint leaves (for garnish)
- 1 pomegranate (optional)
- Edible flowers (optional)
Instructions
- Prepare the Watermelon Base: Wash the watermelon. Cut off the top quarter to create a flat surface. Slice a thin piece off the bottom so it sits flat on the platter.
- Carve the Pumpkin Shape: Using a paring knife, carve 6-8 vertical grooves into the watermelon, about 1-2 inches deep, mimicking pumpkin ridges. Grooves should be deepest at the top and taper toward the bottom.
- Scoop the Melon Balls: Cut cantaloupes and honeydew in half, scoop out seeds, and use a melon baller to create about 2 cups of mixed melon balls.
- Cut the Pineapple Shapes: Slice pineapple into 1/2-inch thick rounds. Use cookie cutters to make stars, leaves, or small pumpkins, or cut into small triangles or diamonds.
- Prepare the Clementine Ribs: Peel clementines and separate into individual segments.
- Assemble the Platter: Place the carved watermelon in the center of a large serving platter. Arrange clementine segments in the grooves. Fill the top area around the stem with green grapes. Scatter melon balls, pineapple shapes, blueberries, and strawberries around the base.
- Add the Stem and Details: Attach a small cluster of green grapes to the top center of the watermelon using toothpicks to form the stem. Arrange fresh mint leaves around the stem. Scatter pomegranate seeds if using.
- Final Touches: Fill any bare spots with extra fruit. Pat any wet fruit dry with paper towels. Add edible flowers if desired.
Notes
Carve the watermelon base up to 24 hours ahead and store wrapped in plastic. Assemble the platter no more than 2-3 hours before serving for best visual effect. If watermelon is wobbly, place a thin slice of cantaloupe under it for stability. Avoid over-carving grooves (max 1-2 inches deep). Use firm but ripe watermelon.
Nutrition
- Serving Size: 1 cup of mixed fruit
- Calories: 80120
- Sugar: 1520
- Sodium: 510
- Carbohydrates: 2028
- Fiber: 24
- Protein: 12
Keywords: pumpkin-shaped fruit tray, fruit platter, fall fruit platter, healthy Halloween snack, fruit pumpkin, easy fruit centerpiece


