There used to be this tiny café tucked away on a side street in Portland called The Gilded Spoon that made the most incredible pumpkin cheesecake I have ever tasted. When they closed their doors three years ago—just a handwritten sign in the window saying “Thank you for the memories”—I honestly felt a little lost. That cheesecake had become my fall ritual, the thing I looked forward to every October like clockwork.
After about seven tries—some were soupy disasters, one was so dense it could have doubled as a doorstop—I finally cracked the code. And wouldn’t you know it, the secret wasn’t in the oven at all. It was in the chill of the fridge. These Light No-Bake Pumpkin Cheesecake Bites are my love letter to that little café, and honestly, they might be even better than the original. Let me tell you, the first time I bit into one and got that perfect creamy-meets-crunchy texture, I actually teared up a little. Maybe you’ve been there—that feeling when a recipe finally tastes like a memory you thought was gone forever.
Why You’ll Love This Recipe
I have tested this recipe more times than I care to admit, tweaking ratios and swapping ingredients until every single bite delivered exactly what I was chasing. Here is why these little bites have become my most-requested fall treat:
- Quick & Easy: Ready in 30 minutes flat. No oven required, no complicated techniques. Perfect for those evenings when a pumpkin craving hits out of nowhere.
- Simple Ingredients: You probably already have most of these in your pantry. No fancy grocery store runs needed—I promise.
- Perfect for Fall Gatherings: Great for Thanksgiving dessert tables, Halloween parties, or just a cozy night in with a cup of tea.
- Crowd-Pleaser: Every single person who has tried these has asked for the recipe. Kids love them, adults devour them, and nobody guesses they are lightened up.
- Unbelievably Delicious: The texture is what gets me every time—creamy, spiced pumpkin filling against that buttery, crunchy crust. It is next-level comfort food in a single bite.
What makes these different from every other no-bake pumpkin recipe out there? I swapped out heavy cream cheese for a blend of Greek yogurt and light cream cheese, cutting the calories without losing any of that rich, tangy flavor. The result is a cheesecake bite that tastes indulgent but leaves you feeling good. It is comfort food reimagined—healthier, faster, but with the same soul-soothing satisfaction that makes you close your eyes after the first bite.
What Ingredients You Will Need
This recipe uses simple, wholesome ingredients that work together to create something truly special. Most of these are pantry staples, which makes these bites perfect for spontaneous baking sessions.
For the Crust
- 1 ½ cups graham cracker crumbs (about 12 full sheets, crushed fine)
- ¼ cup unsalted butter, melted (I use Kerrygold for the best flavor)
- 2 tablespoons granulated sugar (just enough to sweeten the crust)
- ¼ teaspoon ground cinnamon (adds warmth to the base)
- Pinch of salt (balances the sweetness)
For the Pumpkin Cheesecake Filling
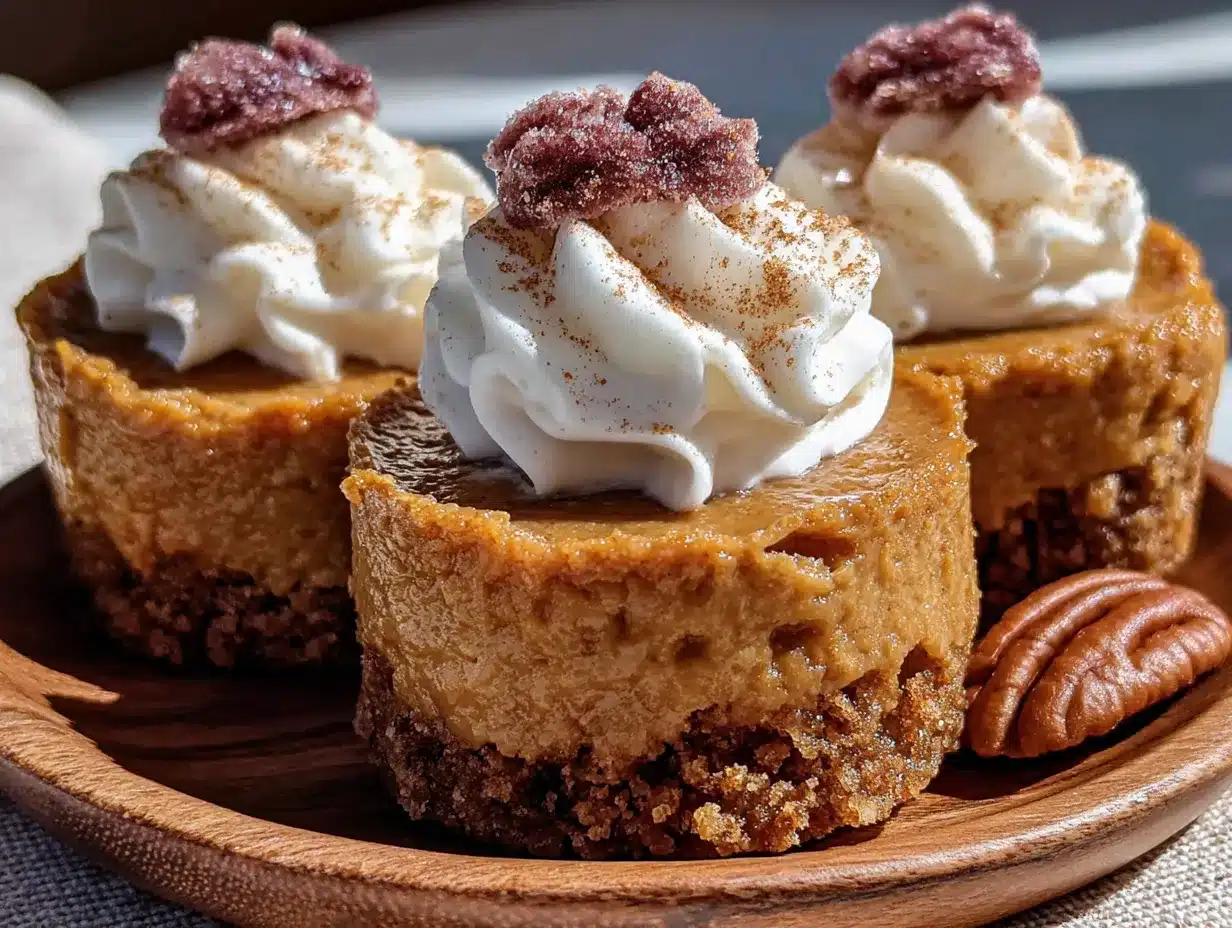
- 8 ounces light cream cheese, softened (Philadelphia is my go-to—it blends the smoothest)
- ½ cup plain Greek yogurt (full-fat or 2% works best for creaminess)
- ¾ cup pumpkin puree (not pumpkin pie filling—make sure it is 100% pure pumpkin)
- ⅓ cup honey or maple syrup (use maple for a deeper fall flavor)
- 1 teaspoon vanilla extract (pure, not imitation)
- 1 ½ teaspoons pumpkin pie spice (or make your own with cinnamon, nutmeg, ginger, and cloves)
- ¼ teaspoon salt (brings everything into balance)
- 1 tablespoon powdered gelatin (helps the filling set without baking)
- 3 tablespoons cold water (for blooming the gelatin)
Ingredient Tips: Look for cream cheese that is block-style, not whipped—it gives you better control over the texture. For the pumpkin puree, I always grab Libby’s because it is consistently thick and not watery. If you are dairy-free, you can substitute the cream cheese with a dairy-free version and the Greek yogurt with full-fat coconut cream, though the texture will be slightly different.
Equipment Needed
- Food processor (for crushing graham crackers—or a zip-top bag and rolling pin works in a pinch)
- Medium mixing bowl (for the crust)
- Large mixing bowl (for the filling)
- Hand mixer or stand mixer (makes blending the filling smooth and quick)
- Small saucepan (for blooming and melting the gelatin)
- Mini muffin tin (24-count, or you can use a regular muffin tin with liners)
- Parchment paper or silicone liners (for easy removal)
- Measuring cups and spoons
- Rubber spatula
- Refrigerator space (they need at least 2 hours to set)
I have made these with both a food processor and the old-fashioned bag-and-rolling-pin method. Honestly, both work fine—the food processor is just faster and gives you a more even crumb. If you do not have a mini muffin tin, you can use a regular one and make slightly larger bites, just adjust the chilling time.
Preparation Method
Let me walk you through this step by step. I have made these so many times that I have the process down to a science, and I will share every little trick I have learned along the way.
- Make the crust (5 minutes): In a medium bowl, combine the graham cracker crumbs, melted butter, sugar, cinnamon, and salt. Stir until every crumb is coated and the mixture feels like wet sand. It should hold together when you press it between your fingers. If it seems dry, add another tablespoon of melted butter.
- Press the crust (5 minutes): Line your mini muffin tin with silicone liners or small strips of parchment paper (this makes lifting them out so much easier later). Spoon about 1 tablespoon of the crust mixture into each cup. Press it down firmly with the back of a small spoon or a shot glass. You want a compact, even layer. Pop the tin in the refrigerator while you make the filling.
- Bloom the gelatin (5 minutes): In a small saucepan, sprinkle the powdered gelatin over the cold water. Let it sit for about 5 minutes—it will look like a thick, jiggly mass. Do not skip this step! Blooming the gelatin ensures it dissolves smoothly and sets properly.
- Melt the gelatin (2 minutes): Place the saucepan over low heat and stir gently until the gelatin dissolves completely. It should be clear and liquid, with no granules. Remove from heat and set aside to cool slightly while you make the filling.
- Make the filling (8 minutes): In a large bowl, beat the softened cream cheese with a hand mixer until it is smooth and fluffy, about 2 minutes. Add the Greek yogurt and beat again until combined. Scrape down the sides of the bowl.
- Add the pumpkin and flavors (3 minutes): Add the pumpkin puree, honey or maple syrup, vanilla extract, pumpkin pie spice, and salt. Beat on medium speed until everything is well combined and silky smooth. Taste it here—I always do. Adjust the sweetness or spice to your liking.
- Add the gelatin (2 minutes): With the mixer running on low, slowly pour in the melted gelatin. Mix until it is fully incorporated, about 30 seconds. The mixture will look slightly thinner but will thicken as it chills.
- Fill the cups (5 minutes): Remove the muffin tin from the fridge. Spoon or pipe the filling into each cup, filling them almost to the top. I use a piping bag for cleaner results, but a spoon works perfectly fine too. Smooth the tops with the back of a spoon.
- Chill (at least 2 hours): Place the tin in the refrigerator and let the bites set for at least 2 hours, though overnight is even better. They should be firm to the touch and hold their shape when you remove them from the liners.
- Serve (2 minutes): Gently lift each bite out of the tin. If you want to get fancy, top with a tiny dollop of whipped cream and a sprinkle of cinnamon before serving.
Sensory Cues: When you press the crust, it should feel compact and slightly buttery. The filling, when you are mixing it, should be a gorgeous deep orange and smell like fall in a bowl—warm spices and sweet pumpkin. When you bite into a finished one, the crust should give a slight crunch before giving way to the silky, creamy filling.
Cooking Tips & Techniques
I have learned a few things the hard way, so let me save you some trouble. First, make absolutely sure your cream cheese is at room temperature. Cold cream cheese will give you lumpy filling, and nobody wants that. Take it out of the fridge about 30 minutes before you start.
The gelatin is another place where things can go wrong. If you add it while it is still hot, it can seize up and create weird stringy bits in your filling. Let it cool for a couple of minutes after melting—it should be warm but not hot to the touch. And please, please bloom it first. I skipped that step once thinking I could just stir it in dry, and ended up with grainy cheesecake bites that never set properly. Lesson learned.
For the crust, pressing it firmly is the key. I use the bottom of a shot glass to really compact it down. A loose crust will crumble apart when you try to eat the bites, and that is just sad. Also, do not overfill the cups—leave a tiny bit of room at the top so the filling does not spill over when you add it.
If you are short on time, you can speed up the setting process by popping the bites in the freezer for 45 minutes instead of the fridge for 2 hours. Just let them sit at room temperature for 5 minutes before serving so they soften slightly.
Variations & Adaptations
One of the things I love most about this recipe is how flexible it is. Here are some variations I have tried and loved:
- Vegan Version: Substitute the cream cheese with a plant-based version, use coconut cream instead of Greek yogurt, and replace the gelatin with agar agar (follow the package instructions—it works differently than gelatin). The texture is slightly less creamy but still delicious.
- Gluten-Free Option: Use gluten-free graham crackers or crushed gluten-free cookies for the crust. I have used gluten-free vanilla wafers with great results.
- Chocolate-Dipped: After the bites have set, melt some dark chocolate and dip the tops. Let them set on parchment paper. The chocolate adds a rich contrast to the spiced pumpkin filling.
- Spiced-Up Version: Add a pinch of cayenne pepper or black pepper to the filling for a warm, unexpected kick. It sounds weird, but trust me—it works.
- Maple Pecan: Swap the graham cracker crust for crushed pecans mixed with a little maple syrup and butter. Toast the pecans first for extra flavor.
I once made a batch with a ginger snap crust instead of graham crackers, and honestly, it might be my new favorite. The spicy ginger pairs beautifully with the pumpkin. Give it a try if you are feeling adventurous.
Serving & Storage Suggestions
These bites are best served cold, straight from the fridge. The texture is perfect when they are firm but not frozen. I like to arrange them on a pretty plate with a dusting of cinnamon and a few fresh cranberries for color. They make a gorgeous addition to any dessert table.
For drinks, they pair beautifully with a hot cup of chai tea, a pumpkin spice latte, or even a glass of cold milk. If you are serving them at a party, set them out about 10 minutes before guests arrive so they soften just a touch.
Storage: Keep these in an airtight container in the refrigerator for up to 5 days. They actually get better after a day or two as the flavors meld together. You can also freeze them for up to 3 months. Just place them in a single layer in a freezer-safe container with parchment paper between layers. Thaw in the refrigerator overnight before serving.
I have never had leftovers last more than two days in my house, but if you do, do not leave them out at room temperature for more than 2 hours. The dairy and pumpkin make them perishable.
Nutritional Information & Benefits
Each light no-bake pumpkin cheesecake bite (based on 24 servings) contains approximately:
- Calories: 95
- Fat: 5g
- Carbohydrates: 11g
- Protein: 3g
- Sugar: 7g
- Fiber: 1g
These bites are lighter than traditional cheesecake thanks to the Greek yogurt and light cream cheese swap. Pumpkin is packed with vitamin A and fiber, making this a dessert that actually offers some nutritional value. The Greek yogurt adds protein and probiotics, which is always a win in my book. If you use honey instead of refined sugar, you get a touch of antioxidants too.
For those watching their sugar intake, you can reduce the honey to ¼ cup and add a few drops of liquid stevia to maintain sweetness. The texture will still be perfect.
Conclusion
These Light No-Bake Pumpkin Cheesecake Bites have become my fall signature, and I am honestly a little proud of that. They capture everything I loved about that café’s cheesecake—the creamy texture, the warm spices, the satisfying crunch—but in a way that fits into my everyday life. No oven required, no complicated techniques, and they leave me feeling good instead of sluggish.
I hope you give these a try and make them your own. Maybe you will add a different spice blend, or dip them in chocolate, or serve them at your Thanksgiving table. Whatever you do, I would love to hear about it. Drop a comment below and tell me how they turned out, or share your own twist on the recipe. There is nothing I love more than hearing how a recipe comes to life in someone else’s kitchen.
Happy fall baking, friends. May your kitchen smell like cinnamon and your heart feel full.
Frequently Asked Questions
Can I use canned pumpkin pie filling instead of pure pumpkin?
I would not recommend it. Pumpkin pie filling already has sugar and spices added, which will throw off the sweetness and texture of your bites. Stick with 100% pure pumpkin puree for the best results.
How do I know when the gelatin is properly bloomed?
After about 5 minutes, the gelatin will look like a thick, jiggly, rubbery mass. It should not be liquid at all. If you still see dry powder, let it sit for another minute or two. Properly bloomed gelatin melts into a clear liquid without any lumps.
Can I make these without gelatin?
Yes, but the texture will be softer. You can substitute the gelatin with an equal amount of cornstarch mixed with a little milk, heated until thickened, then cooled before adding to the filling. The bites will be more like a mousse than a firm cheesecake, but still delicious.
How far in advance can I make these for a party?
You can make them up to 3 days in advance. Store them in an airtight container in the fridge, and they will be perfect. In fact, the flavors actually deepen and meld together after a day or two, so making them ahead is a great strategy.
My bites did not set properly. What went wrong?
This usually happens for one of three reasons: the gelatin was not bloomed properly, the gelatin was added to a mixture that was too cold and seized up, or the bites did not chill long enough. Give them another hour in the fridge and see if they firm up. If not, you can salvage them by spooning the mixture into a bowl and serving it as a pumpkin cheesecake mousse—still tasty, just different!
Pin This Recipe!
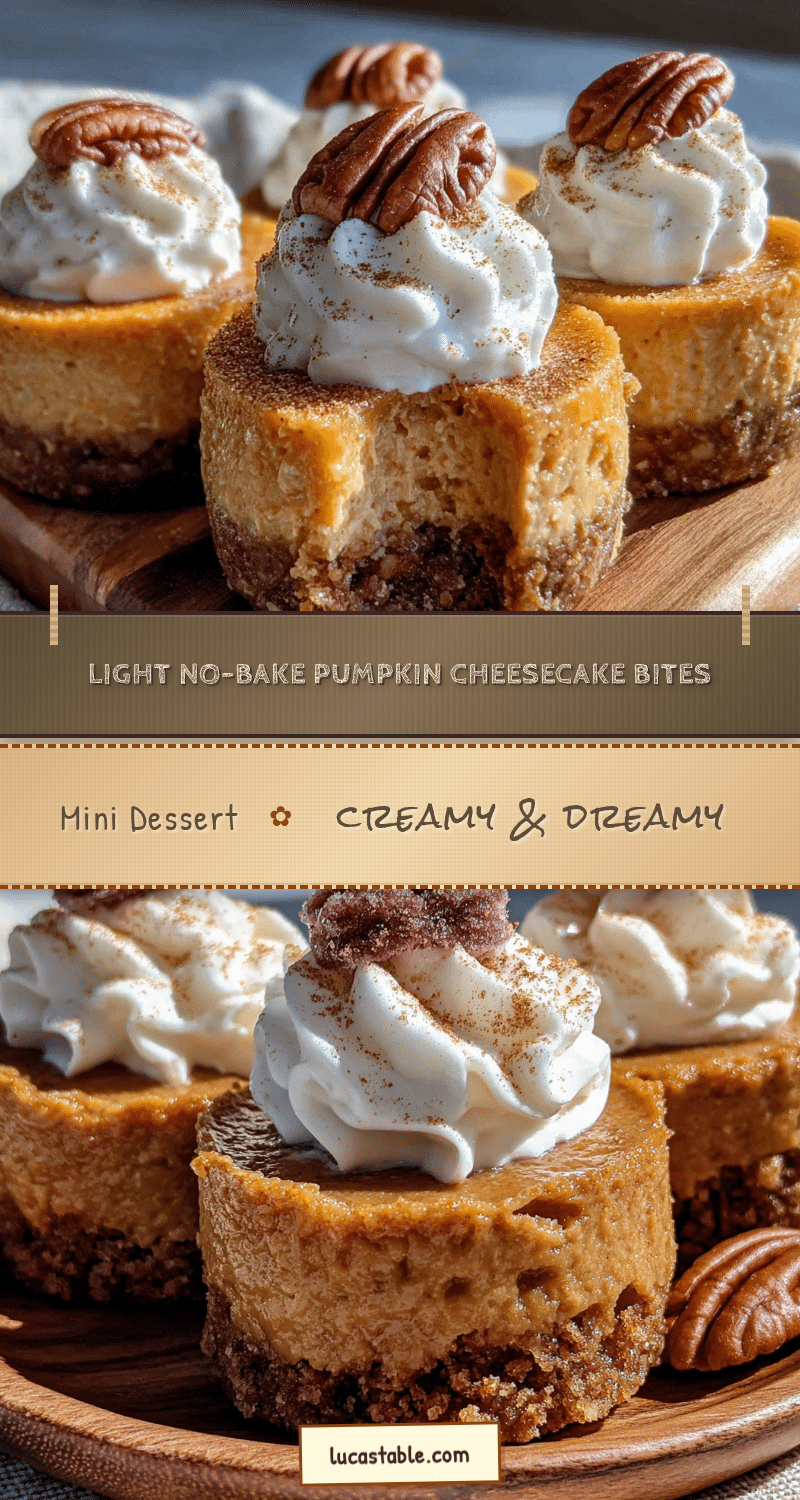
30-Minute Light No-Bake Pumpkin Cheesecake Bites
These light no-bake pumpkin cheesecake bites are a quick and easy fall treat, ready in 30 minutes. Made with a creamy pumpkin filling and a buttery graham cracker crust, they are a healthier, crowd-pleasing dessert perfect for any gathering.
- Prep Time: 15 minutes
- Cook Time: 0 minutes
- Total Time: 2 hours 15 minutes (includes 2 hours chilling)
- Yield: 24 servings 1x
- Category: Dessert
- Cuisine: American
Ingredients
- 1 ½ cups graham cracker crumbs (about 12 full sheets, crushed fine)
- ¼ cup unsalted butter, melted
- 2 tablespoons granulated sugar
- ¼ teaspoon ground cinnamon
- Pinch of salt
- 8 ounces light cream cheese, softened
- ½ cup plain Greek yogurt (full-fat or 2%)
- ¾ cup pumpkin puree (100% pure pumpkin)
- ⅓ cup honey or maple syrup
- 1 teaspoon vanilla extract (pure)
- 1 ½ teaspoons pumpkin pie spice
- ¼ teaspoon salt
- 1 tablespoon powdered gelatin
- 3 tablespoons cold water
Instructions
- Make the crust: In a medium bowl, combine graham cracker crumbs, melted butter, sugar, cinnamon, and salt. Stir until every crumb is coated and the mixture feels like wet sand. It should hold together when pressed between your fingers. If it seems dry, add another tablespoon of melted butter.
- Press the crust: Line a mini muffin tin with silicone liners or small strips of parchment paper. Spoon about 1 tablespoon of the crust mixture into each cup. Press it down firmly with the back of a small spoon or a shot glass to create a compact, even layer. Refrigerate the tin while you make the filling.
- Bloom the gelatin: In a small saucepan, sprinkle the powdered gelatin over the cold water. Let it sit for about 5 minutes until it becomes a thick, jiggly mass.
- Melt the gelatin: Place the saucepan over low heat and stir gently until the gelatin dissolves completely. It should be clear and liquid with no granules. Remove from heat and set aside to cool slightly.
- Make the filling: In a large bowl, beat the softened cream cheese with a hand mixer until smooth and fluffy, about 2 minutes. Add the Greek yogurt and beat again until combined. Scrape down the sides of the bowl.
- Add the pumpkin and flavors: Add the pumpkin puree, honey or maple syrup, vanilla extract, pumpkin pie spice, and salt. Beat on medium speed until everything is well combined and silky smooth. Taste and adjust sweetness or spice to your liking.
- Add the gelatin: With the mixer running on low, slowly pour in the melted gelatin. Mix until fully incorporated, about 30 seconds. The mixture will look slightly thinner but will thicken as it chills.
- Fill the cups: Remove the muffin tin from the fridge. Spoon or pipe the filling into each cup, filling them almost to the top. Smooth the tops with the back of a spoon.
- Chill: Place the tin in the refrigerator and let the bites set for at least 2 hours, though overnight is even better. They should be firm to the touch and hold their shape when removed from the liners.
- Serve: Gently lift each bite out of the tin. Optionally, top with a tiny dollop of whipped cream and a sprinkle of cinnamon before serving.
Notes
Make sure cream cheese is at room temperature to avoid lumps. Let melted gelatin cool slightly before adding to prevent seizing. For a quicker set, freeze for 45 minutes instead of refrigerating for 2 hours. Store in an airtight container in the fridge for up to 5 days or freeze for up to 3 months.
Nutrition
- Serving Size: 1 bite
- Calories: 95
- Sugar: 7
- Fat: 5
- Carbohydrates: 11
- Fiber: 1
- Protein: 3
Keywords: pumpkin cheesecake bites, no-bake, light, fall dessert, easy, healthy


