Maya wasn’t trying to throw a party. I’d stopped by her apartment on a rainy Tuesday to pick up a book I’d lent her, and the sight of her kitchen counter stopped me cold. It was covered—and I mean absolutely covered—with grapes, crackers, wedges of cheese, and little bowls of olives and nuts. She had a whole acorn squash sitting there like a centerpiece, and she was just casually arranging dried figs around it like it was nothing.
“Oh, this?” she said when she caught me staring. “It’s just for Friendsgiving next weekend. I’m testing out a cheap version.”
Cheap version. She said it like she was talking about a spare tire. Meanwhile, my jaw was practically on the floor. The colors alone—deep purple grapes, orange cheddar, green apple slices, those gorgeous dried figs—looked like something you’d pay fifty bucks for at a catered event. And she was just… testing it out. On a Tuesday. In her sweatpants.
I stood there for a good five minutes, honestly, just watching her work. She’d grab a handful of pretzels, scatter them, then step back and tilt her head like she was critiquing a painting. “Too many carbs on the left,” she muttered. I laughed, and she finally looked up and grinned. “You want in on this? I’m making one for your place too.”
That’s how I ended up with the blueprint for the best Friendsgiving charcuterie board I’ve ever made—and for under thirty bucks. You know that feeling when you discover something so good and so easy that you feel like you’ve been doing life wrong? That’s this board. Maya showed me that you don’t need expensive meats or fancy cheese to make something that looks and tastes spectacular. You just need a little strategy, some fall fruit, and the willingness to arrange things like nobody’s watching.
This budget-friendly Friendsgiving charcuterie board with fall fruit became my go-to for every gathering after that. It’s the kind of thing that makes people think you spent hours when you really spent about twenty minutes. And honestly? That’s my favorite kind of cooking.
Why You’ll Love This Recipe
Let me tell you why this board has become my secret weapon for every fall gathering. First off, it’s ridiculously affordable. I’m talking about feeding eight to ten people for what you’d spend on a single appetizer platter at a restaurant. The trick is using seasonal produce and budget-friendly cheese, which I’ll walk you through in a minute.
- Quick & Easy: This comes together in about twenty minutes flat. No cooking, no fuss, just arranging. Perfect for when you’re hosting and already have a million other things to do.
- Simple Ingredients: No fancy grocery trips needed. Most of these items—apples, grapes, crackers, nuts—are probably already in your kitchen or easy to grab without a second mortgage.
- Perfect for Friendsgiving: This board is made for sharing. It’s casual, interactive, and somehow feels both special and totally low-pressure at the same time.
- Crowd-Pleaser: I’ve watched picky eaters, health-conscious friends, and kids all hover around this board. There’s something for everyone, and somehow the combo of sweet, salty, and savory hits every single craving.
- Unbelievably Delicious: The contrast between the crisp apples, the creamy cheese, the salty prosciutto (or the budget-friendly salami I’ll tell you about), and the sweet dried figs is just next-level. It’s comfort food in appetizer form.
What makes this board different from all the others you’ve seen online? It’s the strategy. Most charcuterie guides tell you to buy expensive imported cheeses and cured meats that’ll blow your grocery budget. This one is built around what’s actually affordable in October and November—think sharp cheddar instead of aged gouda, honeycrisp apples instead of exotic pears, and store-brand crackers that taste just as good as the fancy ones.
And here’s the emotional hook: this isn’t just a pretty board. It’s the thing that makes your Friendsgiving feel like a real celebration without the stress. It’s the centerpiece that gets people talking, reaching, laughing. It’s the memory of passing a napkin to your friend while they’re trying to balance a cracker with brie and a fig slice. That’s the good stuff, right there.
What Ingredients You Will Need
This recipe uses simple, budget-friendly ingredients that deliver big flavor and beautiful color without breaking the bank. I’ve organized them by category so you can see exactly what you’re working with.
Cheese (The Star of the Board)
- Sharp cheddar, 8 ounces (block, sliced into thin wedges) – I recommend Tillamook or store brand; both are affordable and melt-in-your-mouth good. Sharp cheddar holds up beautifully against sweet fruit.
- Cream cheese, 8 ounces (one block, softened slightly) – This is your budget-friendly creamy element. It costs a fraction of brie and spreads like a dream. Plus, it pairs amazingly with jam or honey.
- Goat cheese log, 4 ounces (optional but worth it) – Adds that tangy, crumbly texture that makes everything feel fancy. If you’re really pinching pennies, skip it and double the cheddar.
Meat (Keep It Simple, Keep It Cheap)
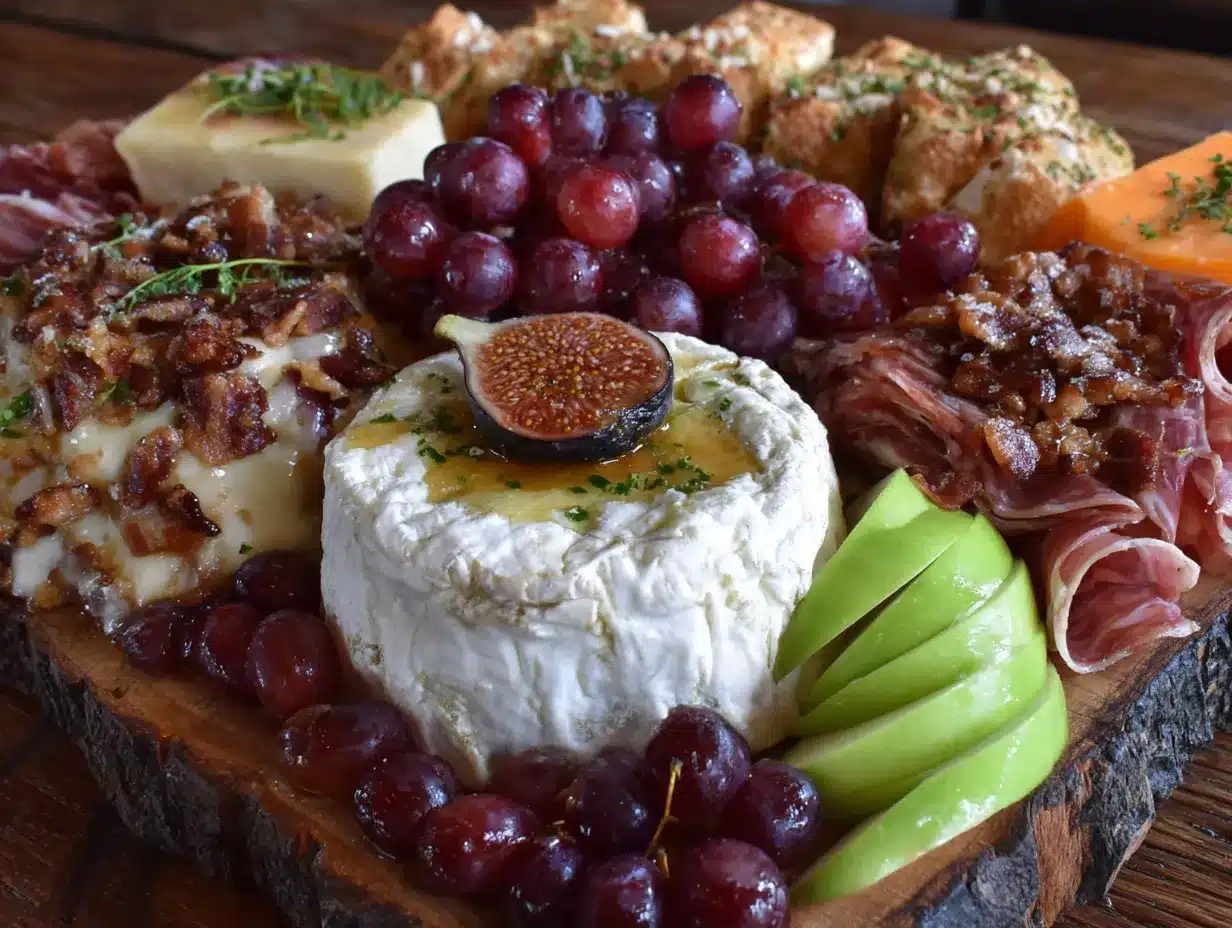
- Salami, 6 ounces (sliced thin) – Genoa salami is my go-to. It’s usually under five bucks for a decent pack, and it’s salty enough to balance all that sweet fruit. Look for store brand—it’s just as good.
- Prosciutto, 4 ounces (optional splurge) – If you can find it on sale, grab it. Otherwise, skip it. The salami does the heavy lifting here.
Fall Fruit (The Budget Hero)
- Honeycrisp apples, 2 large (sliced thin, tossed in lemon juice to prevent browning) – They’re crisp, sweet, and cheap in season. Fuji or Gala work great too.
- Red grapes, 1 cup (washed, left in small clusters) – Grapes are almost always affordable, and they add that perfect pop of juicy sweetness.
- Dried figs, ½ cup (halved) – These are the secret weapon. They look gorgeous, taste like caramel, and a little goes a long way. I buy them in bulk at the discount grocery store.
- Pomegranate seeds, ½ cup (from one pomegranate) – Optional, but they add those little ruby jewels that make the board look like a magazine spread. A single pomegranate costs about two dollars and gives you plenty.
Crunchy Elements
- Wheat crackers, 1 box (about 6 ounces) – I use store-brand wheat thins. They’re sturdy enough for heaping cheese and fruit.
- Pretzel sticks, 1 cup – Adds that salty crunch and fills gaps beautifully.
- Roasted almonds, ½ cup (salted) – Almonds are usually the cheapest nut option. They add protein and texture.
Sweet & Savory Accents
- Honey, 3 tablespoons (for drizzling) – A little drizzle over the cream cheese or goat cheese transforms everything.
- Fig jam or apricot preserves, ¼ cup – Store brand works perfectly. This adds a sweet, sticky element that people go crazy for.
- Fresh rosemary sprigs (for garnish) – Optional, but they make the board look incredibly intentional.
Equipment Needed
The beauty of a charcuterie board is that you don’t need much. Here’s what I use:
- Large wooden cutting board or serving platter – Ideally at least 12 by 18 inches. If you don’t have a big board, use a baking sheet lined with parchment paper. I’ve done it, and it works perfectly.
- Small bowls or ramekins (2-3) – For the jam, honey, and olives if you’re using them. I use the little ones from my soup mug set.
- Cheese knife or small paring knife – For slicing the cheddar and apple.
- Serving spoons or toothpicks – For the jam and olives.
- Cutting board for prep – Just a small one for slicing apples and cheese.
If you don’t have a fancy cheese board, don’t stress. I’ve used a clean pizza pan before, and honestly, nobody noticed. The key is having something flat and large enough to spread everything out. Thrift stores are goldmines for big wooden boards—I got mine for four bucks, and it’s my most-used serving piece.
Preparation Method
This is the fun part. I’m going to walk you through exactly how to build this board so it looks like you spent an hour when you really spent twenty minutes.
- Start with the bowls (5 minutes). Place your small bowls or ramekins on the board first. Space them out—one near the top left, one near the bottom right, and one in the middle if you’re using three. Fill one with the fig jam or apricot preserves, one with honey (leave the spoon in), and one with olives if you’re using them. These bowls act as anchors for the rest of the arrangement.
- Add the cheese (3 minutes). Take your sharp cheddar block and slice it into thin triangles or rectangles—about ¼ inch thick. Fan them out in a line or a small cluster near the center of the board. Next, place the cream cheese block whole on the board. I like to put it near the cheddar but slightly offset. If you’re using goat cheese, place the log next to the cream cheese. The contrast of the white cheese against the orange cheddar is beautiful.
- Layer the meat (2 minutes). Fold each slice of salami in half, then in half again, so you get little quarter-circles. Arrange them in a small pile or a slight fan pattern near the cheese. If you have prosciutto, drape it in loose, wavy ribbons next to the salami. Don’t worry about being perfect—rustic looks intentional here.
- Scatter the fruit (5 minutes). Slice your apples thin (about ¼ inch) and toss them in a little lemon juice to keep them from browning. Arrange the apple slices in a fan pattern or a small cluster opposite the meat. Next, place small clusters of red grapes around the board—don’t pull them apart into individual grapes, leave them in little bunches of three or four. Halve the dried figs and scatter them in the gaps. Sprinkle the pomegranate seeds over the top of everything—they’ll fall into the cracks and look like little jewels.
- Fill the gaps with crunch (3 minutes). Now take your wheat crackers and pretzel sticks and fill in any empty spaces. I like to create little “nests” of crackers near the cheese and meat. The pretzel sticks can be piled in a small cluster or lined up along the edge of the board. Sprinkle the roasted almonds in the remaining gaps.
- Add the finishing touches (2 minutes). Drizzle a little honey over the cream cheese and goat cheese. It doesn’t have to be perfect—just a zigzag pattern. Place a few fresh rosemary sprigs around the board for color and fragrance. Step back and look at it. If you see any big empty spots, fill them with a few more crackers or a handful of grapes.
And that’s it. Seriously. The whole process takes about twenty minutes, and the result looks like it came from a caterer. The sensory cue you’re looking for is abundance—the board should look full and generous, not sparse. If you can’t see the board underneath the food, you’ve done it right.
Cooking Tips & Techniques
I’ve made this board about a dozen times now, and I’ve learned a few things the hard way. Here’s what I wish I’d known from the start.
Don’t overthink the arrangement. The first time I made a charcuterie board, I spent forty-five minutes arranging and rearranging every single cracker. It was exhausting, and honestly, nobody noticed the difference. Now I just place things in rough clusters and let the colors speak for themselves. The board always looks beautiful, even when I’m rushing.
Room temperature is your best friend. Take your cheese out of the fridge about thirty minutes before you start assembling. Cold cheese doesn’t have the same creamy texture, and it won’t spread as nicely. I learned this the hard way when I served rock-hard cream cheese at a party and watched everyone struggle to get it on a cracker. Let it soften, and you’ll be a hero.
Balance flavors and textures. You want a mix of creamy (cream cheese, goat cheese), sharp (cheddar), salty (salami, pretzels), sweet (figs, honey, grapes), and crunchy (almonds, crackers). If you notice your board is all one texture, adjust. I once made a board that was mostly soft things, and it felt one-note. Adding the pretzels and almonds made all the difference.
Prep everything before you start arranging. Slice your cheese, wash your grapes, halve your figs, and have everything in little bowls before you touch the board. This makes the assembly process smooth and stress-free. I tried to slice apples while arranging once, and I ended up with apple juice all over my crackers. Not ideal.
Use the “rule of thirds” for visual appeal. Imagine your board divided into three sections. One section for cheese and meat, one for fruit and sweets, and one for crunchy elements. This creates a natural flow that’s pleasing to the eye. It’s not a hard rule, but it’s a helpful starting point.
Don’t be afraid to fill gaps. The biggest mistake I see in charcuterie boards is too much empty space. If you have gaps, fill them with extra grapes, a few more crackers, or a handful of nuts. A full board looks generous and inviting. An empty board looks like you ran out of money halfway through.
Variations & Adaptations
This board is endlessly adaptable, which is one of the reasons I love it. Here are some variations I’ve tried and loved.
Vegetarian version: Skip the meat entirely and double up on the cheese. Add some roasted chickpeas for protein and crunch. I’ve done this for a vegetarian friend, and she said it was the best board she’d ever had. The key is adding more nuts and maybe some marinated artichoke hearts for that savory bite.
Gluten-free adaptation: Swap the wheat crackers for gluten-free crackers or rice cakes. The pretzel sticks can be replaced with gluten-free pretzels or extra nuts. Everything else on this board is naturally gluten-free, so it’s an easy swap.
Dairy-free option: Use vegan cream cheese and a plant-based cheddar alternative. There are some really good options out now—I like the Miyoko’s brand for the cream cheese. The rest of the board is naturally dairy-free if you skip the cheese. Load up on extra fruit, nuts, and vegetables.
Seasonal fruit swaps: In the fall, apples and grapes are perfect. But in winter, try sliced pears and dried cranberries. In spring, fresh strawberries and apricots. In summer, peaches and blueberries. The board changes with the seasons, which keeps it exciting.
Spicy twist: Add a small bowl of honey drizzled with red pepper flakes for a sweet-heat combo. Or swap the salami for a spicy chorizo. I tried this once for a Friendsgiving with my spice-loving friends, and the honey-chili combo was the first thing to disappear.
Budget-friendly extreme: If you’re really watching your wallet, skip the prosciutto and goat cheese entirely. Use only sharp cheddar and cream cheese. Swap the dried figs for dried apricots (usually cheaper). Use store-brand everything. The board will still look and taste amazing—I promise.
Serving & Storage Suggestions
This board is best served at room temperature, so take it out of the fridge about twenty minutes before your guests arrive. The cheese will be softer, the fruit will be juicier, and everything will taste more flavorful.
For presentation, I like to place the board in the center of the table with small plates and napkins on either side. Toothpicks or small forks are nice for the cheese and fruit, but honestly, most people just use their hands. That’s part of the charm.
If you’re serving this as part of a larger Friendsgiving spread, it pairs beautifully with a crisp white wine like sauvignon blanc or a light red like pinot noir. For non-alcoholic options, sparkling apple cider is a perfect match. The sweetness of the cider plays off the salty cheese and meat beautifully.
Storage: If you have leftovers (which is rare in my house), store the components separately. The cheese can be wrapped in wax paper and kept in the fridge for up to a week. The fruit should be eaten within a day or two—apples and grapes don’t hold up well once sliced. The crackers and pretzels can be stored in an airtight container for weeks.
Reheating: There’s nothing to reheat here, but if you want to refresh the board for a second day, just add fresh fruit and a drizzle of honey. The cheese will taste even better after a day in the fridge, believe it or not.
One thing I love about this board is that the flavors actually get better after a few hours. The cheese absorbs a little of the honey, the fruit releases some juice, and everything melds together in a beautiful way. So if you make it a few hours ahead, don’t worry—it’ll only improve.
Nutritional Information & Benefits
This board is surprisingly balanced, nutrition-wise. Here’s a rough estimate for a serving size (about one-sixth of the board):
- Calories: Approximately 350-400 per serving
- Protein: 15-18 grams (from cheese and salami)
- Carbohydrates: 25-30 grams (from fruit and crackers)
- Fat: 20-25 grams (from cheese and nuts)
- Fiber: 4-6 grams (from apples, figs, and almonds)
The health benefits here are real. Apples are packed with fiber and vitamin C. Grapes contain antioxidants like resveratrol. Almonds are full of healthy fats and vitamin E. And cheese provides calcium and protein. It’s not a health food, but it’s a far cry from processed snacks.
If you’re watching your sodium, go easy on the salami and pretzels. If you’re counting carbs, load up on the cheese and nuts and go light on the crackers. This board is flexible enough to fit most dietary needs.
One thing I love about this board is that it encourages mindful eating. Because everything is in small pieces, you naturally eat slower and pay more attention to what you’re putting in your mouth. That’s a win in my book.
Conclusion
This budget-friendly Friendsgiving charcuterie board with fall fruit has become a tradition in my house, and I hope it becomes one in yours too. It’s the kind of recipe that proves you don’t need to spend a fortune to create something beautiful and delicious. You just need a little creativity, some seasonal fruit, and the willingness to arrange things like nobody’s watching.
I love this board because it brings people together. There’s something about sharing food from a communal board that breaks down barriers and starts conversations. People reach for the same cracker, laugh when their hands touch, and end up talking about their favorite cheese. That’s the magic of a charcuterie board.
So go ahead and make this for your next Friendsgiving. Customize it based on what’s on sale at your grocery store. Swap the fruit for whatever’s in season. Add your favorite jam or a new cheese you’ve been wanting to try. The board is just a starting point—you make it your own.
I’d love to hear how it turns out. Drop a comment below and tell me what variations you tried, or share a photo of your board on Pinterest. Tag me if you want—I’m always looking for inspiration. And remember, the best charcuterie board is the one that makes you happy. Happy Friendsgiving!
Frequently Asked Questions
Can I make this board ahead of time?
Absolutely. You can prep everything the night before—slice the cheese, wash the fruit, arrange the crackers in a container. Just wait to assemble the board until about an hour before serving. The fruit stays fresher that way, and the crackers don’t get soggy.
How do I keep the apples from turning brown?
Toss the apple slices in a little lemon juice or lime juice right after slicing. The citric acid prevents oxidation. I usually use about a tablespoon of juice for two apples. You can also use a commercial product like Fruit Fresh, but lemon juice works perfectly.
What if I don’t have a big board?
No problem at all. Use a large baking sheet, a clean pizza pan, or even a few small plates arranged together. I’ve used a wooden cutting board from the thrift store for years. The key is having a flat surface that’s big enough to spread everything out.
How many people does this board serve?
This board serves about 8 to 10 people as an appetizer. If it’s the main event for a smaller group, it’ll feed 4 to 6 people comfortably. I usually count on about 2 ounces of cheese and 1 ounce of meat per person as a general rule.
Can I use different fruit?
Absolutely. The beauty of this recipe is its flexibility. In the fall, apples and grapes are perfect. In winter, try pears and dried cranberries. In spring, fresh strawberries and apricots. In summer, peaches and blueberries. Just use whatever is in season and on sale.
Pin This Recipe!
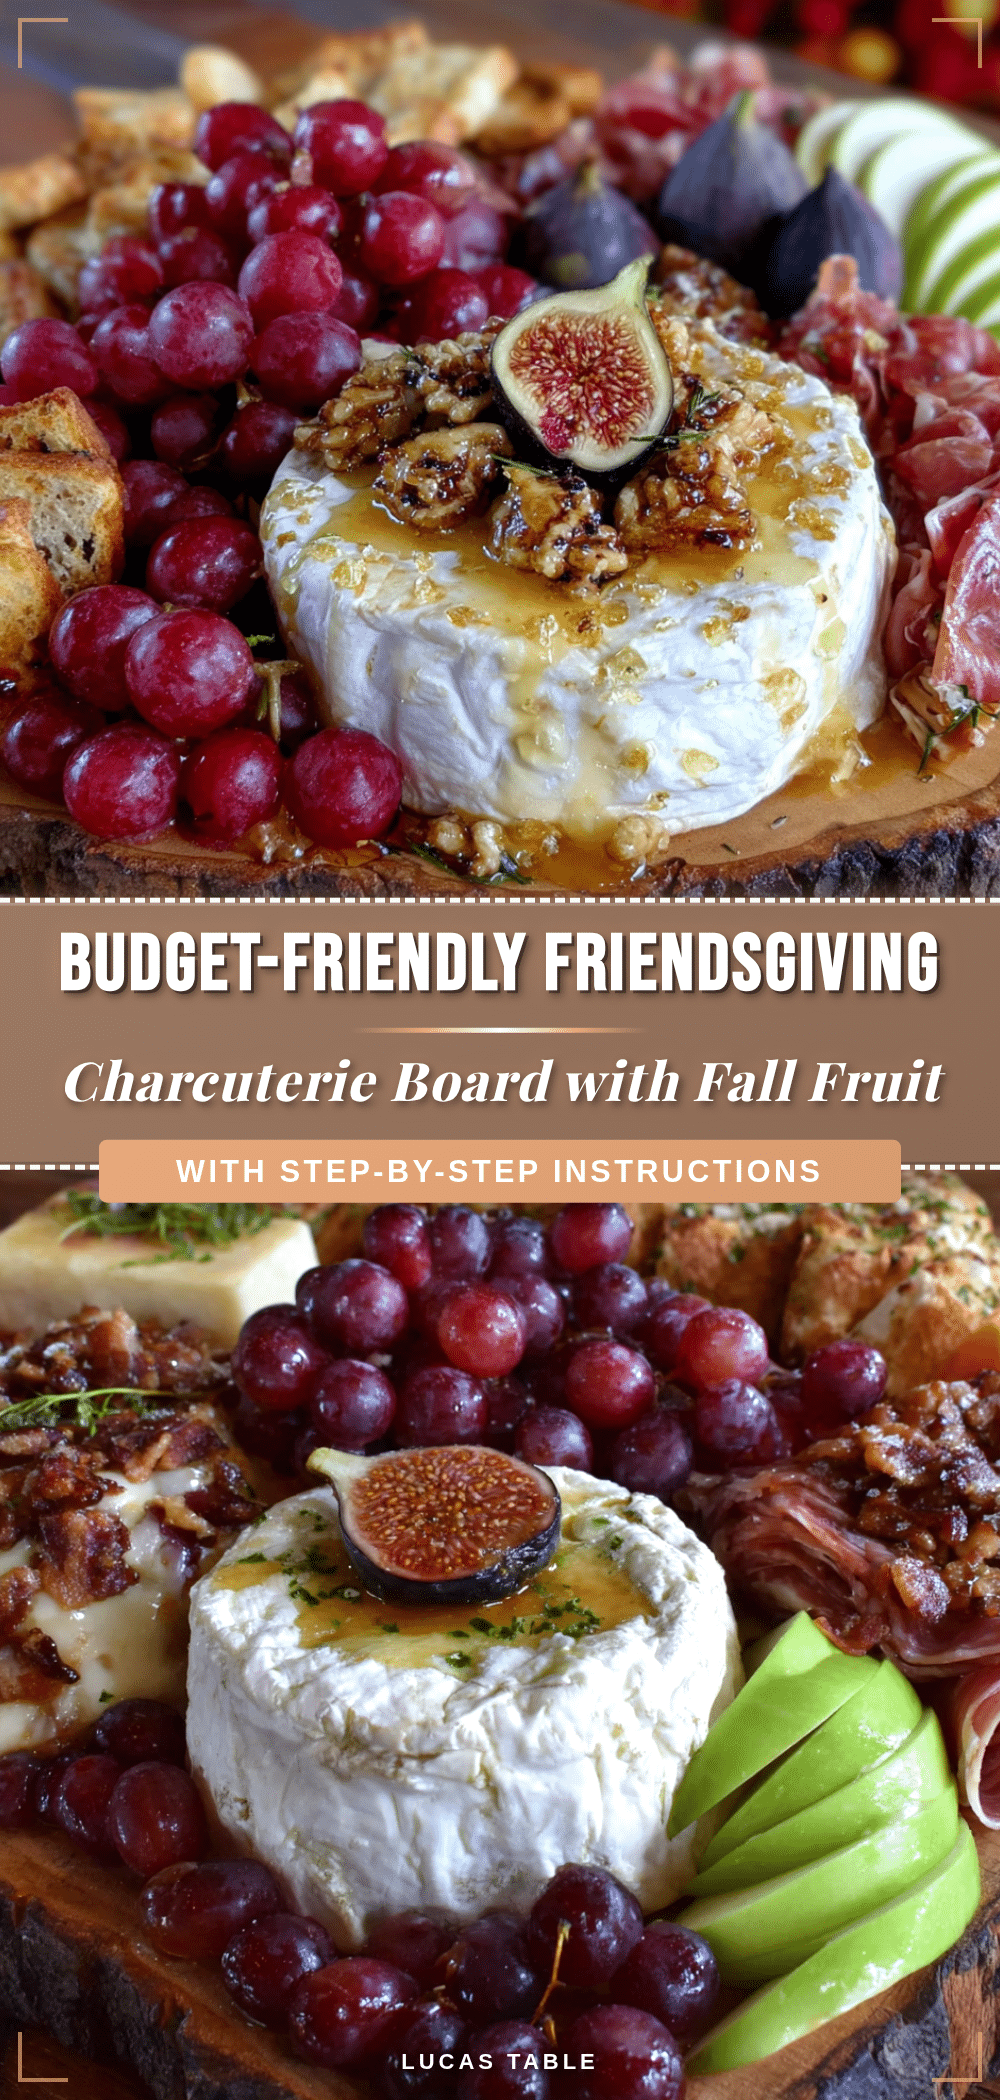
Budget-Friendly Friendsgiving Charcuterie Board with Fall Fruit
A stunning and affordable charcuterie board featuring seasonal fall fruits, budget-friendly cheeses, and simple cured meats. Perfect for Friendsgiving gatherings, this board comes together in about 20 minutes and feeds 8-10 people.
- Prep Time: 20 minutes
- Cook Time: 0 minutes
- Total Time: 20 minutes
- Yield: 8-10 servings
- Category: Appetizer
- Cuisine: American
Ingredients
- Sharp cheddar, 8 ounces (block, sliced into thin wedges)
- Cream cheese, 8 ounces (one block, softened slightly)
- Goat cheese log, 4 ounces (optional)
- Salami, 6 ounces (sliced thin, Genoa preferred)
- Prosciutto, 4 ounces (optional)
- Honeycrisp apples, 2 large (sliced thin, tossed in lemon juice)
- Red grapes, 1 cup (washed, left in small clusters)
- Dried figs, ½ cup (halved)
- Pomegranate seeds, ½ cup (from one pomegranate, optional)
- Wheat crackers, 1 box (about 6 ounces)
- Pretzel sticks, 1 cup
- Roasted almonds, ½ cup (salted)
- Honey, 3 tablespoons
- Fig jam or apricot preserves, ¼ cup
- Fresh rosemary sprigs (for garnish, optional)
Instructions
- Start with the bowls (5 minutes). Place your small bowls or ramekins on the board first. Space them out—one near the top left, one near the bottom right, and one in the middle if you’re using three. Fill one with the fig jam or apricot preserves, one with honey (leave the spoon in), and one with olives if you’re using them.
- Add the cheese (3 minutes). Slice the sharp cheddar into thin triangles or rectangles (about ¼ inch thick). Fan them out in a line or small cluster near the center of the board. Place the cream cheese block whole on the board near the cheddar but slightly offset. If using goat cheese, place the log next to the cream cheese.
- Layer the meat (2 minutes). Fold each slice of salami in half, then in half again to form quarter-circles. Arrange them in a small pile or fan pattern near the cheese. If using prosciutto, drape it in loose, wavy ribbons next to the salami.
- Scatter the fruit (5 minutes). Slice apples thin (about ¼ inch) and toss in lemon juice. Arrange apple slices in a fan pattern or small cluster opposite the meat. Place small clusters of red grapes around the board (leave in bunches of 3-4). Halve dried figs and scatter in gaps. Sprinkle pomegranate seeds over everything.
- Fill the gaps with crunch (3 minutes). Use wheat crackers and pretzel sticks to fill empty spaces. Create little ‘nests’ of crackers near cheese and meat. Pile pretzel sticks in a small cluster or line them along the edge. Sprinkle roasted almonds in remaining gaps.
- Add finishing touches (2 minutes). Drizzle honey over cream cheese and goat cheese in a zigzag pattern. Place fresh rosemary sprigs around the board for color and fragrance. Fill any big empty spots with extra crackers or grapes.
Notes
Take cheese out of fridge 30 minutes before assembling for best texture. Toss apple slices in lemon juice to prevent browning. The board can be prepped the night before (slice cheese, wash fruit) but assemble just before serving. For a budget-friendly extreme, skip prosciutto and goat cheese, use dried apricots instead of figs, and use store-brand everything.
Nutrition
- Serving Size: 1/6 of board
- Calories: 350400
- Sugar: 1518
- Sodium: 600800
- Fat: 2025
- Saturated Fat: 1012
- Carbohydrates: 2530
- Fiber: 46
- Protein: 1518
Keywords: charcuterie board, Friendsgiving, fall fruit, budget-friendly, appetizer, cheese board, easy entertaining


