I was walking through my local grocery store parking lot last October when it hit me — the smell of burnt sugar and warm cinnamon drifting from somewhere nearby. And suddenly I was eight years old, standing on a step stool in my Aunt Jo’s tiny kitchen, watching her pull a sheet pan of glistening pumpkin seeds from the oven. She’d let me sprinkle the cinnamon-sugar mixture myself, which meant half of it ended up on the counter and the other half on the floor. She didn’t care. She just laughed and said, “More for the kitchen fairies, honey.”
Aunt Jo passed away five years ago, and I haven’t thought about those pumpkin seeds in forever. But that parking lot moment hit me like a freight train. I mean, honestly, I stood there holding my reusable bags like an absolute fool, trying not to cry over a snack I hadn’t eaten in decades. So I went home, bought three pumpkins (because why stop at one?), and spent the entire weekend trying to recreate that exact taste — that perfect balance of light, crunchy texture with just the right amount of sweet warmth. Let me tell you, it took some trial and error. The first batch came out chewy. The second batch burned. The third batch? Well, the third batch made me close my eyes and smile like I was eight years old again.
Maybe you’ve been there — chasing a taste from your past that you can almost but not quite remember. That’s what this recipe is for me. It’s not just about using up pumpkin seeds after carving jack-o’-lanterns. It’s about bringing back a feeling, one crunchy, cinnamon-kissed bite at a time. And honestly? It works every single time.
Why You’ll Love This Recipe
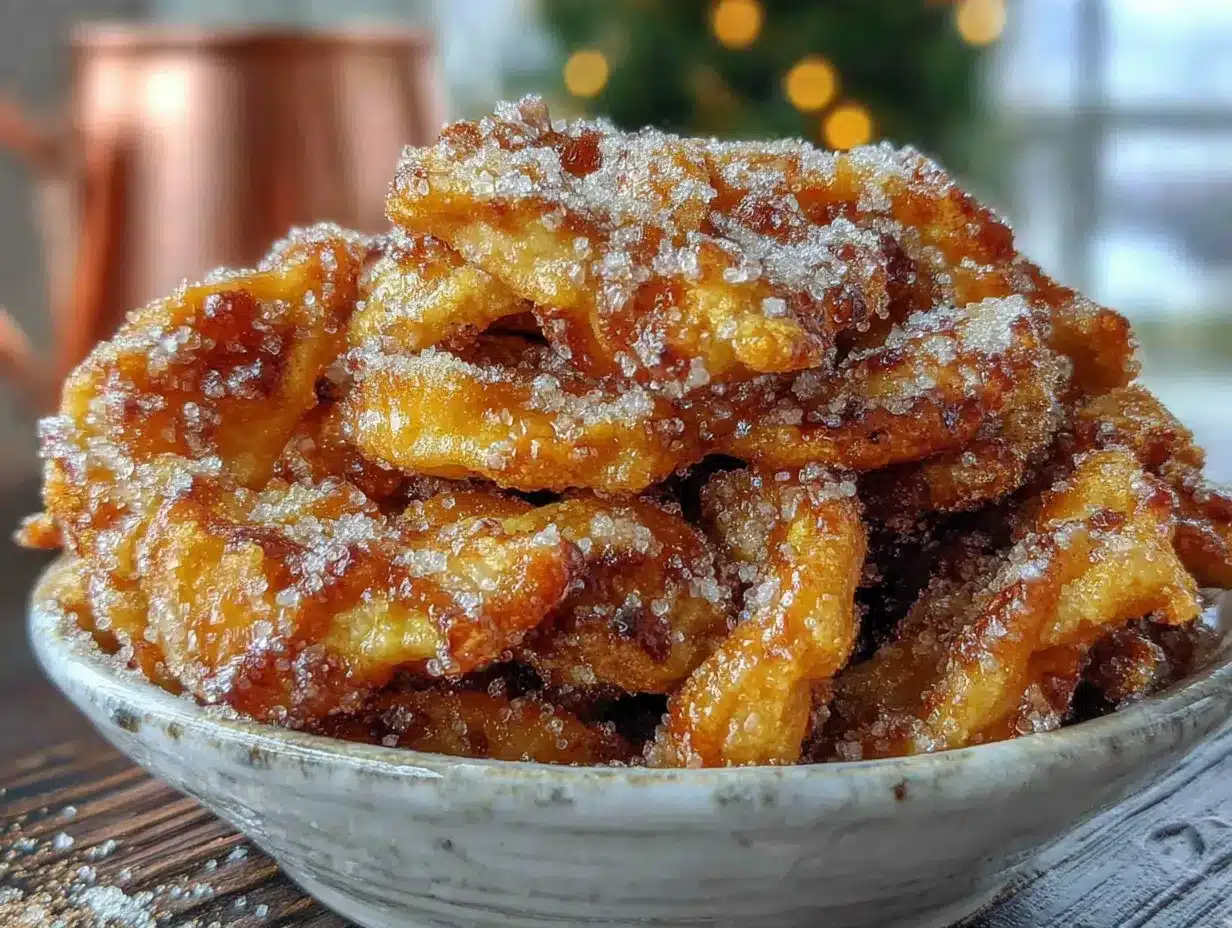
This isn’t your average pumpkin seed recipe. Most versions out there turn out either too chewy, too oily, or just plain boring. I tested this one six times before I got it right — and let me tell you, the difference is in the details. You get seeds that are actually light and crispy, not dense or soggy. The cinnamon-sugar coating clings to every little nook and cranny, so each bite delivers that sweet warmth without being cloying.
- Quick & Easy: From start to finish, you’re looking at about 30 minutes. That’s faster than most cookies, and way less fuss.
- Simple Ingredients: You likely have everything in your pantry right now — pumpkin seeds, butter, sugar, cinnamon, salt. No fancy grocery runs needed.
- Perfect for Fall: Whether you’re carving pumpkins for Halloween, hosting a Thanksgiving gathering, or just craving something cozy, these seeds fit right in.
- Crowd-Pleaser: I brought a batch to my book club last week, and they were gone before we even discussed the first chapter. Kids love them, adults love them — they just disappear.
- Unbelievably Delicious: The texture is what gets you. Light, airy, with that satisfying crunch that makes you reach for another handful before you’ve finished the first.
What makes this recipe different from the rest? It’s the boiling step. I know, it sounds weird, but boiling the seeds before roasting changes everything. It helps them puff up and get that light, crispy texture instead of staying dense and chewy. Plus, the cinnamon-sugar mixture gets brushed on twice — once halfway through roasting and once at the end — so you get that perfect caramelized coating without any burnt spots. It’s not just another version of roasted pumpkin seeds. It’s the best version.
What Ingredients You Will Need
This recipe uses simple, wholesome ingredients that come together to create something genuinely special. Most of these are pantry staples, which makes this an easy last-minute snack when the craving hits.
- Fresh pumpkin seeds — You’ll need about 1 ½ cups of raw seeds, straight from a pumpkin. Rinse them well to remove the stringy pulp, then pat them dry. If you’re using store-bought raw pumpkin seeds (pepitas), that works too — just skip the rinsing step and reduce the boiling time slightly.
- Water — 4 cups for boiling the seeds. This step is non-negotiable if you want that light, crispy texture. I’ve tried skipping it, and the results were disappointing.
- Salt — 1 teaspoon for the boiling water, plus a pinch for the coating. I prefer fine sea salt here because it dissolves evenly.
- Unsalted butter — 2 tablespoons, melted. Butter gives the seeds that rich, toasty flavor that oil just can’t match. I use salted butter in a pinch and just reduce the added salt slightly.
- Granulated sugar — 3 tablespoons. White sugar creates that light, crunchy coating without weighing the seeds down. Brown sugar works too, but it’s more likely to burn, so watch the oven closely.
- Ground cinnamon — 1 ½ teaspoons. I recommend using a fresh jar of cinnamon for the best flavor. Old cinnamon loses its punch, and this recipe deserves that warm, aromatic kick.
- Vanilla extract — ½ teaspoon. This is my secret ingredient. It deepens the sweetness and makes the cinnamon flavor feel more rounded, almost like a snickerdoodle cookie.
If you want to get creative, you can swap the cinnamon for pumpkin pie spice, or add a pinch of nutmeg or cardamom for extra warmth. For a dairy-free version, use coconut oil instead of butter — it adds a subtle tropical note that pairs surprisingly well with the cinnamon.
Equipment Needed
You don’t need anything fancy for this recipe, which is part of the beauty. Here’s what you’ll need:
- Medium saucepan — For boiling the seeds. Any pot works, but avoid nonstick if you can, since the salt can scratch the coating over time.
- Colander — To drain the seeds after boiling. A fine-mesh strainer works even better because the seeds won’t slip through.
- Baking sheet — A rimmed sheet pan is ideal. The rim keeps the seeds from rolling off when you toss them. I’ve used a flat cookie sheet before, and let’s just say I spent ten minutes picking seeds off the oven floor.
- Parchment paper — This makes cleanup a breeze and prevents sticking. You can use a silicone baking mat instead if you prefer.
- Small bowl — For mixing the cinnamon-sugar coating.
- Pastry brush — For brushing the butter mixture onto the seeds. A silicone brush works best because it doesn’t shed bristles. If you don’t have one, you can drizzle the butter and toss the seeds with a spatula.
Budget-friendly tip: You can absolutely use a regular baking sheet without parchment paper — just give it a light spray of cooking oil first. And if you don’t have a pastry brush, a spoon works fine for drizzling.
Preparation Method
- Preheat your oven to 350°F (175°C). Line a rimmed baking sheet with parchment paper and set it aside.
- Clean the pumpkin seeds. Separate the seeds from the pumpkin pulp and place them in a colander. Rinse under cold running water, using your fingers to rub off any stringy bits. Don’t worry about getting them perfectly clean — a little pulp adds flavor. Pat the seeds dry with a clean kitchen towel.
- Boil the seeds. Bring 4 cups of water and 1 teaspoon of salt to a boil in a medium saucepan. Add the pumpkin seeds and boil for exactly 10 minutes. This step is crucial — it helps the seeds puff up and get that light, crispy texture instead of staying dense. While they boil, mix 3 tablespoons of granulated sugar, 1 ½ teaspoons of ground cinnamon, and a pinch of salt in a small bowl.
- Drain and dry. Pour the seeds into the colander and let them drain thoroughly. Spread them out on a clean kitchen towel and pat them as dry as possible. Any excess moisture will make them steam instead of roast, so take your time here.
- First roast. Spread the dried seeds in a single layer on the prepared baking sheet. Roast for 10 minutes, stirring halfway through. The seeds should look slightly dry and start to smell toasty.
- Add the butter and coating. While the seeds roast, melt 2 tablespoons of unsalted butter and stir in ½ teaspoon of vanilla extract. Remove the seeds from the oven, drizzle the butter mixture over them, and toss gently with a spatula. Sprinkle half the cinnamon-sugar mixture over the seeds and toss again to coat evenly.
- Second roast. Return the seeds to the oven and roast for another 8–10 minutes, stirring once more halfway through. Watch them closely in the last few minutes — the sugar can burn quickly. The seeds should be golden brown and smell amazing.
- Final coating. Remove the seeds from the oven and immediately sprinkle the remaining cinnamon-sugar mixture over them. Toss gently while they’re still hot, so the sugar sticks to the butter coating. Let them cool completely on the baking sheet — they’ll crisp up as they cool.
- Break apart and enjoy. Once cooled, break any clumps apart with your fingers. The seeds should be light, crunchy, and perfectly coated in that sweet cinnamon goodness.
Pro tip: If your seeds seem chewy after cooling, spread them back on the baking sheet and roast for another 3–4 minutes at 325°F (160°C). Every oven runs a little differently, and sometimes they just need a few extra minutes.
Cooking Tips & Techniques
The biggest mistake I made with my first batch? Skipping the boiling step. I thought, “Eh, how much difference can it really make?” A lot, apparently. Those seeds came out dense and chewy, more like sad little pebbles than the light, crunchy snack I was after. The boiling step is non-negotiable — it softens the outer shell of the seed just enough that it puffs up during roasting instead of staying flat and tough.
Another thing I learned the hard way: don’t overcrowd the baking sheet. If the seeds are piled on top of each other, they’ll steam instead of roast, and you’ll end up with a soggy mess. Spread them in a single layer, and give them a little breathing room. If you’re making a big batch, use two baking sheets or roast them in shifts.
Timing is everything with these seeds. The sugar coating can go from perfectly caramelized to burnt in about 30 seconds, so stay close to the oven during that last roasting round. I usually set a timer for 6 minutes, check them, then set another timer for 2 minutes. It’s better to pull them out a minute early than a minute late — they’ll continue to crisp up as they cool.
One more thing: let the seeds cool completely before you dig in. I know, I know, they smell incredible straight out of the oven, but if you eat them while they’re warm, they’ll seem soft and almost chewy. Give them 15–20 minutes on the baking sheet, and they’ll transform into that perfect, crunchy texture you’re after.
Variations & Adaptations
This recipe is wonderfully flexible. Here are a few variations I’ve tried and loved:
- Spicy Cinnamon-Sugar Seeds: Add ¼ teaspoon of cayenne pepper to the cinnamon-sugar mixture. The heat sneaks up on you after the sweetness hits — it’s addictive.
- Maple Pecan Pumpkin Seeds: Swap the granulated sugar for 2 tablespoons of maple syrup and add ¼ cup of chopped pecans during the last 5 minutes of roasting. The maple flavor pairs beautifully with the cinnamon.
- Chocolate-Dipped Seeds: Once the seeds are completely cool, melt some dark chocolate and drizzle it over them. Let the chocolate set, then break into clusters. It’s like a candy bar, but healthier.
- Vegan Version: Use coconut oil instead of butter. The coconut flavor is subtle and actually complements the cinnamon really well. Just make sure your sugar is vegan-friendly.
- Savory-Sweet Twist: Reduce the sugar to 1 tablespoon and add ½ teaspoon of smoked paprika and a pinch of black pepper. The smoky heat balances the sweetness in a surprising way.
I tried the maple pecan version last Thanksgiving, and it was the first thing to disappear from the snack table. My cousin actually asked me for the recipe, which is basically the highest compliment in my family.
Serving & Storage Suggestions
These seeds are best served at room temperature, straight from the baking sheet or from a bowl on the counter. They’re perfect for snacking on their own, but they also make a fantastic topping for yogurt, oatmeal, or even a simple green salad with apples and goat cheese. The sweet crunch adds something special to an otherwise ordinary dish.
For storage, let the seeds cool completely, then transfer them to an airtight container. They’ll stay fresh and crispy at room temperature for up to 2 weeks — though in my experience, they never last that long. If you live in a humid climate, you might notice them losing their crunch after a few days. Just spread them back on a baking sheet and roast at 300°F (150°C) for 5 minutes to revive them.
You can also freeze these seeds for up to 3 months. Place them in a freezer-safe bag or container, and thaw at room temperature for about 15 minutes before serving. They won’t be quite as crispy as fresh, but they’re still delicious. I like to keep a bag in the freezer for unexpected guests or late-night snack attacks.
The flavors actually develop a bit overnight — the cinnamon seems to mellow and blend with the sugar, creating an even more balanced taste. So don’t worry if you make them a day ahead. They might even be better.
Nutritional Information & Benefits
Per serving (about ¼ cup): approximately 180 calories, 12g fat, 15g carbohydrates, 7g protein, 3g fiber, 8g sugar. These numbers will vary slightly depending on the exact size of your seeds and how much coating sticks.
Pumpkin seeds are a nutritional powerhouse. They’re packed with magnesium, zinc, and healthy fats that support heart health and immune function. The fiber content helps keep you full and satisfied, making this a snack that actually works with your body instead of against it. Plus, the cinnamon adds antioxidants and may help regulate blood sugar levels, which is a nice bonus.
This recipe is naturally gluten-free and can easily be made dairy-free or vegan with a simple swap. If you’re watching your sugar intake, you can reduce the sugar to 2 tablespoons — the seeds will still be delicious, just slightly less sweet. I’ve made them that way for friends with dietary restrictions, and nobody complained.
Honestly, I love that this snack feels indulgent but is actually pretty good for you. It’s the kind of thing you can feel good about eating while watching a movie or packing in a lunchbox.
Conclusion
These light and crispy cinnamon sugar pumpkin seeds are more than just a way to use up pumpkin guts after Halloween. They’re a little piece of nostalgia that you can recreate in your own kitchen, no Aunt Jo required. The boiling step makes all the difference, giving you that airy, crunchy texture that most recipes miss. And the double-coating of cinnamon sugar? Pure magic.
I hope you’ll try this recipe and make it your own. Maybe you’ll add a pinch of cayenne for heat, or drizzle them with chocolate for a sweet treat, or just enjoy them exactly as written. Whatever you do, let me know how it goes. Drop a comment below and tell me about your first bite — did you close your eyes? Did it take you somewhere? I’d love to hear your story.
Until next time, happy roasting. And don’t forget to save some for the kitchen fairies.
Frequently Asked Questions
Can I use store-bought pepitas instead of fresh pumpkin seeds?
Yes, absolutely. Store-bought raw pepitas work perfectly for this recipe. Just skip the rinsing step and reduce the boiling time to 5 minutes since they’re already clean and slightly smaller than fresh seeds.
Why did my seeds turn out chewy instead of crispy?
This usually happens for one of three reasons: you skipped the boiling step, you didn’t dry the seeds thoroughly after boiling, or you overcrowded the baking sheet. Make sure to boil for the full 10 minutes, pat the seeds as dry as possible, and spread them in a single layer on the pan.
Can I make these in an air fryer?
Yes! Preheat your air fryer to 325°F (160°C). Cook the seeds for 8–10 minutes, shaking the basket halfway through. Add the butter and coating, then cook for another 3–4 minutes. Watch them closely since air fryers run hot.
How do I prevent the sugar coating from burning?
Keep a close eye on the seeds during the last few minutes of roasting. If your oven runs hot, reduce the temperature to 325°F (160°C) for the second roast. You can also add the final sprinkle of cinnamon sugar after the seeds come out of the oven instead of during roasting.
Can I use brown sugar instead of granulated sugar?
Yes, but brown sugar has more moisture and can burn more easily. If you use brown sugar, reduce the oven temperature to 325°F (160°C) and watch the seeds closely. The flavor will be richer and slightly molasses-like, which pairs beautifully with cinnamon.
Pin This Recipe!
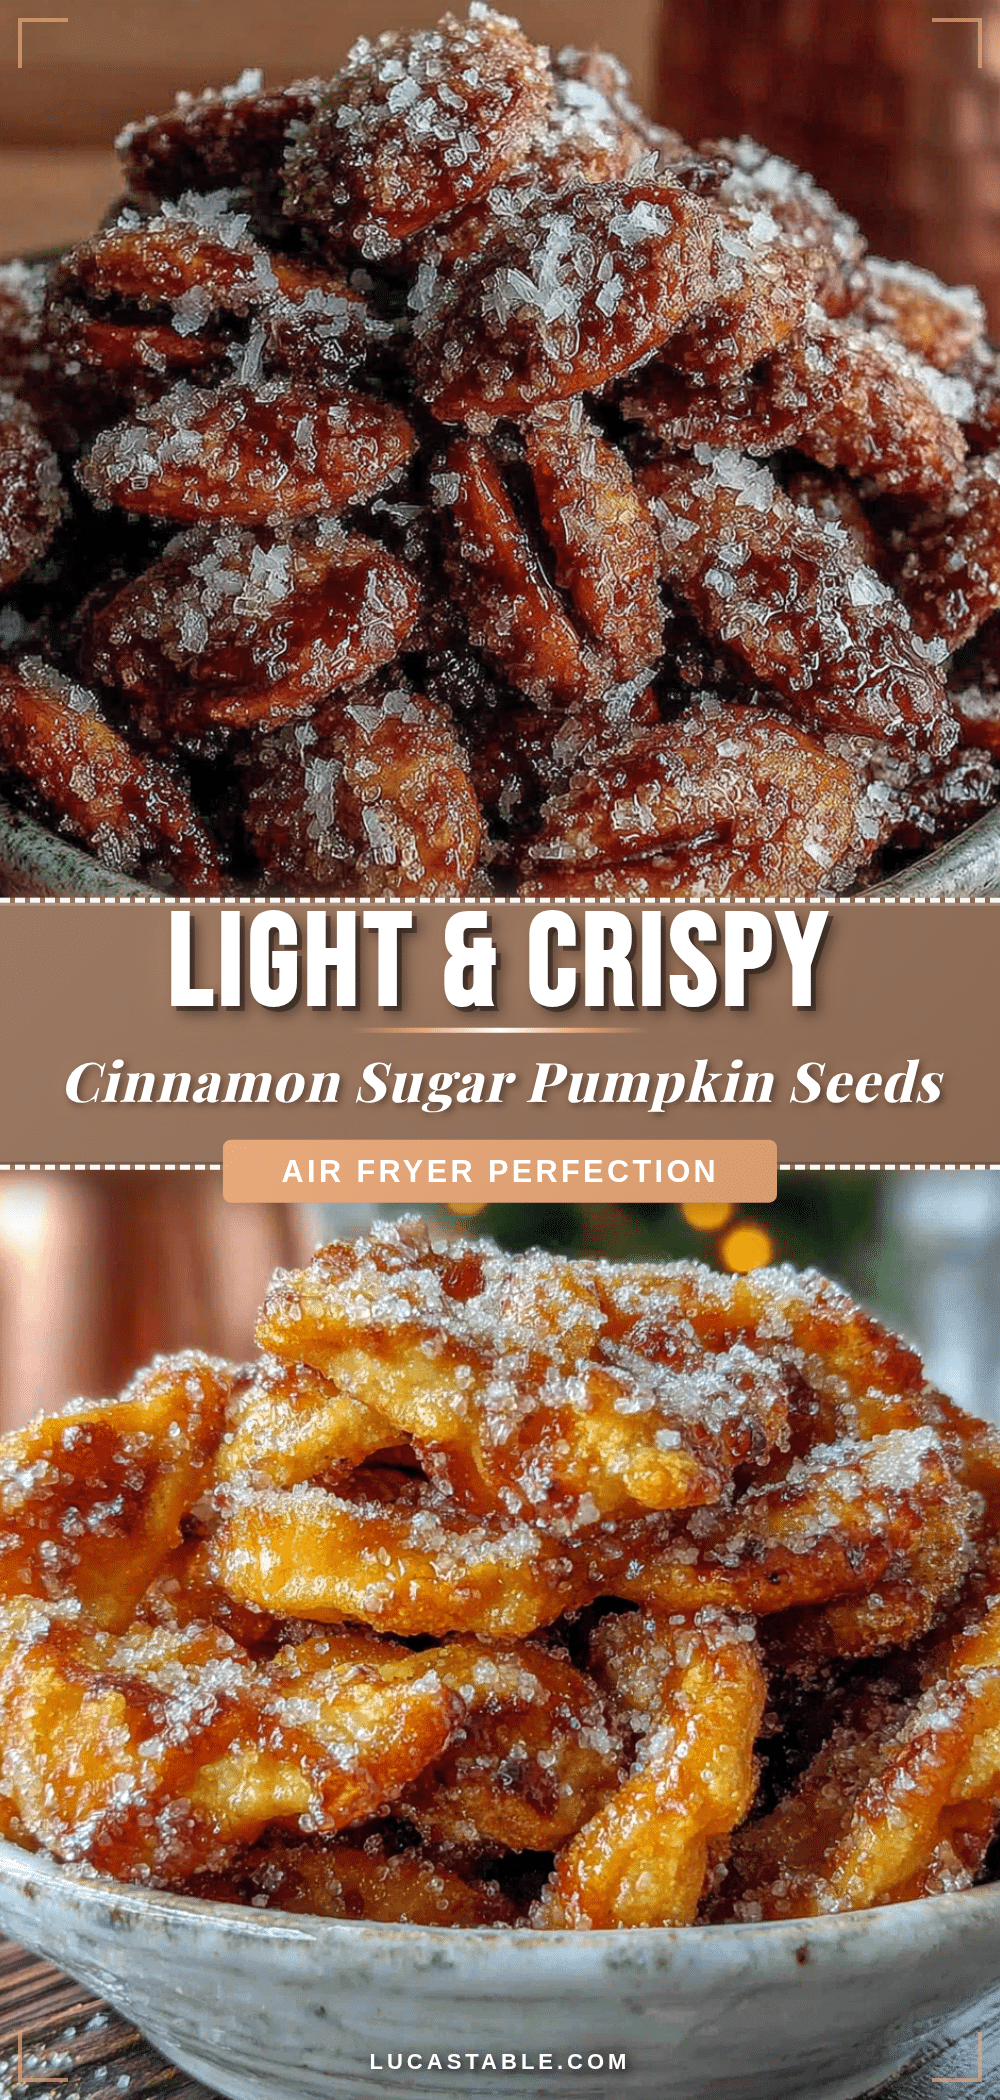
Best Easy Cinnamon Sugar Pumpkin Seeds Recipe
These light and crispy cinnamon sugar pumpkin seeds are a nostalgic snack that brings back childhood memories. The secret is boiling the seeds before roasting for a perfect crunch, with a double coating of cinnamon sugar for irresistible sweetness.
- Prep Time: 15 minutes
- Cook Time: 20 minutes
- Total Time: 35 minutes
- Yield: 4 servings 1x
- Category: Snack
- Cuisine: American
Ingredients
- 1 ½ cups fresh pumpkin seeds (or raw pepitas)
- 4 cups water
- 1 teaspoon fine sea salt (for boiling)
- Pinch of salt (for coating)
- 2 tablespoons unsalted butter (melted)
- 3 tablespoons granulated sugar
- 1 ½ teaspoons ground cinnamon
- ½ teaspoon vanilla extract
Instructions
- Preheat your oven to 350°F (175°C). Line a rimmed baking sheet with parchment paper and set aside.
- Clean the pumpkin seeds: Separate seeds from pumpkin pulp, rinse under cold water, and pat dry with a clean kitchen towel.
- Boil the seeds: Bring 4 cups of water and 1 teaspoon of salt to a boil in a medium saucepan. Add pumpkin seeds and boil for exactly 10 minutes.
- While seeds boil, mix 3 tablespoons granulated sugar, 1 ½ teaspoons ground cinnamon, and a pinch of salt in a small bowl.
- Drain seeds in a colander and spread on a clean kitchen towel to pat dry as much as possible.
- Spread dried seeds in a single layer on the prepared baking sheet. Roast for 10 minutes, stirring halfway through.
- While seeds roast, melt 2 tablespoons unsalted butter and stir in ½ teaspoon vanilla extract.
- Remove seeds from oven, drizzle with butter mixture, and toss gently. Sprinkle half the cinnamon-sugar mixture over seeds and toss to coat.
- Return seeds to oven and roast for another 8–10 minutes, stirring once halfway through. Watch closely to prevent burning.
- Remove seeds from oven and immediately sprinkle remaining cinnamon-sugar mixture over them. Toss gently while hot.
- Let seeds cool completely on the baking sheet (they will crisp up as they cool).
- Break any clumps apart with your fingers and enjoy.
Notes
Boiling the seeds is crucial for a light, crispy texture. Do not skip this step. For best results, let seeds cool completely before eating. If seeds seem chewy after cooling, roast for an additional 3-4 minutes at 325°F (160°C). Store in an airtight container at room temperature for up to 2 weeks.
Nutrition
- Serving Size: ¼ cup
- Calories: 180
- Sugar: 8
- Sodium: 150
- Fat: 12
- Saturated Fat: 4
- Carbohydrates: 15
- Fiber: 3
- Protein: 7
Keywords: cinnamon sugar pumpkin seeds, roasted pumpkin seeds, fall snack, Halloween snack, easy pumpkin seeds recipe


