The woman at the community garden plot next to mine watched me fumbling with a bag of store-bought decorations one October afternoon. She didn’t say anything at first. Then she wiped her hands on her apron and walked over, pulling a crumpled recipe card from her pocket. “For the Halloween party,” she said, pointing at the faded ink. “My kids are grown now, but I still make these every year.” Her name was Rosa, and she’d been making these deviled eggs with olive spiders for over twenty years. She told me the trick was in the eyes—you had to use just the right size of black olive so the spider legs looked creepy but not comical.
I’ll be honest, I’d never thought of combining deviled eggs with Halloween. I mean, deviled eggs are already a bit spooky if you think about it—they’re eggs that have been hollowed out and filled back up with their own guts. But Rosa’s version took that concept and ran with it. She showed me how to slice the olives just so, how to position the legs so they looked like they were crawling right off the plate. I messed up my first batch something awful—the legs kept falling off and I had to use toothpicks to hold them in place. Rosa just laughed and handed me another olive.
Maybe you’ve been there, staring at Pinterest boards full of elaborate Halloween treats that take three hours and a pastry degree to pull off. These deviled eggs are the opposite of that. They’re quick, they’re creepy, and they actually taste amazing. The smoky olive flavor against the creamy, tangy yolk filling is a combination you won’t forget. I’ve been making them every Halloween since that day in the garden, and every time I do, I think of Rosa and her worn-out recipe card. This is the kind of recipe that becomes tradition, you know? The kind your kids will ask for years later.
Why You’ll Love This Recipe
Let me tell you why these deviled eggs with olive spiders have become my most-requested Halloween dish. First off, they’re ridiculously easy. We’re talking twenty minutes from start to finish, and most of that is just boiling eggs. You don’t need any special equipment or hard-to-find ingredients. Just eggs, mayo, mustard, and a can of black olives. That’s it. I’ve tested this recipe at least a dozen times, and I’ve got the process down to a science.
- Quick & Easy: Comes together in under 25 minutes, perfect for busy Halloween weeknights or last-minute party prep. You can even boil the eggs ahead of time.
- Simple Ingredients: No fancy grocery trips needed. You likely have everything in your kitchen right now except maybe the olives. And those are in every grocery store.
- Perfect for Halloween: These are the star of any spooky spread. Kids love the creepy spider look, and adults appreciate the classic deviled egg flavor.
- Crowd-Pleaser: I’ve brought these to three different Halloween parties and they disappeared every single time. People can’t resist the combination of creamy filling and smoky olive.
- Unbelievably Delicious: The texture is perfect—smooth, creamy filling with that briny pop from the olive spider on top. It’s comfort food with a creepy twist.
What makes this recipe different from all the other Halloween deviled eggs out there? It’s the technique. Most recipes just stick a whole olive on top and call it a day. But Rosa taught me to use the olive in a way that actually looks like a spider—with legs and everything. The secret is slicing the olive into thin strips for the legs and using the pitted center for the body. It sounds fiddly, but I promise it’s easier than it looks. I’ve had people tell me they tried other versions and the spiders looked like blobs. This method gives you real, recognizable spiders that actually creep people out a little.
Honestly, this recipe is the kind that makes you close your eyes after the first bite. The smoky, briny olive against the creamy, tangy yolk—it’s a combination that just works. And the best part? You get to watch people’s faces when they see a spider sitting on their food. The shock, then the laugh, then the “oh, that’s actually really good” moment. It’s pure Halloween magic.
What Ingredients You Will Need
This recipe uses simple, everyday ingredients to deliver that perfect Halloween vibe without any fuss. Most of these are pantry staples, and the ones that aren’t are easy to find at any grocery store. Here’s what you’ll need:
For the Deviled Eggs:
- 6 large eggs (room temperature works best for even cooking, but cold is fine too)
- 3 tablespoons mayonnaise (I prefer Hellmann’s or Duke’s for that tangy flavor)
- 1 teaspoon yellow mustard (or Dijon if you want a sharper kick)
- 1/4 teaspoon salt (plus more for the boiling water)
- 1/8 teaspoon black pepper (freshly ground if you have it)
- 1/4 teaspoon paprika (smoked paprika adds a nice depth, but regular works great)
- 1 teaspoon white vinegar (this helps the filling stay bright and adds a subtle tang)
For the Olive Spiders:
- 1 can (6 ounces) large black olives (look for whole, pitted olives—the big ones work best for spider bodies)
- 1/4 cup cream cheese, softened (optional, but helps the spiders stick to the eggs)
Ingredient Tips:
Let me share a few things I’ve learned from making these over the years. For the eggs, older eggs actually peel easier than fresh ones. If your eggs are super fresh, try boiling them a day or two before you plan to make this recipe. The olives are the star of the show here, so don’t skimp. I’ve tried different brands and the key is getting large, firm olives. California black olives work perfectly—they’re mild in flavor and hold their shape when you slice them. If you can find jumbo olives, even better. They make for bigger, creepier spiders.
For the mayonnaise, I’ve tested this with both full-fat and light versions. Full-fat gives you a creamier filling that holds its shape better when piped. If you’re watching calories, light mayo works but the texture will be a bit softer. The mustard is non-negotiable in my book—it adds that classic deviled egg tang that balances the richness of the yolk. I’ve tried skipping it and the filling tasted flat. Trust me on this one.
The cream cheese for the spiders is optional but highly recommended. It acts like glue, helping the olive legs stay in place. Without it, the legs tend to fall off when you transport the eggs. I learned this the hard way after showing up to a party with a plate of legless spiders. Not a good look.
Equipment Needed
You don’t need much for this recipe, which is part of its charm. Here’s what you’ll need:
- Medium saucepan for boiling the eggs
- Sharp knife for slicing olives (a paring knife works great)
- Cutting board
- Small mixing bowl for the filling
- Fork or potato masher for mashing the yolks
- Piping bag or zip-top bag for filling the eggs (a spoon works too, but piping looks nicer)
- Serving platter (a dark-colored plate makes the spiders pop)
If you don’t have a piping bag, don’t worry. Just spoon the filling into a zip-top bag, snip off the corner, and pipe away. I’ve done it that way plenty of times and it works perfectly. For the knife, a serrated knife actually works better for slicing olives—the teeth grip the slippery olive skin and give you cleaner cuts. That’s a tip I picked up from a chef friend, and it’s been a game-changer.
Preparation Method
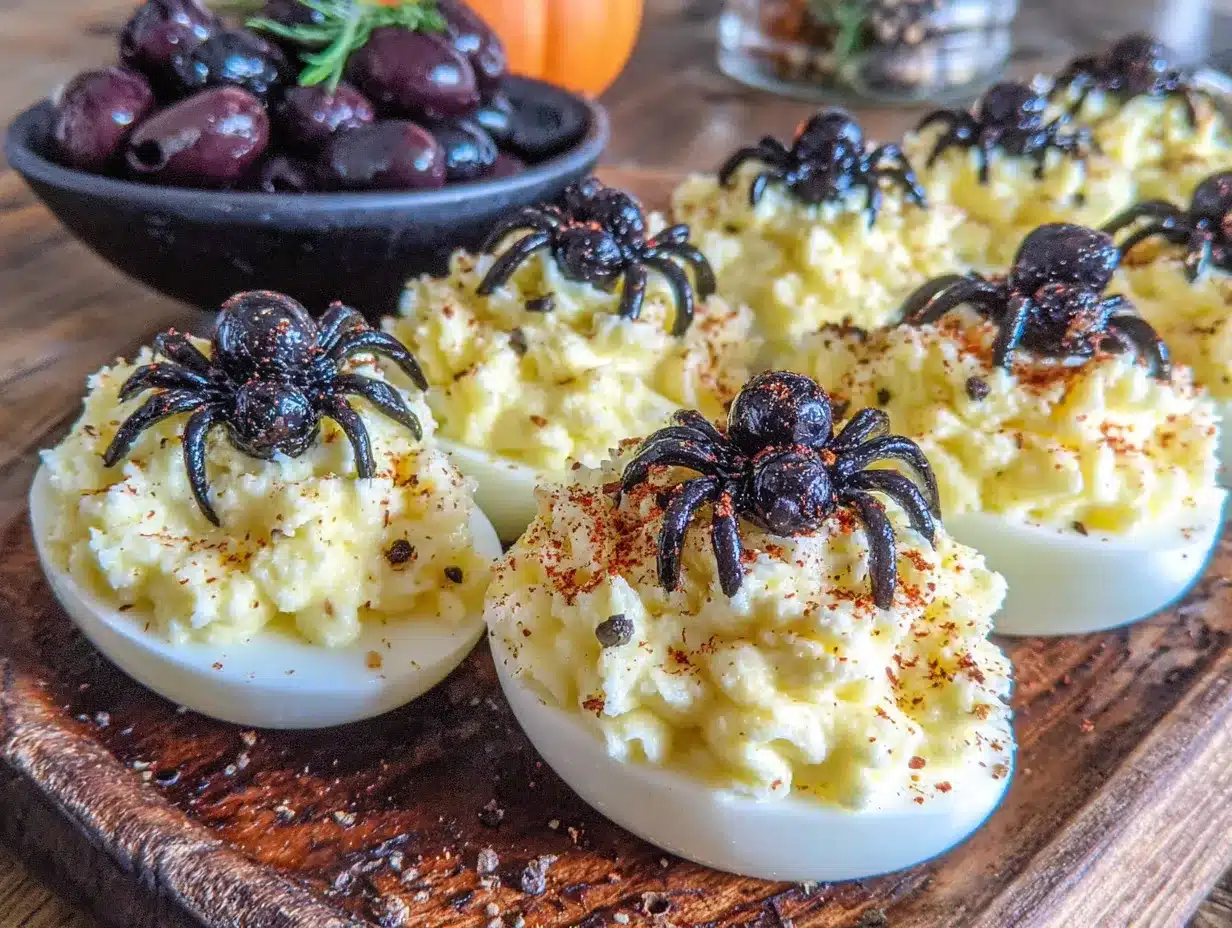
Alright, let’s get into the nitty-gritty. I’ve broken this down into clear steps so you can follow along easily. Take your time with the olive spiders—they’re the fun part.
- Boil the eggs. Place your eggs in a single layer in a medium saucepan. Cover them with cold water by about an inch. Add a generous pinch of salt and a splash of vinegar to the water—this helps the shells peel off easier. Bring the water to a rolling boil over high heat. Once it’s boiling, cover the pot, remove it from heat, and let it sit for exactly 12 minutes. Set a timer, seriously. I’ve forgotten before and ended up with green-ringed yolks.
- Ice bath time. While the eggs are cooking, fill a bowl with ice water. When the timer goes off, transfer the eggs to the ice bath using a slotted spoon. Let them sit for at least 5 minutes. This stops the cooking process and makes peeling a breeze. I’ve skipped this step when I was in a hurry and regretted it—the shells stuck like glue.
- Peel the eggs. Gently tap each egg on the counter to crack the shell, then roll it between your palms to loosen the shell. Start peeling from the wider end where the air pocket is. Rinse the peeled eggs under cool water to remove any tiny shell fragments. Pat them dry with a paper towel.
- Cut the eggs. Using a sharp knife, slice each egg in half lengthwise. Gently pop out the yolks into a small mixing bowl. Arrange the egg white halves on your serving platter, cut side up. If they wobble, slice a tiny piece off the bottom to make them sit flat.
- Make the filling. Mash the yolks with a fork until they’re crumbly with no large chunks. Add the mayonnaise, mustard, salt, pepper, paprika, and vinegar. Mix until smooth and creamy. Taste it and adjust the seasoning if needed. I usually add a pinch more paprika because I love that smoky flavor.
- Fill the eggs. Spoon the filling into a piping bag or a zip-top bag with the corner snipped off. Pipe the filling into each egg white half, mounding it slightly. You want a nice, generous amount—not too flat, not too tall. If you’re using a spoon, just dollop the filling in and smooth it out.
- Make the olive spiders. This is the fun part. Drain the olives and pat them dry with a paper towel. For each spider, you’ll need one whole olive for the body and half an olive for the legs. Take a whole olive and slice it in half crosswise (not lengthwise). Set the top half aside—that’s the body. Take the bottom half and slice it into thin strips lengthwise. You should get 4 to 5 strips. These are the legs. Arrange the strips on top of the deviled egg like spider legs—four on each side. Place the olive body on top, cut side down, so it covers where the legs meet. If you’re using cream cheese, dab a tiny bit on the bottom of the body to help it stick.
- Add the eyes. For the finishing touch, add tiny dots of cream cheese or mayonnaise to the olive body for eyes. You can use a toothpick to place them. This little detail makes the spiders look alive and creepy. I’ve had kids scream when they saw these—mission accomplished.
- Chill and serve. Refrigerate the deviled eggs for at least 30 minutes before serving. This helps the filling set and the spiders stay in place. They’re best served cold, straight from the fridge.
Cooking Tips & Techniques
Let me share some hard-earned wisdom from my many batches of spider deviled eggs. First up, the biggest mistake people make is overcooking the eggs. I know I mentioned the 12-minute rule, but seriously, stick to it. Overcooked eggs get that gray-green ring around the yolk and they smell sulfurous. Nobody wants that. If you’re nervous, use an instant-read thermometer—the yolk should reach 158°F (70°C).
For the olive spiders, patience is your friend. I remember my first attempt was a disaster because I tried to rush the slicing. The olives kept slipping and I ended up with uneven, mangled legs. Here’s the trick: use a sharp serrated knife and cut slowly. Let the knife do the work. If the olives are too slippery, pat them dry with a paper towel first. And if a leg breaks, just eat it. No one will know.
Another thing I’ve learned: don’t overfill the piping bag. Fill it about halfway and twist the top to create pressure. This gives you more control and less mess. I’ve had the bag burst on me mid-pipe and ended up with yolk filling all over my hands. Not fun. Also, if you’re making these for a party, boil the eggs and make the filling a day ahead. Just keep the filling and egg whites separate in the fridge. Assemble and add the spiders right before serving so the olives don’t dry out.
Timing is everything with these. You want the spiders to look fresh, not shriveled. I usually make the spiders no more than an hour before serving. If you’re transporting them, put the eggs on a flat platter with a lid or cover them with plastic wrap. And here’s a pro tip: use a dark-colored platter. The white eggs and black spiders pop beautifully against a black or dark purple plate. It gives the whole thing a spooky vibe.
Variations & Adaptations
One of the best things about this recipe is how customizable it is. Here are some variations I’ve tried and loved:
- Spicy Spider Eggs: Add 1/4 teaspoon of cayenne pepper or a dash of hot sauce to the yolk filling. The heat pairs beautifully with the cool, creamy texture. I tried this for a Halloween party with friends who love spicy food and it was a hit.
- Avocado Deviled Spiders: Replace half the mayonnaise with mashed avocado. This gives the filling a green tint that looks even more Halloween-appropriate. Plus, it’s a bit healthier. Just add a squeeze of lemon juice to keep the avocado from browning.
- Bacon Spider Eggs: Crumble cooked bacon into the yolk filling before piping. The smoky, salty bacon with the briny olive is a match made in heaven. I made these for a football party and they disappeared in minutes.
- Veggie Spider Eggs: For a lighter version, replace the mayonnaise with Greek yogurt. Add some finely chopped chives or dill for freshness. This works great if you’re serving these at a healthier gathering.
- Different Spider Designs: Try using pimento-stuffed olives for a red-eyed spider look. Or use small capers for the eyes instead of cream cheese. You can even use red bell pepper strips for the legs for a more colorful spider.
If you’re feeding a crowd, double or triple the recipe easily. Just boil more eggs and make extra filling. The spiders take a bit more time, but the wow factor is worth it. I’ve also made these with quail eggs for bite-sized spiders—they’re adorable and perfect for appetizer tables.
Serving & Storage Suggestions
These deviled eggs are best served cold, straight from the fridge. Arrange them on a platter with some fake spider webs or plastic spiders for extra Halloween flair. I like to sprinkle a little extra paprika on top for color. They pair beautifully with other Halloween snacks like mummy hot dogs, pumpkin-shaped cheese balls, or ghost-shaped cookies.
For beverages, these go great with a crisp white wine like Sauvignon Blanc or a light beer. For kids, serve them with apple cider or sparkling water with a splash of pomegranate juice for a creepy red color. The creamy, tangy filling balances nicely with something bubbly and refreshing.
Storage-wise, these are best eaten within 24 hours. The olive spiders can get a bit dry if left too long. Store any leftovers in an airtight container in the refrigerator for up to two days. Don’t freeze them—the texture of the filling will be ruined. If you’re making them ahead, prep everything separately and assemble just before serving. The filling can be made a day in advance and stored in a piping bag in the fridge. The egg whites can be boiled and peeled a day ahead too. Just keep them in a bowl of cold water in the fridge to stay fresh.
One thing I’ve noticed: the flavors actually get better after a few hours in the fridge. The mustard and paprika meld together, and the filling becomes even creamier. So if you make these in the morning for an evening party, they’ll taste even better. Just add the spiders right before serving.
Nutritional Information & Benefits
Here’s a rough breakdown per deviled egg (based on one egg half with filling and one spider):
- Calories: 85
- Protein: 6g
- Fat: 6g
- Carbohydrates: 1g
- Fiber: 0g
- Sugar: 0g
- Sodium: 180mg
Eggs are a fantastic source of high-quality protein and contain all nine essential amino acids. They’re also rich in choline, which supports brain health, and lutein, which is good for your eyes. The black olives add healthy monounsaturated fats and a dose of vitamin E. This recipe is naturally gluten-free and low-carb, making it suitable for keto and paleo diets. If you’re watching your cholesterol, you can use half the yolks and add more egg whites to the filling. I’ve done this and it still tastes great.
One thing to note: this recipe contains eggs and dairy (mayonnaise and cream cheese), so it’s not suitable for vegans or those with dairy allergies. But you can easily make it dairy-free by using vegan mayo and skipping the cream cheese on the spiders. The spiders will still stick if you press them gently into the filling.
Conclusion
These Quick Spooky Halloween Deviled Eggs with Olive Spiders are the kind of recipe that makes Halloween entertaining actually fun. They’re quick, they’re creepy, and they taste amazing. I’ve been making them for years now, and they never fail to get a reaction. Whether you’re hosting a Halloween party, bringing a dish to a potluck, or just want to surprise your kids with something fun after school, these deviled eggs deliver.
Don’t be afraid to make them your own. Add more spice, swap in different olives, or experiment with the filling. The beauty of this recipe is how flexible it is. And honestly, even if your spiders don’t look perfect, they’ll still taste delicious. That’s the thing about cooking—it doesn’t have to be perfect to be wonderful.
I’d love to hear how yours turn out! Drop a comment below and let me know if your kids screamed (in a good way) or if you came up with a clever variation. Share this recipe with your Halloween-loving friends, and don’t forget to pin it for later. Happy Halloween, and happy cooking!
Frequently Asked Questions
Can I make these deviled eggs a day ahead?
Yes! Boil the eggs, make the filling, and store them separately in the fridge. Assemble the eggs and add the olive spiders right before serving for the best texture and appearance.
How do I keep the olive spiders from falling off?
Use a tiny dab of cream cheese or mayonnaise on the bottom of the olive body to help it stick to the filling. Press gently and let the eggs chill for at least 30 minutes before serving.
Can I use different types of olives?
Absolutely! Large black olives work best for the classic spider look, but you can use kalamata olives for a richer flavor or green olives for a different color. Just make sure they’re large enough to slice easily.
How do I get perfectly peeled hard-boiled eggs?
Use older eggs (a week old is ideal), add salt and vinegar to the boiling water, and plunge the cooked eggs into an ice bath immediately. Start peeling from the wider end where the air pocket is.
Are these deviled eggs suitable for kids?
Definitely! Kids love the creepy spider design. The flavors are mild and familiar—just creamy deviled eggs with a briny olive on top. Just be prepared for some dramatic “ewww” reactions followed by “can I have another one?”
Pin This Recipe!
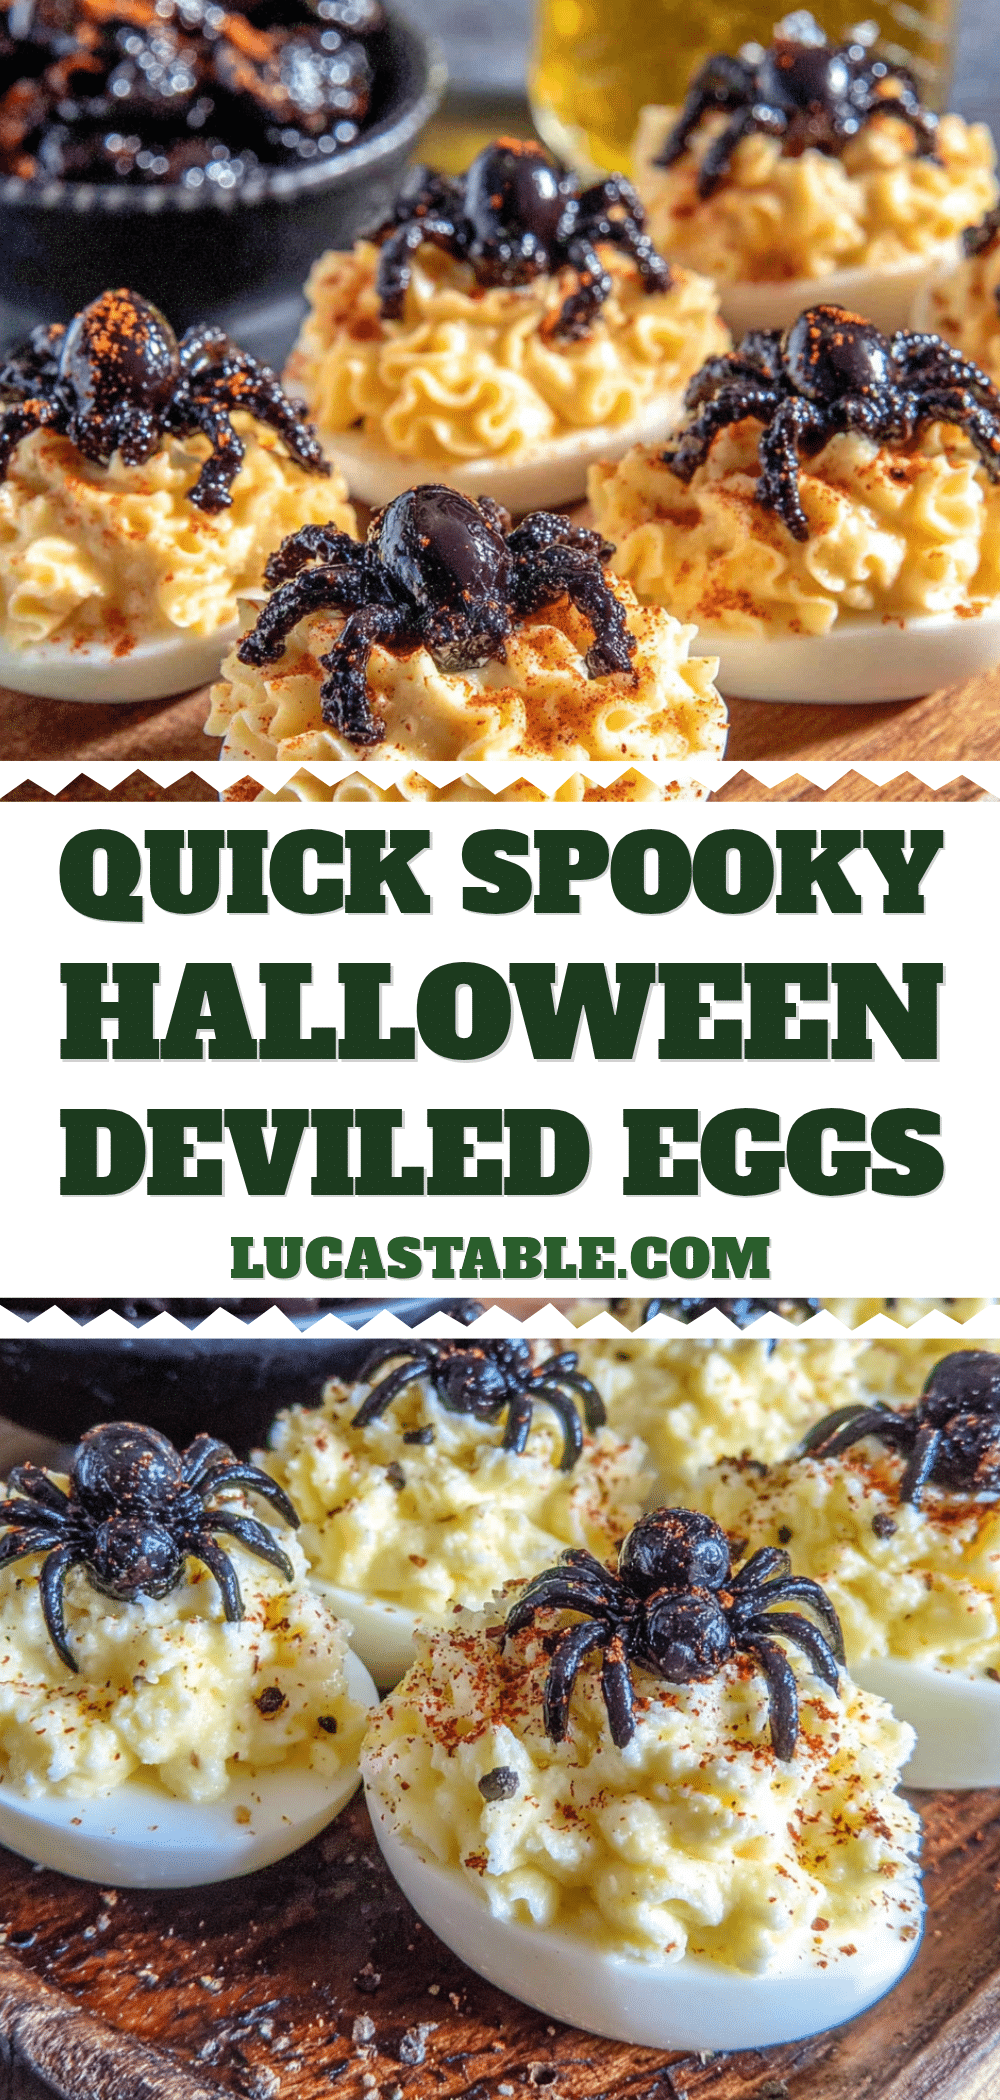
Easy Halloween Deviled Eggs with Creepy Olive Spiders
Quick and creepy deviled eggs topped with olive spiders, perfect for Halloween parties. Creamy, tangy filling with smoky olive flavor that kids and adults love.
- Prep Time: 15 minutes
- Cook Time: 12 minutes
- Total Time: 27 minutes
- Yield: 12 deviled egg halves 1x
- Category: Appetizer
- Cuisine: American
Ingredients
- 6 large eggs
- 3 tablespoons mayonnaise
- 1 teaspoon yellow mustard
- 1/4 teaspoon salt
- 1/8 teaspoon black pepper
- 1/4 teaspoon paprika
- 1 teaspoon white vinegar
- 1 can (6 ounces) large black olives, whole and pitted
- 1/4 cup cream cheese, softened (optional)
Instructions
- Place eggs in a single layer in a medium saucepan. Cover with cold water by about an inch. Add a generous pinch of salt and a splash of vinegar. Bring to a rolling boil over high heat. Cover, remove from heat, and let sit for exactly 12 minutes.
- While eggs cook, fill a bowl with ice water. Transfer eggs to ice bath using a slotted spoon. Let sit for at least 5 minutes.
- Peel eggs by gently tapping on counter to crack shell, then rolling between palms. Start peeling from the wider end. Rinse under cool water and pat dry.
- Slice each egg in half lengthwise. Pop out yolks into a small mixing bowl. Arrange egg white halves on serving platter, cut side up.
- Mash yolks with a fork until crumbly. Add mayonnaise, mustard, salt, pepper, paprika, and vinegar. Mix until smooth and creamy. Adjust seasoning if needed.
- Spoon filling into a piping bag or zip-top bag with corner snipped off. Pipe filling into each egg white half, mounding slightly.
- Drain olives and pat dry. For each spider: slice one whole olive in half crosswise. Set top half aside for body. Slice bottom half into thin strips lengthwise (4-5 strips) for legs.
- Arrange olive strips on top of deviled egg like spider legs (four on each side). Place olive body on top, cut side down. If using cream cheese, dab a tiny bit on bottom of body to help it stick.
- Add tiny dots of cream cheese or mayonnaise to olive body for eyes using a toothpick.
- Refrigerate deviled eggs for at least 30 minutes before serving. Serve cold.
Notes
Use older eggs for easier peeling. For best results, boil eggs a day or two ahead. Make spiders no more than an hour before serving to prevent olives from drying out. Use a dark-colored platter to make spiders pop. The filling can be made a day ahead and stored in a piping bag in the fridge.
Nutrition
- Serving Size: 1 deviled egg half
- Calories: 85
- Sodium: 180
- Fat: 6
- Saturated Fat: 2
- Carbohydrates: 1
- Protein: 6
Keywords: Halloween deviled eggs, olive spiders, creepy deviled eggs, spooky appetizer, easy Halloween recipe


