My niece Mia asked why I couldn’t just pour the jello in layers and let it set in the fridge. I started to explain why that wouldn’t work — something about temperature and setting times and the science of it all. Then I stopped. Honestly, I had no good reason. I’d been overcomplicating it for years, making individual molds and stressing about perfectly separated stripes. Mia, who was eight at the time and just wanted a fun Halloween snack, looked at me like I was the one who didn’t get it. She was right. I poured three layers into clear cups, let them set one at a time, and they came out perfect. The colors stayed separate, the kids went wild, and I learned a valuable lesson about listening to the simplest ideas in the room.
These Easy Candy Corn Jello Cups are now our go-to Halloween dessert. They’re ridiculously simple — no fancy equipment, no complicated techniques, just three layers of jello that mimic those iconic candy corn stripes. My kitchen counter was a mess that first time, with jello packets everywhere and Mia licking the spoon, but that moment of being wrong turned into our favorite tradition. Maybe you’ve been there, overthinking a recipe when the easiest method was staring you right in the face.
The best part? These jello cups cost pennies to make, they’re a hit at every Halloween party, and they keep the kids busy for hours. I keep making them because they remind me that sometimes the best recipes come from letting go of control and trusting the process — or in this case, trusting an eight-year-old.
Why You’ll Love These Candy Corn Jello Cups
Let me tell you why this recipe has earned a permanent spot in our Halloween rotation. I’ve tested it with my own kids, my neighbor’s picky eaters, and a classroom full of sugar-crazed second graders. It passed every test with flying colors.
- Quick & Easy: Each layer takes about 15 minutes to set, so you can whip these up in under an hour total. Perfect for busy Halloween weeknights or last-minute party prep.
- Simple Ingredients: You need exactly three boxes of jello, some boiling water, and clear cups. That’s it. No fancy grocery trips, no obscure ingredients.
- Perfect for Halloween: These look like candy corn but taste like fruity jello — a fun twist that kids absolutely love. Great for classroom parties, trick-or-treat gatherings, or just a spooky snack at home.
- Crowd-Pleaser: I’ve yet to meet a kid who doesn’t gobble these up. The layers are fun to eat, and the colors are so festive. Even adults sneak one when they think no one’s watching.
- Unbelievably Delicious: The combination of orange, yellow, and clear jello creates this beautiful gradient that tastes as good as it looks. It’s like eating a rainbow, but better.
What makes these jello cups different from every other Halloween dessert out there? It’s the layering technique. Most recipes tell you to use a straw to inject layers or to tilt the cups at weird angles. Not here. We’re doing it the smart way — letting each layer set completely before adding the next. This gives you perfect, clean stripes every single time. No mess, no stress, just gorgeous candy corn colors that look like they came from a bakery.
This recipe isn’t just good — it’s the kind that makes you close your eyes after the first bite. The jello is so smooth and wobbly, and the sweetness hits just right. It’s comfort food reimagined for Halloween, and it brings so much joy without any of the fuss.
What Ingredients You Will Need
This recipe uses simple, store-bought ingredients to create a dessert that looks way more complicated than it actually is. You probably already have most of these in your pantry, which is the whole point.
- 1 box (3 oz) orange jello — I recommend Jell-O brand for the most consistent results, but any store brand works fine. Look for a bright, vibrant orange color. (This gives you the bottom layer that looks like the orange part of candy corn.)
- 1 box (3 oz) lemon or pineapple jello — Yellow is the key here. Lemon jello gives a slightly tangy flavor that balances the sweetness, but pineapple works great too. (This is your middle layer, the yellow stripe.)
- 1 box (3 oz) unflavored gelatin — This is your secret weapon. You’ll mix it with water to create a clear top layer that looks like the white tip of candy corn. Knox brand is my go-to, but any unflavored gelatin works. (Adds that authentic candy corn look without extra sugar.)
- 3 cups boiling water — Divided into 1 cup portions for each layer. Use freshly boiled water for the best dissolve. (Tap water is fine, just make sure it’s really boiling.)
- 1 cup cold water — For the unflavored gelatin layer. You’ll mix this with the gelatin before adding boiling water. (Room temperature water works in a pinch.)
- Clear plastic cups (9 oz size) — I use the 9-ounce clear cups from the party supply store. You can find them at any grocery store or online. The clear cups are essential for showing off those beautiful layers. (Dixie cups work but you won’t see the stripes as well.)
- Optional: Whipped cream or Cool Whip — For topping. Not necessary, but it adds a nice creamy finish. (My kids insist on it.)
- Optional: Halloween sprinkles — For decoration. Little ghosts, pumpkins, or just orange and black sprinkles make these extra festive. (Totally optional but so fun.)
Ingredient Tips: If you can’t find lemon jello, any yellow jello flavor works. I’ve used peach and even mango in a pinch. The flavor changes slightly but the color stays true. For the unflavored gelatin, make sure you’re buying the powder, not the sheets. Sheets work differently and you’ll need to adjust the measurements. Also, check the expiration date on your jello boxes — old jello doesn’t set as firmly, and you’ll end up with a soupy mess. Trust me, I learned that one the hard way.
Substitution Guidance: For a sugar-free version, use sugar-free jello and sugar-free unflavored gelatin. The texture is slightly different — a bit softer — but the taste is still great. For a vegan option, look for agar-agar powder instead of gelatin. You’ll need to follow the package directions because agar sets differently. I’ve tried it once and it worked, but the texture is firmer and less jiggly. Not bad, just different.
Equipment Needed
The beauty of this recipe is that you don’t need any fancy kitchen gadgets. Here’s what you’ll need:
- Small mixing bowls (3) — One for each layer. I use my Pyrex glass bowls because they handle hot water well. Any bowl works, just make sure it’s heat-safe.
- Whisk or fork — For stirring the jello until it’s completely dissolved. A whisk works faster, but a fork gets the job done too.
- Measuring cups — A 1-cup measure for the boiling water and a 1-cup measure for the cold water. I use my glass Pyrex measuring cup for the hot water.
- Kettle or pot — For boiling water. I use my electric kettle because it’s faster, but a pot on the stove works just fine.
- Clear plastic cups (9 oz) — These are your serving vessels. I get mine at the dollar store — 50 cups for a few bucks. They’re perfect for parties.
- Refrigerator space — You need room for the cups to sit flat while the layers set. Clear a shelf in your fridge before you start.
- Liquid measuring cup — For the cold water. I use a 2-cup Pyrex measure.
Budget-Friendly Tip: Don’t buy fancy jello molds or special cups. Clear plastic cups from the dollar store work perfectly and cost pennies. I’ve been using the same box of cups for three Halloweens now. Also, skip the expensive whipped cream — store-brand Cool Whip tastes the same and costs half as much.
Preparation Method
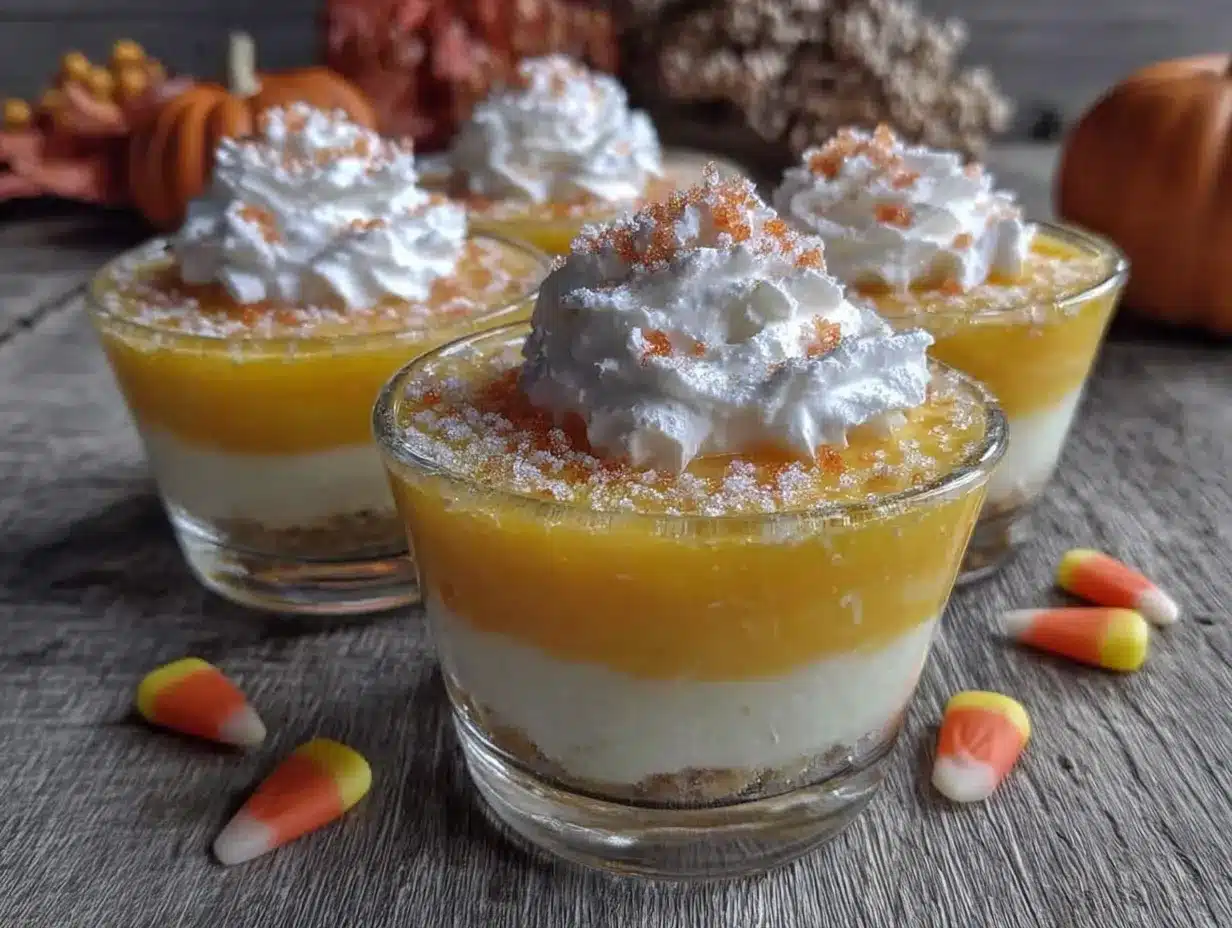
Alright, let’s make these candy corn jello cups. I promise it’s easier than it sounds. Take your time with the layers, and you’ll have a gorgeous Halloween dessert that looks like it took hours.
- Prepare your workspace. Clear a flat spot in your refrigerator where the cups can sit undisturbed. I usually put a baking sheet on a shelf to keep everything stable. Also, get your clear cups ready — you’ll need about 8 to 10 cups depending on how full you fill them.
- Make the orange layer (bottom). In a small bowl, empty the orange jello packet. Add 1 cup of boiling water and whisk until the powder is completely dissolved. No grains left — that’s the key. Let it cool for about 5 minutes at room temperature. You want it warm but not hot.
- Pour the orange layer. Divide the orange jello evenly among your cups. Fill each cup about one-third full. I use a liquid measuring cup with a spout for easy pouring. Place the cups in the refrigerator and let them set for about 15 to 20 minutes. The jello should be firm to the touch but not completely solid — you want it set enough that the next layer won’t mix in.
- Make the yellow layer (middle). While the orange layer is setting, empty the lemon or pineapple jello packet into another bowl. Add 1 cup of boiling water and whisk until dissolved. Let it cool for 5 minutes. You want it at room temperature — if it’s too hot, it will melt the orange layer.
- Pour the yellow layer. Once the orange layer is set, carefully pour the yellow jello on top. Use a spoon to guide the liquid if you’re worried about splashing. Fill each cup about two-thirds full now. Return the cups to the fridge for another 15 to 20 minutes.
- Make the clear layer (top). In a third bowl, empty the unflavored gelatin packet. Add 1 cup of cold water and stir until the gelatin is dissolved. It will look clumpy at first — keep stirring. Then add 1 cup of boiling water and whisk until everything is clear and smooth. Let it cool for 5 minutes.
- Pour the clear layer. Once the yellow layer is set, carefully pour the clear gelatin on top. Fill each cup almost to the rim — leave about a quarter-inch of space. You want the clear layer to be visible but not overflowing. Return to the fridge for at least 2 hours, or until completely firm.
- Top and serve. Once the jello is fully set, add a dollop of whipped cream on top if you’re using it. Sprinkle with Halloween sprinkles for extra fun. Serve cold and watch the kids go crazy.
Troubleshooting Tip: If your layers are mixing together, one of two things happened. Either you didn’t let the previous layer set long enough, or you poured the next layer while it was still too hot. Give each layer a full 20 minutes in the fridge, and let your jello cool to room temperature before pouring. Also, pour slowly — a fast pour can break the surface of the set layer.
Sensory Cue: When the jello is set, it should feel firm but wobbly when you tap the cup. It should jiggle like a classic jello dessert, not slosh around like liquid. If you see any movement when you tilt the cup, it needs more time.
Cooking Tips & Techniques
I’ve made these jello cups more times than I can count, and I’ve learned a few tricks along the way. Here’s what I wish someone had told me the first time.
Patience is your friend. I know it’s tempting to rush the layers, but trust me — each layer needs its full setting time. I once tried to speed things up by putting the cups in the freezer. Big mistake. The jello froze on top but stayed liquid underneath, and I ended up with a layered mess. Give each layer 20 minutes minimum. Set a timer if you have to.
Use room temperature water for the unflavored gelatin. This is a mistake I made the first time. I added boiling water directly to the unflavored gelatin powder, and it clumped up into nasty little balls. The trick is to dissolve the gelatin in cold water first, then add the boiling water. It makes a huge difference.
Let the jello cool before pouring. Hot jello will melt the layer underneath. I let each batch cool for 5 to 10 minutes at room temperature before pouring. You want it warm but not hot — think bathwater temperature, not tea temperature.
Multitask wisely. While the orange layer is setting, make your yellow jello and let it cool on the counter. Then make the clear layer while the yellow is setting. This way, you’re never waiting around. I usually have all three bowls ready before I start pouring.
Don’t overfill the cups. Leave a little space at the top for the whipped cream. If you fill the cups to the brim, the whipped cream will spill over and make a mess. I learned this one when my counter looked like a jello war zone.
Use a measuring cup with a spout. This makes pouring so much easier and less messy. I use my 2-cup Pyrex measure for the orange and yellow layers, and a smaller one for the clear layer. The spout gives you control, especially when you’re pouring into tiny cups.
Variations & Adaptations
One of the best things about this recipe is how easy it is to customize. Here are some variations I’ve tried and loved.
Halloween Color Swap: Instead of candy corn colors, try purple, green, and clear for a witchy vibe. Or red, black, and clear for a spooky look. I did a purple-green-orange combo for a monster-themed party, and the kids went nuts. Just match the jello flavors to the colors you want.
Layered Parfait Style: Instead of three separate layers, try making a jello parfait. Layer orange jello, then a thin layer of whipped cream, then yellow jello, then more whipped cream, then clear jello. It’s more work but looks incredible. I did this for a Halloween brunch and everyone thought I was a professional pastry chef.
Fruit-Infused Version: Add small fruit pieces to the layers for extra texture. Mandarin oranges in the orange layer, pineapple chunks in the yellow layer, and apple cubes in the clear layer. The fruit adds a fresh element that balances the sweetness. Just make sure the fruit is well-drained so it doesn’t water down the jello.
Dairy-Free Option: Skip the whipped cream or use a dairy-free alternative like coconut whipped cream. The jello itself is dairy-free, so this is an easy swap. I’ve used So Delicious coconut whipped topping and it works great.
Individual Serving Cups: If you’re serving these at a party, make them in small 4-ounce cups instead of 9-ounce cups. They’re perfect for little hands and portion control. I made a batch of mini cups for my daughter’s preschool Halloween party, and they were a hit with the teachers too.
Serving & Storage Suggestions
These jello cups are best served cold, straight from the fridge. The texture is perfect when they’ve had at least 2 hours to set, but overnight is even better. The flavors meld together and the layers become more defined.
Presentation: Arrange the cups on a platter or tray in a pattern — alternating colors or grouping them by flavor. I like to add a few Halloween-themed napkins and some candy corn around the platter for a festive touch. If you’re serving them at a party, write each kid’s name on their cup with a permanent marker. It makes them feel special and prevents mix-ups.
Complementary Dishes: These jello cups pair perfectly with other Halloween treats. Serve them alongside Halloween popcorn mix for a sweet-and-salty combo, or with spider web cupcakes for a full dessert spread. For a healthier option, add a fruit platter with apple slices and grapes.
Storage: Store leftover jello cups in the refrigerator, covered with plastic wrap or in an airtight container. They’ll keep for up to 5 days, though they’re usually gone within 24 hours at my house. The layers stay separate and the texture remains perfect.
Reheating: Don’t reheat these — jello doesn’t do well with heat. If you want to serve them at room temperature, take them out of the fridge about 15 minutes before serving. They’ll soften slightly but still hold their shape.
Flavor Development: These jello cups actually get better after a day in the fridge. The flavors meld together and the layers become more distinct. If you’re making them for a party, I recommend making them the night before. The colors will be more vibrant and the texture will be perfect.
Nutritional Information & Benefits
Let’s be real — these are a treat, not a health food. But here’s what you should know.
Estimated Nutritional Values (per serving, without whipped cream):
| Nutrient | Amount |
|---|---|
| Calories | 80-100 |
| Total Fat | 0g |
| Sodium | 80mg |
| Total Carbohydrates | 19g |
| Sugars | 18g |
| Protein | 2g |
Health Benefits: Okay, so jello isn’t exactly a superfood. But gelatin does contain collagen, which is good for your joints, skin, and hair. It’s also a source of protein — about 2 grams per serving. Plus, these cups are fat-free and relatively low in calories compared to other Halloween desserts. A single candy bar has more calories and sugar than one of these jello cups.
Dietary Considerations: These jello cups are gluten-free, dairy-free (without the whipped cream), and nut-free. They’re also kosher if you use kosher-certified gelatin. For a sugar-free version, use sugar-free jello and sugar-free unflavored gelatin. Just note that the texture will be slightly softer.
Potential Allergens: The jello itself is allergen-free, but check the labels on your whipped cream and sprinkles. Some brands contain dairy, soy, or artificial colors that might be an issue for sensitive kids. I always use store-brand Cool Whip, which is dairy-free and soy-free.
Personal Wellness Perspective: I’m not here to preach about healthy eating, especially around Halloween. These jello cups are a fun treat that kids love, and they’re a better option than a bag of candy. They’re portion-controlled, lower in sugar than most desserts, and they don’t leave you with a sugar crash. Plus, making them with your kids is a fun activity that builds memories. Balance is everything, and these cups fit perfectly into a balanced approach to treats.
Frequently Asked Questions
Can I use sugar-free jello for these cups?
Absolutely. Sugar-free jello works perfectly for this recipe. The texture is slightly softer than regular jello, but the layers still set beautifully. Just follow the same instructions — dissolve the powder in boiling water, let it cool, and pour. I’ve made sugar-free versions for friends with diabetes, and they turned out great.
How long do these jello cups need to set?
Each layer needs about 15 to 20 minutes in the refrigerator. The final layer needs at least 2 hours, but overnight is best. If you’re in a hurry, you can speed things up by putting the cups in the freezer for 10 minutes per layer — just don’t forget about them or they’ll freeze solid. I set a timer to be safe.
Can I make these jello cups in advance?
Yes, and I actually recommend it. These cups taste better after a day in the fridge because the flavors meld together. Make them the night before your Halloween party, and they’ll be perfect. They’ll keep in the fridge for up to 5 days, though the texture might soften slightly after day 3.
Why did my layers mix together?
This usually happens for one of two reasons. Either you didn’t let the previous layer set long enough, or you poured the next layer while it was still too hot. Give each layer a full 20 minutes in the fridge, and let your jello cool to room temperature before pouring. Also, pour slowly — a fast pour can break the surface of the set layer.
Can I use different flavors of jello?
Absolutely. The candy corn colors are traditional, but you can use any flavor combination you like. Try strawberry, lemon, and blueberry for a rainbow effect. Or grape, lime, and orange for a spooky Halloween vibe. Just make sure the colors contrast well so the layers are visible. I’ve done a red, white, and blue version for the Fourth of July, and it was a hit.
Conclusion
These Easy Candy Corn Jello Cups are proof that the best recipes don’t have to be complicated. They’re fun, festive, and so simple that even an eight-year-old can figure them out — and in my case, teach her aunt a thing or two. The layers are gorgeous, the taste is sweet and fruity, and the whole process takes less than an hour of active time.
I love this recipe because it brings people together. My kids help me make them every Halloween now, and we’ve started a tradition of taste-testing each layer. Mia still reminds me that she was the one who figured it out, and I let her take the credit. Honestly, she earned it.
I’d love to hear how yours turn out. Did you stick with the candy corn colors or try something different? Did your kids help you make them? Drop a comment below and let me know — I read every single one. And if you loved this recipe, share it with a friend who needs a fun Halloween dessert idea. Happy Halloween, and happy jello-making!
Pin This Recipe!
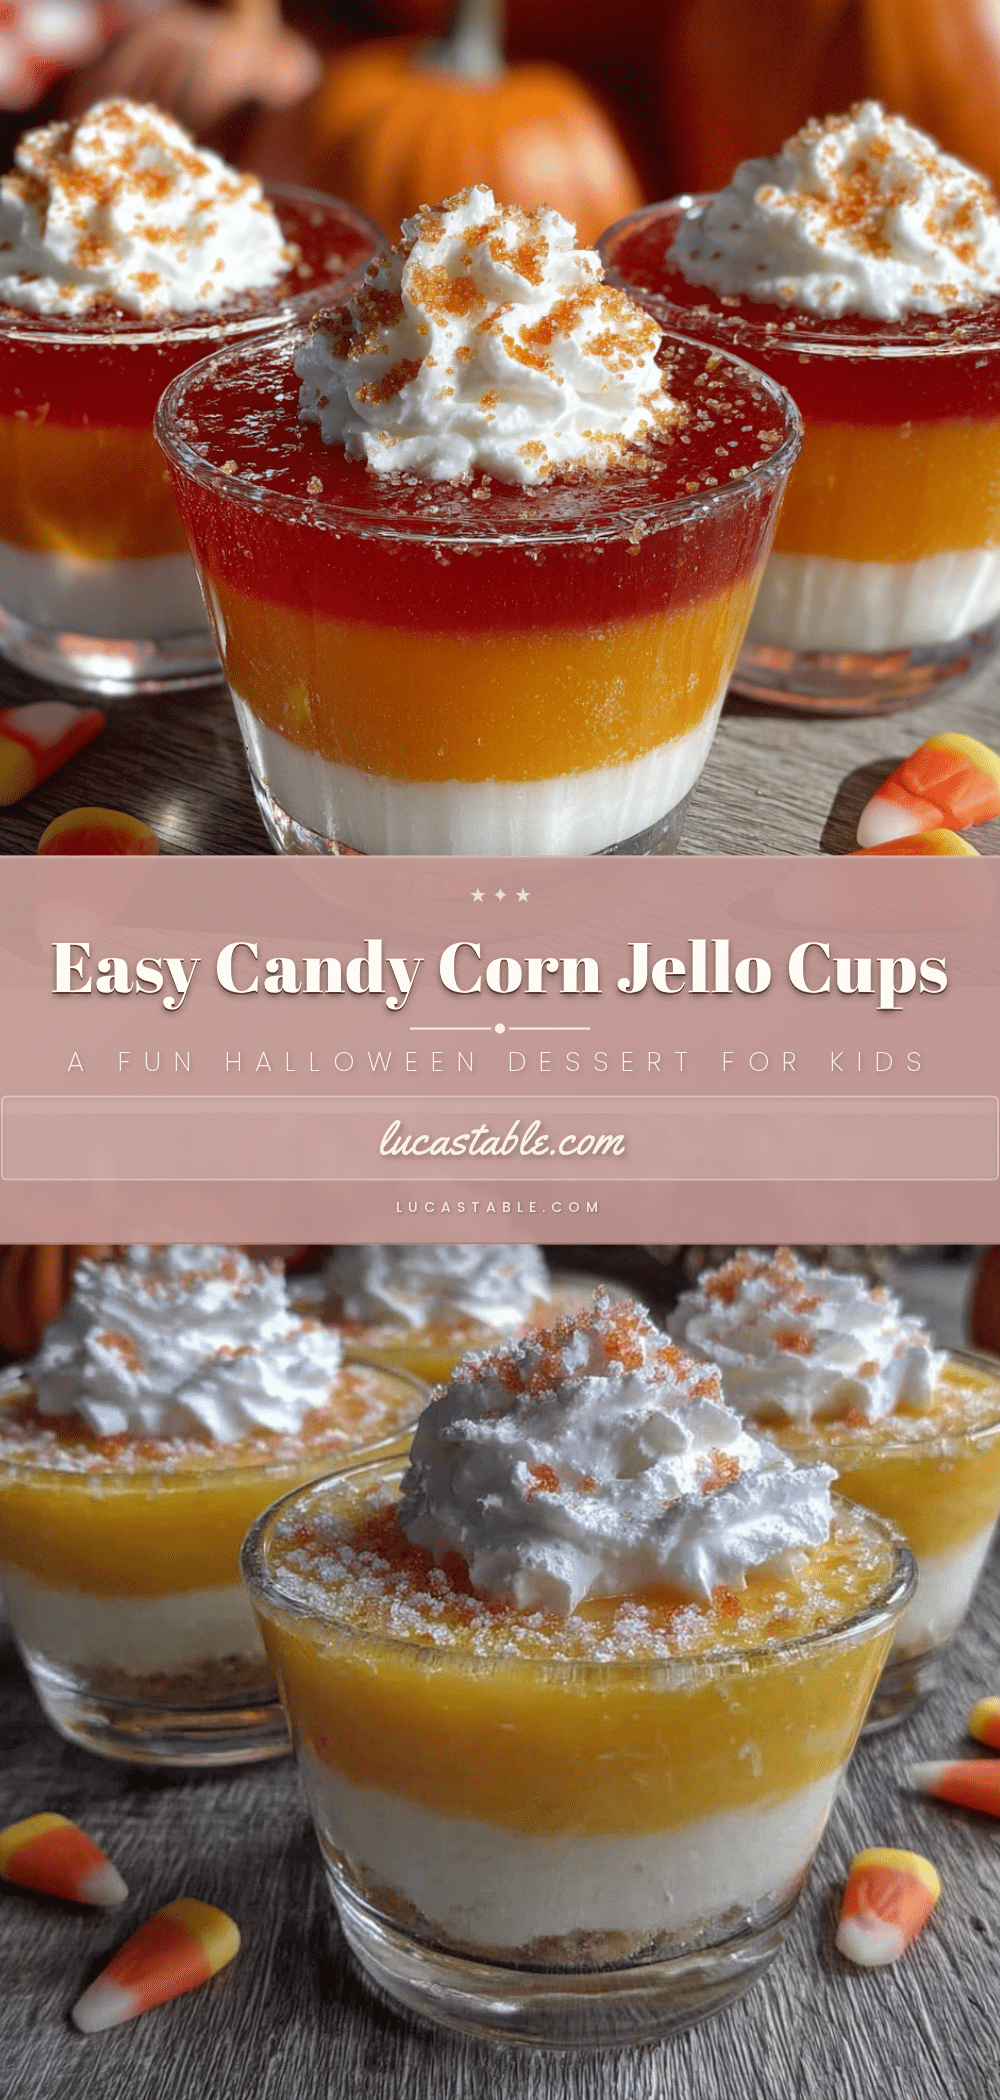
Easy Candy Corn Jello Cups: Best Halloween Dessert for Kids
These Easy Candy Corn Jello Cups are a fun, festive Halloween dessert with three layers of jello that mimic candy corn stripes. Simple to make with just a few ingredients, they’re perfect for kids’ parties and Halloween gatherings.
- Prep Time: 15 minutes
- Cook Time: 0 minutes
- Total Time: 2 hours 30 minutes (includes setting time)
- Yield: 8 to 10 servings 1x
- Category: Dessert
- Cuisine: American
Ingredients
- 1 box (3 oz) orange jello
- 1 box (3 oz) lemon or pineapple jello
- 1 box (3 oz) unflavored gelatin
- 3 cups boiling water, divided
- 1 cup cold water
- Clear plastic cups (9 oz size)
- Optional: Whipped cream or Cool Whip for topping
- Optional: Halloween sprinkles for decoration
Instructions
- Prepare your workspace: Clear a flat spot in your refrigerator where the cups can sit undisturbed. Get your clear cups ready (about 8 to 10 cups).
- Make the orange layer (bottom): In a small bowl, empty the orange jello packet. Add 1 cup of boiling water and whisk until the powder is completely dissolved. Let it cool for about 5 minutes at room temperature.
- Pour the orange layer: Divide the orange jello evenly among your cups, filling each about one-third full. Place cups in the refrigerator and let set for 15 to 20 minutes until firm to the touch.
- Make the yellow layer (middle): While the orange layer sets, empty the lemon or pineapple jello packet into another bowl. Add 1 cup of boiling water and whisk until dissolved. Let cool for 5 minutes.
- Pour the yellow layer: Once the orange layer is set, carefully pour the yellow jello on top, filling each cup about two-thirds full. Return to the fridge for another 15 to 20 minutes.
- Make the clear layer (top): In a third bowl, empty the unflavored gelatin packet. Add 1 cup of cold water and stir until dissolved. Then add 1 cup of boiling water and whisk until clear and smooth. Let cool for 5 minutes.
- Pour the clear layer: Once the yellow layer is set, carefully pour the clear gelatin on top, filling each cup almost to the rim (leave about 1/4 inch space). Return to the fridge for at least 2 hours, or until completely firm.
- Top and serve: Once fully set, add a dollop of whipped cream on top if desired. Sprinkle with Halloween sprinkles for extra fun. Serve cold.
Notes
Patience is key: let each layer set fully (15-20 minutes) before adding the next. Use room temperature water for unflavored gelatin to prevent clumping. Let jello cool to room temperature before pouring to avoid melting the previous layer. For best results, make the night before serving.
Nutrition
- Serving Size: 1 jello cup (without
- Calories: 80100
- Sugar: 18
- Sodium: 80
- Carbohydrates: 19
- Protein: 2
Keywords: candy corn jello cups, Halloween dessert, easy jello recipe, kids Halloween treat, layered jello, no-bake dessert


