My neighbor Sarah wasn’t trying to impress anyone that October afternoon. I’d stopped by to borrow a ladder—ours had mysteriously vanished during a backyard shed reorganization—and the smell hit me before I even made it past her front door. Cinnamon, nutmeg, something warm and buttery. She was standing in her kitchen in sweatpants and an oversized sweater, pulling a mini muffin tin out of the oven like it was no big deal.
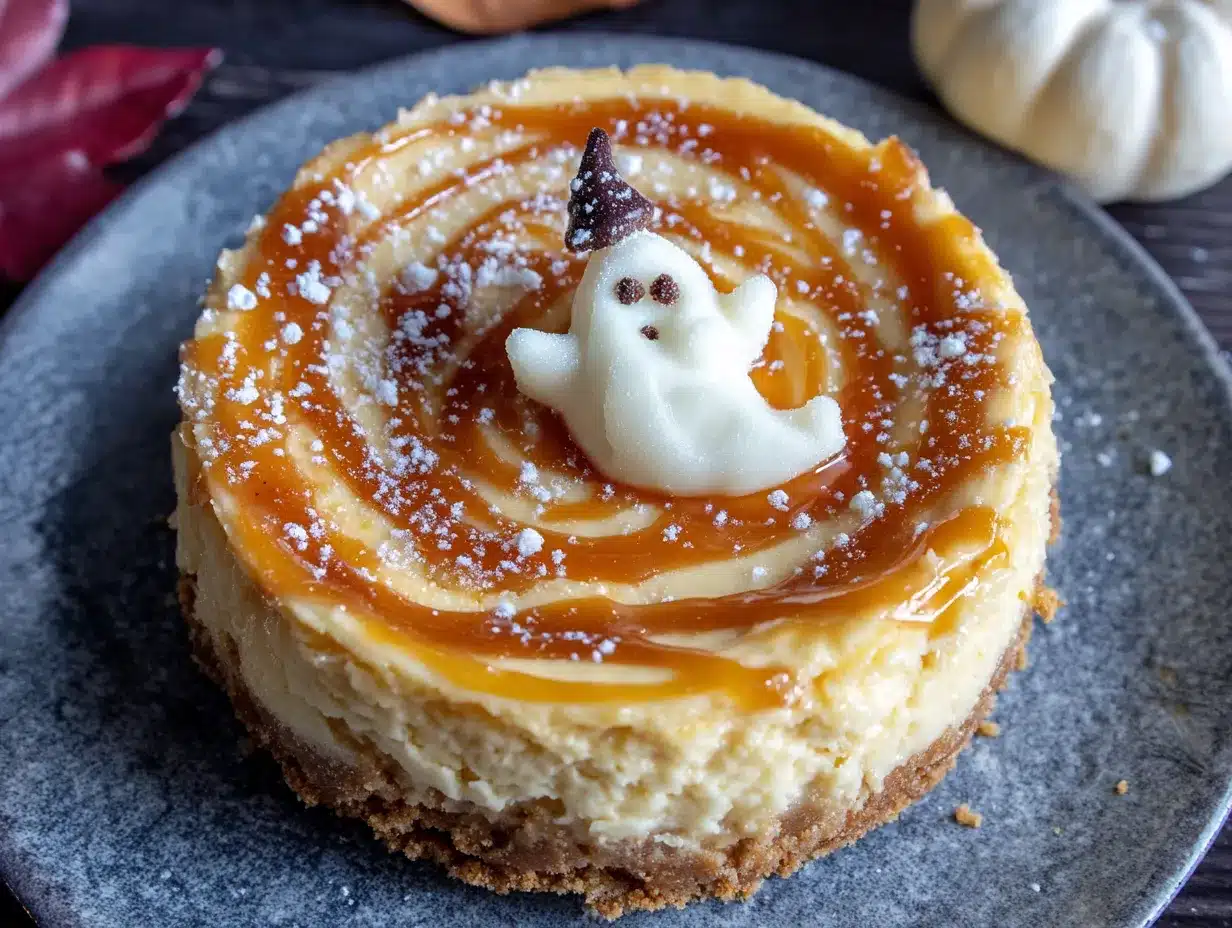
“Oh, those are just something I’m testing for the kids’ Halloween party,” she said, waving her hand like she’d just boiled water. But I was already staring at these adorable little pumpkin cheesecakes, each one with a tiny pretzel stem poking out the top. They looked like miniature Jack-o’-lanterns, all golden and cute and absolutely perfect. She slid one onto a napkin for me without me even asking, and honestly? That first bite stopped me mid-sentence. The silky pumpkin filling, the buttery graham cracker crust, that tiny hint of salt from the pretzel—I mean, I stood there in her kitchen eating three of them while she laughed at me.
Maybe you’ve been there, where you taste something so unexpectedly good that you immediately start planning when you’re going to make it yourself. I asked for the recipe before I even remembered the ladder. Sarah scribbled it on a sticky note, and I’ve been tweaking it ever since. These cozy mini Halloween pumpkin cheesecakes have become my go-to for every fall gathering. They’re small enough that you don’t feel guilty having two, but packed with enough creamy pumpkin flavor that one never feels like enough.
What gets me every time is how something so simple can feel so special. I mean, it’s cheesecake in a mini muffin tin. But the way the spices warm up your kitchen, the way they look sitting on a platter with little candy eyes staring up at you—it’s pure autumn magic in two bites. And the best part? They’re genuinely easy. No water bath, no cracking worries, none of that fussy cheesecake drama. Just pure, cozy, Halloween fun.
Why You’ll Love This Recipe
Let me tell you why these little guys have earned a permanent spot in my fall baking rotation. I’ve tested this recipe at least six times—yes, six—tweaking the spice ratio, testing different crusts, even trying them with and without the pretzel stems. This version is the one that finally made me stop and say, “Okay, this is it.”
- Quick & Easy: From start to finish, you’re looking at about 35 minutes. No water bath, no complicated steps. These come together faster than a batch of cookies, which honestly makes them perfect for those “I need something cute for the party tomorrow” moments.
- Simple Ingredients: You probably have most of this stuff in your pantry right now. Canned pumpkin, cream cheese, graham crackers, sugar, eggs. No weird specialty items that you’ll use once and then forget about until next Halloween.
- Perfect for Halloween Parties: These are the kind of treat that makes people stop and take photos before they eat them. The mini size means they’re great for kids and adults alike, and they look adorable on any dessert table.
- Crowd-Pleaser: I brought these to a neighborhood potluck last week, and three different people asked for the recipe. Even the folks who “don’t really like pumpkin” went back for seconds. Something about the creamy cheesecake texture just works.
- Unbelievably Delicious: The texture is what gets me every time. It’s dense but silky, not too sweet, with that warm pumpkin pie spice flavor that just feels like a hug in food form. The graham cracker crust adds just enough crunch, and the pretzel stem? Pure genius.
What makes this recipe different from all the other pumpkin cheesecake recipes out there? It’s the proportions. I spent a lot of time getting the pumpkin-to-cream-cheese ratio just right—too much pumpkin and it gets watery, too much cream cheese and you lose that pumpkin flavor. This version hits the sweet spot. Plus, the mini size means they bake evenly and quickly, so you don’t have to worry about that dreaded cheesecake crack situation.
This isn’t just another pumpkin dessert. It’s the kind of recipe that makes you close your eyes after the first bite. It’s comfort food reimagined in a tiny, portable, Halloween-themed package. Perfect for impressing guests without any stress, or turning a regular Tuesday night into something a little more special.
What Ingredients You Will Need
This recipe uses simple, wholesome ingredients to deliver that cozy pumpkin cheesecake flavor without any fuss. Most of these are pantry staples, especially if you’re already in fall baking mode. Here’s what you’ll need:
For the Graham Cracker Crust
- 1 cup graham cracker crumbs (about 8 full sheets, crushed finely)
- 2 tablespoons granulated sugar
- 4 tablespoons unsalted butter, melted (I prefer Kerrygold for the flavor, but any brand works fine)
- Pinch of salt (optional, but I like it to balance the sweetness)
For the Pumpkin Cheesecake Filling
- 8 ounces cream cheese, softened to room temperature (Philadelphia is my go-to—it gives the smoothest texture)
- 1/3 cup granulated sugar
- 1/4 cup packed light brown sugar
- 1/2 cup canned pumpkin puree (not pumpkin pie filling—make sure you grab the plain stuff)
- 1 large egg, room temperature
- 1 teaspoon vanilla extract
- 1/2 teaspoon ground cinnamon
- 1/4 teaspoon ground nutmeg (freshly grated if you have it, but pre-ground works great)
- 1/4 teaspoon ground ginger
- 1/8 teaspoon ground cloves
- Pinch of salt
For Decoration
- 24 small pretzel twists or pretzel sticks (for the pumpkin stems—I use Snyder’s mini pretzels)
- Orange candy melts or orange food coloring mixed with white chocolate (for drizzling, optional but cute)
- Mini chocolate chips or candy eyes (for faces, if you’re feeling festive)
- Green icing or green candy melts (for little pumpkin vines, optional)
A few ingredient notes from my testing: Make sure your cream cheese is truly at room temperature. I’ve made the mistake of using cold cream cheese before, and the filling ends up lumpy. Let it sit on the counter for at least 30 minutes. Also, don’t skip the brown sugar—it adds a depth of flavor that white sugar alone just can’t match. And if you’re out of graham crackers, you can substitute with crushed vanilla wafers or even shortbread cookies. The texture will be slightly different, but still delicious.
For a dairy-free version, use dairy-free cream cheese and a plant-based butter. I’ve tested this with Kite Hill cream cheese, and while the texture is slightly less creamy, it still works beautifully. Just make sure to let it soften completely.
Equipment Needed
You don’t need anything fancy for these mini cheesecakes, which is part of the appeal. Here’s what you’ll need:
- Mini muffin tin: This is non-negotiable. You need a 24-cup mini muffin tin. I got mine at Target for about $12, and it’s one of my most-used pans during the holidays.
- Mixing bowls: One medium bowl for the crust, one large bowl for the filling. Glass or metal works best.
- Electric hand mixer or stand mixer: You can mix the filling by hand, but an electric mixer makes it much smoother. I use my KitchenAid hand mixer for this.
- Measuring cups and spoons: Standard set for dry and wet ingredients.
- Food processor or zip-top bag and rolling pin: For crushing the graham crackers. I’ve done both methods, and honestly, the zip-top bag with a rolling pin works just fine. It’s also a great way to release some frustration.
- Small cookie scoop or tablespoon: For evenly portioning the crust and filling. A #60 cookie scoop is perfect for this.
- Piping bag or zip-top bag: For filling the muffin cups neatly. You can also just use a spoon, but a piping bag makes it cleaner.
- Cooling rack: For cooling the cheesecakes before chilling.
If you don’t have a mini muffin tin, you could use a regular muffin tin with liners, but the baking time will increase significantly, and you won’t get that cute mini pumpkin look. Honestly, the mini muffin tin is worth the investment if you make these more than once a season.
Preparation Method
Alright, let’s get to the fun part. I’ve broken this down step by step so you don’t miss anything. Trust me, I’ve made every mistake possible with these, so I’m sharing all the little tricks I’ve learned.
Step 1: Preheat and Prep
Preheat your oven to 325°F (163°C). Line your mini muffin tin with mini paper liners. I know some recipes say you don’t need liners, but trust me on this one—the liners make it so much easier to get the cheesecakes out without destroying them. Plus, they look cuter with the little frilly edges.
Step 2: Make the Crust
In a medium bowl, combine 1 cup graham cracker crumbs, 2 tablespoons sugar, and a pinch of salt. Pour in 4 tablespoons melted butter and stir with a fork until the mixture looks like wet sand. It should hold together when you squeeze a bit in your hand. If it’s too dry, add another teaspoon of melted butter. If it’s too wet, add a tablespoon more crumbs.
Drop about 1 heaping teaspoon of the crust mixture into each mini muffin cup. Use a small glass or a tamper to press it down firmly. I use the bottom of a shot glass—works perfectly. You want the crust to be compact, not loose. Pop the tin in the fridge while you make the filling. This helps the crust set and prevents it from getting soggy.
Step 3: Make the Filling
In a large bowl, beat 8 ounces of softened cream cheese with an electric mixer until smooth and creamy, about 1 minute. Scrape down the sides of the bowl. Add 1/3 cup granulated sugar and 1/4 cup brown sugar, and beat until combined, about 30 seconds. Don’t overmix—we don’t want to incorporate too much air, which can cause cracks.
Add 1/2 cup pumpkin puree, 1 large egg, 1 teaspoon vanilla, and all the spices (1/2 teaspoon cinnamon, 1/4 teaspoon nutmeg, 1/4 teaspoon ginger, 1/8 teaspoon cloves, and a pinch of salt). Beat on low speed until just combined. Scrape the bowl again and give it one more quick mix. The filling should be smooth and a beautiful orange color. Taste it—seriously, I always taste it at this point. It should be creamy, spiced, and not too sweet.
Step 4: Fill the Cups
Transfer the filling to a piping bag or a zip-top bag with the corner snipped off. Pipe the filling into each muffin cup, filling them almost to the top—about 3/4 full. The cheesecakes will puff up slightly but won’t overflow. Tap the pan gently on the counter a few times to release any air bubbles.
Step 5: Bake
Bake at 325°F for 14-16 minutes, or until the edges are set and the centers are just slightly jiggly. This is the tricky part—you want them to look almost done but with a tiny wobble in the center. They’ll continue to set as they cool. Overbaking is the number one mistake people make with mini cheesecakes. They’ll go from perfect to dry and cracked in about 30 seconds, so keep an eye on them.
Step 6: Cool and Chill
Let the cheesecakes cool in the pan on a wire rack for 15 minutes. Then carefully remove them (the liners make this easy) and transfer to the rack to cool completely, about 30 minutes. Once they’re at room temperature, transfer them to the refrigerator and chill for at least 2 hours. Overnight is even better—the texture gets creamier as they rest.
Step 7: Decorate
Once the cheesecakes are fully chilled, it’s time to make them look like little pumpkins. Gently press a pretzel stem into the top center of each cheesecake. If you want to get fancy, melt some orange candy melts and drizzle a little over the top, then add a tiny green icing vine. For Halloween fun, press two mini chocolate chips or candy eyes into the front to make little faces. My kids love this part—they make each one have a different expression.
Cooking Tips & Techniques
I’ve made these mini pumpkin cheesecakes more times than I care to admit, and I’ve learned a few things the hard way. Here are my best tips:
Room temperature ingredients are not optional. I know, I know, everyone says this. But with cheesecake, it really matters. Cold cream cheese creates lumps that no amount of mixing will fix. Cold eggs can make the filling seize up. Set everything out 30-45 minutes before you start.
Don’t overmix the filling. This is the second biggest mistake. When you beat too much air into the filling, it puffs up in the oven and then collapses, leaving cracks. Mix just until everything is combined and smooth. When in doubt, stop mixing.
Use a water bath? No way. One of the best things about mini cheesecakes is that you don’t need a water bath. The small size means they bake evenly without the risk of cracking from temperature changes. It’s one less thing to worry about.
Check early, check often. Start checking your cheesecakes at 12 minutes. Every oven runs differently, and mini cheesecakes go from underdone to overdone fast. The edges should look set, and the center should jiggle like Jell-O when you gently shake the pan.
Let them chill completely. I know it’s tempting to dig in right away, but these really need at least 2 hours in the fridge. The texture transforms from okay to amazing as they chill. Overnight is even better—the flavors meld and the creaminess reaches its peak.
One time I was in a hurry and tried to speed-cool them in the freezer. Big mistake. The tops got a weird, rubbery texture, and the crust got soggy from condensation. Just be patient. Good things come to those who wait, especially with cheesecake.
Variations & Adaptations
One of the best things about this recipe is how flexible it is. Here are some variations I’ve tried and loved:
Gluten-Free Version: Swap the graham crackers for gluten-free graham crackers or crushed gluten-free vanilla cookies. I’ve used Partake brand with great results. The texture is slightly different but still delicious.
Dairy-Free Version: Use dairy-free cream cheese (Kite Hill or Violife work well) and a plant-based butter. The texture will be slightly less dense, but the flavor is still spot-on. Just make sure to let the cream cheese soften completely.
Extra Spicy: If you love that warm pumpkin spice flavor, add an extra 1/4 teaspoon of cinnamon and a pinch of cardamom. I did this once on a whim, and now I can’t go back. The cardamom adds this subtle floral note that’s incredible.
Chocolate Pumpkin: Add 2 tablespoons of cocoa powder to the filling and reduce the graham cracker crumbs by 2 tablespoons. The chocolate-pumpkin combo is surprisingly good—like a pumpkin mocha in cheesecake form.
No-Bake Version: If you don’t want to turn on the oven, you can make these as a no-bake cheesecake. Use the same crust but press it into the cups and freeze for 10 minutes. For the filling, beat 8 ounces cream cheese with 1/4 cup sugar, then fold in 1/2 cup pumpkin puree and 1 cup whipped topping. Spoon into cups and chill for 4 hours. They’re lighter and fluffier, but honestly? Still pretty great.
My personal favorite variation is the extra spicy one with a drizzle of dark chocolate on top. I made it for a Halloween party last year, and people literally hovered around the dessert table. It’s that good.
Serving & Storage Suggestions
These mini pumpkin cheesecakes are best served cold, straight from the fridge. The texture is at its creamiest when they’re well-chilled. Arrange them on a platter with a few autumn leaves or mini pumpkins around the edges for a festive look.
They pair beautifully with a cup of hot apple cider, a spiced chai latte, or even a glass of cold milk. If you’re serving them at a party, consider putting out a bowl of whipped cream and a shaker of cinnamon so guests can add their own toppings.
Storage: Keep the cheesecakes in an airtight container in the refrigerator for up to 5 days. Place them in a single layer with parchment paper between layers if you need to stack them. The pretzel stems will soften slightly after a day, so if you want them crunchy, add the pretzels just before serving.
Freezing: These freeze beautifully. Place the undecorated cheesecakes on a baking sheet and freeze until solid, about 2 hours. Transfer to a freezer-safe container or zip-top bag, separating layers with parchment paper. They’ll keep for up to 3 months. To serve, thaw in the refrigerator overnight, then add the pretzel stems and decorations.
One thing I’ve noticed: the flavors actually get better after a day or two in the fridge. The spices meld together, and the texture becomes even creamier. So if you can make them a day ahead, do it. Your future self will thank you.
Nutritional Information & Benefits
Here’s the approximate nutritional breakdown per mini cheesecake (based on 24 servings):
- Calories: 95
- Fat: 6g
- Carbohydrates: 9g
- Protein: 2g
- Sugar: 7g
- Fiber: 0.5g
These little guys are relatively low in calories for a dessert, which means you can have two without any guilt. The pumpkin adds a good dose of vitamin A and fiber, while the cream cheese provides a bit of protein and calcium. The graham cracker crust is mostly carbs, but hey, it’s dessert—we’re not pretending it’s a health food.
For those watching their sugar intake, you can reduce the sugar to 1/4 cup total and add a tablespoon of maple syrup for natural sweetness. The texture will be slightly less firm, but the flavor is still wonderful.
Potential allergens: This recipe contains dairy, gluten, and eggs. For allergen-friendly versions, see the variations section above.
I love that these cheesecakes feel indulgent without being over-the-top. They’re the kind of treat that satisfies your sweet tooth without leaving you in a sugar coma. Perfect for a little Halloween treat that won’t derail your healthy habits.
Conclusion
These cozy mini Halloween pumpkin cheesecakes have become a staple in my fall baking rotation, and I have a feeling they’ll become one in yours too. They’re everything I want in a seasonal dessert—easy to make, absolutely delicious, and just the right amount of festive. No fussy techniques, no expensive ingredients, no stress. Just pure, creamy, pumpkin-spiced happiness in two bites.
What I love most about this recipe is how adaptable it is. Make them spicy, make them chocolatey, make them gluten-free—they always turn out great. And that moment when you pull them out of the fridge, all chilled and perfect, and press a little pretzel stem into each one? It’s pure autumn joy.
I’d love to hear how yours turn out. Did you add candy faces? Drizzle them with chocolate? Make them extra spicy? Drop a comment below and tell me about your version. And if you share them on social media, tag me—I love seeing your creations. Happy Halloween, friends. Go make some cozy magic in your kitchen.
Frequently Asked Questions
Can I use pumpkin pie filling instead of pumpkin puree?
I don’t recommend it. Pumpkin pie filling already has sugar and spices added, which will throw off the balance of the recipe. Stick with plain pumpkin puree so you can control the sweetness and spice level yourself.
Why did my mini cheesecakes crack on top?
Cracks usually happen from overbaking or overmixing. Make sure you take them out when the centers are still slightly jiggly, and mix the filling just until combined. Also, letting them cool slowly in the pan helps prevent cracks.
Can I make these ahead of time?
Absolutely! In fact, they taste better after a day in the fridge. You can make them up to 3 days ahead and keep them in an airtight container. Add the pretzel stems and decorations just before serving to keep them crunchy.
How do I get the cheesecakes out of the pan without destroying them?
Use paper liners! This is the easiest way. If you don’t have liners, let them cool completely in the fridge, then run a thin knife around the edges before gently popping them out. Freezing them for 30 minutes first also helps.
Can I use a regular muffin tin instead of mini?
You can, but the baking time will increase significantly—about 22-25 minutes for regular-sized muffins. You’ll also get fewer servings, and they won’t have that cute mini pumpkin look. If you make them regular-sized, double-check the centers with a toothpick.
Pin This Recipe!
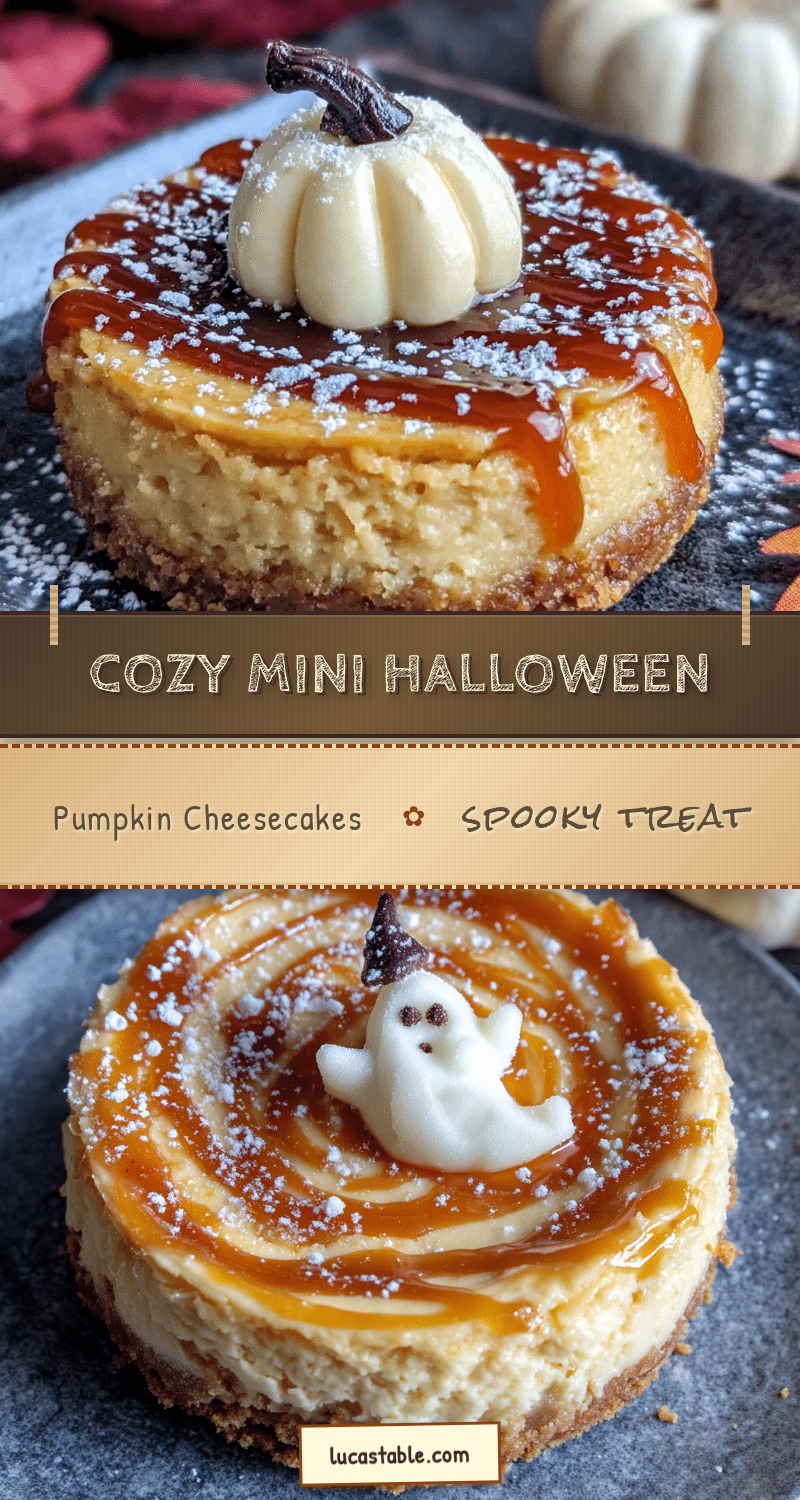
Cozy Mini Halloween Pumpkin Cheesecakes: Easy & Best Recipe
These adorable mini pumpkin cheesecakes are the perfect Halloween treat. With a buttery graham cracker crust, silky pumpkin filling, and a pretzel stem, they’re easy to make and packed with cozy autumn flavor.
- Prep Time: 15 minutes
- Cook Time: 16 minutes
- Total Time: 2 hours 31 minutes (includes chilling)
- Yield: 24 servings 1x
- Category: Dessert
- Cuisine: American
Ingredients
- 1 cup graham cracker crumbs (about 8 full sheets, crushed finely)
- 2 tablespoons granulated sugar
- 4 tablespoons unsalted butter, melted
- Pinch of salt
- 8 ounces cream cheese, softened to room temperature
- 1/3 cup granulated sugar
- 1/4 cup packed light brown sugar
- 1/2 cup canned pumpkin puree (not pumpkin pie filling)
- 1 large egg, room temperature
- 1 teaspoon vanilla extract
- 1/2 teaspoon ground cinnamon
- 1/4 teaspoon ground nutmeg
- 1/4 teaspoon ground ginger
- 1/8 teaspoon ground cloves
- Pinch of salt
- 24 small pretzel twists or pretzel sticks (for stems)
- Orange candy melts or orange food coloring mixed with white chocolate (optional, for drizzling)
- Mini chocolate chips or candy eyes (optional, for faces)
- Green icing or green candy melts (optional, for vines)
Instructions
- Preheat oven to 325°F (163°C). Line a 24-cup mini muffin tin with mini paper liners.
- In a medium bowl, combine graham cracker crumbs, 2 tablespoons sugar, and a pinch of salt. Pour in melted butter and stir with a fork until the mixture looks like wet sand.
- Drop about 1 heaping teaspoon of the crust mixture into each mini muffin cup. Press down firmly with a small glass or tamper. Refrigerate the tin while making the filling.
- In a large bowl, beat softened cream cheese with an electric mixer until smooth, about 1 minute. Add 1/3 cup granulated sugar and brown sugar, beat until combined, about 30 seconds. Do not overmix.
- Add pumpkin puree, egg, vanilla, cinnamon, nutmeg, ginger, cloves, and a pinch of salt. Beat on low speed until just combined. Scrape bowl and mix briefly.
- Transfer filling to a piping bag or zip-top bag with corner snipped. Pipe filling into each muffin cup, filling about 3/4 full. Tap pan gently to release air bubbles.
- Bake at 325°F for 14-16 minutes, until edges are set and centers are slightly jiggly. Do not overbake.
- Cool in pan on a wire rack for 15 minutes. Remove cheesecakes from pan and cool completely on rack, about 30 minutes. Refrigerate for at least 2 hours, or overnight.
- Once chilled, press a pretzel stem into the top center of each cheesecake. Optionally, drizzle with melted orange candy melts, add green icing vines, and press mini chocolate chips or candy eyes for faces.
Notes
Make sure cream cheese is at room temperature to avoid lumps. Do not overmix the filling to prevent cracks. Check cheesecakes at 12 minutes to avoid overbaking. Chill for at least 2 hours for best texture. Add pretzel stems just before serving to keep them crunchy. For dairy-free, use dairy-free cream cheese and plant-based butter. For gluten-free, use gluten-free graham crackers.
Nutrition
- Serving Size: 1 mini cheesecake
- Calories: 95
- Sugar: 7
- Sodium: 85
- Fat: 6
- Saturated Fat: 3
- Carbohydrates: 9
- Fiber: 0.5
- Protein: 2
Keywords: mini pumpkin cheesecakes, Halloween desserts, pumpkin cheesecake bites, easy fall dessert, mini cheesecakes, Halloween party treats


