Let’s be honest, candy corn is a divisive little triangle. People either hoard the bags starting in September or they turn up their noses at the waxy sweetness. I’ve always landed somewhere in the middle—I appreciate the nostalgia but rarely crave a straight handful. But these Chewy Halloween Candy Corn Blondies? They changed the game entirely, and maybe they’ll change yours too.
Here’s what makes these blondies stand out from the usual Halloween baking chaos:
- Quick & Easy: From mixing bowl to oven in under 15 minutes. No stand mixer required, no chilling time, no fuss.
- Simple Ingredients: You probably have everything but the candy corn sitting in your pantry right now. No obscure extracts or specialty flours.
- Perfect for Halloween Parties: These are the dessert that disappears first at every gathering—kids grab them, adults sneak them, everyone asks for the recipe.
- Crowd-Pleaser: Even the candy corn skeptics (you know who you are) will reach for a second square. The candy melts into these chewy, buttery pockets that taste nothing like the straight-from-the-bag experience.
- Unbelievably Delicious: The edges get that perfect golden-brown crisp while the center stays soft and dense. It’s the texture contrast that makes these dangerously good.
This isn’t just another blondie recipe dressed up for Halloween. The trick is how the candy corn bakes—it transforms from that waxy texture into something almost caramel-like, studding the blondie with little bursts of sweetness. I’ve tested this with different ratios, different pans, different oven temperatures, and this version is the one that delivers every single time. It’s the kind of dessert that makes you close your eyes after the first bite, and honestly, that’s exactly what Halloween baking should do.
What Ingredients You Will Need
This recipe uses simple, wholesome ingredients to deliver bold flavor and satisfying texture without the fuss. The magic happens when these everyday staples meet the star of the show—candy corn—and transform into something unexpectedly wonderful.
- Unsalted butter, melted (1 cup / 2 sticks / 226g) — Melting the butter is key here; it creates that dense, chewy texture that makes blondies so satisfying. I use Land O’Lakes or Kerrygold for the best flavor, but any good-quality unsalted butter works.
- Light brown sugar, packed (1 ½ cups / 300g) — Brown sugar gives blondies their signature chewiness and that deep, almost caramel-like flavor. Pack it firmly into your measuring cup for accuracy.
- Granulated sugar (½ cup / 100g) — A little white sugar helps the edges get that beautiful golden crispness without making the whole thing crunchy.
- Large eggs (2, room temperature) — Room temperature eggs incorporate more evenly into the melted butter, giving you a smoother batter. If you forget to set them out, place them in a bowl of warm water for 5 minutes.
- Vanilla extract (2 teaspoons) — Pure vanilla extract makes a noticeable difference here. The imitation stuff has an artificial aftertaste that doesn’t play well with the candy corn’s sweetness.
- All-purpose flour (2 cups / 240g) — Spoon and level your flour—scooping directly from the bag packs it down and gives you dry, crumbly blondies. I’ve tested this with gluten-free 1:1 blends (Bob’s Red Mill works great) with excellent results.
- Baking powder (1 teaspoon) — Not baking soda! Baking powder gives blondies their lift without making them cakey. Double-check your container before measuring.
- Salt (½ teaspoon) — A little salt balances the sweetness and makes the candy corn flavor pop. I use fine sea salt for even distribution.
- Candy corn (1 ½ cups / about 300g) — The star ingredient! Brach’s is the classic choice and what I recommend for consistent results. The generic store brands tend to be harder and don’t soften as nicely during baking. You want the candy corn that’s soft and slightly pliable at room temperature.
- Optional: Halloween sprinkles (2 tablespoons) — Totally optional, but they make the blondies look festive if you’re bringing them to a party. Add them right before baking so they stay visible on top.
Equipment Needed
You don’t need a fancy kitchen to make these blondies, and that’s part of the beauty. Here’s what you’ll need:
- 9×13-inch baking pan — Metal pans give you better browning than glass. If you only have glass, reduce the oven temperature by 25°F and expect slightly longer baking time.
- Parchment paper — This is non-negotiable for easy removal. Leave overhang on two opposite sides to create handles. I’ve learned this the hard way after a stuck-blondie disaster that required a butter knife and a lot of patience.
- Large mixing bowl — Any medium-to-large bowl works. I use my grandmother’s old ceramic mixing bowl because it feels right for fall baking.
- Whisk — For combining wet ingredients. A wooden spoon also works if your whisk is hiding somewhere in the back of a drawer.
- Rubber spatula — For folding in the candy corn without crushing it. A wooden spoon works too, but a spatula is gentler.
- Measuring cups and spoons — Dry measuring cups for flour and sugar, liquid measuring cup for melted butter. Yes, the difference matters.
- Cooling rack — Not strictly necessary, but it prevents soggy bottoms. If you don’t have one, transfer the blondies to a cutting board after 10 minutes in the pan.
Budget-friendly tip: Skip the fancy Nordic Ware pan and use a basic metal baking pan from the grocery store. It’ll work just fine, and you can spend the savings on extra candy corn.
Preparation Method
Preheat your oven to 350°F (175°C). Line your 9×13-inch baking pan with parchment paper, leaving about 2 inches of overhang on the long sides. Give the parchment a quick spritz of non-stick spray for extra insurance—I once skipped this step and spent 20 minutes picking blondie pieces out of the pan corners.
- Melt the butter — Place 1 cup (2 sticks) of unsalted butter in a microwave-safe bowl and heat in 30-second intervals until fully melted. Let it cool for 2-3 minutes while you prepare the other ingredients. You don’t want it hot enough to cook the eggs, just warm enough to melt the sugar.
- Combine sugars and butter — In your large mixing bowl, whisk together the melted butter, 1 ½ cups packed light brown sugar, and ½ cup granulated sugar. Whisk vigorously for about 1 minute until the mixture looks smooth and slightly thickened. This step helps dissolve some of the sugar crystals for a more tender blondie.
- Add eggs and vanilla — Crack both eggs into the butter-sugar mixture, add 2 teaspoons vanilla extract, and whisk until fully incorporated. The batter should look glossy and smooth, like thick caramel sauce. If it looks separated or greasy, your butter was too hot—don’t panic, just whisk a little longer and it will come together.
- Mix dry ingredients — In a separate bowl, whisk together 2 cups all-purpose flour, 1 teaspoon baking powder, and ½ teaspoon salt. This ensures the baking powder is evenly distributed so you don’t end up with one puffy blondie and one flat one.
- Combine wet and dry — Pour the dry ingredients into the wet mixture and fold together with your rubber spatula. Stop mixing as soon as you no longer see streaks of flour. Overmixing develops gluten and gives you tough, bread-like blondies instead of tender, chewy ones. A few small flour patches are fine—they’ll disappear during baking.
- Fold in the candy corn — Gently fold 1 ½ cups of candy corn into the batter. The batter will be thick—almost like cookie dough. Don’t press too hard or the candy corn will break apart. You want whole pieces scattered throughout the blondies.
- Transfer to pan — Scrape the batter into your prepared pan and spread it evenly. The batter is too thick to pour, so use your spatula to push it into the corners. Wet your spatula slightly if the batter sticks to it. If you’re using the optional Halloween sprinkles, scatter them over the top now.
- Bake — Place the pan on the middle rack of your preheated oven and bake for 22-26 minutes. The blondies are done when the edges are golden brown and the center looks set but still slightly soft—a toothpick inserted near the center should come out with a few moist crumbs attached, not wet batter. At 22 minutes, start checking every 2 minutes. Ovens vary wildly, and 2 extra minutes can mean the difference between chewy perfection and dry disappointment.
- Cool completely — Place the pan on a cooling rack and let the blondies cool for at least 30 minutes in the pan. Use the parchment handles to lift the entire block onto a cutting board. Let them cool completely before cutting—about 1 hour total. I know the temptation is real, but warm blondies crumble when you cut them. Ask me how I know this.
- Cut and serve — Use a sharp knife to cut into 24 squares (6 rows by 4 rows). Wipe the knife clean between cuts for neat edges. For the cleanest slices, refrigerate the blondies for 15 minutes before cutting.
Cooking Tips & Techniques
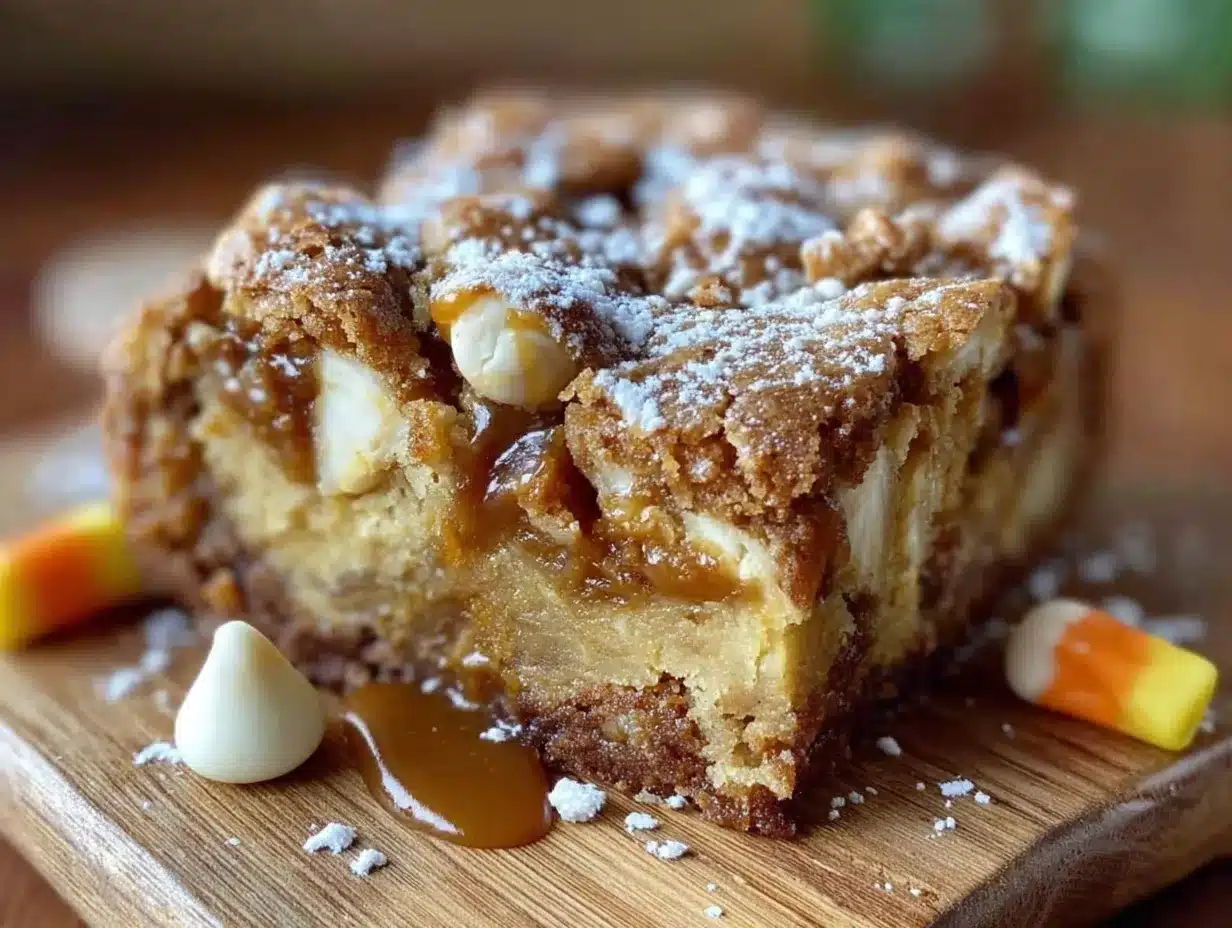
I’ve made these blondies approximately seven thousand times (okay, maybe more like fifteen, but it feels like seven thousand). Here’s what I’ve learned the hard way so you don’t have to:
Don’t overbake. This is the number one mistake people make with blondies. They look underdone in the center when they’re actually perfect. Remember: blondies continue baking from residual heat after they come out of the oven. Pull them when the center still has a slight jiggle. I once left a batch in for 28 minutes because I was answering texts, and they came out more like hockey pucks than blondies. Learn from my distraction.
Room temperature eggs matter. Cold eggs seize up the melted butter and give you a lumpy batter. If you forgot to set them out, place them in a bowl of warm tap water for 5 minutes. Problem solved.
Press extra candy corn on top. Before baking, press a few extra pieces of candy corn into the top of the batter. The ones folded inside will sink slightly, so this ensures every bite has visible candy corn and those beautiful pockets of melted sweetness.
Use a metal pan. Glass and ceramic pans insulate too well and can leave the center underdone while the edges burn. Metal pans conduct heat evenly and give you that perfect golden edge. If you only have glass, reduce the temperature to 325°F and expect 5-7 extra minutes of baking time.
Let them cool completely. I cannot stress this enough. Cutting warm blondies is like trying to cut warm fudge—you’ll get a sticky mess. The candy corn needs time to set back up after melting in the oven. Patience pays off in clean, beautiful squares.
Variations & Adaptations
One of the best things about this recipe is how easily it adapts to different tastes and dietary needs. Here are some variations I’ve tried and loved:
Gluten-Free Version: Substitute the all-purpose flour with a 1:1 gluten-free baking blend (I recommend Bob’s Red Mill or King Arthur Measure for Measure). No other adjustments needed. The texture is slightly more tender but equally delicious. My gluten-sensitive friend brought these to a potluck and no one could tell the difference.
Add Chocolate Chips: Fold in ½ cup of white chocolate chips or semi-sweet chocolate chips along with the candy corn. The chocolate balances the sweetness and adds another layer of flavor. White chocolate works especially well here—it echoes the vanilla notes in the blondie base.
Spiced Version: Add 1 teaspoon of pumpkin pie spice or cinnamon to the flour mixture. The warm spices complement the candy corn’s sweetness and make these feel even more like fall. I did this on a whim last October and now it’s my go-to variation.
Use Other Fall Candies: Swap half the candy corn for candy pumpkins (the little orange and green ones) or chopped Reese’s Pieces. The peanut butter flavor is surprisingly good with the buttery blondie base. Just make sure the pieces are roughly the same size so they distribute evenly.
Dairy-Free Version: Use a plant-based butter stick (I like Miyoko’s or Country Crock Plant Butter) in place of regular butter. The texture will be slightly less dense but still chewy and delicious. Check your candy corn—most brands are dairy-free, but Brach’s is always safe.
Serving & Storage Suggestions
These blondies are versatile enough for any Halloween gathering. Here’s how to serve and store them for maximum enjoyment:
Serving Temperature: Room temperature is ideal. The texture is perfectly chewy, the candy corn has set back up, and the flavors have had time to meld. If you want to get fancy, warm individual blondies in the microwave for 10 seconds and serve with a scoop of vanilla ice cream. The warm blondie + cold ice cream combination is next-level.
Presentation Ideas: Arrange the blondies on a platter lined with orange and black napkins for Halloween parties. Dust with powdered sugar for a ghostly effect, or drizzle with melted white chocolate and orange food coloring for a festive finish. For Halloween gift-giving, stack 4-6 blondies in a clear cellophane bag tied with a black ribbon.
Storage Instructions: Store blondies in an airtight container at room temperature for up to 5 days. Place a piece of bread in the container to absorb excess moisture and keep the blondies soft—replace the bread every 2 days. Do not refrigerate them; the cold temperature dries out the blondies and makes the candy corn hard again.
Freezer Instructions: These blondies freeze beautifully. Wrap individual squares tightly in plastic wrap, then place them in a freezer-safe bag or container. They’ll keep for up to 3 months. To thaw, let them sit at room temperature for about 30 minutes. You can also microwave frozen blondies for 15-20 seconds for a warm treat straight from the freezer.
Flavor Development: Here’s a little secret—these blondies taste even better the next day. The flavors meld overnight, the texture settles into that perfect chew, and the candy corn pockets become more cohesive. If you can resist eating them the day you bake them, you’ll be rewarded with an even better experience.
Nutritional Information & Benefits
Let’s be real—these are a treat, not a health food. But here’s the nutritional breakdown so you can plan accordingly:
Per serving (1 blondie, based on 24 servings):
- Calories: 215
- Total Fat: 9g
- Saturated Fat: 5g
- Cholesterol: 35mg
- Sodium: 95mg
- Total Carbohydrates: 33g
- Sugars: 22g
- Protein: 2g
Dietary Considerations: This recipe contains dairy (butter), eggs, gluten (flour), and is not suitable for vegans. For gluten-free and dairy-free options, see the Variations section above. Candy corn is typically free of common allergens like nuts and soy, but always check the label if you’re cooking for someone with severe allergies.
Health Perspective: I’m not going to pretend these are good for you in the traditional sense. But here’s what I will say—baking for holidays and special occasions is part of a balanced relationship with food. These blondies are made with real butter, real eggs, and real vanilla. There are no preservatives, no artificial colors (well, except the candy corn itself), and no weird additives. They’re a homemade treat made with love, and that counts for something. Enjoy them in moderation, share them with friends, and don’t feel guilty about it.
Conclusion
These Chewy Halloween Candy Corn Blondies are the kind of recipe that makes you look forward to fall baking season all year long. They’re easy enough for a Tuesday night baking project but special enough for the biggest Halloween party. The candy corn skeptics in your life will be converted, the kids will devour them, and you’ll feel like a baking genius with minimal effort.
I love this recipe because it captures everything I want from Halloween baking—it’s festive without being fussy, sweet without being cloying, and nostalgic without being boring. Every time I make these blondies, I think about all the Halloweens I’ve celebrated, from childhood costume parties to adult gatherings where the candy bowl is more for the grown-ups than the trick-or-treaters.
Now I want to hear from you! Have you tried baking with candy corn before? Did these blondies convert any skeptics in your life? Drop a comment below and let me know how they turned out. And if you came up with your own variation—spiced, chocolate-studded, or otherwise—share it with the community. We’re all here to make Halloween a little sweeter, one blondie at a time.
Happy Halloween baking, my friends! May your blondies be chewy, your candy corn plentiful, and your kitchen filled with the smell of butter and sugar.
Frequently Asked Questions
Can I use salted butter instead of unsalted?
Yes, but reduce the added salt to ¼ teaspoon. Salted butter typically contains about ¼ teaspoon of salt per stick, so this adjustment keeps the overall salt level balanced.
Why did my blondies turn out cakey instead of chewy?
This usually happens for one of three reasons: too much flour, overmixing the batter, or overbaking. Make sure you’re spooning and leveling your flour, mixing just until combined, and pulling the blondies from the oven when the center still looks slightly underdone.
Can I use leftover Halloween candy instead of candy corn?
Absolutely! Chopped chocolate bars (like Hershey’s or Milky Way), Reese’s Pieces, or M&Ms all work great. Just keep the total amount to about 1 ½ cups and chop any large pieces into bite-sized chunks so they distribute evenly.
How do I know when the blondies are done baking?
The edges should be golden brown and pulling away slightly from the pan. The center should look set but still soft—it should have a slight jiggle when you gently shake the pan. A toothpick inserted near the center should come out with moist crumbs, not wet batter.
Can I make these blondies ahead of time for a party?
Yes, and they actually taste better the next day! Bake them up to 2 days in advance, store them in an airtight container at room temperature, and cut them just before serving for the freshest presentation. You can also freeze the baked, uncut blondie block for up to 3 months.
Pin This Recipe!
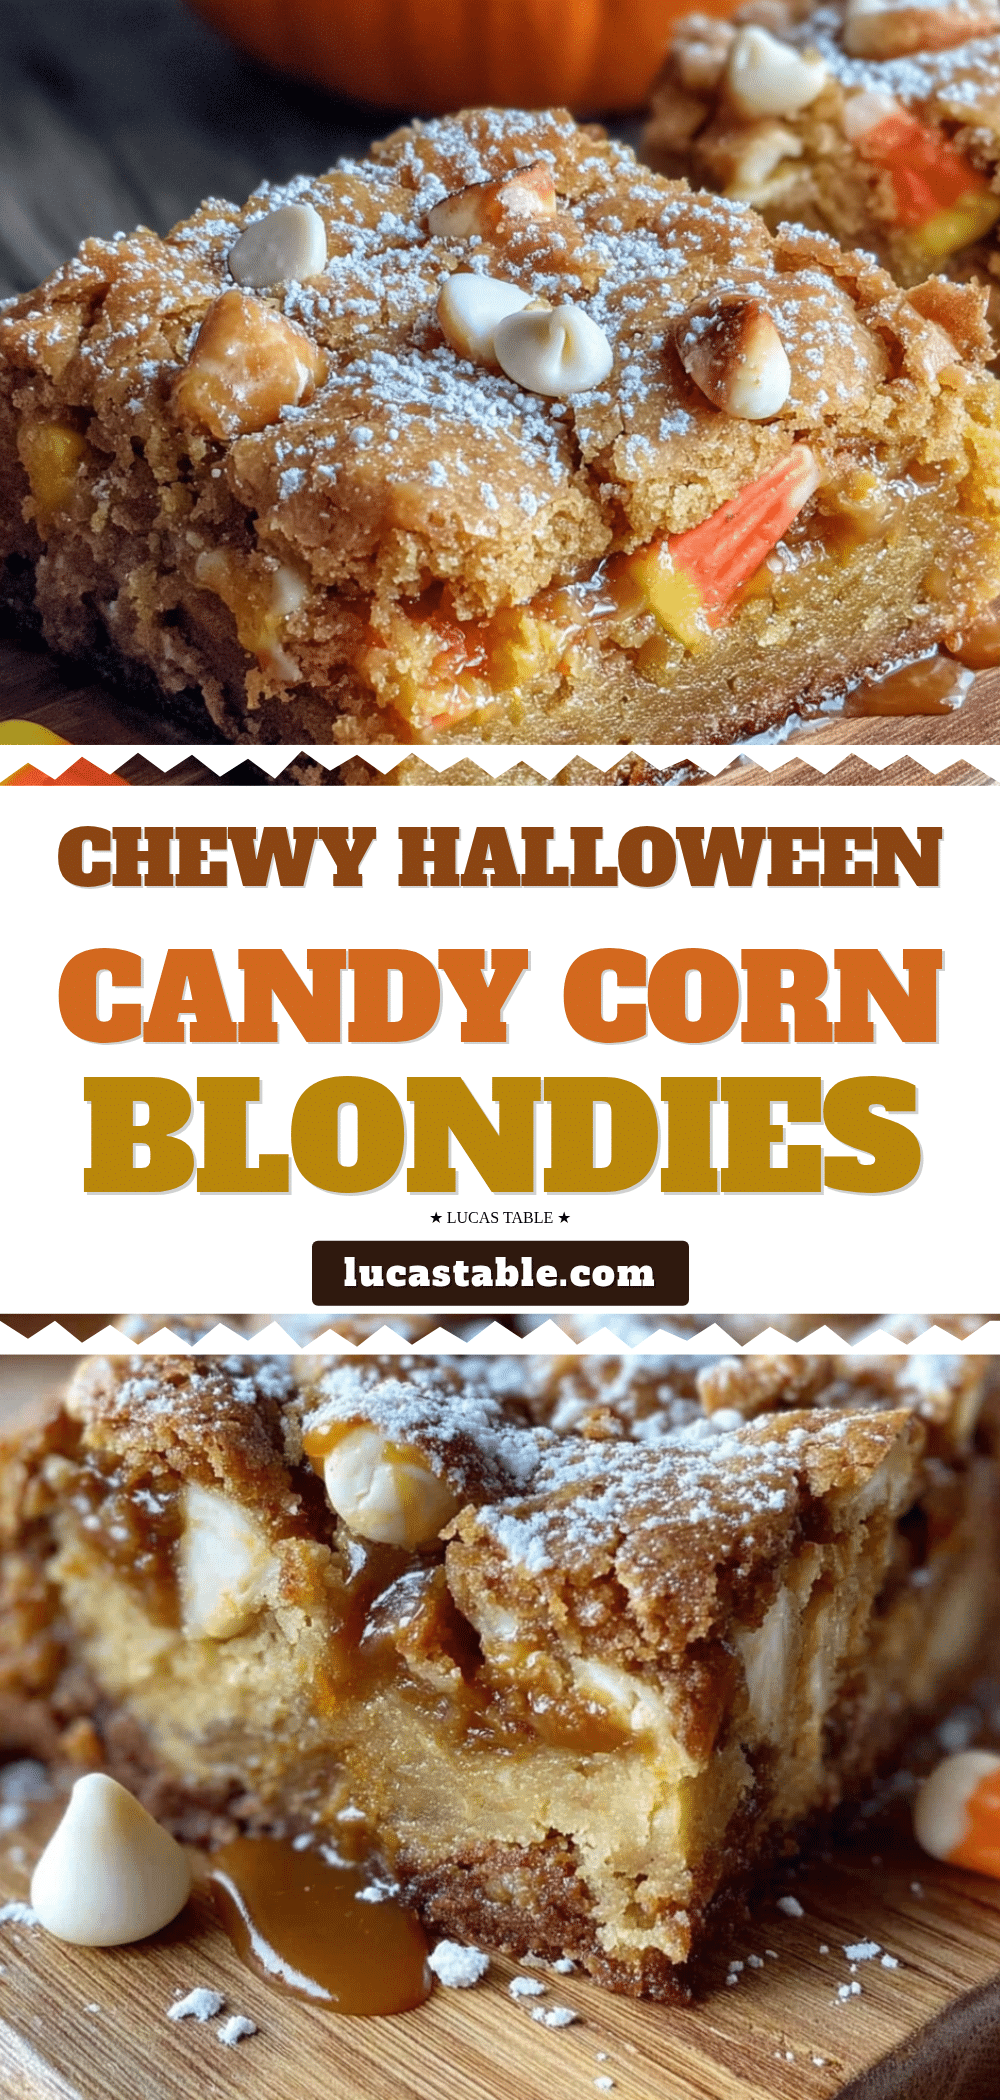
Chewy Candy Corn Blondies: Easy Halloween Dessert
These chewy candy corn blondies transform the divisive Halloween candy into buttery, caramel-like pockets of sweetness. Quick to make with simple ingredients, they’re a crowd-pleaser that even candy corn skeptics will love.
- Prep Time: 15 minutes
- Cook Time: 26 minutes
- Total Time: 1 hour 41 minutes
- Yield: 24 servings 1x
- Category: Dessert
- Cuisine: American
Ingredients
- 1 cup (2 sticks / 226g) unsalted butter, melted
- 1 ½ cups (300g) light brown sugar, packed
- ½ cup (100g) granulated sugar
- 2 large eggs, room temperature
- 2 teaspoons vanilla extract
- 2 cups (240g) all-purpose flour
- 1 teaspoon baking powder
- ½ teaspoon salt
- 1 ½ cups (about 300g) candy corn
- 2 tablespoons Halloween sprinkles (optional)
Instructions
- Preheat oven to 350°F (175°C). Line a 9×13-inch baking pan with parchment paper, leaving overhang on the long sides. Lightly spray with non-stick spray.
- Melt 1 cup unsalted butter in a microwave-safe bowl in 30-second intervals. Let cool for 2-3 minutes.
- In a large mixing bowl, whisk together melted butter, 1 ½ cups packed light brown sugar, and ½ cup granulated sugar for about 1 minute until smooth and slightly thickened.
- Add 2 room temperature eggs and 2 teaspoons vanilla extract. Whisk until fully incorporated and glossy.
- In a separate bowl, whisk together 2 cups all-purpose flour, 1 teaspoon baking powder, and ½ teaspoon salt.
- Pour dry ingredients into wet mixture and fold with a rubber spatula until just combined. Do not overmix.
- Gently fold in 1 ½ cups candy corn until evenly distributed.
- Scrape batter into prepared pan and spread evenly. If using, scatter Halloween sprinkles on top.
- Bake on middle rack for 22-26 minutes, until edges are golden brown and center is set but slightly soft. A toothpick inserted near the center should come out with moist crumbs.
- Cool in pan on a rack for 30 minutes, then use parchment handles to lift onto a cutting board. Cool completely (about 1 hour) before cutting into 24 squares.
Notes
Don’t overbake; blondies continue baking from residual heat. Use room temperature eggs for smooth batter. Press extra candy corn on top before baking for visible pieces. Cool completely before cutting to avoid crumbling. For cleaner slices, refrigerate for 15 minutes before cutting. Blondies taste even better the next day.
Nutrition
- Serving Size: 1 blondie
- Calories: 215
- Sugar: 22
- Sodium: 95
- Fat: 9
- Saturated Fat: 5
- Carbohydrates: 33
- Protein: 2
Keywords: candy corn blondies, Halloween dessert, chewy blondies, easy Halloween recipe, fall baking, candy corn recipe


