I used to think corn casserole was a potluck relic. You know the one—sweet, mushy, beige, and somehow always sitting next to the sad green bean casserole at the church basement buffet. For years, I walked right past it. Then a Tuesday happened. A regular, nothing-special Tuesday where I had thirty minutes, a box of Jiffy mix, and a block of cheddar that needed using up. I threw together what I thought would be a quick side dish, something to go with the black bean tacos I was half-heartedly assembling. And then I caught myself. Standing at the counter, fork in hand, eating spoonful after spoonful straight from the dish before dinner even started. Honestly, I wasn’t even hungry. But this version—with the sharp cheddar and the little kick of jalapeño—had me completely off guard.
It wasn’t supposed to be this good. I mean, it’s cornbread mix and sour cream. That’s not exactly culinary school material. But there’s something about the way the creamed corn keeps it impossibly tender while the cheese gets all melty and the jalapeños leave these little warm spots throughout. I had to admit it: I was converted. And I wasn’t even trying to be.
Maybe you’ve been there too. You think you know a dish, you’ve made up your mind about it, and then one version just flips everything around. That’s what this casserole did to me. It’s quick, it’s cheesy, it’s got just enough heat to keep things interesting, and it comes together in about the time it takes to preheat the oven. Now I make it whenever I need something fast that still feels like comfort food. And I don’t even pretend I’m not going to eat half of it before it hits the table.
Why You’ll Love This Recipe
Let me tell you why this one sticks around in my kitchen. I’ve tested it on tired Tuesday nights, on busy holiday preps, and even on a camping trip where I baked it in a cast iron skillet over coals. Each time, it delivered. Here’s what makes it different from every other corn casserole you’ve seen:
- Quick & Easy: From start to oven in under 10 minutes. No chopping marathon, no complicated steps. Just stir, pour, and bake.
- Simple Ingredients: You probably have most of this in your pantry right now. Jiffy mix, canned corn, sour cream, butter, cheese, and jalapeños. That’s it.
- Perfect for Weeknights: This is the kind of side dish that saves dinner. Throw it together while your main dish cooks, and you’ve got something that feels like you tried way harder than you actually did.
- Crowd-Pleaser: I’ve served this to picky kids, spice-wary relatives, and cheese snobs. The empty dish speaks for itself every time.
- Unbelievably Delicious: The texture is the real star here. It’s not dry like regular cornbread and not soupy like pudding. It’s this perfect in-between place where every bite is tender, creamy, and just a little bit custardy.
What sets this recipe apart is the balance. Most corn casseroles lean too sweet or too bland. By using sharp cheddar and fresh jalapeño, you get this savory edge that cuts through the corn’s natural sweetness. And the ratio of wet to dry ingredients is something I tweaked over several batches until it was just right—moist but not soggy, set but not dense. It’s the kind of recipe that makes you close your eyes after the first bite, even if you’re just eating it over the sink at 6:30 PM on a Wednesday.
What Ingredients You Will Need
This recipe uses simple, everyday ingredients to deliver big flavor without the fuss. Most of these are pantry staples, which is exactly what you want on a busy weeknight.
- 1 box (8.5 oz) Jiffy Corn Muffin Mix — This is the backbone of the recipe. The mix is slightly sweet, which pairs perfectly with the savory add-ins. I’ve tried other brands, but Jiffy really does give the best texture here.
- 1 can (15.25 oz) whole kernel corn, drained — Adds texture and pops of sweetness. Drain it well so the casserole doesn’t get watery.
- 1 can (14.75 oz) cream-style corn — This is what makes the casserole so creamy and tender. Don’t skip it or substitute it—the texture won’t be the same.
- 1 cup sour cream — Adds richness and moisture. Full-fat works best here, but Greek yogurt can be swapped in if that’s what you have.
- 1/2 cup unsalted butter, melted — Butter brings flavor and helps the top get golden. Salted butter works too—just reduce any extra salt you add.
- 2 cups shredded sharp cheddar cheese — Sharp cheddar gives the most flavor. Pre-shredded is fine in a pinch, but freshly shredded melts smoother. I like Tillamook or Cabot for consistent quality.
- 2-3 fresh jalapeños, diced (seeds removed for less heat) — Fresh jalapeños add a bright, grassy heat that jarred ones just can’t match. Leave some seeds in if you want more kick.
- 1/2 teaspoon salt — Enhances all the flavors without making it salty.
- 1/4 teaspoon black pepper — A little goes a long way here.
Substitution Notes: If you need a gluten-free option, use a gluten-free cornbread mix instead of Jiffy. For a lighter version, swap half the sour cream with plain Greek yogurt. And if you’re out of fresh jalapeños, pickled ones work in a pinch—just pat them dry first to avoid extra moisture.
Equipment Needed
You don’t need a fancy kitchen to pull this off. Here’s what you’ll need:
- 9×13-inch baking dish — Glass or ceramic works best for even baking. I’ve used a metal pan before and the edges browned a little too fast.
- Large mixing bowl — Big enough to stir everything without splashing.
- Whisk or wooden spoon — A whisk works great for smoothing out the batter, but a sturdy spoon does the job too.
- Measuring cups and spoons — For accuracy, especially with the sour cream and butter.
- Cheese grater — If you’re shredding your own cheese. It takes an extra two minutes but makes a difference in melt quality.
- Cutting board and knife — For dicing the jalapeños.
- Non-stick cooking spray or butter — For greasing the dish.
No special equipment required. If you don’t have a 9×13, an 8×8 will work—just increase the baking time by about 10 minutes. Cast iron skillet? That works beautifully too and gives you a nice crispy edge.
Preparation Method
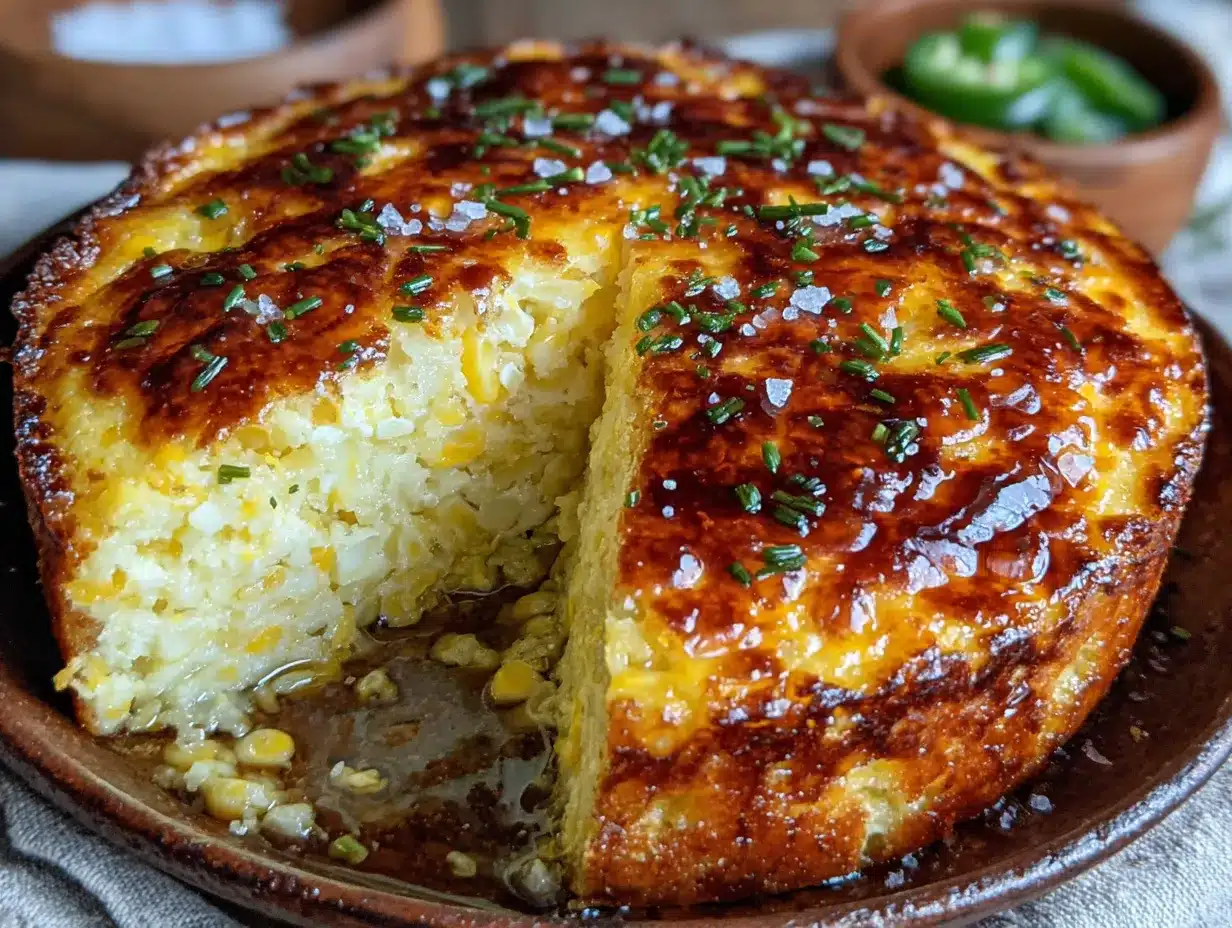
This comes together faster than you think. Here’s how to do it:
- Preheat your oven to 350°F (175°C). While it’s heating, grease your 9×13 baking dish with cooking spray or a thin layer of butter. Set it aside.
- Drain the whole kernel corn. Open the can, pour it into a colander, and let it sit for a minute. You want as much liquid out as possible. Pat it dry with a paper towel if you’re feeling thorough.
- In a large mixing bowl, whisk the eggs. Crack two large eggs and whisk them until they’re uniform and slightly frothy. This helps the casserole rise evenly.
- Add the wet ingredients. Pour in the melted butter, sour cream, and cream-style corn. Whisk until everything is smooth and combined. The mixture should look pale yellow and creamy.
- Stir in the drained whole kernel corn. Fold it in gently with a spatula or spoon. You want it distributed evenly throughout the batter.
- Add the Jiffy mix, salt, and pepper. Sprinkle the dry mix over the wet ingredients and stir until just combined. A few small lumps are fine—overmixing makes the casserole tough.
- Fold in 1 1/2 cups of the shredded cheddar and the diced jalapeños. Reserve the remaining 1/2 cup of cheese for the top. Stir until the cheese and jalapeños are evenly distributed. The batter should look thick but scoopable.
- Pour the batter into the prepared baking dish. Spread it into an even layer with a spatula. It will look a little lumpy—that’s normal.
- Sprinkle the remaining 1/2 cup of cheese on top. Spread it evenly so every bite gets a little cheesy crust.
- Bake for 35-40 minutes. The casserole is done when the edges are golden brown and the center is set but still slightly jiggly. A toothpick inserted in the center should come out clean or with a few moist crumbs. The top should be bubbly and lightly browned.
- Let it rest for 5-10 minutes before serving. This step is important—it allows the casserole to set up so you get clean slices instead of a messy scoop. The residual heat also finishes cooking the center gently.
Sensory cues to watch for: The kitchen will smell like melted butter and cornbread around the 20-minute mark. By 30 minutes, you’ll start to smell the cheese browning. The casserole should puff up slightly in the oven and deflate a little as it cools. That’s exactly what you want.
Cooking Tips & Techniques
I’ve made this casserole more times than I can count, and I’ve learned a few things the hard way. Here’s what I wish someone had told me the first time:
Don’t overmix the batter. I know it’s tempting to keep stirring until it’s perfectly smooth, but that activates the gluten in the cornbread mix and makes the casserole dense and tough. Stop as soon as the dry ingredients are incorporated. A few lumps are your friend.
Room temperature ingredients matter. If your eggs and sour cream are cold, the melted butter will seize up and create lumps. Let them sit on the counter for 15 minutes before you start. I learned this after one particularly lumpy batch that never quite baked evenly.
Watch the baking time. Every oven runs a little different. My old oven took a full 40 minutes, but my current one is done at 35. Start checking at 30 minutes—if the top is golden and the center is set but still has a slight wobble, it’s ready. Overbaking dries it out, and nobody wants dry corn casserole.
Let it rest. I know you’re hungry. I’ve been there. But cutting into it right out of the oven gives you a runny, soupy mess. The resting time lets the starches set and the moisture redistribute. Trust me on this one—I ruined a perfectly good casserole by being impatient once, and I still regret it.
For extra crispy edges, bake it in a cast iron skillet. The hot metal creates a crust that’s absolutely irresistible. Just preheat the skillet in the oven while it’s warming up, then carefully pour the batter in.
Make it ahead: You can assemble the casserole up to a day in advance. Just cover it with foil and refrigerate. Add about 10 minutes to the baking time if you’re starting from cold.
Variations & Adaptations
This recipe is flexible, and I’ve tried several variations depending on what I have on hand or who I’m feeding.
Spicy Southwest Version: Add a can of drained diced green chiles along with the jalapeños. Throw in some cumin and chili powder—about 1/2 teaspoon each. Top with pepper jack cheese instead of cheddar. This version is perfect with tacos or enchiladas.
Bacon & Chive: Cook 4 strips of bacon until crispy, crumble them, and fold into the batter along with 2 tablespoons of chopped fresh chives. The smoky saltiness cuts through the sweetness beautifully. I made this for a potluck once and got asked for the recipe three times.
Milder Version: If you’re cooking for kids or spice-sensitive folks, skip the jalapeños entirely. Add an extra 1/2 cup of corn or even some diced bell pepper for color and crunch without the heat. It’s still delicious—just different.
Dairy-Free Adaptation: Use vegan sour cream, plant-based butter, and dairy-free cheddar shreds. The texture will be slightly less rich, but it still works. I’ve tested this with Miyoko’s butter and Violife cheese, and it came out surprisingly good.
Add Protein: Make it a main dish by folding in 1 cup of shredded cooked chicken or crumbled chorizo. Reduce the sour cream to 3/4 cup to keep the batter from getting too wet. This turns it into a one-dish meal that’s ready in under an hour.
Serving & Storage Suggestions
This casserole is best served warm, straight from the oven. The cheese is melty, the edges are golden, and the center is soft and creamy. I like to scoop it out with a big spoon rather than cutting neat squares—it feels more rustic that way.
What to serve with it: This pairs beautifully with grilled chicken, pulled pork, or black bean tacos. It’s also fantastic alongside a simple green salad with a tangy vinaigrette to cut through the richness. For a full weeknight meal, I’ll make this, some quick crispy garlic chicken, and a side of steamed broccoli. Dinner is on the table in 45 minutes flat.
Storage: Leftovers keep well in the refrigerator for up to 4 days. Store them in an airtight container. The casserole will firm up as it chills, but it softens again when reheated.
Reheating: The oven is best for restoring texture. Place leftovers in a 350°F oven for 10-15 minutes, or until warmed through. The microwave works in a pinch—just know the edges won’t be as crispy. I’ve also reheated slices in a dry skillet over medium heat, which gives you a nice crust on the bottom.
Freezing: This casserole freezes surprisingly well. Bake it, let it cool completely, then wrap it tightly in foil and freeze for up to 3 months. Thaw overnight in the fridge and reheat in a 350°F oven until hot. I’ve done this for holiday prepping, and no one could tell it wasn’t fresh.
Flavors actually deepen after a day in the fridge. The jalapeño heat mellows out and the corn sweetness becomes more pronounced. I sometimes make this specifically to eat as leftovers the next day.
Nutritional Information & Benefits
Here’s the approximate nutritional breakdown per serving (based on 8 servings):
| Nutrient | Amount |
|---|---|
| Calories | 320 |
| Total Fat | 20g |
| Saturated Fat | 12g |
| Cholesterol | 85mg |
| Sodium | 580mg |
| Total Carbohydrates | 30g |
| Dietary Fiber | 2g |
| Sugars | 8g |
| Protein | 10g |
This casserole isn’t health food, but it does have some redeeming qualities. Corn provides fiber and B vitamins. Jalapeños contain capsaicin, which may boost metabolism slightly. And the calcium from the cheese is good for bone health. I look at it as a comfort food that happens to have a few nutritional perks—and sometimes that’s exactly what you need on a busy weeknight.
Dietary considerations: This recipe contains gluten (from the Jiffy mix) and dairy. For gluten-free, use a gluten-free cornbread mix. For dairy-free, follow the adaptation notes above. It’s naturally nut-free and egg-free if you use an egg substitute.
Conclusion
This quick cheesy jalapeño Jiffy corn casserole is the kind of recipe that saves dinner on those nights when you have nothing planned and even less energy. It comes together in minutes, uses ingredients you probably already have, and delivers that warm, satisfying feeling of a home-cooked meal without any of the stress.
I love this recipe because it’s honest. It doesn’t pretend to be fancy or complicated. It’s just good, simple food that works every single time. Whether you’re feeding a crowd or just yourself on a Tuesday night, it delivers exactly what it promises: comfort, flavor, and a little bit of heat.
Try it once, and I think you’ll understand why I couldn’t stop eating it straight from the dish. Play with the variations, make it your own, and let me know how it turns out. Leave a comment below or tag me in your photos—I genuinely love seeing your versions. And if you have a favorite twist I haven’t tried, I’m all ears. Happy cooking!
Frequently Asked Questions
Can I use a different brand of corn muffin mix?
Yes, you can. Just keep in mind that different brands have different sweetness levels and textures. Jiffy is slightly sweeter and finer in texture than some other mixes. If you use a different brand, you might need to adjust the sugar or liquid slightly. I’d recommend starting with the same amounts and seeing how the batter looks—it should be thick but scoopable.
How do I know when the casserole is fully baked?
The edges should be golden brown and pulling away slightly from the sides of the dish. The center should be set but still have a slight jiggle when you gently shake the pan. A toothpick inserted in the center should come out clean or with a few moist crumbs. If it comes out wet with batter, it needs more time. If it comes out completely dry, it might be overbaked.
Can I make this casserole ahead of time?
Absolutely. You can assemble the casserole up to 24 hours in advance, cover it with foil, and refrigerate. When you’re ready to bake, add about 10 minutes to the baking time since you’re starting from cold. You can also bake it fully, let it cool, and reheat it later. It keeps well in the fridge for up to 4 days.
How can I reduce the spice level?
Remove all the seeds and white membranes from the jalapeños before dicing them—that’s where most of the heat lives. You can also use just one jalapeño instead of two or three. For a completely mild version, skip the jalapeños altogether and add a can of diced green chiles, which are much milder and add great flavor without the burn.
Can I freeze this casserole?
Yes, it freezes beautifully. Bake it completely, let it cool to room temperature, then wrap it tightly in foil or plastic wrap and place it in a freezer-safe bag. It will keep for up to 3 months. To reheat, thaw overnight in the refrigerator and warm it in a 350°F oven for about 20 minutes, or until heated through. The texture holds up remarkably well.
Pin This Recipe!
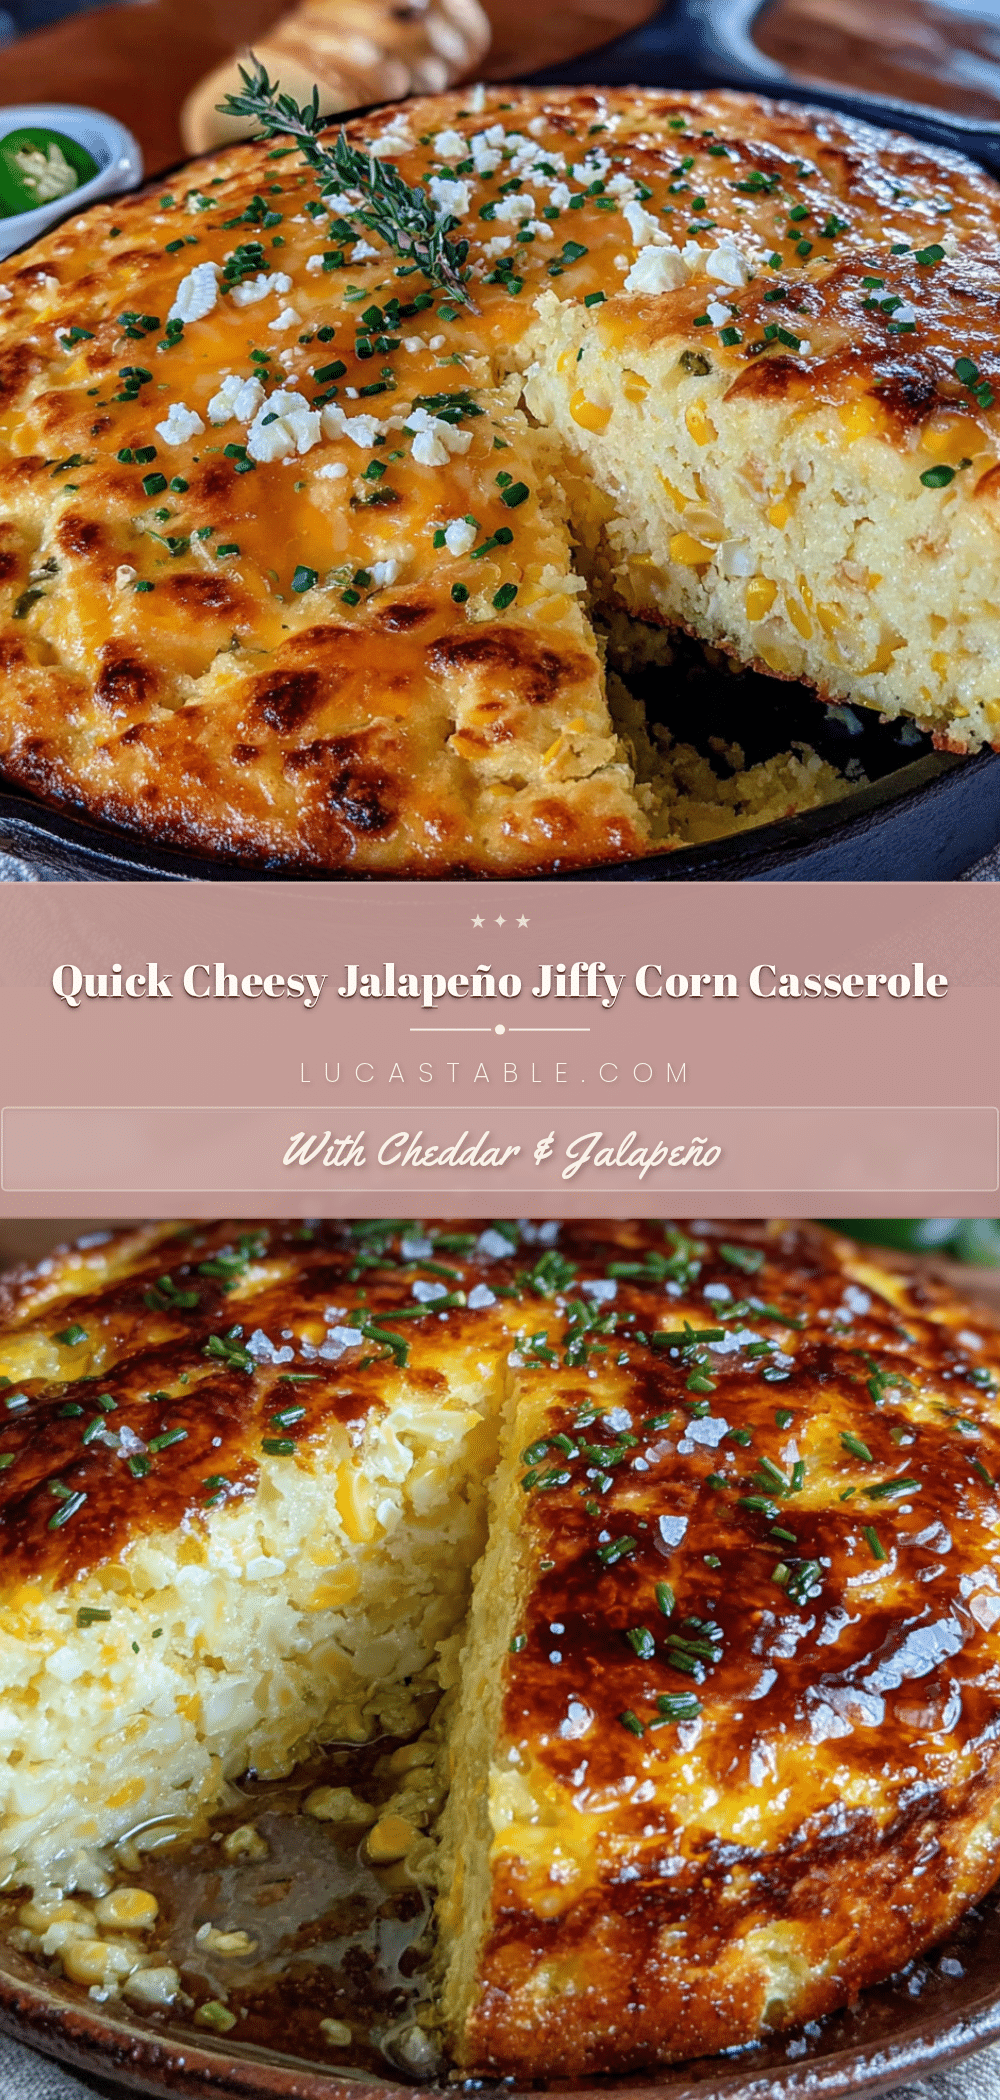
Best Quick Cheesy Jalapeño Jiffy Corn Casserole

A quick, cheesy corn casserole with a kick of jalapeño, made with Jiffy mix, sharp cheddar, and simple pantry staples. Perfect for weeknights, it delivers comfort food flavor in under an hour.
- Prep Time: 10 minutes
- Cook Time: 35-40 minutes
- Total Time: 45-50 minutes
- Yield: 8 servings 1x
- Category: Side Dish
- Cuisine: American
Ingredients
- 1 box (8.5 oz) Jiffy Corn Muffin Mix
- 1 can (15.25 oz) whole kernel corn, drained
- 1 can (14.75 oz) cream-style corn
- 1 cup sour cream
- 1/2 cup unsalted butter, melted
- 2 cups shredded sharp cheddar cheese
- 2–3 fresh jalapeños, diced (seeds removed for less heat)
- 1/2 teaspoon salt
- 1/4 teaspoon black pepper
Instructions
- Preheat your oven to 350°F (175°C). Grease a 9×13-inch baking dish with cooking spray or butter.
- Drain the whole kernel corn in a colander and pat dry with a paper towel.
- In a large mixing bowl, whisk 2 large eggs until frothy.
- Add melted butter, sour cream, and cream-style corn. Whisk until smooth and combined.
- Stir in the drained whole kernel corn gently.
- Add Jiffy mix, salt, and pepper. Stir until just combined (a few lumps are fine).
- Fold in 1 1/2 cups of shredded cheddar and diced jalapeños. Reserve 1/2 cup cheese for topping.
- Pour batter into prepared dish and spread evenly.
- Sprinkle remaining 1/2 cup cheese on top.
- Bake for 35-40 minutes until edges are golden and center is set but slightly jiggly. A toothpick should come out clean or with moist crumbs.
- Let rest for 5-10 minutes before serving.
Notes
Don’t overmix the batter to avoid a dense texture. Let ingredients come to room temperature for best results. Start checking for doneness at 30 minutes. Let the casserole rest before serving to set properly. For extra crispy edges, use a cast iron skillet. Can be assembled up to 24 hours in advance.
Nutrition
- Serving Size: 1 serving (1/8 of ca
- Calories: 320
- Sugar: 8
- Sodium: 580
- Fat: 20
- Saturated Fat: 12
- Carbohydrates: 30
- Fiber: 2
- Protein: 10
Keywords: corn casserole, Jiffy corn casserole, cheesy corn casserole, jalapeño corn casserole, quick corn casserole, weeknight side dish, comfort food


