I wasn’t expecting baking advice from my daughter’s second-grade teacher, but there I was, at a school craft fair, elbow-deep in glitter glue, listening to Mrs. Patterson describe exactly how to make these Grinch cookies. She was hunched over a lopsided gingerbread house, and I was trying to keep my hot cocoa from spilling onto a pile of pipe cleaners. Honestly, I was just making small talk about holiday stress, and she just started talking about this recipe like it was the most obvious thing in the world. She said, “You need a cookie that looks like the Grinch’s heart grew three sizes, but one that a picky four-year-old will actually eat.” That was the moment. I mean, I’d seen a million Christmas cookie recipes, but this one? It stuck with me. Maybe you’ve been there, scrolling through Pinterest for something that isn’t a total disaster with kids. These cookies are it. They are soft, chewy, and that little Red Hot heart in the middle? It’s pure magic. The first time I made them, my son, who usually picks out the chocolate chips, ate three. Three! Let me tell you, that felt like a win bigger than any perfectly decorated sugar cookie.
Why You’ll Love This Recipe
These aren’t just pretty cookies. They are the kind of cookie that solves a real problem for parents. You need something festive that doesn’t require a ton of specialty ingredients or a calm, quiet kitchen. These deliver every time.
- Quick & Easy: From start to finish, these are on the table in about 25 minutes. No chilling the dough, no fussy piping bags. Perfect for a Tuesday afternoon when the kids are bouncing off the walls.
- Simple Ingredients: You probably have everything in your pantry right now. No hunting for obscure extracts or fancy sugars. It’s all basic baking staples.
- Crowd-Pleaser: I have yet to meet a kid who doesn’t love these. The bright green color is a hit, and the Red Hot heart is a fun, slightly spicy surprise. Adults love them too, which is always a bonus.
- Unbelievably Delicious: This isn’t just a gimmick cookie. The base is a super soft, chewy sugar cookie that stays tender for days. The lime and vanilla combo gives it a unique, bright flavor that isn’t too sweet.
What makes this different from every other Grinch cookie out there? It’s the texture. I spent a good three batches getting this just right. Too many recipes turn out cakey or hard. This one uses a trick with melted butter and a bit of cornstarch to guarantee that soft-baked, bakery-style chew. It’s comfort food reimagined—a little bit healthier on the sugar front than a frosted cookie, faster to make, but with the same soul-soothing satisfaction of a holiday treat.
What Ingredients You Will Need
This recipe uses simple, wholesome ingredients to deliver that perfect soft texture and bold flavor. Most of these are pantry staples, which is exactly what you need for a last-minute baking session with the kids.
- For the Cookie Dough:
- 1 cup (2 sticks) unsalted butter, melted and slightly cooled (Melting the butter is key for a chewy texture, no need to cream it!)
- 1 cup granulated sugar
- 1 large egg, room temperature (A cold egg will seize the melted butter, so let it sit out for 15 minutes)
- 2 teaspoons vanilla extract (I prefer pure vanilla, but imitation works fine here)
- 1 teaspoon lime zest (This is my secret weapon. It brightens the green and cuts the sweetness)
- 2 cups all-purpose flour
- 2 tablespoons cornstarch (This is the magic ingredient for soft cookies)
- 1 teaspoon baking soda
- 1/2 teaspoon salt
- Green gel food coloring (I recommend Americolor or Wilton. Liquid drops won’t give you that vibrant Grinch green without making the dough sticky)
- For the Decoration:
- Red Hot candies (You need about 24-30 for the hearts)
- Optional: Powdered sugar for dusting (This gives them a “snowy” look, but is totally optional)
Ingredient Tip: For the best lime flavor, use a microplane to zest the lime directly over the bowl. The oils in the zest are where the flavor lives. I usually buy a few extra limes around the holidays just for this recipe. Also, don’t skip the cornstarch! It’s the trick that keeps these cookies from spreading too thin and staying perfectly puffy.
Equipment Needed
You don’t need any fancy gadgets for these cookies, which is part of their charm. Here is what I use every time I make them.
- Large mixing bowls (One for wet, one for dry)
- Whisk and rubber spatula
- Measuring cups and spoons
- Standard baking sheet (I prefer light-colored metal sheets for even browning)
- Parchment paper or silicone baking mat (Absolutely necessary for easy cleanup and preventing sticking)
- Cookie scoop (about 1.5 tablespoons) (This makes uniform cookies that bake evenly. A spoon works, but a scoop is easier for little hands)
- Cooling rack
If you don’t have a cookie scoop, just use two spoons. It’s not a big deal. I actually dropped my favorite scoop in the sink last week and used a regular tablespoon. The cookies were a little less uniform, but they tasted exactly the same. Don’t stress over the tools.
Preparation Method
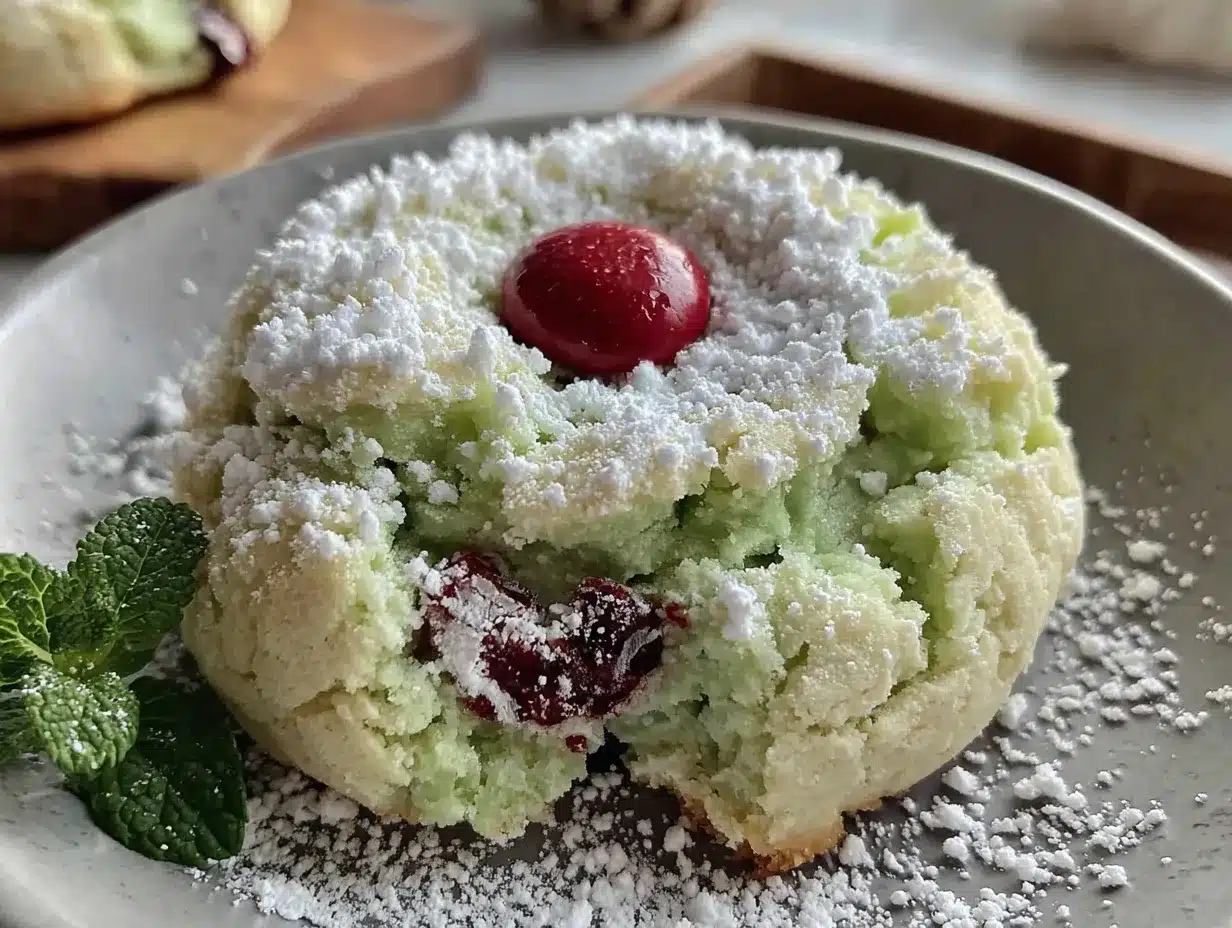
Let’s get baking! This process is fast, so have your ingredients measured and ready to go. It’s a great recipe to do with kids because the steps are simple and the payoff is immediate.
- Preheat and Prep: Preheat your oven to 350°F (175°C). Line your baking sheet with parchment paper. This is non-negotiable for soft cookies.
- Mix the Wet Ingredients: In a large bowl, whisk together the melted butter and granulated sugar until it looks like wet sand. It should be smooth and glossy. Add the egg, vanilla extract, and lime zest. Whisk vigorously for about 30 seconds until the mixture is pale and slightly thickened. This is where you incorporate air.
- Add the Color: Add your green gel food coloring. Start with a small amount—about 1/8 teaspoon—and mix it in. You can always add more, but you can’t take it away. I usually add a bit more than I think I need because the color fades slightly during baking. Aim for a bright Grinch green.
- Combine Dry Ingredients: In a separate bowl, whisk together the flour, cornstarch, baking soda, and salt. This ensures the leavening agents are evenly distributed.
- Make the Dough: Pour the dry ingredients into the wet ingredients. Use a rubber spatula to fold everything together. Stir just until no streaks of flour remain. Overmixing will make the cookies tough. The dough will be soft and slightly sticky—that’s perfect.
- Scoop the Cookies: Use your cookie scoop to portion out balls of dough. Place them on the prepared baking sheet about 2 inches apart. They will spread a little, but not too much. You should get about 24 cookies from this batch.
- Bake: Bake for 8-10 minutes. The cookies will look puffy and just set around the edges. The centers will look slightly underdone and soft. This is exactly what you want for a chewy cookie. Do not overbake! They will continue to cook on the hot sheet pan.
- Create the Heart: Here is the fun part. As soon as the cookies come out of the oven, while they are still hot and soft, gently press a Red Hot candy into the center of each cookie. It will sink slightly into the soft dough. If you wait too long, the cookie will set and the candy won’t stick.
- Cool: Let the cookies cool on the baking sheet for 5 minutes. This allows them to set up properly. Then, transfer them to a wire rack to cool completely. If you move them too early, they will fall apart.
Pro-Tip: If your dough feels too sticky to scoop, pop it in the fridge for 10 minutes. This happens sometimes if your butter was too warm or your egg was too big. A quick chill fixes it right up.
Cooking Tips & Techniques
I’ve made these cookies at least a dozen times, and I’ve learned a few things the hard way. Here are my best tips to get them perfect every single time.
- The Melted Butter Trick: Using melted butter instead of softened butter is the key to a chewy cookie. It changes how the sugar dissolves and how the gluten forms. Don’t skip it. Just make sure the butter isn’t boiling hot when you add the egg, or you’ll end up with scrambled eggs in your cookie dough.
- Don’t Overbake: This is the most common mistake. If you wait until the cookies are golden brown, they will be hard and crunchy. Take them out when the edges are just set and the center looks a little puffy and soft. They will look underdone, but trust the process.
- Pressing the Candy: The Red Hots need to go in immediately. I mean, the second the sheet pan comes out of the oven. If you wait even a minute, the cookie starts to set, and the candy will just sit on top and fall off later. I usually have the bag of Red Hots open and ready to go before I even put the cookies in the oven.
- Uniform Size: Using a cookie scoop ensures all your cookies are the same size, which means they bake evenly. If you have one giant cookie and one tiny cookie, the tiny one will be burnt and the giant one will be raw. A scoop is a simple fix for this common problem.
- Lime vs. Lemon: I’ve tried both. Lemon works in a pinch, but lime gives a more unique, tropical flavor that pairs beautifully with the vanilla and the spicy Red Hots. It’s worth buying a lime.
Variations & Adaptations
One of the best things about this recipe is how easy it is to tweak. Here are a few ways I’ve changed it up depending on what I have on hand or who I’m feeding.
- Dietary Swap – Gluten-Free: I have a friend with celiac disease, so I tested this with a 1:1 gluten-free baking flour (like Bob’s Red Mill). It works perfectly. The cornstarch in the recipe already helps with texture, so the GF flour doesn’t make it grainy. Just be sure to let the dough rest for 10 minutes before baking to allow the flour to hydrate.
- Flavor Twist – Peppermint Grinch: For a more traditional holiday flavor, swap the lime zest and vanilla for 1/2 teaspoon of peppermint extract. The green color works perfectly with peppermint, and the Red Hot heart gives it a nice, spicy finish. My kids actually prefer this version in December.
- Allergen Friendly – Dairy-Free: Use a high-quality vegan butter stick (like Miyoko’s or Country Crock Plant Butter) in place of the regular butter. Melt it the same way. The cookies will be slightly less tender but still delicious and chewy. I’ve made this for a school bake sale with a “dairy-free” label, and they were gone in an hour.
- Method Change – No Red Hots: If you can’t find Red Hots or you don’t like the spicy cinnamon flavor, use a mini chocolate chip or a small M&M pressed into the center. It won’t look like a heart, but it will still be a delicious green cookie. I did this once when I ran out of Red Hots, and my husband actually preferred them.
Serving & Storage Suggestions
These cookies are best served slightly warm, when the Red Hot heart is still a little soft and the cookie is perfectly chewy. But they are also fantastic at room temperature.
- Serving: I love to serve these on a festive platter with a dusting of powdered sugar to look like snow. They pair wonderfully with a glass of cold milk, a cup of hot cocoa, or even a scoop of vanilla ice cream for a fun dessert.
- Storage: Store these in an airtight container at room temperature. They will stay soft and chewy for up to 5 days. I usually layer them between sheets of parchment paper to prevent them from sticking together.
- Freezing: These freeze beautifully. You can freeze the baked cookies for up to 3 months. Just place them in a single layer in a freezer-safe bag or container. Thaw them at room temperature for about 30 minutes before serving. You can also freeze the unbaked dough balls. Scoop them, place them on a baking sheet, freeze until solid, then transfer to a bag. Bake from frozen, adding 2-3 minutes to the bake time.
- Reheating: To bring back that fresh-from-the-oven texture, pop a cookie in the microwave for 10 seconds. It softens the cookie and warms the Red Hot heart. It’s a game-changer.
Nutritional Information & Benefits
While these are a treat, they aren’t a total sugar bomb. One cookie is a nice, satisfying size that doesn’t leave you feeling overly full or guilty.
Per cookie (based on 24 cookies):
Calories: ~145 | Fat: 8g | Carbs: 18g | Protein: 1.5g | Sugar: 10g
The lime zest adds a tiny bit of Vitamin C, and the Red Hots are surprisingly low in actual sugar compared to a chocolate chip. From a wellness perspective, I love that this recipe uses simple ingredients without any artificial preservatives or hydrogenated oils. It’s a real-food treat that you can feel good about giving to your kids. Plus, the act of baking together is a wonderful way to connect and create memories, which is a benefit that doesn’t show up on a nutrition label.
Conclusion
These Grinch cookies are more than just a cute holiday recipe. They are a reliable, easy, and genuinely delicious cookie that solves the “what do we make for the school party?” dilemma. They are proof that you don’t need fancy skills or expensive ingredients to create something magical in the kitchen. I love that they bring a smile to my kids’ faces every single time, and I love that I can make them in under 30 minutes without losing my mind. I really hope you give these a try. Don’t be afraid to let the kids get their hands messy with the dough—the imperfections are what make them perfect. If you make them, I’d love to hear about it! Leave a comment below and tell me how they turned out, or share a photo on Pinterest. Happy baking!
Frequently Asked Questions
Can I use liquid green food coloring instead of gel?
You can, but you will need a lot of it to get that vibrant Grinch green. This can make the dough sticky and affect the texture. Gel food coloring is much more concentrated and gives you a better color without adding extra liquid. It’s worth the small investment if you bake cookies often.
Why did my cookies spread too much?
This usually happens if your butter was too hot when you mixed it, or if you didn’t measure your flour correctly. Make sure your melted butter is just slightly warm, not hot. Also, spoon your flour into the measuring cup and level it off with a knife. Scooping directly from the bag compacts the flour, which can throw off the ratio.
Can I make these cookies ahead of time?
Absolutely! You can make the dough up to 3 days in advance and keep it in the fridge. Just let it sit at room temperature for 10 minutes before scooping, as cold dough is harder to work with. You can also freeze the baked cookies for up to 3 months.
My Red Hots keep falling off. What am I doing wrong?
You are likely waiting too long to press them in. The cookie needs to be very hot and soft for the candy to sink in and stick. Press the Red Hots in immediately as soon as the cookies come out of the oven. If they still fall off, try pressing them in a little deeper, but not so deep that they go through the bottom of the cookie.
Can I use a different candy for the heart?
Yes! Mini M&Ms, chocolate chips, or even a small piece of a cherry are great substitutes. If you want to keep the heart shape, you can buy heart-shaped sprinkles or cut a small heart out of a fruit roll-up. The Red Hots are traditional, but feel free to get creative with what you have on hand.
Pin This Recipe!

Easy Grinch Cookies Recipe with Red Hot Hearts

Soft, chewy sugar cookies dyed Grinch-green and topped with a Red Hot candy heart. A quick and easy holiday treat that kids love, ready in about 25 minutes.
- Prep Time: 15 minutes
- Cook Time: 10 minutes
- Total Time: 25 minutes
- Yield: 24 cookies 1x
- Category: Dessert
- Cuisine: American
Ingredients
- 1 cup (2 sticks) unsalted butter, melted and slightly cooled
- 1 cup granulated sugar
- 1 large egg, room temperature
- 2 teaspoons vanilla extract
- 1 teaspoon lime zest
- 2 cups all-purpose flour
- 2 tablespoons cornstarch
- 1 teaspoon baking soda
- 1/2 teaspoon salt
- Green gel food coloring
- Red Hot candies (about 24-30)
- Optional: Powdered sugar for dusting
Instructions
- Preheat oven to 350°F (175°C). Line a baking sheet with parchment paper.
- In a large bowl, whisk together melted butter and granulated sugar until smooth and glossy.
- Add egg, vanilla extract, and lime zest. Whisk vigorously for about 30 seconds until pale and slightly thickened.
- Add green gel food coloring (start with 1/8 teaspoon) and mix until bright Grinch-green.
- In a separate bowl, whisk together flour, cornstarch, baking soda, and salt.
- Pour dry ingredients into wet ingredients. Fold with a rubber spatula until just combined (do not overmix). Dough will be soft and slightly sticky.
- Using a cookie scoop (about 1.5 tablespoons), portion dough balls and place 2 inches apart on prepared baking sheet.
- Bake for 8-10 minutes, until edges are set and centers look puffy and slightly underdone.
- Immediately after removing from oven, press a Red Hot candy into the center of each cookie while still hot.
- Let cookies cool on baking sheet for 5 minutes, then transfer to a wire rack to cool completely.
Notes
For best results, use gel food coloring for vibrant green color. Press Red Hots into cookies immediately after baking. If dough is too sticky, chill for 10 minutes. Do not overbake; cookies should look slightly underdone in the center.
Nutrition
- Serving Size: 1 cookie
- Calories: 145
- Sugar: 10
- Sodium: 95
- Fat: 8
- Saturated Fat: 5
- Carbohydrates: 18
- Fiber: 0.5
- Protein: 1.5
Keywords: Grinch cookies, Christmas cookies, soft sugar cookies, green cookies, Red Hot cookies, holiday baking, easy cookie recipe


