I was supposed to be making a proper Christmas dessert. You know the kind—something that requires a stand mixer, a candy thermometer, and at least three bowls to wash. It was the Tuesday before Christmas, the power flickered twice (thanks, winter storm), and I was already running late on my holiday baking list. I grabbed what I thought was a block of cream cheese from the fridge, but my hands were numb from hauling in firewood, and honestly, I wasn’t paying attention. What came out of that mixing bowl was nothing like the elegant yule log I had planned—and it was better.
Let me set the scene for you. My kitchen counter was a disaster zone of flour dust, spilled vanilla, and three different kinds of sprinkles. The dog had eaten a gingerbread man off the cooling rack. I was one burnt batch of cookies away from calling the whole thing off and ordering pizza. That’s when I spotted the package of Oreos staring at me from the pantry, almost mocking me with their simplicity. Maybe you’ve been there—that moment when you just need a win in the kitchen, something that doesn’t require precision or patience or a degree in pastry arts.
I crushed those cookies with the bottom of a cast iron skillet (therapeutic, honestly), tossed in some softened cream cheese, and started rolling. The first batch looked like lumpy snowballs. The second batch looked a little better. By the third try, I had these perfect little spheres that tasted like Christmas morning—rich, chocolatey, with that signature Oreo crunch hiding inside. I dipped them in white chocolate, threw on some festive sprinkles, and suddenly my kitchen felt like a holiday miracle had happened. These cozy no-bake Christmas Oreo balls became the thing I bring to every party now, and nobody believes they only took twenty minutes to make.
Why You’ll Love This Recipe
Let me tell you why these little bites of joy have earned a permanent spot in my holiday rotation. I’ve tested this recipe at three different Christmas gatherings, two cookie swaps, and one very desperate New Year’s Eve when I forgot to bring dessert. Every single time, people asked for the recipe before they finished chewing. That’s the kind of authority that comes from hands-on kitchen experience, not from reading a cookbook.
- Quick & Easy: These come together in under 20 minutes of active time. No baking, no waiting for dough to chill for hours, no complicated techniques. You can literally make these while wrapping presents or watching Home Alone for the twelfth time.
- Simple Ingredients: Three main ingredients. That’s it. Oreos, cream cheese, and white chocolate. You probably have most of this in your kitchen right now, which means no last-minute grocery store panic runs.
- Perfect for Christmas: These are the ultimate holiday party treat. They look fancy sitting on a platter with their white chocolate coating and colorful sprinkles, but they’re secretly the easiest thing on the table.
- Crowd-Pleaser: Kids love them, adults love them, even your picky aunt who “doesn’t do sweets” will sneak one. I’ve watched it happen.
- Unbelievably Delicious: The texture is what gets everyone. That creamy, fudgy center with little bits of Oreo crunch, all wrapped in a crisp white chocolate shell. It’s next-level comfort food that somehow feels both indulgent and nostalgic.
What makes these different from every other Oreo ball recipe out there? It’s the technique. Most recipes tell you to just mix everything together and roll, but they don’t tell you about the cream cheese temperature trick or the chilling method that prevents cracking. I’ve dialed in the exact cream cheese-to-cookie ratio so you get that perfect fudgy texture without it being too soft or too stiff. This isn’t just another version of a holiday treat—it’s the version that will make your friends text you for the recipe in January.
What Ingredients You Will Need
This recipe uses simple, everyday ingredients to deliver big holiday flavor without any fuss. Everything here is probably already in your pantry or easily found at any grocery store. The beauty of these cozy no-bake Christmas Oreo balls is that they don’t require any specialty items or expensive baking supplies.
- 1 (14.3 oz) package Oreo cookies (regular, not double-stuf—you want the standard cookie-to-creme ratio for the right texture)
- 8 oz cream cheese, softened to room temperature (full-fat works best, but low-fat can work in a pinch—just know the texture will be slightly less creamy)
- 12 oz white chocolate melting wafers or white chocolate chips (I prefer Ghirardelli melting wafers for the smoothest coating, but any good-quality white chocolate works)
- 1-2 tablespoons coconut oil or vegetable shortening (optional, but helps thin the white chocolate for easier dipping)
- Christmas sprinkles, crushed candy canes, or festive decorations (for topping)
Ingredient Selection Tips:
For the Oreos, I’ve tried this with the double-stuf version, and honestly, the texture gets too soft. The standard Oreo has the perfect ratio of cookie to creme filling that gives these balls their signature fudgy-but-not-greasy texture. If you’re feeling adventurous, the mint Oreos make an amazing holiday variation—just swap them in for a peppermint twist.
For the cream cheese, this is where quality matters. I recommend Philadelphia cream cheese for the most consistent results. Generic brands sometimes have a higher water content, which can make your mixture too sticky to roll. Let it sit on the counter for at least 30 minutes before starting—cold cream cheese won’t blend smoothly and will leave annoying white streaks in your dark cookie mixture.
Substitution Guidance:
Need a dairy-free option? Use a dairy-free cream cheese alternative (Kite Hill works well) and vegan white chocolate. The texture will be slightly different, but still delicious. For a gluten-free version, use gluten-free Oreos (yes, they exist and they taste just as good). If you can’t find white chocolate, dark chocolate or milk chocolate both work beautifully—just adjust your sprinkles to match.
Equipment Needed
You don’t need a fancy kitchen setup for these Christmas Oreo balls. Here’s what you’ll actually use:
- Food processor (for crushing cookies into fine crumbs—you can use a rolling pin and a zip-top bag, but the processor makes it so much faster)
- Large mixing bowl (for combining the cookie crumbs and cream cheese)
- Rubber spatula (for mixing—your hands work too, but the spatula keeps things less messy)
- Small cookie scoop or tablespoon (for portioning equal-sized balls)
- Baking sheet lined with parchment paper (for chilling the balls)
- Microwave-safe bowl (for melting the white chocolate)
- Fork or dipping tool (for coating the balls in chocolate)
- Plastic wrap (for covering the bowl while the mixture chills)
Budget-Friendly Alternatives: No food processor? No problem. Put the Oreos in a large zip-top bag, seal it tight (leave a little air in there for cushion), and go to town with a rolling pin or even a heavy skillet. It takes about 5 minutes of pounding and takes out some aggression—very therapeutic during the stressful holiday season. For melting the chocolate, a double boiler works great if you don’t want to use a microwave, but honestly, the microwave method is faster and requires less cleanup.
Preparation Method

Let me walk you through this step by step. I’ve made these cozy no-bake Christmas Oreo balls about fifty times now, so I know exactly where things can go wrong and how to fix them.
- Crush the Oreos. Place the entire package of Oreos (cream filling and all) into your food processor. Pulse until you get fine, sand-like crumbs. Don’t overprocess into a paste—you want some tiny bits of texture in there. If you’re using the bag-and-rolling-pin method, make sure there are no large chunks left. This should take about 30 seconds in a food processor or 5 minutes of determined pounding.
- Soften the cream cheese. This is where most people mess up. Your cream cheese needs to be at genuine room temperature—not cold, not microwaved. I leave mine on the counter for at least 30 minutes before starting. If you forget, cut it into small cubes and let it sit for 15 minutes. Do not microwave it, or you’ll get lumpy, greasy Oreo balls. Trust me on this one—I learned the hard way.
- Mix the base. In your large bowl, combine the crushed Oreo crumbs and softened cream cheese. Use your rubber spatula to fold everything together until no white streaks remain. The mixture will look like dark, fudgy cookie dough. It should hold together when you squeeze a small amount in your hand. If it’s too dry, add another tablespoon of cream cheese. If it’s too sticky, add a few more crushed cookies.
- Chill the mixture. Cover the bowl with plastic wrap and pop it in the refrigerator for 30 minutes. This step is non-negotiable. The mixture needs to firm up so you can roll it into balls without making a giant mess. While it chills, line your baking sheet with parchment paper.
- Roll the balls. Using your cookie scoop or a tablespoon, portion out the mixture and roll between your palms to form 1-inch balls. Place them on the parchment-lined baking sheet. You should get about 24-30 balls, depending on size. If your hands get sticky, lightly dampen them with water. If the mixture starts getting too soft, pop the whole tray back in the fridge for 10 minutes.
- Freeze the balls. Place the baking sheet with the rolled balls in the freezer for at least 15 minutes. This is the secret to a perfect white chocolate coating. Frozen balls mean the chocolate sets quickly and doesn’t slide off or crack. You can leave them in there for up to an hour if you get distracted wrapping presents.
- Melt the white chocolate. Place your white chocolate wafers or chips in a microwave-safe bowl. Microwave in 30-second intervals, stirring between each, until smooth. Add 1 tablespoon of coconut oil if the chocolate seems too thick. Be careful—white chocolate burns easily and turns into a grainy mess. Stop heating as soon as it’s mostly melted and stir until completely smooth.
- Dip the balls. Working with 3-4 balls at a time (keep the rest in the freezer), drop each ball into the melted white chocolate. Use a fork to gently roll it around until fully coated. Lift it out with the fork, tap the fork on the edge of the bowl to let excess chocolate drip off, and place it back on the parchment paper. If the chocolate starts getting too thick, reheat it for 15 seconds.
- Add decorations. While the white chocolate is still wet, sprinkle on your Christmas sprinkles, crushed candy canes, or a dusting of cocoa powder. Work quickly—the chocolate sets fast on the frozen balls. I like to do a few at a time, sprinkle, then move on to the next batch.
- Set and serve. Let the coated balls sit at room temperature until the chocolate is completely set, about 15-20 minutes. Or pop them back in the fridge for 10 minutes if you’re impatient (I usually am). Serve immediately or store for later.
Cooking Tips & Techniques
After making these Christmas Oreo balls for every holiday event in my social circle, I’ve collected some hard-won wisdom. Let me save you from my mistakes.
The Cream Cheese Temperature Trick: This is the single most important tip I can give you. Cold cream cheese will not blend smoothly into the Oreo crumbs. You’ll end up with white streaks and lumps that look unappealing and create uneven texture. But here’s the thing—if your cream cheese is too warm (like, left out for hours), the mixture becomes a sticky nightmare that won’t roll into balls. The sweet spot is 30-45 minutes on the counter. It should feel cool to the touch but give slightly when you press it.
The Freezer Is Your Best Friend: I cannot stress this enough. Rolling the balls and then freezing them before dipping is the difference between professional-looking truffles and sad, cracked messes. The first time I made these, I skipped the freezer step because I was in a hurry. The white chocolate coating cracked, slid off, and created a puddle of chocolate on my parchment paper. It looked like a crime scene. Now I always freeze for at least 15 minutes, and my balls come out perfectly smooth every time.
Multitasking Strategy: Here’s how I make these efficiently. While the Oreo mixture is chilling in the fridge, I set up my dipping station—parchment paper on the counter, sprinkles in a small bowl, white chocolate measured out. Then while the rolled balls are in the freezer, I melt the chocolate. This way, everything is ready to go when it’s time to dip, and I’m not running around the kitchen with chocolate-covered hands.
Common Mistake to Avoid: Don’t overmix the Oreo crumbs and cream cheese. I know it’s tempting to keep stirring until everything is perfectly uniform, but overmixing can make the texture too dense and almost greasy. Mix just until no white streaks remain, then stop. A few tiny lumps of cream cheese are fine—they’ll disappear when the mixture chills.
Variations & Adaptations
One of the things I love most about these cozy no-bake Christmas Oreo balls is how customizable they are. Here are some variations I’ve tried and loved:
Peppermint Oreo Balls: Swap regular Oreos for the peppermint version during the holiday season. The minty flavor pairs beautifully with the white chocolate coating. Top with crushed candy canes for extra crunch and festive flair. I made these for a cookie swap last year and they disappeared in ten minutes.
Dark Chocolate Lovers: Skip the white chocolate and dip these in dark chocolate (70% cacao or higher) for a less sweet, more sophisticated treat. The bitterness of the dark chocolate balances the sweet Oreo filling perfectly. Sprinkle with sea salt flakes right after dipping for that sweet-salty magic.
Gluten-Free Version: Use gluten-free Oreos (they’re certified gluten-free and taste identical to the original). Everything else in the recipe is naturally gluten-free, so this is an easy swap that makes the treat accessible to everyone at your holiday gathering.
Vegan Option: Use dairy-free cream cheese (I’ve had good results with Tofutti and Kite Hill brands) and vegan white chocolate. The texture will be slightly softer, so you might need to freeze the balls for an extra 10 minutes before dipping. The taste is still incredible—my vegan friend couldn’t believe these were dairy-free.
Flavor Twist: Add 1 teaspoon of peppermint extract or orange extract to the Oreo mixture before rolling. This adds a subtle holiday flavor that makes these feel extra special. Just be careful not to add too much—a little extract goes a long way.
Serving & Storage Suggestions
These Christmas Oreo balls are best served chilled or at room temperature, depending on your preference. I like to take them out of the fridge about 10 minutes before serving so the centers soften slightly while the chocolate coating stays firm. Arrange them on a festive platter or tiered serving tray for maximum holiday presentation points.
What to Serve With Them: These pair beautifully with a cup of hot cocoa, a peppermint mocha, or a glass of cold milk. For a dessert spread, I like to serve them alongside gingerbread cookies, sugar cookies, and a warm apple cider. They also make excellent gifts—pack them in a decorative tin lined with parchment paper and tie with a ribbon.
Storage Instructions: Store these in an airtight container in the refrigerator for up to 2 weeks. Honestly, they taste even better on day two or three as the flavors meld together. To freeze, place the finished, fully set Oreo balls in a single layer in a freezer-safe container with parchment paper between layers. They’ll keep for up to 3 months in the freezer. Thaw in the refrigerator overnight before serving.
Reheating Tip: These don’t need reheating, but if you prefer a softer center, let them sit at room temperature for 15-20 minutes before eating. The white chocolate coating will stay firm while the inside gets deliciously fudgy.
Nutritional Information & Benefits
Let’s be real—these are a treat, not a health food. But here’s the estimated nutritional breakdown per ball (based on 28 servings):
| Nutrient | Amount per ball |
|---|---|
| Calories | 145 |
| Total Fat | 9g |
| Saturated Fat | 5g |
| Carbohydrates | 16g |
| Sugar | 12g |
| Protein | 2g |
| Sodium | 95mg |
Health Considerations: While these are definitely a splurge, the cream cheese does provide some calcium and protein. The dark chocolate variation offers antioxidants from the cocoa. For a slightly lighter version, you can use reduced-fat cream cheese and skip the white chocolate coating, simply rolling the balls in cocoa powder or crushed nuts instead.
Dietary Notes: These contain dairy and gluten (unless using substitutions). They are egg-free and nut-free as written. Always check labels if cooking for someone with allergies, as some white chocolate brands may contain soy lecithin or other additives.
Conclusion
These cozy no-bake Christmas Oreo balls have become my holiday signature, and I honestly can’t imagine the season without them. They started as a kitchen accident on a stressful Tuesday, but now they’re the treat everyone asks for by name. There’s something magical about taking three simple ingredients and turning them into something that looks like it came from a fancy bakery—and doing it in under an hour with zero oven time.
I want you to make these your own. Use your favorite Oreo flavor, pick sprinkles that match your holiday theme, or experiment with different chocolate coatings. The beauty of this recipe is that it’s forgiving enough for beginners but impressive enough for experienced bakers. Whether you’re making these for a Christmas party, a cookie exchange, or just because you need a little holiday cheer, they never disappoint.
So go ahead—crush some cookies, get your hands messy, and create something delicious. And when you make them, come back and tell me how they turned out. Did you try a fun variation? Did your family devour them in record time? I’d love to hear your story in the comments below. Happy holidays, and happy rolling!
Frequently Asked Questions
Can I use double-stuf Oreos for this recipe?
I’ve tried it, and honestly, I don’t recommend it. The extra cream filling makes the mixture too soft and sticky, which means your balls won’t hold their shape as well. Stick with regular Oreos for the best texture. If you only have double-stuf, remove half the cream filling before crushing.
Why did my white chocolate coating crack?
This usually happens when your Oreo balls aren’t cold enough when you dip them, or when the white chocolate is too thick. Make sure your balls are frozen solid (at least 15 minutes in the freezer) and add a tablespoon of coconut oil to thin the chocolate. Also, don’t tap the fork too hard when removing excess chocolate—gentle taps only.
Can I make these ahead of time for Christmas?
Absolutely! These are actually perfect for making ahead. You can prepare the Oreo balls (undipped) and freeze them for up to a month. When you’re ready, just thaw them in the fridge for 30 minutes, then dip and decorate. Or make the fully finished balls and store them in the fridge for up to 2 weeks.
How do I get perfectly round balls?
Use a cookie scoop for uniform portions, then roll between your palms using gentle pressure. If the mixture starts sticking to your hands, lightly dampen your palms with water. For the roundest results, chill the mixture thoroughly before rolling—it firms up the cream cheese and makes shaping much easier.
Can I use milk chocolate instead of white chocolate?
Yes, and it’s delicious! Milk chocolate gives these a more classic, less sweet flavor. Use the same melting method—30-second intervals in the microwave, stirring between each. Dark chocolate also works beautifully if you want a more sophisticated, less sugary treat. Just adjust your sprinkles to match the chocolate color.
Pin This Recipe!
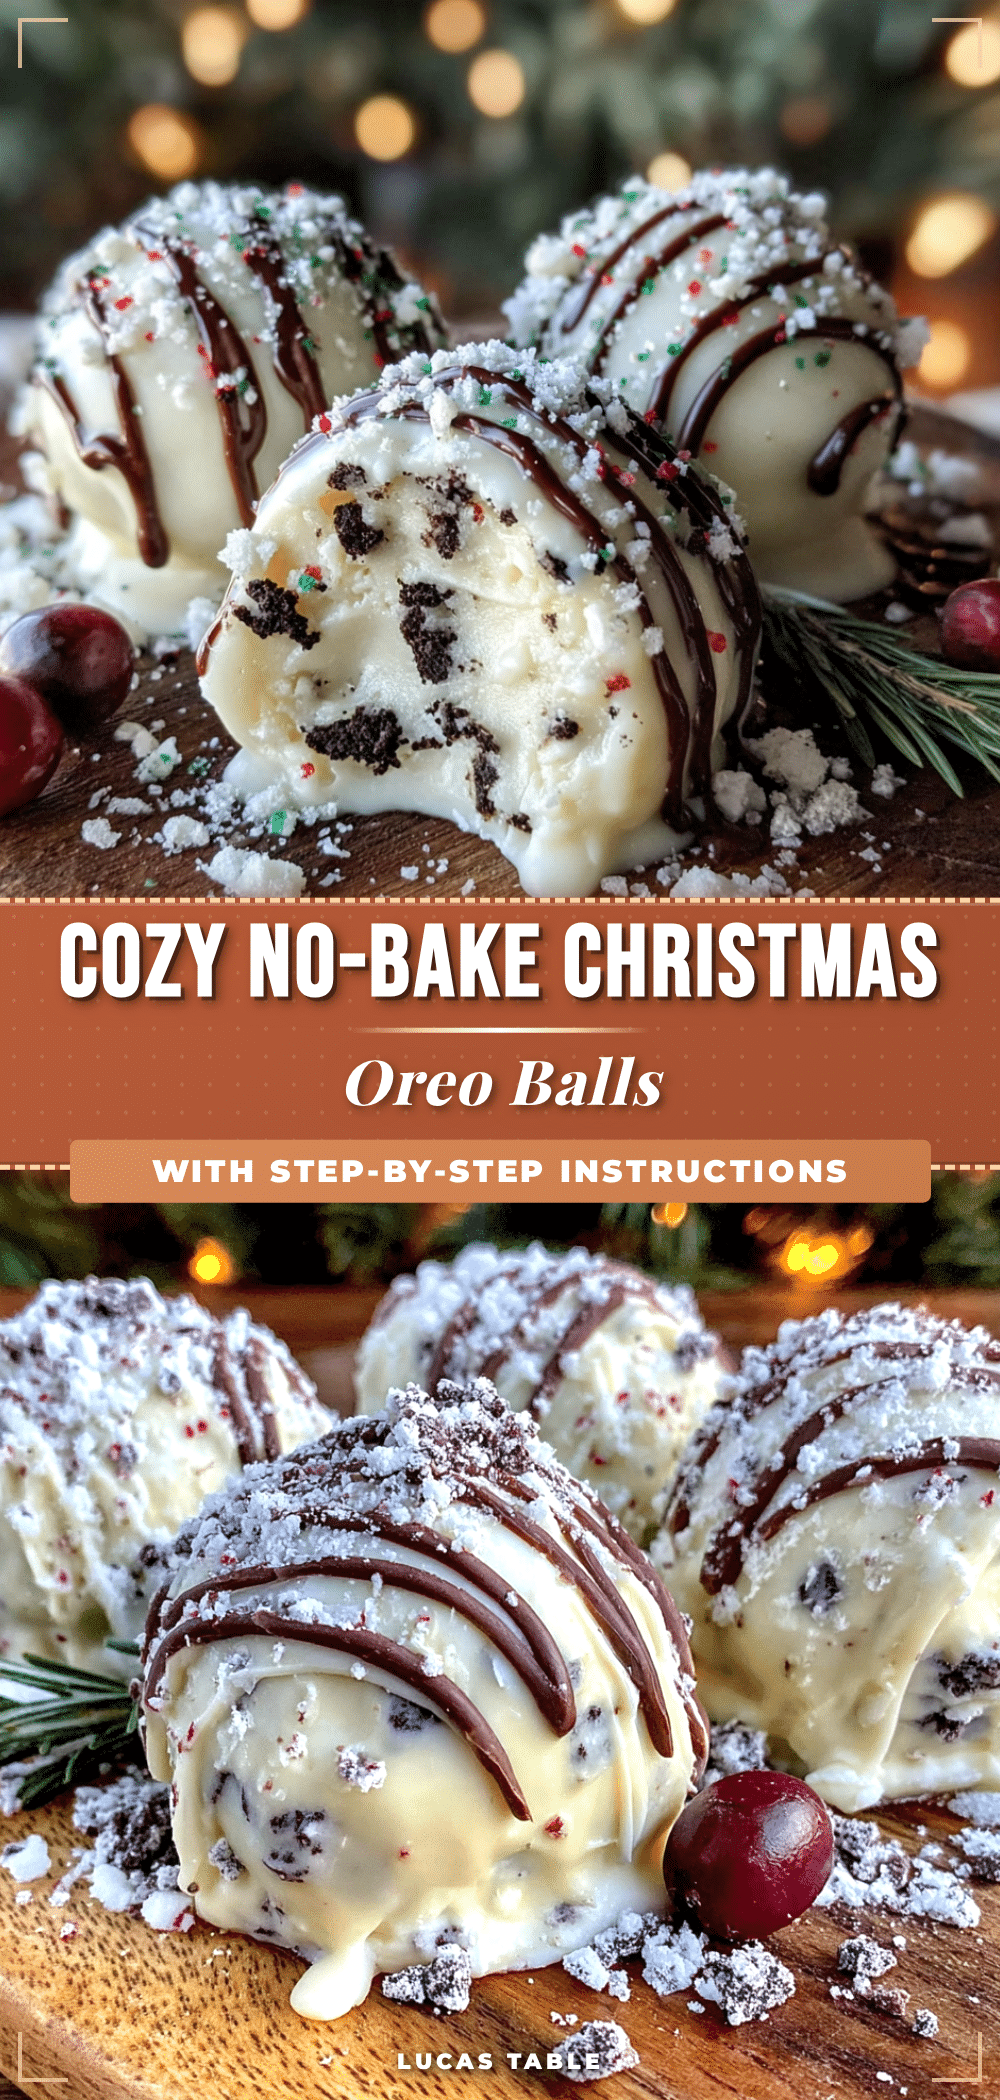
Cozy No-Bake Christmas Oreo Balls: Easy 3-Ingredient Treat

These no-bake Christmas Oreo balls are a quick and easy holiday treat made with just three ingredients: Oreos, cream cheese, and white chocolate. Perfect for parties, cookie swaps, or last-minute dessert emergencies, they come together in under 20 minutes and look festive on any platter.
- Prep Time: 20 minutes
- Cook Time: 0 minutes
- Total Time: 1 hour 5 minutes (includes chilling and setting time)
- Yield: 28 servings 1x
- Category: Dessert
- Cuisine: American
Ingredients
- 1 (14.3 oz) package Oreo cookies (regular, not double-stuf)
- 8 oz cream cheese, softened to room temperature
- 12 oz white chocolate melting wafers or white chocolate chips
- 1–2 tablespoons coconut oil or vegetable shortening (optional, for thinning chocolate)
- Christmas sprinkles, crushed candy canes, or festive decorations (for topping)
Instructions
- Crush the Oreos: Place the entire package of Oreos (cream filling and all) into a food processor. Pulse until you get fine, sand-like crumbs. Do not overprocess into a paste.
- Soften the cream cheese: Leave cream cheese on the counter for at least 30 minutes to reach room temperature. Do not microwave.
- Mix the base: In a large bowl, combine crushed Oreo crumbs and softened cream cheese. Fold together with a rubber spatula until no white streaks remain. The mixture should hold together when squeezed.
- Chill the mixture: Cover the bowl with plastic wrap and refrigerate for 30 minutes. Line a baking sheet with parchment paper.
- Roll the balls: Using a cookie scoop or tablespoon, portion out the mixture and roll between your palms to form 1-inch balls. Place on the parchment-lined baking sheet. You should get about 24-30 balls.
- Freeze the balls: Place the baking sheet with rolled balls in the freezer for at least 15 minutes.
- Melt the white chocolate: Place white chocolate wafers or chips in a microwave-safe bowl. Microwave in 30-second intervals, stirring between each, until smooth. Add 1 tablespoon of coconut oil if chocolate seems too thick.
- Dip the balls: Working with 3-4 balls at a time (keep rest in freezer), drop each ball into melted white chocolate. Use a fork to roll until fully coated. Lift out, tap fork on bowl edge to remove excess, and place back on parchment paper.
- Add decorations: While white chocolate is still wet, sprinkle on Christmas sprinkles, crushed candy canes, or other decorations. Work quickly as chocolate sets fast on frozen balls.
- Set and serve: Let coated balls sit at room temperature until chocolate is completely set, about 15-20 minutes. Or refrigerate for 10 minutes. Serve immediately or store.
Notes
For best results, use regular Oreos (not double-stuf) and full-fat cream cheese. Freeze the rolled balls before dipping to prevent cracking. Store in an airtight container in the refrigerator for up to 2 weeks, or freeze for up to 3 months.
Nutrition
- Serving Size: 1 ball
- Calories: 145
- Sugar: 12
- Sodium: 95
- Fat: 9
- Saturated Fat: 5
- Carbohydrates: 16
- Protein: 2
Keywords: Christmas Oreo balls, no-bake dessert, Oreo truffles, holiday treats, easy Christmas dessert, 3-ingredient dessert, white chocolate Oreo balls


