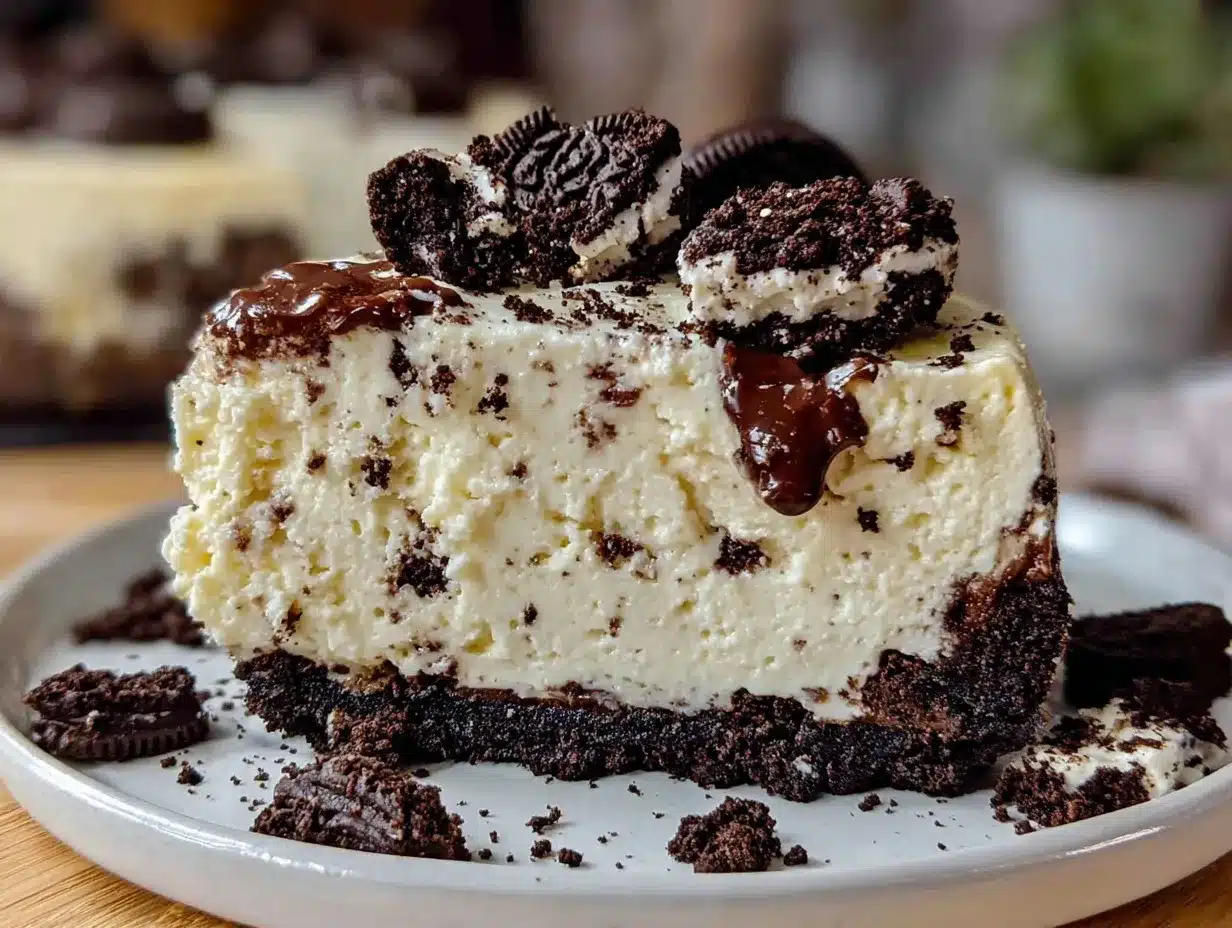
Let me tell you, the scent of crushed Oreos mingling with velvety cream cheese is enough to make anyone’s mouth water. The first time I whipped up this Creamy No-Bake Oreo Cheesecake Delight, I was instantly hooked—the kind of moment where you pause, take a deep breath, and just smile because you know you’re onto something truly special. Years ago, when I was knee-high to a grasshopper, my grandma used to make rich, baked cheesecakes that felt like a warm hug on chilly evenings. But this no-bake version? It’s dangerously easy, delivering pure, nostalgic comfort without heating up the kitchen or waiting hours for the oven to do its magic.
I stumbled upon this recipe on a rainy weekend, craving something sweet but low fuss. My family couldn’t stop sneaking pieces off the cooling rack (and I can’t really blame them). Honestly, this cheesecake delight feels like a warm hug wrapped in cookie crumbs, perfect for potlucks, sweet treats for your kids, or brightening up your Pinterest cookie board with its creamy texture and Oreo crunch. After testing it multiple times—in the name of research, of course—it’s become a staple for family gatherings and gifting. Trust me, you’re going to want to bookmark this one.
Why You’ll Love This Creamy No-Bake Oreo Cheesecake Delight Recipe
From my kitchen to yours, this recipe stands out because it’s the kind of dessert that wins hearts without the stress. Here’s why you’ll be smitten:
- Quick & Easy: Comes together in under 20 minutes, perfect for busy weeknights or last-minute cravings.
- Simple Ingredients: No fancy grocery trips needed; you likely already have everything in your kitchen.
- Perfect for Any Occasion: Great for birthdays, casual get-togethers, or when you just want to treat yourself.
- Crowd-Pleaser: Always gets rave reviews from kids and adults alike—honestly, it disappears fast.
- Unbelievably Delicious: The creamy cheesecake base paired with crunchy Oreo bits creates a texture and flavor combo that feels like pure comfort food.
This isn’t just another Oreo cheesecake—this is the best no-bake version you’ll find. The secret? Blending cream cheese just right for that ultra-smooth, luscious texture, and folding in crushed Oreos for an irresistible crunch. Plus, skipping the oven means it keeps all that creamy goodness intact. It’s comfort food reimagined—faster, lighter, but still soul-soothing. Perfect for impressing guests without the fuss or turning a simple dessert into a memorable delight.
What Ingredients You Will Need
This Creamy No-Bake Oreo Cheesecake Delight uses simple, wholesome ingredients to deliver bold flavor and that satisfying creamy texture without any fuss. Most are pantry staples, and substitutions are easy if you need them.
- For the Crust:
- 24 Oreo cookies (about 1 ¾ cups crushed) – I prefer Nabisco for the perfect crunch
- 5 tablespoons unsalted butter, melted (adds richness and holds the crust together)
- For the Cheesecake Filling:
- 16 oz (450g) cream cheese, softened (full-fat for best creaminess)
- ¾ cup (90g) powdered sugar (for gentle sweetness)
- 1 teaspoon vanilla extract (adds warm depth)
- 1 ½ cups (360ml) heavy cream, cold (whipped to soft peaks)
- 10 Oreo cookies, crushed into small chunks (for folding in)
- Optional Topping:
- Whipped cream and extra Oreo crumbs for garnish
If you want a dairy-free or lighter option, swap cream cheese with a dairy-free cream cheese alternative and heavy cream with coconut cream. For gluten-free, use gluten-free chocolate sandwich cookies instead of Oreos. In summer, try adding fresh berries on top for a bright contrast.
Equipment Needed
- 9-inch (23cm) springform pan or pie dish – springform makes for easy removal
- Mixing bowls – at least two, preferably medium and large
- Electric mixer or stand mixer – for whipping cream and beating cream cheese smoothly
- Food processor or zip-top bag and rolling pin – to crush Oreos finely
- Rubber spatula – for folding and scraping the bowl efficiently
- Measuring cups and spoons – for precise ingredient amounts
If you don’t have a food processor, no worries! Just place the Oreos in a sealed plastic bag and crush them with a rolling pin or heavy pan. A hand mixer works fine if you don’t own a stand mixer, but patience is key for achieving the perfect whipped cream. For budget-friendly options, thrift stores often have springform pans in great shape.
Preparation Method
- Prepare the Crust: Start by crushing 24 Oreo cookies into fine crumbs. You want about 1 ¾ cups total. Mix the crumbs with 5 tablespoons of melted unsalted butter until the mixture looks like wet sand. Press this mixture firmly into the bottom of your springform pan, creating an even layer. Chill in the fridge while you prepare the filling. (This usually takes about 10 minutes.)
- Make the Cheesecake Filling: In a large bowl, beat 16 oz (450g) of softened cream cheese with ¾ cup (90g) powdered sugar and 1 teaspoon vanilla extract. Beat until smooth and creamy, no lumps! This should take about 3-4 minutes with an electric mixer on medium speed. (If the cream cheese isn’t soft enough, the filling will be lumpy.)
- Whip the Cream: In a separate chilled bowl, whip 1 ½ cups (360ml) of cold heavy cream to soft peaks. You’ll know it’s ready when the cream holds gentle peaks but still looks silky—not stiff. This usually takes about 3-5 minutes. (Be careful not to overwhip or you’ll get butter!)
- Combine Filling and Whipped Cream: Gently fold about half of the whipped cream into the cream cheese mixture to lighten it. Then fold in the remaining whipped cream until fully blended. Next, fold in 10 crushed Oreo cookies—small chunks, not dust! This adds that perfect Oreo crunch in every bite. (Folding gently keeps the filling airy.)
- Assemble the Cheesecake: Pour the filling over the chilled crust, smoothing the top with a spatula. Cover with plastic wrap and refrigerate for at least 4 hours, preferably overnight. This allows the cheesecake to firm up and flavors to meld beautifully.
- Serve: When ready, remove the cheesecake from the springform pan. Garnish with whipped cream and extra Oreo crumbs if desired. Slice with a warm knife for clean cuts. (Dipping the knife in hot water and wiping it dry between slices works wonders.)
Cooking Tips & Techniques for a Perfect No-Bake Oreo Cheesecake
Let me share some tips I learned after a few too many cheesecake “experiments.” First, patience is your best friend—don’t rush the chilling time. The filling needs those hours in the fridge to set properly. Also, softening the cream cheese is key; cold cream cheese leads to lumps, and nobody wants that.
When whipping cream, keep your bowl and beaters cold—pop them in the fridge or freezer for a bit before starting. It helps the cream whip faster and fluffier, giving you that light texture that feels like a cloud. Folding is an art—use a gentle touch and a rubber spatula to avoid deflating the cream. And don’t skip the vanilla extract; it’s the secret that brings all the flavors together.
If your crust feels too crumbly, add a little extra melted butter next time—just a tablespoon or so. Finally, use a warm knife when slicing to avoid crumbling the edges. I once learned this the hard way after a messy first slice, but it’s a game-changer!
Variations & Adaptations You Can Try
This Creamy No-Bake Oreo Cheesecake Delight is a flexible canvas for creativity. Here are a few of my favorite twists:
- Mint Oreo Variation: Swap regular Oreos for mint-flavored ones for a refreshing twist. Add a few drops of peppermint extract to the filling for an extra pop.
- Peanut Butter Swirl: Fold in a few tablespoons of creamy peanut butter into the cheesecake filling before adding Oreos. It adds a rich, nutty depth that pairs beautifully with chocolate.
- Berry Topping: For a fruity spin, top the cheesecake with fresh strawberries, raspberries, or blueberries. A drizzle of berry compote makes it even more special.
- Gluten-Free Option: Use gluten-free chocolate sandwich cookies in place of Oreos to keep it safe for gluten-sensitive friends.
- Dairy-Free Version: Swap cream cheese and heavy cream with coconut-based alternatives. Keep in mind texture will be slightly different but still delicious.
I recently tried adding espresso powder to the crust for a mocha Oreo cheesecake, and it was a hit! Small tweaks like these can make the recipe your own while keeping that creamy, dreamy base intact.
Serving & Storage Suggestions
This cheesecake is best served chilled—straight from the fridge when the filling is firm but still creamy. Present it on a cake stand or pretty plate, garnished with whipped cream and extra Oreo crumbs for that irresistible look. It pairs wonderfully with a cup of strong coffee or a glass of cold milk.
Store leftovers tightly wrapped in plastic wrap or in an airtight container in the refrigerator. It keeps beautifully for up to 4 days, and honestly, it tastes even better the next day as the flavors settle in. For longer storage, you can freeze individual slices wrapped well; thaw overnight in the fridge before serving.
When reheating (if you want it slightly softer), just let slices sit at room temperature for 15-20 minutes—no microwave needed. This dessert really shines when you give it a little time to come to the perfect creamy consistency.
Nutritional Information & Benefits
This Creamy No-Bake Oreo Cheesecake Delight isn’t exactly a diet food, but it’s a delightful treat worth savoring. Each serving (about 1/12th of the cheesecake) contains roughly 350 calories, 25 grams fat, 30 grams carbohydrates, and 5 grams protein.
Cream cheese provides calcium and protein, while the Oreos add that nostalgic chocolate flavor. Using heavy cream gives it that luscious mouthfeel, though you can opt for lighter dairy or plant-based alternatives to reduce fat content. This recipe is gluten-containing unless you use gluten-free cookies, and it contains dairy, so keep that in mind for allergies.
Honestly, it’s a treat to enjoy mindfully—perfect for celebrations or when you want a little indulgence with no fuss.
Conclusion
If you’re looking for a dessert that’s creamy, crunchy, and downright comforting without turning on the oven, this Creamy No-Bake Oreo Cheesecake Delight is your new best friend. It’s quick, simple, and endlessly customizable to suit your taste buds or dietary needs.
I love this recipe because it brings back those cozy family moments without the hassle—plus, it always disappears fast (which says a lot!). Take your time with it, add your personal flair, and don’t forget to share how it turns out.
Feel free to leave a comment below with your tweaks or stories, and if you loved this recipe, pass it on to someone who deserves a little sweetness today. Happy cheesecake making!
Frequently Asked Questions
Can I use low-fat cream cheese for this recipe?
Yes, but note the texture may be less creamy and slightly tangier. Full-fat cream cheese gives the best results.
How long does the cheesecake need to chill before serving?
At least 4 hours, but overnight chilling is best for firm texture and flavor melding.
Can I make this cheesecake ahead of time?
Absolutely! It keeps well in the fridge for up to 4 days and can be frozen if wrapped properly.
What’s the best way to crush Oreos without a food processor?
Place Oreos in a sealed plastic bag and crush them with a rolling pin or heavy pan until finely ground.
Is it possible to make this recipe vegan?
You can try using vegan cream cheese and coconut cream, and vegan sandwich cookies, but the texture and flavor will differ from the traditional version.
Pin This Recipe!

Creamy No-Bake Oreo Cheesecake Delight
A quick and easy no-bake Oreo cheesecake with a creamy texture and crunchy Oreo bits, perfect for any occasion and a crowd-pleaser dessert.
- Prep Time: 15 minutes
- Cook Time: 0 minutes
- Total Time: 4 hours 15 minutes
- Yield: 12 servings 1x
- Category: Dessert
- Cuisine: American
Ingredients
- 24 Oreo cookies (about 1 ¾ cups crushed)
- 5 tablespoons unsalted butter, melted
- 16 oz (450g) cream cheese, softened
- ¾ cup (90g) powdered sugar
- 1 teaspoon vanilla extract
- 1 ½ cups (360ml) heavy cream, cold
- 10 Oreo cookies, crushed into small chunks
- Optional: whipped cream and extra Oreo crumbs for garnish
Instructions
- Prepare the crust by crushing 24 Oreo cookies into fine crumbs (about 1 ¾ cups). Mix with 5 tablespoons melted unsalted butter until mixture resembles wet sand. Press firmly into the bottom of a 9-inch springform pan. Chill in the fridge for about 10 minutes.
- In a large bowl, beat 16 oz softened cream cheese with ¾ cup powdered sugar and 1 teaspoon vanilla extract until smooth and creamy, about 3-4 minutes.
- In a separate chilled bowl, whip 1 ½ cups cold heavy cream to soft peaks, about 3-5 minutes.
- Gently fold half of the whipped cream into the cream cheese mixture to lighten it, then fold in the remaining whipped cream until fully blended. Fold in 10 crushed Oreo cookies in small chunks.
- Pour the filling over the chilled crust and smooth the top with a spatula. Cover with plastic wrap and refrigerate for at least 4 hours or overnight.
- Remove cheesecake from the springform pan. Garnish with whipped cream and extra Oreo crumbs if desired. Slice with a warm knife for clean cuts.
Notes
Chill the cheesecake for at least 4 hours or overnight for best results. Use softened cream cheese to avoid lumps. Keep bowl and beaters cold when whipping cream. Fold gently to keep filling airy. Use a warm knife for clean slicing. For dairy-free or gluten-free options, substitute ingredients accordingly.
Nutrition
- Serving Size: 1 slice (1/12th of c
- Calories: 350
- Fat: 25
- Carbohydrates: 30
- Protein: 5
Keywords: no-bake cheesecake, Oreo cheesecake, easy dessert, creamy cheesecake, Oreo dessert, no-bake dessert, quick cheesecake