“You’ve got to try this—it’s like a chocolate explosion with a surprise inside,” my friend texted me one chilly evening, and honestly, I was skeptical. Red velvet lava cakes? I pictured some fancy dessert that needed hours of work or rare ingredients. But curiosity got the better of me, and I decided to give it a shot after a long, tiring day that had me reaching for comfort food (again).
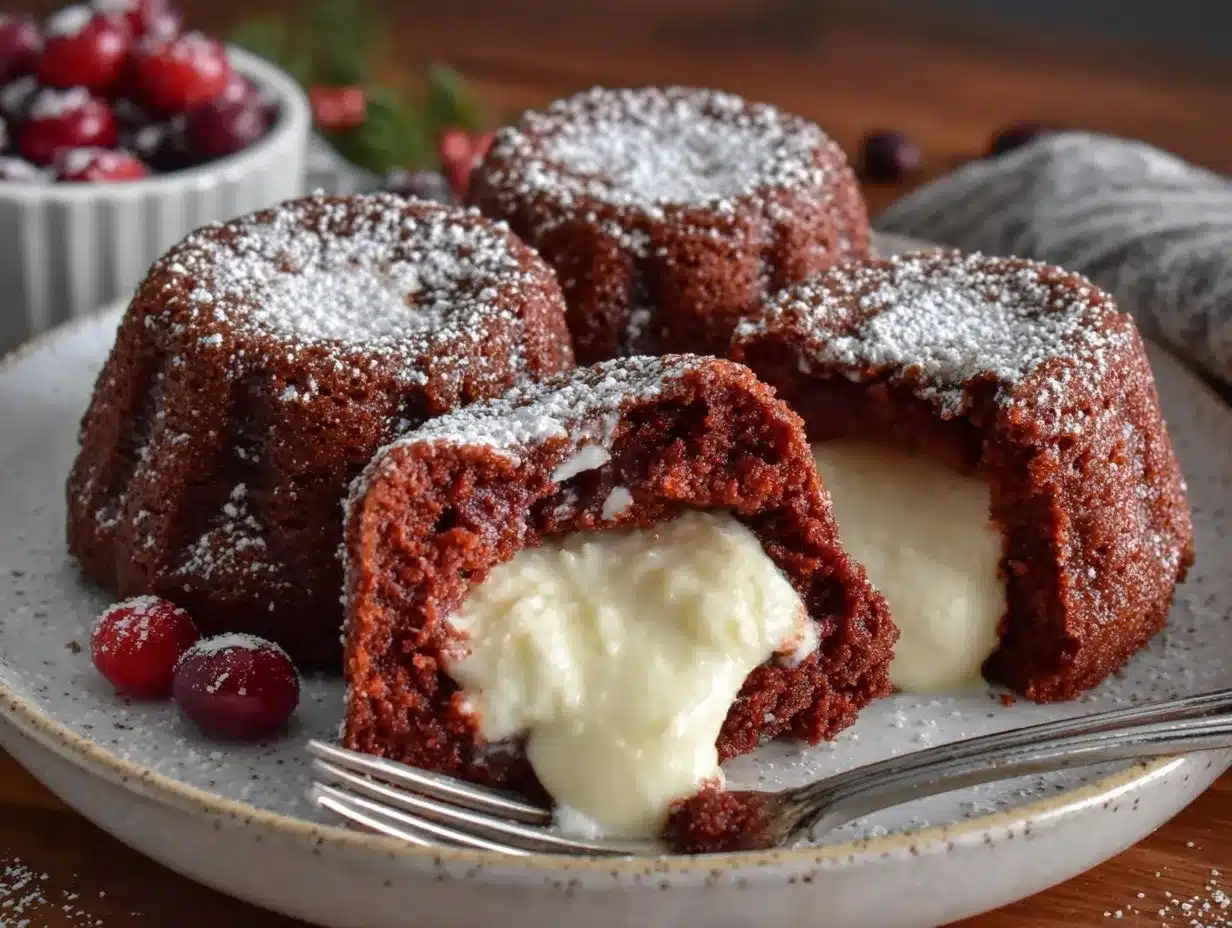
What happened next was a quiet revelation. The moment I cut into the cake and that rich, molten cream cheese center oozed out, I was hooked. It wasn’t just the vibrant red color or the decadent chocolate aroma filling my kitchen—it was the perfect balance of tangy cream cheese melting into the soft, cocoa-infused cake. The recipe quickly became my go-to when I needed a little indulgence with zero fuss.
There’s something about the simplicity and richness of these decadent red velvet lava cakes with cream cheese center that feels like a warm hug on a plate. They’re not just desserts; they’re little moments of joy I sneak in when life’s hectic. And the best part? You don’t have to be a pastry chef to pull them off. This recipe stuck around because it’s approachable, rewarding, and honestly, a little bit addictive.
Why You’ll Love This Recipe
After making these decadent red velvet lava cakes more times than I can count, I’ve picked up a few reasons why they keep winning me over—and my friends too:
- Quick & Easy: Ready in under 30 minutes, these cakes fit perfectly into busy weeknights or last-minute dessert cravings.
- Simple Ingredients: No specialty stores required. You probably already have the pantry staples—like cocoa, cream cheese, and red food coloring—on hand.
- Perfect for Special Occasions: Whether it’s a cozy date night or a festive holiday, these cakes bring that wow factor without the stress.
- Crowd-Pleaser: Kids, adults, picky eaters—they all ask for seconds (and thirds!).
- Unbelievably Delicious: The contrast between the tender red velvet crumb and the luscious cream cheese center is sheer magic.
This isn’t just another red velvet cake. What sets it apart is the molten cream cheese core that stays perfectly gooey while the cake bakes just enough to hold its shape. The recipe’s tested balance of cocoa and buttermilk gives it that classic tang and deep flavor, taking it way beyond your typical boxed mix. It’s a dessert that feels both indulgent and comforting—a rare treat that you can pull off without stress.
Honestly, after trying this, you might find yourself craving it even on the busiest days, much like I did. It’s that kind of recipe that quietly promises a little slice of happiness every time you make it.
What Ingredients You Will Need
This recipe uses simple, wholesome ingredients to deliver bold flavor and a satisfying molten texture without fuss. Most of these are pantry staples, so you can whip up these decadent red velvet lava cakes whenever the craving hits.
- For the Cake Batter:
- All-purpose flour – 1 cup (120 g), sifted for lightness
- Unsweetened cocoa powder – 2 tablespoons (use a good quality like Valrhona for richer taste)
- Granulated sugar – ¾ cup (150 g), adds sweetness
- Unsalted butter – 6 tablespoons (85 g), melted and cooled
- Buttermilk – ½ cup (120 ml), brings tang and moisture (substitute with milk + 1 tsp lemon juice if needed)
- Large egg – 1, room temperature for better mixing
- Vanilla extract – 1 teaspoon, enhances flavor
- Red food coloring – 1 tablespoon (liquid or gel, gel works best for vibrant color)
- Baking powder – ½ teaspoon, for lift
- Salt – ¼ teaspoon, balances sweetness
- For the Cream Cheese Center:
- Cream cheese – 4 ounces (115 g), softened (I like Philadelphia brand for smooth texture)
- Powdered sugar – ¼ cup (30 g), sweetens without grittiness
- Vanilla extract – ½ teaspoon
Feel free to swap all-purpose flour with almond flour for a gluten-free twist, though the texture will be a bit different. For dairy-free, use coconut cream cheese and plant-based milk. Seasonal berry sauce pairs beautifully on top if you want a fresh contrast.
Equipment Needed
- Ramekins or small oven-safe molds (6-ounce size works well) – for individual lava cakes
- Mixing bowls – at least two (one for batter, one for cream cheese filling)
- Electric mixer or sturdy whisk – to get the cream cheese filling silky smooth
- Measuring cups and spoons – for precise ingredient amounts
- Spatula – for folding batter gently
- Oven – preheated to 425°F (220°C) for that perfect molten center
- Baking sheet – to place ramekins on for easy handling
If ramekins aren’t on hand, you can use silicone muffin cups but watch baking time closely. I’ve found that a small offset spatula helps with even batter distribution, but a regular spoon works just fine. No fancy tools needed—just a few basics you probably have around.
Preparation Method
- Preheat your oven to 425°F (220°C). Lightly butter and flour the ramekins, tapping out excess flour to prevent sticking.
- Prepare the cream cheese center: In a bowl, beat the softened cream cheese with powdered sugar and vanilla extract until smooth and creamy. Cover and chill while you make the batter (about 10 minutes).
- Make the cake batter: In a medium bowl, whisk together sifted flour, cocoa powder, baking powder, and salt. Set aside.
- In a separate bowl, combine melted butter and granulated sugar. Stir until combined but don’t overmix. Add the egg, vanilla extract, and red food coloring, mixing until smooth and uniform.
- Alternate adding the dry ingredients and buttermilk to the wet mixture. Start and end with the dry ingredients. Fold gently just until combined—don’t overwork the batter or it may turn dense.
- Fill ramekins: Spoon about 2 tablespoons (30 ml) of cake batter into the bottom of each ramekin. Then add about 1 tablespoon (15 ml) of the cream cheese filling in the center. Top with another 2 tablespoons (30 ml) of cake batter, covering the cream cheese completely.
- Bake for 12 to 14 minutes. The edges should be set but the center still slightly jiggly. Overbaking will lose the molten effect.
- Cool for 2 minutes, then run a knife around the edges. Carefully invert onto a dessert plate. The cream cheese center should ooze out like a little lava flow.
Watch for visual cues: the cakes will puff up and crack slightly on top. The smell of cocoa and vanilla will fill your kitchen—trust me, it’s delightful. If you want to speed things up, you can prepare the cream cheese center ahead and keep it chilled, just scoop it out when ready to assemble.
Cooking Tips & Techniques
Getting that perfect molten core can be tricky at first, but here’s what I’ve learned through trial and error:
- Don’t overfill ramekins: Leaving enough space on top allows the cake to rise without spilling over, but still covers the cream cheese center.
- Temperature matters: A hot oven (425°F/220°C) is crucial to bake the edges quickly while keeping the center gooey.
- Timing is everything: Baking even a minute too long can firm up the lava. Start checking at 12 minutes.
- Chill the cream cheese filling: It helps maintain that lovely molten texture inside without melting completely before baking.
- Use room temperature eggs: They incorporate better, giving a smoother batter.
I once baked these at a lower temperature and ended up with a cakey dessert instead of lava cakes—lesson learned! Multitasking while baking is possible, like throwing together a quick zesty lemon chicken or a 15-minute spaghetti aglio olio for dinner, then sliding your ramekins in during the last 15 minutes. That way, dessert is fresh and impressive without extra stress.
Variations & Adaptations
These decadent red velvet lava cakes can be customized easily to suit different preferences and dietary needs:
- Vegan option: Use dairy-free cream cheese (like Kite Hill) and substitute egg with flaxseed meal (1 tbsp flaxseed + 3 tbsp water) for a plant-based version.
- Flavor twist: Add a teaspoon of instant espresso powder to the batter to deepen the chocolate flavor without overpowering the red velvet essence.
- Seasonal touch: Top with fresh raspberries or a drizzle of raspberry coulis to brighten the richness and add a tangy contrast.
- Mini cakes: Use a mini muffin tin for bite-sized lava cakes—perfect for parties or when you want just a taste of indulgence.
- Spice it up: Sprinkle a pinch of cinnamon or cayenne pepper into the batter for a subtle warmth that surprises the palate.
I once swapped the cream cheese center for a swirl of peanut butter and it was surprisingly good—something to think about if you’re feeling adventurous. For a quicker dessert, you might enjoy pairing these with the quick creamy tuna pasta or a simple quick crispy chicken fried rice for a full meal experience followed by this sweet treat.
Serving & Storage Suggestions
Serve these decadent red velvet lava cakes warm to fully enjoy the molten cream cheese center. A scoop of vanilla ice cream or a dollop of whipped cream adds an extra layer of indulgence.
They look stunning dusted with powdered sugar or garnished with a few fresh berries. Presentation-wise, a simple white plate showcases the vivid red color beautifully.
To store, cover leftover cakes tightly with plastic wrap and keep them in the refrigerator for up to 3 days. Reheat gently in the microwave for 20-30 seconds—just enough to warm the center without drying out the cake.
These cakes also freeze well! Wrap each cake individually in plastic wrap and store in an airtight container for up to 2 months. When ready, thaw overnight in the fridge and warm before serving.
Flavors actually deepen a bit after resting, so if you plan ahead, they taste even richer the next day.
Nutritional Information & Benefits
Each decadent red velvet lava cake (serving size: 1 ramekin) contains approximately:
| Calories | 320 |
|---|---|
| Fat | 18g |
| Carbohydrates | 35g |
| Protein | 5g |
| Sugar | 25g |
Key ingredients like cocoa powder provide antioxidants and mood-boosting compounds. Cream cheese offers calcium and protein, though it’s best enjoyed in moderation. For those watching carbs, swapping all-purpose flour with almond flour reduces carbs and adds healthy fats.
Gluten-sensitive eaters can use gluten-free flour blends without losing texture, making this dessert accessible to many. That said, it contains dairy and eggs, so it’s not suitable for strict vegan or allergen-free diets unless adapted.
From a wellness perspective, this dessert strikes a nice balance between indulgence and ingredient simplicity—comfort food that doesn’t rely on artificial additives or processed mixes.
Conclusion
These decadent red velvet lava cakes with cream cheese center are proof that impressive desserts don’t have to be complicated or time-consuming. Whether you’re celebrating a special moment or just craving a little sweet comfort, this recipe comes through every time.
Feel free to tweak the flavors, add your favorite toppings, or even pair it with a quick savory meal like a crispy BBQ chicken pizza for a balanced dinner and dessert combo. It’s a recipe that fits your lifestyle and taste buds, evolving as you make it your own.
Honestly, I keep coming back to this one because it’s reliable, delicious, and just the right kind of indulgence. Give it a try—you might find it becomes your new favorite way to end a meal.
FAQs
- Can I make these lava cakes ahead of time? Yes! Assemble them and refrigerate for up to 24 hours before baking. Just add a minute or two to the baking time if chilled.
- What if I don’t have ramekins? Small oven-safe cups or silicone muffin molds work fine. Just adjust baking time and watch closely.
- How do I get the cream cheese center gooey? Use softened cream cheese and don’t overbake. The center should jiggle slightly when you take it out.
- Can I freeze the cakes? Absolutely! Freeze unbaked, wrapped tightly, for up to 2 months. Thaw and bake as usual.
- Is there a dairy-free version? Use dairy-free cream cheese and plant-based milk substitutes, and replace the egg with a flax egg for a vegan adaptation.
Pin This Recipe!
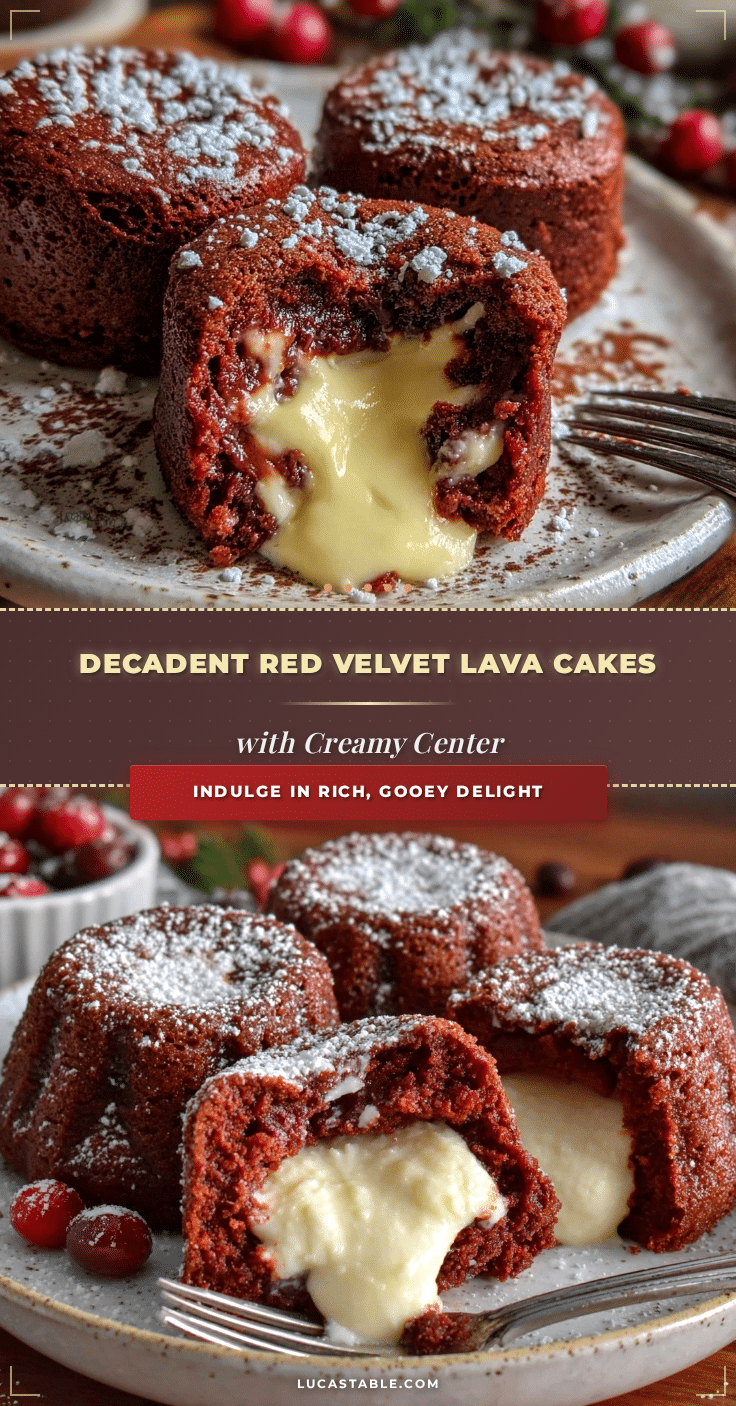
Decadent Red Velvet Lava Cakes Recipe Easy Homemade with Cream Cheese Center
These decadent red velvet lava cakes feature a rich, molten cream cheese center and a tender cocoa-infused cake, perfect for quick indulgence with simple ingredients.
- Prep Time: 15 minutes
- Cook Time: 14 minutes
- Total Time: 29 minutes
- Yield: 6 servings 1x
- Category: Dessert
- Cuisine: American
Ingredients
- 1 cup all-purpose flour (120 g), sifted
- 2 tablespoons unsweetened cocoa powder
- 3/4 cup granulated sugar (150 g)
- 6 tablespoons unsalted butter (85 g), melted and cooled
- 1/2 cup buttermilk (120 ml) (or milk + 1 tsp lemon juice)
- 1 large egg, room temperature
- 1 teaspoon vanilla extract
- 1 tablespoon red food coloring (liquid or gel)
- 1/2 teaspoon baking powder
- 1/4 teaspoon salt
- 4 ounces cream cheese (115 g), softened
- 1/4 cup powdered sugar (30 g)
- 1/2 teaspoon vanilla extract
Instructions
- Preheat your oven to 425°F (220°C). Lightly butter and flour the ramekins, tapping out excess flour to prevent sticking.
- Prepare the cream cheese center: In a bowl, beat the softened cream cheese with powdered sugar and vanilla extract until smooth and creamy. Cover and chill for about 10 minutes.
- Make the cake batter: In a medium bowl, whisk together sifted flour, cocoa powder, baking powder, and salt. Set aside.
- In a separate bowl, combine melted butter and granulated sugar. Stir until combined but don’t overmix. Add the egg, vanilla extract, and red food coloring, mixing until smooth and uniform.
- Alternate adding the dry ingredients and buttermilk to the wet mixture, starting and ending with the dry ingredients. Fold gently just until combined—don’t overwork the batter.
- Fill ramekins: Spoon about 2 tablespoons (30 ml) of cake batter into the bottom of each ramekin. Add about 1 tablespoon (15 ml) of the cream cheese filling in the center. Top with another 2 tablespoons (30 ml) of cake batter, covering the cream cheese completely.
- Bake for 12 to 14 minutes. The edges should be set but the center still slightly jiggly. Avoid overbaking to maintain the molten effect.
- Cool for 2 minutes, then run a knife around the edges. Carefully invert onto a dessert plate. The cream cheese center should ooze out like lava.
Notes
Do not overbake to keep the molten center gooey. Use room temperature eggs for better batter texture. Chill the cream cheese filling before assembling. If using silicone muffin cups, watch baking time closely. You can prepare the cream cheese center ahead and keep chilled. For gluten-free, substitute all-purpose flour with almond flour. For dairy-free, use coconut cream cheese and plant-based milk. Freeze unbaked cakes wrapped tightly for up to 2 months.
Nutrition
- Serving Size: 1 ramekin
- Calories: 320
- Sugar: 25
- Fat: 18
- Carbohydrates: 35
- Protein: 5
Keywords: red velvet lava cakes, cream cheese lava cake, molten lava cake, easy dessert, quick red velvet cake, homemade lava cake, chocolate dessert