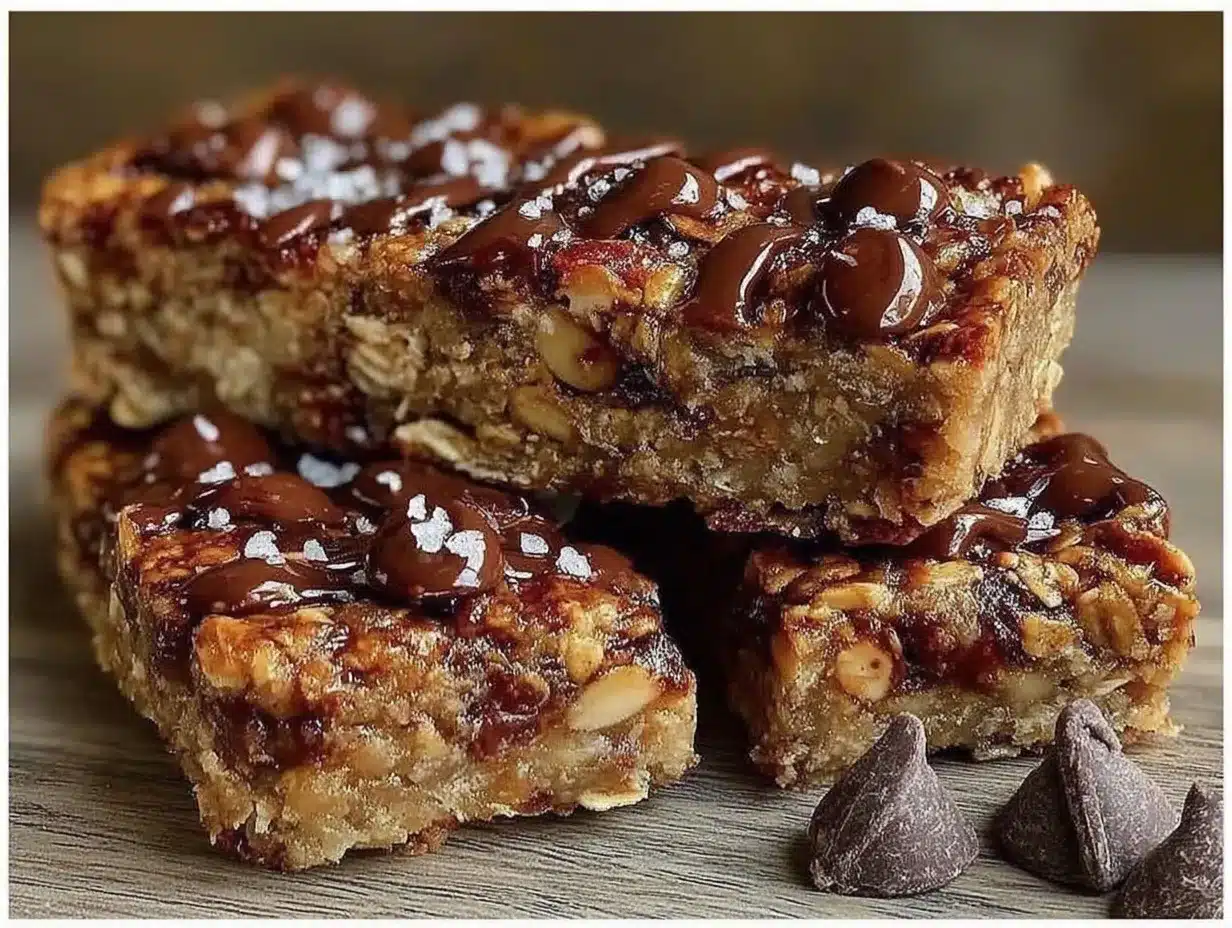
“Are you sure these are no-bake?” my friend asked skeptically, eyeing the sticky, chewy bars I’d just pulled from the fridge. Honestly, I get it. I’d always thought homemade granola bars meant turning on the oven and babysitting trays. But this recipe? It’s a game changer. I stumbled upon it during one of those chaotic mornings when the usual breakfast options vanished faster than I could blink.
I was juggling a cranky toddler, a ringing phone, and an empty pantry. The idea of baking anything felt like a joke. That’s when I grabbed a handful of pantry staples—rolled oats, peanut butter, honey—and tossed in some chocolate chips, mostly as a treat (because, why not?). No timer, no heat, just mixing and chilling. The result was surprisingly chewy and satisfying, the kind of snack that sticks with you in the best way.
Since then, I’ve made these granola bars multiple times a week, tweaking the mix to get that perfect chewy texture without turning my kitchen into a sauna. It’s become my go-to when I’m out of time but need a snack that doesn’t scream “store-bought.” Plus, I love that they come together so quickly and without turning on the oven—perfect for those busy days when you just want to get something done without fussing.
What really sold me? That moment when I realized these bars were more than just a quick fix—they’re a reliable, tasty snack that my kids love and friends always ask me to bring along. No fancy ingredients, no baking skills, just simple, chewy, chocolate chip goodness that feels like a little win in a hectic day.
So, if you’re tired of the same old snack options and want something easy, chewy, and downright delicious, this easy chewy no-bake chocolate chip granola bars recipe might just become your new favorite. It certainly did for me.
Why You’ll Love This Recipe
After countless trials and a fair share of sticky fingers, I can honestly say this easy chewy no-bake chocolate chip granola bars recipe is one of the most satisfying snacks to whip up. Here’s why it stands out:
- Quick & Easy: Ready in under 15 minutes, these bars are perfect when you need a snack ASAP without sacrificing taste.
- Simple Ingredients: No need for exotic shopping trips—just pantry staples like oats, peanut butter, and honey, plus chocolate chips for that sweet touch.
- Perfect for On-the-Go: Whether packing lunchboxes, fueling hikes, or stashing in your desk drawer, these bars hold up well and travel easily.
- Crowd-Pleaser: Kids, coworkers, and friends alike can’t get enough—there’s something about that chewy texture combined with melty chocolate that wins everyone over.
- Unbelievably Delicious: The blend of nutty oats and gooey peanut butter with chocolate chips is comfort food without the heaviness.
This recipe isn’t just another granola bar hack. I’ve played with various sweeteners and nut butters, but this balance hits the spot every time. The secret? A mix of rolled oats for chewiness and just enough binder to keep everything together without turning rock-hard.
It’s also a great entry point for anyone intimidated by baking or who hates waiting for the oven to preheat. Honestly, it feels like cheating—but in the best way possible. Plus, if you enjoy recipes with a quick prep like the quick creamy tuna pasta or easy 15-minute spaghetti aglio olio, you’ll appreciate how this snack fits right into busy schedules.
What Ingredients You Will Need
This recipe uses simple, wholesome ingredients to deliver bold flavor and satisfying texture without the fuss. Most of these are pantry staples that I almost always have on hand, making it super convenient for last-minute snacking.
- Old-Fashioned Rolled Oats (2 cups / 180g) – The base for chewiness and fiber. I prefer Bob’s Red Mill for consistent texture.
- Natural Peanut Butter (1/2 cup / 125g) – Acts as the binder and adds richness. Creamy or chunky works, but creamy gives a smoother bar.
- Honey (1/4 cup / 85g) – The natural sweetener and helps with that sticky, chewy texture.
- Mini Chocolate Chips (1/2 cup / 90g) – The star addition for sweetness and melty pockets of joy. Semi-sweet is my go-to.
- Vanilla Extract (1 tsp) – Just a touch to round out the flavors.
- Salt (1/4 tsp) – Enhances all the flavors and balances the sweetness.
- Optional Mix-Ins: dried cranberries, chopped nuts, or shredded coconut (about 1/4 cup each) – great for adding texture or seasonal flair.
Feel free to swap peanut butter with almond or cashew butter if you want a different nutty profile. For a gluten-free option, double-check your oats’ certification. And if you want to cut down on sugar, maple syrup works well instead of honey, though the texture shifts slightly.
Equipment Needed
- Mixing Bowl: A large bowl to combine all your ingredients comfortably. Glass or stainless steel works fine.
- Wooden Spoon or Silicone Spatula: For mixing sticky ingredients without losing your patience.
- 8×8-inch (20×20 cm) Baking Pan: To press the granola mixture evenly. I line mine with parchment paper to make lifting bars out easier.
- Measuring Cups and Spoons: For accuracy—especially important with sticky ingredients like honey and peanut butter.
- Refrigerator: To chill and set the bars properly.
If you don’t have a baking pan that size, any similarly sized container with straight sides works. I’ve even used a loaf pan or plastic container when pressed for options. Pro tip: pressing the mixture firmly into the pan helps keep the bars from crumbling.
Preparation Method
- Prepare Your Pan: Line an 8×8-inch (20×20 cm) baking pan with parchment paper, leaving some overhang on the sides for easy removal later. This step saves you from a sticky cleanup and helps the bars come out in one piece. (5 minutes)
- Warm the Peanut Butter and Honey: In a microwave-safe bowl, gently heat the peanut butter and honey together for about 30 seconds to 1 minute until they soften and become easier to mix. Stir until smooth and combined. This little warm-up makes the mixture more manageable and ensures everything binds well. (2 minutes)
- Mix Dry Ingredients: In your large mixing bowl, combine the rolled oats, salt, and any optional mix-ins like nuts or dried fruit. Stir to evenly distribute. (2 minutes)
- Combine Wet and Dry: Pour the warmed peanut butter and honey mixture over the oats. Add vanilla extract. Stir everything together thoroughly until every oat is coated and the mixture looks sticky and clumpy. (3 minutes)
- Add Chocolate Chips: Let the mixture cool slightly (to avoid melting the chips completely), then fold in the mini chocolate chips gently. This keeps them from melting into a muddy mess but still gives those lovely melty spots. (1 minute)
- Press Mixture Into Pan: Transfer the mixture into your lined pan. Using a spatula or your clean hands, press down firmly and evenly to compact the bars. This step is key for chewy bars that hold together without crumbling. (5 minutes)
- Chill: Cover the pan with plastic wrap and refrigerate for at least 2 hours, or until firm enough to cut. Patience here pays off for perfect chewy texture. (2 hours or overnight)
- Cut and Serve: Use the parchment overhang to lift the set slab from the pan. Slice into bars or squares with a sharp knife. Store any extras in an airtight container in the fridge. (5 minutes)
If the bars crumble when cutting, they might need more chilling time. Also, pressing the mixture firmly before chilling prevents this issue. If you want softer bars, try cutting them sooner but handle carefully.
Cooking Tips & Techniques
Getting chewy granola bars without baking is all about balance, and a few tricks make a big difference:
- Warm Ingredients: Softening peanut butter and honey before mixing helps everything bind smoothly and evenly, avoiding dry patches.
- Firm Pressing: Don’t just plop the mixture into the pan—press it firmly with your hands or spatula. This compacts the oats and sticky bits, creating that satisfying chew.
- Chill Time: Skipping or shortening the chill time leads to crumbly bars. At least 2 hours (or overnight) is ideal for bars that hold together.
- Chocolate Chip Addition: Adding chocolate chips after the mixture cools a bit prevents them from melting completely, keeping the texture interesting.
- Mix-Ins: If you add nuts or dried fruit, chop nuts smaller to avoid bars falling apart, and avoid wet ingredients like fresh fruit which can make bars soggy.
I’ve learned the hard way that rushing the chill or skimping on the pressing causes crumbly bars that disappoint. Also, playing with different nut butters affects texture—almond butter bars are a bit softer, while peanut butter gives that classic chew.
Variations & Adaptations
This easy chewy no-bake chocolate chip granola bars recipe is a great foundation to customize based on your taste or dietary needs.
- Nut-Free Version: Swap peanut butter for sunflower seed butter to keep it allergy-friendly without losing that creaminess.
- Seasonal Twist: Swap chocolate chips for white chocolate and add dried cranberries or chopped apricots for a festive flair, especially around the holidays.
- Protein Boost: Mix in a scoop of your favorite protein powder or some chia seeds to make these bars a more substantial snack or post-workout bite.
- Vegan Option: Use maple syrup instead of honey and dairy-free chocolate chips to make these bars fully plant-based.
- Different Nut Butters: Cashew, almond, or even a blend can alter the flavor profile while keeping the texture delightfully chewy.
I once made a batch with almond butter and added shredded coconut — gave it a tropical vibe that disappeared way too fast at a picnic. Also, if you prefer a softer bar, try reducing oats slightly and upping the nut butter a tad.
Serving & Storage Suggestions
These granola bars are best served chilled or at room temperature. I find they hold their chewy texture nicely straight from the fridge but soften up pleasantly if left out for 10-15 minutes.
Try pairing them with a cup of coffee or a cold glass of milk for a satisfying snack break. They’re also fantastic tucked into lunchboxes or alongside a fresh fruit salad for a balanced afternoon pick-me-up.
For storage, keep the bars in an airtight container in the refrigerator for up to a week. They freeze well too—wrap individual bars in plastic wrap and store in a freezer-safe bag. Thaw at room temperature or pop in the microwave for 15 seconds for a quick treat.
Over time, the flavors actually deepen. Letting the bars chill overnight enhances that nutty, sweet harmony, making them even better the next day.
Nutritional Information & Benefits
Each bar roughly provides:
| Calories | 180-200 kcal |
|---|---|
| Protein | 5g |
| Fat | 9g (mostly healthy fats from nut butter) |
| Carbohydrates | 22g (including 2-3g fiber) |
Thanks to the oats and nut butter, these bars provide a nice dose of fiber and heart-healthy fats, keeping you fuller longer. Using natural peanut butter and honey keeps things less processed, and you can adjust sweetness to your liking.
They’re gluten-free if you pick certified gluten-free oats, and dairy-free if you choose vegan chocolate chips. Just note the nut content for allergy considerations.
For anyone who’s tried the quick 15-minute shrimp fried rice or easy zesty lemon garlic tilapia, you might appreciate how these bars fit into a balanced, real-food approach without complicating your routine.
Conclusion
This easy chewy no-bake chocolate chip granola bars recipe is a keeper for anyone who wants a fuss-free, delicious snack that just works. It’s flexible, fast, and downright tasty—perfect for those moments when you need something homemade but can’t face the oven.
Feel free to tweak the mix-ins or nut butters to suit your cravings or pantry situation. I’ve loved watching friends and family make this their own, whether for school snacks, on-the-go energy, or just a sweet treat.
Personally, these bars remind me that sometimes the best recipes come from simple moments and a little bit of kitchen improvisation. I hope they become a little kitchen secret in your household, too.
If you give this recipe a try, I’d love to hear how you customize it or what mix-ins you add. Just drop a comment below and share your chewy granola bar story!
FAQs About Easy Chewy No-Bake Chocolate Chip Granola Bars
Can I use quick oats instead of rolled oats?
Quick oats are finer and can make the texture a bit mushier. Rolled oats give the best chewiness and structure, but in a pinch, quick oats will still work.
How long do these granola bars last?
Stored in an airtight container in the refrigerator, they last up to a week. You can freeze them for up to 2 months.
Can I use other types of chocolate chips?
Absolutely! Dark chocolate, white chocolate, or even butterscotch chips can add a fun twist.
Is it possible to make these bars nut-free?
Yes, swap peanut butter for sunflower seed butter or a seed butter of your choice for a nut-free version.
Can I add protein powder to this recipe?
Yes, adding a scoop of protein powder can boost nutrition. Just be sure to slightly reduce the oats or add a bit more binder to keep the bars from becoming too dry.
Pin This Recipe!
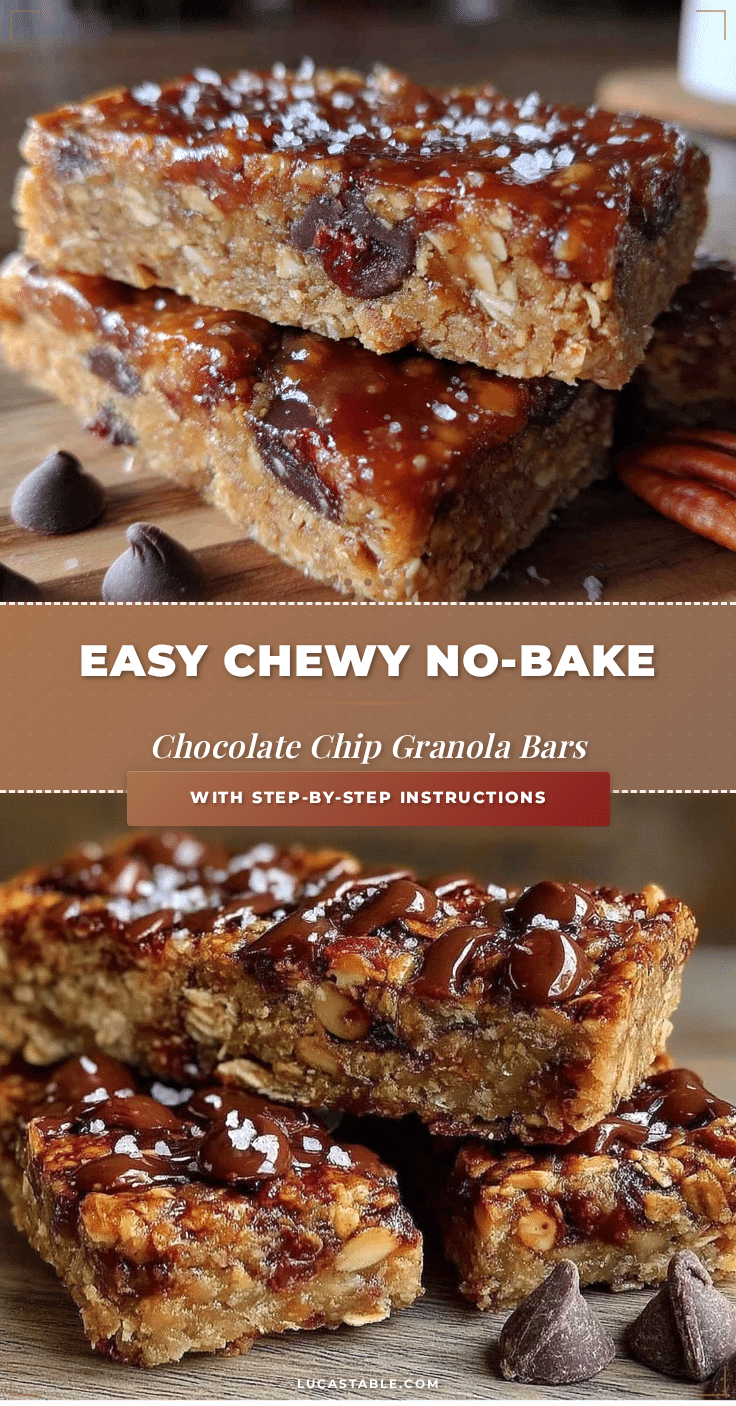
Easy Chewy No-Bake Chocolate Chip Granola Bars
A quick and easy no-bake recipe for chewy chocolate chip granola bars made with simple pantry staples like rolled oats, peanut butter, and honey. Perfect for a satisfying snack without turning on the oven.
- Prep Time: 15 minutes
- Cook Time: 0 minutes
- Total Time: 2 hours 15 minutes
- Yield: 12 bars 1x
- Category: Snack
- Cuisine: American
Ingredients
- 2 cups old-fashioned rolled oats (180g)
- 1/2 cup natural peanut butter (125g)
- 1/4 cup honey (85g)
- 1/2 cup mini chocolate chips (90g)
- 1 tsp vanilla extract
- 1/4 tsp salt
- Optional mix-ins: dried cranberries, chopped nuts, or shredded coconut (about 1/4 cup each)
Instructions
- Line an 8×8-inch (20×20 cm) baking pan with parchment paper, leaving some overhang on the sides for easy removal. (5 minutes)
- Warm the peanut butter and honey together in a microwave-safe bowl for 30 seconds to 1 minute until softened. Stir until smooth and combined. (2 minutes)
- In a large mixing bowl, combine the rolled oats, salt, and any optional mix-ins like nuts or dried fruit. Stir to evenly distribute. (2 minutes)
- Pour the warmed peanut butter and honey mixture over the oats. Add vanilla extract. Stir thoroughly until every oat is coated and the mixture looks sticky and clumpy. (3 minutes)
- Let the mixture cool slightly, then fold in the mini chocolate chips gently to avoid melting them completely. (1 minute)
- Transfer the mixture into the lined pan. Press down firmly and evenly with a spatula or clean hands to compact the bars. (5 minutes)
- Cover the pan with plastic wrap and refrigerate for at least 2 hours or overnight until firm enough to cut. (2 hours or overnight)
- Use the parchment overhang to lift the set slab from the pan. Slice into bars or squares with a sharp knife. Store extras in an airtight container in the fridge. (5 minutes)
Notes
Warm peanut butter and honey before mixing for better binding. Press mixture firmly into pan to avoid crumbly bars. Chill at least 2 hours or overnight for best texture. Add mix-ins like nuts or dried fruit for variety. Use parchment paper overhang for easy removal. For softer bars, reduce oats slightly and increase nut butter.
Nutrition
- Serving Size: 1 bar
- Calories: 190
- Fat: 9
- Carbohydrates: 22
- Fiber: 2.5
- Protein: 5
Keywords: no-bake granola bars, chocolate chip granola bars, chewy granola bars, easy snacks, peanut butter granola bars, healthy snacks, quick snacks