“You’re telling me we’re out of cake for the big game day? Right before halftime?” I muttered, staring at the empty shelves of my local bakery. Honestly, I was scrambling—half panicked, half desperate. But then I remembered this perfect sheet cake recipe I’d stumbled on last minute, the one with that buttercream frosting you can tint to any school colors imaginable. It was a total lifesaver, and honestly, it saved the day better than I expected.
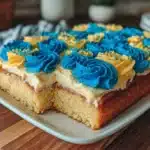
What’s funny is that I wasn’t even planning to make it—just a backup plan lurking in my brain for emergencies. This recipe came from the kind of last-minute dash to the kitchen that any busy parent or unexpected host knows all too well. I whipped it together with whatever I had on hand, and by the time the second quarter rolled around, the cake was not only done but also looking sharp with the perfect splash of our team’s blue and gold on top.
Since then, this “Perfect Sheet Cake with Custom School Colors Buttercream” has become my go-to for celebrations, from school events to casual get-togethers. It’s simple, forgiving, and frankly, the kind of cake that makes you look like you planned the whole thing in advance—even if you didn’t. There’s something quietly satisfying about a cake that tastes like classic comfort but has that personal touch of custom colors making it special.
It’s stuck with me not just because it’s reliable but because it’s a recipe that feels like a little secret weapon—ready whenever you need a fuss-free, crowd-pleasing dessert that still has a personal flair. The more I made it, the more I realized: this cake isn’t just dessert; it’s a celebration starter. And that’s why it’s worth sharing.
Why You’ll Love This Recipe
Honestly, this perfect sheet cake recipe has won me over because it hits all the right notes for busy days and special moments alike. After testing and tweaking it through countless occasions (some planned, some not), I can confidently say it’s one of the most reliable and crowd-pleasing cakes you’ll ever make.
- Quick & Easy: Comes together in under an hour, including baking and frosting, perfect for last-minute celebrations or weekday treats.
- Simple Ingredients: You probably already have everything in your pantry—no hunting for weird or expensive stuff.
- Perfect for School Events: Whether it’s a pep rally, graduation, or birthday, the custom buttercream lets you match any school colors flawlessly.
- Crowd-Pleaser: Kids and adults alike rave about the moist, tender crumb and smooth, creamy frosting.
- Unbelievably Delicious: The balance of vanilla and just the right touch of sweetness makes it feel like classic comfort food with a fresh twist.
What sets this recipe apart? The buttercream frosting is where the magic happens. By blending high-quality unsalted butter with just the right amount of powdered sugar and a splash of vanilla, then tinting it with gel food coloring, you get this ultra-smooth, vibrant icing that stays perfect at room temperature. Not to mention, the sheet cake base has the kind of moist texture that holds up well under frosting without crumbling or drying out.
This isn’t just another sheet cake; it’s the one I turn to when I want something that looks impressive but doesn’t require hours in the kitchen or fancy tools. I’ve even paired it with a simple homemade whipped cream for lighter occasions, but honestly, the buttercream in school colors steals the show every time.
It’s the kind of recipe that makes you feel calm and confident in the kitchen, whether you’re dealing with a last-minute request or planning ahead for a big gathering. For those moments when you want to make something special but don’t want to stress, this cake quietly delivers.
What Ingredients You Will Need
This perfect sheet cake recipe uses straightforward, pantry-friendly ingredients that come together to create a moist, tender cake with buttery, colorful frosting. No fancy shopping trips required!
- For the Cake Batter:
- All-purpose flour – 2 ½ cups (315 g), sifted for a light crumb
- Baking powder – 2 ½ teaspoons (12 g), for that perfect rise
- Salt – ½ teaspoon (3 g), to balance sweetness
- Unsalted butter – 1 cup (227 g), softened (I prefer Land O’Lakes for consistent texture)
- Granulated sugar – 2 cups (400 g), for just the right sweetness
- Large eggs – 4, room temperature (helps with batter emulsification)
- Pure vanilla extract – 1 tablespoon (15 ml), adds warmth and depth
- Whole milk – 1 cup (240 ml), room temperature (you can swap with almond milk for dairy-free)
- For the Custom School Colors Buttercream:
- Unsalted butter – 1 cup (227 g), softened to room temperature
- Powdered sugar – 4 cups (480 g), sifted to avoid lumps
- Pure vanilla extract – 2 teaspoons (10 ml)
- Heavy cream or whole milk – 2-4 tablespoons (30-60 ml), for smooth consistency
- Gel food coloring in your school colors – use gel for vibrant hues and less mess
- Pinch of salt – balances the sweetness and enhances flavor
For best results, pick unsalted butter at room temperature—it creams better and gives a smoother texture. For the milk, whole milk makes the cake tender and rich, but feel free to use your preferred dairy or non-dairy milk alternatives.
If you want to get creative, you can swap out the vanilla extract for almond or lemon extract to complement the cake, just a little goes a long way. And if you’re looking for a gluten-free version, substituting the flour with a gluten-free baking blend works well, though expect a slightly different crumb.
Equipment Needed
Making this perfect sheet cake is straightforward, and the equipment list is pretty basic, which makes it even more approachable.
- 9×13-inch (23×33 cm) rectangular baking pan – standard size for even baking and easy slicing
- Electric hand mixer or stand mixer – crucial for creaming butter and sugar smoothly and whipping the buttercream
- Mixing bowls – medium and large for batter and frosting prep
- Rubber spatula – for scraping down the sides of bowls and folding ingredients without deflating the batter
- Sifter or fine mesh strainer – to sift flour and powdered sugar for light texture
- Offset spatula or butter knife – for spreading the buttercream evenly
- Measuring cups and spoons – for precise ingredients (both US and metric recommended)
If you don’t have a stand mixer, a good electric hand mixer will do just fine. I also like to keep a bench scraper handy for neat edges when frosting, but it’s totally optional. For budget-friendly setups, using a whisk and elbow grease can work in a pinch, especially for the cake batter, though the frosting will be easier to manage with a mixer.
Preparation Method

- Preheat your oven to 350°F (175°C). Lightly grease your 9×13-inch pan with butter or non-stick spray, then dust with a little flour to keep the cake from sticking.
- Mix dry ingredients: In a medium bowl, sift together 2 ½ cups (315 g) of all-purpose flour, 2 ½ teaspoons (12 g) baking powder, and ½ teaspoon (3 g) salt. Set aside.
- Cream butter and sugar: In a large bowl, use your mixer to beat 1 cup (227 g) softened unsalted butter with 2 cups (400 g) granulated sugar until light and fluffy—this usually takes about 3-5 minutes on medium speed. It should look pale and almost whipped.
- Add eggs and vanilla: Beat in 4 large eggs, one at a time, ensuring each is fully incorporated before adding the next. Then mix in 1 tablespoon (15 ml) pure vanilla extract.
- Alternate adding dry ingredients and milk: Reduce mixer speed to low. Add the dry ingredients in three parts, alternating with 1 cup (240 ml) whole milk—start and end with dry ingredients. Mix just until combined after each addition to avoid overmixing.
- Pour batter into pan: Scrape the batter into your prepared pan and smooth the top with a spatula. The batter will be thick but spreadable.
- Bake: Place in preheated oven and bake for 35-40 minutes, or until a toothpick inserted in the center comes out clean. The cake should feel springy to the touch.
- Cool: Let the cake cool completely in the pan on a wire rack before frosting. This usually takes about 1 hour—don’t skip this step or your buttercream will melt!
- Make the buttercream: Beat 1 cup (227 g) softened unsalted butter on medium speed until creamy (about 1-2 minutes). Gradually add 4 cups (480 g) powdered sugar, mixing on low to avoid a sugar cloud. Add 2 teaspoons (10 ml) vanilla extract and 2-4 tablespoons (30-60 ml) heavy cream or milk to reach spreading consistency. Add a pinch of salt.
- Color the frosting: Divide the buttercream into small bowls depending on how many colors you want. Add gel food coloring a little at a time until you get the perfect shade. Mix well.
- Frost the cake: Using an offset spatula, spread the buttercream evenly over the cooled cake. For school colors, pipe or spread each color in stripes or blocks—get creative! You can use piping bags or just a spoon and spatula depending on your style.
Pro tip: If your buttercream feels too stiff, add a little more milk, a teaspoon at a time. If too soft, add a bit more powdered sugar. The frosting should be creamy and hold its shape but still be spreadable.
Cooking Tips & Techniques
Making a perfect sheet cake with custom school colors buttercream might sound fancy, but a few tricks make it much easier than you think.
- Room temperature ingredients matter: Butter, eggs, and milk all blend better when not cold. This helps your batter come together smoothly and gives you a tender crumb.
- Don’t overmix the batter: Once you add the flour, mix just until combined. Overmixing develops gluten and makes the cake dense instead of fluffy.
- Check your oven temperature: Oven temperatures can vary. I recommend using an oven thermometer to avoid overbaking or underbaking.
- Cool completely before frosting: Buttercream melts fast on warm cake. Patience here keeps your colors crisp and clean.
- Use gel coloring: Gel food coloring gives vivid hues without watering down your frosting, which can happen with liquid colors.
- Mix buttercream at medium speed: This traps air and makes frosting light and fluffy instead of dense.
- Practice piping on parchment paper: Before decorating the cake, try your piping technique on parchment to get comfortable with pressure and flow.
One time, I rushed the cooling step and ended up with a frosting mess that looked more like abstract art than school colors. Lesson learned! Now I always set a timer for at least an hour and use the downtime to prep other dishes or even whip up a quick zesty lemon chicken if the day’s been hectic.
Variations & Adaptations
This recipe is super adaptable, making it a great base for different tastes and dietary needs.
- Dietary swaps: Use almond flour or a gluten-free blend instead of all-purpose flour for gluten sensitivity. Swap whole milk with coconut or oat milk for dairy-free versions.
- Flavor twists: Add citrus zest (lemon, orange) to the batter for a fresh note. Or swap vanilla extract for almond or coconut extracts to customize flavor.
- Frosting alternatives: Instead of buttercream, try cream cheese frosting for a tangy contrast. You can still tint it with food coloring, but keep it chilled for best results.
- Color combos: Beyond school colors, try seasonal palettes for holidays or birthdays—think pastel pinks and blues or autumn oranges and browns.
- Baking method: This batter works well in two 8-inch round pans if you want a layered cake instead of a sheet.
Personally, I once made this cake with a friend’s requested purple and gold colors for a surprise birthday, using a hint of lavender extract in the frosting—it was a hit! Feel free to experiment and make it your own.
Serving & Storage Suggestions
Serve this cake at room temperature for the best flavor and texture—the buttercream is at its creamiest, and the cake moistness really shines.
- Slice with a clean, sharp knife for neat pieces.
- Pair it with fresh berries or a simple cup of coffee or tea for a balanced treat.
- If you want to keep it fresh, cover it loosely with plastic wrap or store in an airtight container at room temperature for up to 2 days.
- For longer storage, refrigerate up to 5 days or freeze slices wrapped tightly in plastic and foil for up to 2 months.
- To reheat frozen slices, let thaw at room temperature and warm gently in a microwave (10-15 seconds) if desired.
Flavors tend to mellow and deepen when stored overnight, making it even better the next day if you have the patience to wait. Just bring it to room temperature before serving.
Nutritional Information & Benefits
This perfect sheet cake is a treat but made with real butter and simple ingredients, so you get classic comfort without artificial nonsense.
- Approximate calories per serving (1 slice, 1/12th of cake): 350-400 kcal
- Contains moderate protein from eggs and milk, and energy-rich carbs from flour and sugar.
- Butter provides healthy fats, and whole milk adds calcium and vitamin D.
- Gluten-free versions can be made with alternative flours for dietary restrictions.
- Allergens include dairy, eggs, and gluten (unless substituted).
While it’s not a health food per se, this cake fits well into balanced eating when enjoyed in moderation. The homemade buttercream is free from preservatives often found in store-bought frostings, making it a cleaner choice for celebrations.
Conclusion
This perfect sheet cake with custom school colors buttercream is honestly one of those recipes that feels like a kitchen victory every time. It’s easy, forgiving, and customizable, and it always delivers that sweet spot between homemade charm and polished presentation.
Whether you’re celebrating a school event, a birthday, or just craving a reliable dessert, this cake gives you that personal touch without the stress. I love how it lets me bring a little color and fun to the table while staying grounded in classic flavors.
If you give it a try, don’t hesitate to tweak the colors or flavors to fit your own style—you might find it becomes your go-to for all kinds of celebrations. And if you’re looking for more quick and delicious meal ideas to pair with your dessert, you might enjoy the quick creamy tuna pasta or the crispy BBQ chicken pizza recipes I’ve shared.
Happy baking—and here’s to many colorful celebrations ahead!
FAQs
Can I make this sheet cake ahead of time?
Yes! You can bake the cake up to two days in advance and keep it wrapped at room temperature. Make the buttercream the day of for the freshest frosting and best texture.
How do I get bright, vivid school colors in the buttercream?
Use gel food coloring rather than liquid—it’s more concentrated and won’t thin out your frosting. Add color a little at a time until you reach the desired shade.
Can I freeze this cake after it’s frosted?
It’s better to freeze the cake unfrosted. Wrap it tightly in plastic wrap and foil. Once thawed, frost it fresh for the best texture and appearance.
What if I don’t have an electric mixer?
You can mix the batter and frosting by hand using a whisk and strong arm, but it will take more effort, especially for creaming the butter and sugar and whipping the frosting smooth.
Can I use this recipe for cupcakes instead of a sheet cake?
Absolutely! Adjust baking time to about 18-22 minutes at 350°F (175°C) and bake in lined muffin tins. The buttercream frosting works perfectly on cupcakes, too.
Pin This Recipe!
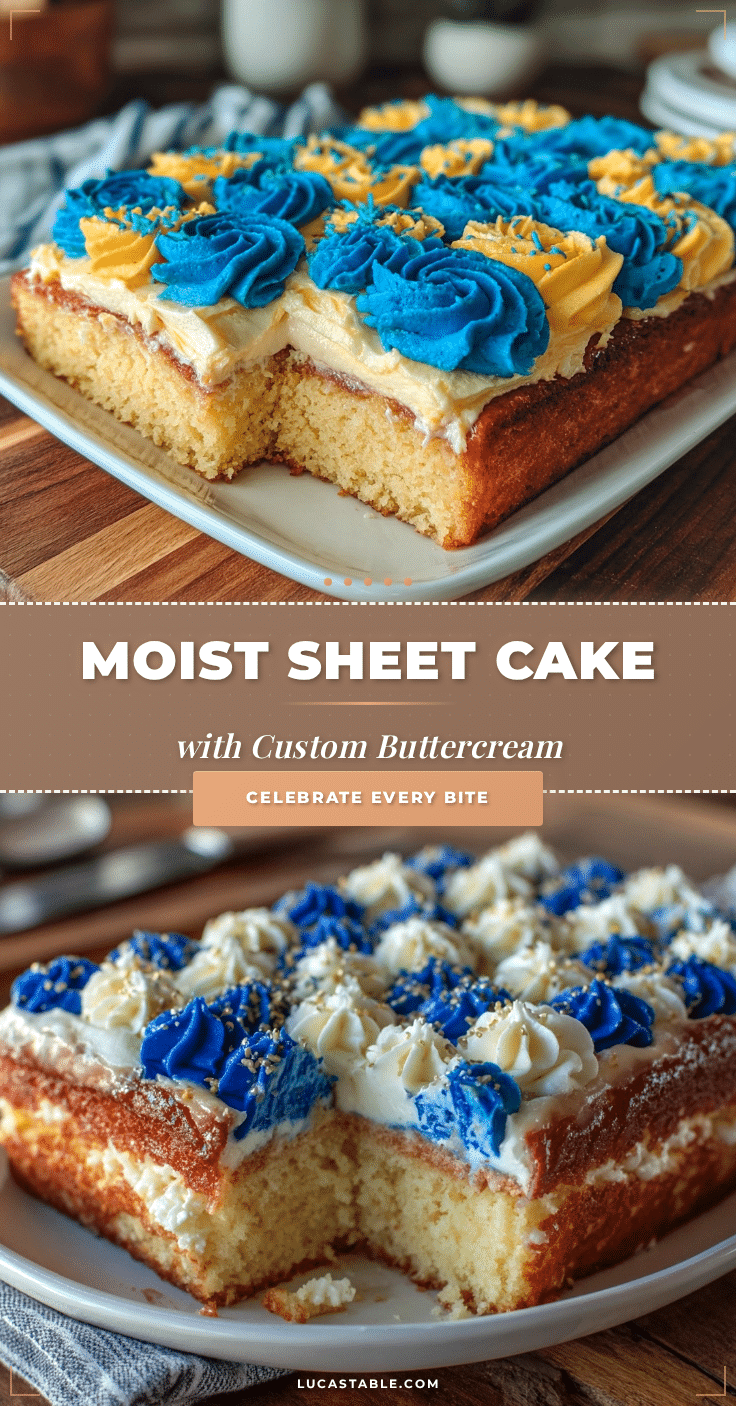
Perfect Sheet Cake with Custom School Colors Buttercream
A quick and easy sheet cake recipe with a moist, tender crumb and customizable buttercream frosting that can be tinted to any school colors, perfect for celebrations and last-minute events.
- Prep Time: 20 minutes
- Cook Time: 35-40 minutes
- Total Time: 1 hour 15 minutes
- Yield: 12 servings 1x
- Category: Dessert
- Cuisine: American
Ingredients
- 2 ½ cups (315 g) all-purpose flour, sifted
- 2 ½ teaspoons (12 g) baking powder
- ½ teaspoon (3 g) salt
- 1 cup (227 g) unsalted butter, softened
- 2 cups (400 g) granulated sugar
- 4 large eggs, room temperature
- 1 tablespoon (15 ml) pure vanilla extract
- 1 cup (240 ml) whole milk, room temperature
- 1 cup (227 g) unsalted butter, softened (for buttercream)
- 4 cups (480 g) powdered sugar, sifted
- 2 teaspoons (10 ml) pure vanilla extract (for buttercream)
- 2–4 tablespoons (30–60 ml) heavy cream or whole milk (for buttercream)
- Gel food coloring in your school colors
- Pinch of salt (for buttercream)
Instructions
- Preheat your oven to 350°F (175°C). Lightly grease a 9×13-inch pan with butter or non-stick spray, then dust with flour.
- In a medium bowl, sift together the flour, baking powder, and salt. Set aside.
- In a large bowl, beat the softened butter and granulated sugar with a mixer on medium speed until light and fluffy, about 3-5 minutes.
- Add eggs one at a time, beating well after each addition. Mix in the vanilla extract.
- Reduce mixer speed to low. Add the dry ingredients in three parts, alternating with the milk, starting and ending with dry ingredients. Mix just until combined after each addition.
- Pour the batter into the prepared pan and smooth the top with a spatula.
- Bake for 35-40 minutes or until a toothpick inserted in the center comes out clean and the cake feels springy.
- Cool the cake completely in the pan on a wire rack, about 1 hour.
- To make the buttercream, beat softened butter on medium speed until creamy, about 1-2 minutes.
- Gradually add powdered sugar on low speed to avoid a sugar cloud.
- Add vanilla extract, heavy cream or milk, and a pinch of salt. Beat until smooth and spreadable.
- Divide buttercream into bowls and tint with gel food coloring to desired shades.
- Spread or pipe the buttercream evenly over the cooled cake, using piping bags or spatulas to create custom school colors designs.
Notes
Use room temperature ingredients for best results. Do not overmix the batter to keep the cake tender. Cool cake completely before frosting to prevent melting. Use gel food coloring for vibrant frosting colors. Adjust buttercream consistency with milk or powdered sugar as needed.
Nutrition
- Serving Size: 1 slice (1/12th of c
- Calories: 375
- Sugar: 38
- Sodium: 220
- Fat: 18
- Saturated Fat: 11
- Carbohydrates: 52
- Fiber: 1
- Protein: 4
Keywords: sheet cake, buttercream frosting, school colors, easy cake recipe, celebration cake, last-minute dessert