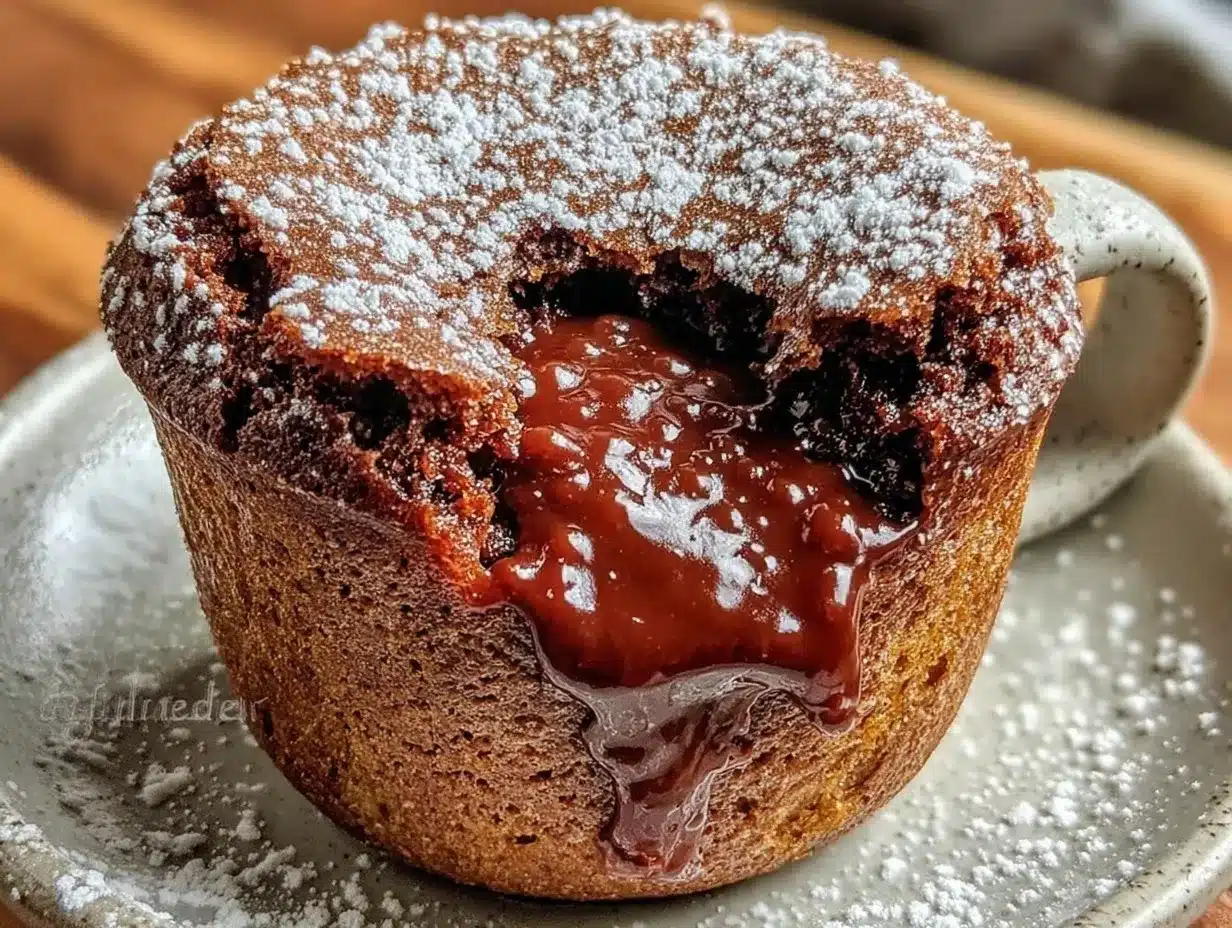
“Could you just grab me something sweet?” That text popped up on my phone just as I was about to settle in for a quiet night. Honestly, I had zero plans for fancy desserts, and heading out for a store-bought treat felt like way too much effort. So, I found myself in the kitchen, staring at a lone mug, some pantry staples, and a stubborn craving. That’s how this easy single-serve mug brownie with molten chocolate center was born — a little experiment that turned into an instant favorite.
What I didn’t expect was how that gooey, molten chocolate surprise in the middle would completely change my idea of a quick dessert. It’s the kind of brownie that feels indulgent but demands barely any time or cleanup. I’ve made it so many times since then, sometimes late at night when the kitchen is quiet, and the world feels a little slower. The smell of chocolate bubbling in the microwave, the soft warmth of the mug in my hands — it’s oddly comforting.
There’s something about a single-serve dessert that speaks to those moments when you just want a little joy without fuss. This recipe stuck with me because it’s not just a brownie—it’s a quick little celebration in a cup. Every bite melts just right, and you don’t have to share if you don’t want to (though I won’t judge if you do). It’s like a secret indulgence that’s always ready when you need it most.
Why You’ll Love This Recipe
After countless trials and tweaking, this easy single-serve mug brownie with molten chocolate center became my go-to for quick desserts that don’t skimp on flavor or texture. Here’s why it’s worth keeping in your back pocket:
- Quick & Easy: Comes together in under 5 minutes, perfect for last-minute cravings or busy evenings.
- Simple Ingredients: Uses everyday pantry staples—no need for specialty shopping trips or fancy chocolates.
- Perfect for Solo Treats: Ideal when you want dessert just for yourself without leftovers tempting you later.
- Crowd-Pleaser: While it’s single-serve, it’s also easy to multiply for a small group or unexpected guests.
- Molten Chocolate Center: The gooey middle makes it feel like a special occasion, even on a random Tuesday.
This recipe isn’t just another mug brownie because the molten center sets it apart. Instead of a dry or cakey texture, you get a balance of fudgy edges and a warm, flowing chocolate core that feels like a mini chocolate lava cake. I’ve also found that using a pinch of espresso powder intensifies the chocolate flavor without overpowering it, which is a little trick I picked up from trying richer desserts.
Honestly, this recipe fits into the rhythm of hectic days as easily as it satisfies sweet tooth moments. Whether you’re winding down after a quick spaghetti aglio olio dinner or craving something indulgent after a long day, this mug brownie delivers warmth and comfort without the guilt of making a whole batch.
What Ingredients You Will Need
This mug brownie uses simple, wholesome ingredients to deliver bold chocolate flavor and a satisfying, molten texture without any fuss. Most of these are pantry staples you probably have on hand, and substitutions are easy if needed.
- All-purpose flour: 4 tablespoons (30 g) – provides structure; you can use almond flour for a gluten-free twist.
- Granulated sugar: 4 tablespoons (50 g) – balances the bitterness of cocoa; light brown sugar adds a hint of molasses if preferred.
- Unsweetened cocoa powder: 2 tablespoons (10 g) – I recommend Dutch-processed for a smoother, richer taste.
- Baking powder: 1/8 teaspoon – helps the brownie rise slightly without becoming cakey.
- Pinch of salt: enhances the chocolate flavor.
- Milk: 3 tablespoons (45 ml), any kind (dairy or plant-based) – adds moisture; almond or oat milk works well.
- Vegetable oil: 2 tablespoons (30 ml) – keeps the brownie fudgy; melted coconut oil is a nice alternative.
- Vanilla extract: 1/4 teaspoon – brings depth to the flavor.
- Chocolate chunk or chocolate chips: about 1 tablespoon (15 g) – for the molten center; I like using a square of dark chocolate for that perfect melt.
- Optional espresso powder: 1/8 teaspoon – intensifies chocolate flavor without tasting like coffee.
Feel free to swap ingredients based on what you have. For instance, using honey instead of sugar results in a different texture but still tasty. Fresh seasonal berries on the side make a lovely contrast, especially if you want to lighten things up.
Equipment Needed
- Microwave-safe mug: About 12-ounce capacity to avoid overflow; ceramic mugs are best for even heating.
- Measuring spoons and cups: For precise ingredient measurements.
- Mixing spoon or small whisk: To combine ingredients smoothly.
- Microwave: Essential for this recipe; if you don’t have one, you can use a toaster oven but cooking times will vary.
- Optional: Small silicone spatula for scraping the mug.
I once tried to make this in a regular coffee mug that was too small, and the batter overflowed—lesson learned! Also, using a ceramic mug helps keep the brownie warm longer, which is a nice bonus when you want to savor every bite. No fancy gadgets required here, making it a budget-friendly treat anyone can whip up.
Preparation Method
- Combine dry ingredients: In your mug, stir together 4 tablespoons (30 g) all-purpose flour, 4 tablespoons (50 g) granulated sugar, 2 tablespoons (10 g) unsweetened cocoa powder, 1/8 teaspoon baking powder, a pinch of salt, and optional 1/8 teaspoon espresso powder. Mix well to avoid lumps.
- Add wet ingredients: Pour in 3 tablespoons (45 ml) milk, 2 tablespoons (30 ml) vegetable oil, and 1/4 teaspoon vanilla extract. Stir thoroughly until you see a smooth batter with no dry pockets.
- Insert molten center: Press a tablespoon (15 g) of chocolate chunk or chips into the center of the batter. Try to bury it slightly so it melts inside and doesn’t just sit on top.
- Microwave cooking: Microwave on high for 50-60 seconds. Watch carefully—cooking times vary by microwave wattage. The brownie should look set around the edges but still slightly soft in the center.
- Cooling and serving: Let the mug brownie cool for 1-2 minutes. This helps the molten center set just enough to avoid burning your tongue but keeps that luscious gooey texture.
Pro tip: If the brownie seems undercooked, microwave in additional 10-second bursts. Overcooking results in a dry texture, so keep an eye on it. I learned this the hard way on my third attempt. Also, stirring the batter gently but thoroughly ensures no flour pockets sneak in, which can ruin the smooth bite.
Cooking Tips & Techniques
Getting the perfect molten center is honestly a bit of an art, but here are some tips I’ve picked up:
- Chocolate placement: Don’t just sprinkle chips on top; press a solid chunk or a few chips into the center of the batter to create that molten surprise after microwaving.
- Microwave power matters: Every microwave heats differently. Start with 50 seconds and adjust in 10-second increments. It’s better to undercook slightly than overdo it.
- Don’t overmix: Stir just until combined. Overmixing can make the brownie tough instead of tender.
- Use fresh baking powder: This little ingredient helps with texture—expired powder can cause a dense brownie.
- Experiment with add-ins: A pinch of cinnamon or a few chopped nuts add fun flavor and texture.
Once, I tried microwaving on max power for a full minute and ended up with a dry mug brownie that tasted like a chocolate brick. Lesson learned: quick but gentle wins here. Also, the quality of cocoa powder makes a noticeable difference. I recommend sticking to trusted brands like Hershey’s or Valrhona for a richer flavor.
Variations & Adaptations
This mug brownie recipe is a fantastic base that invites creativity. Here are some ways I’ve played around with it:
- Dietary swaps: Use almond or oat milk and swap the oil for melted coconut oil to make it dairy-free and vegan-friendly.
- Flavor twists: Add a teaspoon of peanut butter under the chocolate chunk for a gooey peanut butter surprise or sprinkle a pinch of chili powder for a subtle kick.
- Texture change: Fold in some mini marshmallows or chopped nuts for added chew and crunch.
- Seasonal adaptation: Swap the molten chocolate for a spoonful of berry jam or a cube of white chocolate during summertime.
- Microwave alternatives: If you don’t have a microwave, try baking the batter in a small ramekin at 350°F (175°C) for about 12-15 minutes, checking frequently.
One of my favorite tweaks is adding a tiny scoop of vanilla ice cream on top just before digging in. It turns this quick mug brownie into a mini dessert experience that feels way more indulgent than it actually is.
Serving & Storage Suggestions
This easy single-serve mug brownie with molten chocolate center is best served warm, straight from the microwave, so you get that luscious molten middle at its peak. I like to let it rest for a minute or two—long enough to avoid burning my mouth but short enough to keep it gooey.
For a little extra flair, top with a dusting of powdered sugar, a drizzle of caramel sauce, or a scoop of your favorite ice cream. Fresh berries or a dollop of whipped cream also complement the rich chocolate beautifully.
If you have leftovers (rare, but it happens), cover the mug with plastic wrap and refrigerate. Reheat gently in the microwave for 15-20 seconds, but note the molten center won’t be quite the same once cooled.
Flavors tend to mellow after refrigeration, so I recommend enjoying this treat fresh whenever possible. If you’re planning a cozy night in after a quick dinner like the quick crispy BBQ chicken pizza, this mug brownie makes a perfect sweet finish.
Nutritional Information & Benefits
This recipe offers a modest portion of chocolate indulgence with roughly 300-350 calories per serving, depending on ingredient choices. Using simple ingredients keeps it straightforward without added preservatives or excessive sugars.
Key benefits include:
- Portion control: Single serving means no overeating temptation.
- Antioxidants: Cocoa powder provides flavonoids known for heart health benefits.
- Customizable: You can easily swap ingredients to suit low-carb, dairy-free, or vegan diets.
Be mindful that this recipe contains gluten, dairy (unless swapped), and soy if using standard chocolate chips. Personally, I appreciate how it fits into a balanced diet when enjoyed occasionally as a comforting treat.
Conclusion
This easy single-serve mug brownie with molten chocolate center is a little reminder that sometimes the best desserts are the simplest ones. It’s quick, satisfying, and hits that sweet spot between indulgence and convenience.
Whether you’re winding down after a busy day or sneaking in a solo dessert moment, this recipe adapts effortlessly to your mood and pantry. I love how it feels personal—like it was made just for me, whenever I need it.
Give it a try, and don’t hesitate to tweak the flavors to match your cravings. If you’ve enjoyed this treat, you might also appreciate the ease and comfort of the quick creamy tuna pasta recipe or a speedy quick zesty lemon chicken for dinner. Feel free to share your own twists or questions in the comments—there’s always room to swap ideas and stories.
Here’s to sweet moments made simple!
Frequently Asked Questions
Can I make the mug brownie in an oven instead of a microwave?
Yes! Use a small ramekin and bake at 350°F (175°C) for about 12-15 minutes. Keep an eye on it to avoid drying out and test doneness by gently touching the edges.
What kind of chocolate is best for the molten center?
A good-quality dark chocolate chunk or chips work best. I prefer a square of dark chocolate for a rich, smooth melt, but milk chocolate is fine if you like it sweeter.
Is this recipe gluten-free?
Not as written, since it uses all-purpose flour. You can substitute almond flour or a gluten-free baking blend, but texture may vary slightly.
Can I prepare this in advance?
This mug brownie is best fresh. While you can mix the dry ingredients ahead, adding wet ingredients and microwaving right before eating is ideal for that molten texture.
How do I avoid the brownie turning rubbery or dry?
Watch microwave times carefully. Start with 50 seconds, then add 10-second bursts if needed. Overcooking dries it out, so less is more here.
Pin This Recipe!
Easy Single-Serve Mug Brownie Recipe with Molten Chocolate Center

A quick and easy single-serve mug brownie with a gooey molten chocolate center, perfect for satisfying last-minute dessert cravings with minimal effort and cleanup.
- Prep Time: 3 minutes
- Cook Time: 1 minute
- Total Time: 4 minutes
- Yield: 1 serving 1x
- Category: Dessert
- Cuisine: American
Ingredients
- 4 tablespoons (30 g) all-purpose flour
- 4 tablespoons (50 g) granulated sugar
- 2 tablespoons (10 g) unsweetened cocoa powder
- 1/8 teaspoon baking powder
- Pinch of salt
- 3 tablespoons (45 ml) milk (any kind, dairy or plant-based)
- 2 tablespoons (30 ml) vegetable oil
- 1/4 teaspoon vanilla extract
- 1 tablespoon (15 g) chocolate chunk or chocolate chips
- Optional: 1/8 teaspoon espresso powder
Instructions
- In your microwave-safe mug, stir together the all-purpose flour, granulated sugar, unsweetened cocoa powder, baking powder, salt, and optional espresso powder until well combined and free of lumps.
- Add the milk, vegetable oil, and vanilla extract to the dry ingredients and stir thoroughly until you have a smooth batter with no dry pockets.
- Press the chocolate chunk or chips into the center of the batter, slightly burying it so it melts inside during cooking.
- Microwave on high for 50-60 seconds. The brownie should be set around the edges but still slightly soft in the center. Adjust cooking time in 10-second increments if needed.
- Let the mug brownie cool for 1-2 minutes before eating to allow the molten center to set slightly and avoid burning your tongue.
Notes
Use a ceramic mug about 12 ounces to avoid overflow. Adjust microwave time based on your microwave’s wattage, starting with 50 seconds and adding 10-second bursts if needed. Press the chocolate chunk into the center for a molten core. Overcooking will dry out the brownie. Fresh baking powder improves texture. Optional espresso powder intensifies chocolate flavor without adding coffee taste. Variations include using almond or oat milk and coconut oil for vegan/dairy-free, adding peanut butter, chili powder, or marshmallows for flavor and texture twists. Can be baked in a small ramekin at 350°F for 12-15 minutes if no microwave is available.
Nutrition
- Serving Size: 1 mug brownie (about
- Calories: 325
- Sugar: 25
- Sodium: 150
- Fat: 18
- Saturated Fat: 3.5
- Carbohydrates: 40
- Fiber: 3
- Protein: 4
Keywords: mug brownie, single serve dessert, quick brownie, molten chocolate, microwave dessert, easy brownie recipe