The Saturday before Easter has always been a whirlwind at our house. One year, with the kids bouncing off the walls and a pantry only half-stocked, I decided to throw together a simple baking project that could keep everyone busy and happy. We ended up making these Easter Bunny Cupcakes kids can decorate themselves — and honestly, it saved the day. It wasn’t perfect at first (my frosting was too runny, and the “bunny ears” nearly melted), but after testing this recipe 10+ times, I finally nailed the balance between easy, fun, and downright adorable.
What makes this treat special is that it’s not just a cupcake — it’s an activity. The kids get to create their own little Easter bunnies with simple decorations, and the whole thing feels like a mini celebration of spring right on the kitchen table. Plus, this Easter Bunny Cupcakes recipe easy spring treat kids can decorate is manageable for cooks of all skill levels (even the kids!). It’s become a tradition in our family, and I’m excited to share it with you.
Why You’ll Love This Recipe
This recipe has completely changed how I approach Easter treats and spring baking. I’ve made these cupcakes with my kids, at birthday parties, and even for casual weeknight family fun — everyone loves them.
- Kid-Friendly Decorating — The best part? The kids can join in and decorate their cupcakes however they want. No complicated piping skills needed, just fun shapes and colors.
- Simple Ingredients — You probably have most of these in your pantry already. I keep a stash of basic baking staples just for moments like this, so the cupcakes come together quickly.
- Perfect for Spring Celebrations — Whether it’s an Easter party, a spring potluck, or just a weekend activity, these cupcakes brighten the table and bring smiles.
- Easy to Customize — You can swap frosting flavors or decorations to suit your family’s tastes and dietary needs.
- Encourages Creativity — Each bunny looks different because the kids get to choose how to decorate. It’s a great way to keep them engaged and proud of their creation.
I make these Easter Bunny Cupcakes recipe easy spring treat kids can decorate often during the season — no fancy ingredients, just lots of fun and smiles. For more quick and engaging family-friendly dishes, I also love whipping up recipes like crispy BBQ chicken pizza or shrimp alfredo pasta for simple weeknight dinners that everyone enjoys.
Ingredients You’ll Need
Here’s the best part: this recipe uses mostly pantry staples and a few fun extras for decorating. I always pick up the cupcakes and frosting ingredients ahead of time, so we can dive into decorating without a last-minute grocery run.
- All-purpose flour (2 ½ cups / 310g) — The base for tender, fluffy cupcakes. I use King Arthur flour because it’s consistent, but any brand works.
- Baking powder (2 ½ teaspoons) — Gives cupcakes their lift. Make sure it’s fresh for best rise.
- Sugar (1 ¾ cups / 350g) — Sweetness that balances perfectly with the frosting.
- Unsalted butter (½ cup / 115g, softened) — Adds richness. I always let it soften to room temp for smooth batter.
- Large eggs (3) — Bind everything together and add moisture.
- Whole milk (1 cup / 240ml) — Keeps the cupcakes moist and tender.
- Vanilla extract (2 teaspoons) — The flavor foundation. Pure vanilla is worth the splurge here.
- Powdered sugar (3 cups / 360g) — For the frosting. Sift it to avoid lumps.
- Cream cheese (8 oz / 225g, softened) — Creates a tangy, creamy frosting that’s easy to spread.
- Mini marshmallows — For bunny tails or ears. Kids love the fluffiness.
- Pink and white candy melts — For bunny ears and noses. You can find these in the baking aisle or online.
- Chocolate chips (mini size) — Perfect for eyes or whiskers.
- Shredded coconut (optional) — Adds a fun fluffy texture for tails or fur.
Equipment Needed
You don’t need anything fancy for this. Here’s what I actually use to make these Easter Bunny Cupcakes kids can decorate:
- Muffin tin — Standard 12-cup size works great. I use a non-stick one to make cupcake removal easier.
- Mixing bowls — A large bowl for the batter and a smaller one for frosting.
- Electric hand mixer
- Spatula — For folding and scraping the batter, and spreading frosting evenly.
- Piping bags or zip-top bags — Optional, but handy if you want more control when decorating.
- Small bowls or plates — For organizing decorations like candy melts, chocolate chips, and mini marshmallows.
Optional but useful:
- Silicone baking cups — If you want to skip greasing the pan and add a pop of color.
- Microwave-safe bowl — For melting candy melts quickly and safely.
How to Make Easter Bunny Cupcakes Kids Can Decorate: Step by Step
Alright, let’s get into it. I’ll walk you through exactly how I make these cupcakes, including the small tricks that actually make a difference when you’re baking with little helpers around.
- Preheat and Prep (10 minutes)
Start by preheating your oven to 350°F (175°C). Line your muffin tin with paper liners or silicone cups. Measure out all your ingredients — having everything ready makes the process smooth, especially when kids want to jump in. - Mix Dry Ingredients (3 minutes)
In a large bowl, whisk together the all-purpose flour, baking powder, and a pinch of salt. This ensures an even rise and keeps the cupcakes light. - Cream Butter and Sugar (5 minutes)
Using your hand mixer, beat the softened butter and sugar until light and fluffy. You’ll notice the texture change and the mixture will look pale — that’s your cue that air is incorporated, which means fluffy cupcakes. - Add Eggs and Vanilla (2 minutes)
Crack in the eggs one at a time, beating well after each addition. Then stir in the vanilla extract. The batter will start to smell amazing here, and it’s the base of your flavor. - Combine Wet and Dry Ingredients (4 minutes)
Alternate adding the dry flour mix and the milk to the butter mixture, starting and ending with flour. Mix on low speed to avoid overworking the batter. The batter should be smooth and pourable, not thick or sticky. - Fill Cupcake Liners (5 minutes)
Use a large spoon or small ice cream scoop to fill each liner about 2/3 full. This prevents overflow and gives the cupcakes room to rise beautifully. - Bake (18-20 minutes)
Pop the tin in the oven and bake until a toothpick inserted in the center comes out clean. The tops should be lightly golden and spring back when touched. - Cool Completely (30 minutes)
Transfer the cupcakes to a wire rack to cool fully. This step is key — frosting melts on warm cupcakes, and decorating becomes a mess. - Make the Cream Cheese Frosting (10 minutes)
Beat the softened cream cheese and butter together until smooth. Gradually add powdered sugar and continue beating until the frosting is fluffy and spreadable. If it’s too thick, a splash of milk helps. - Decorate with Kids (Fun time!)
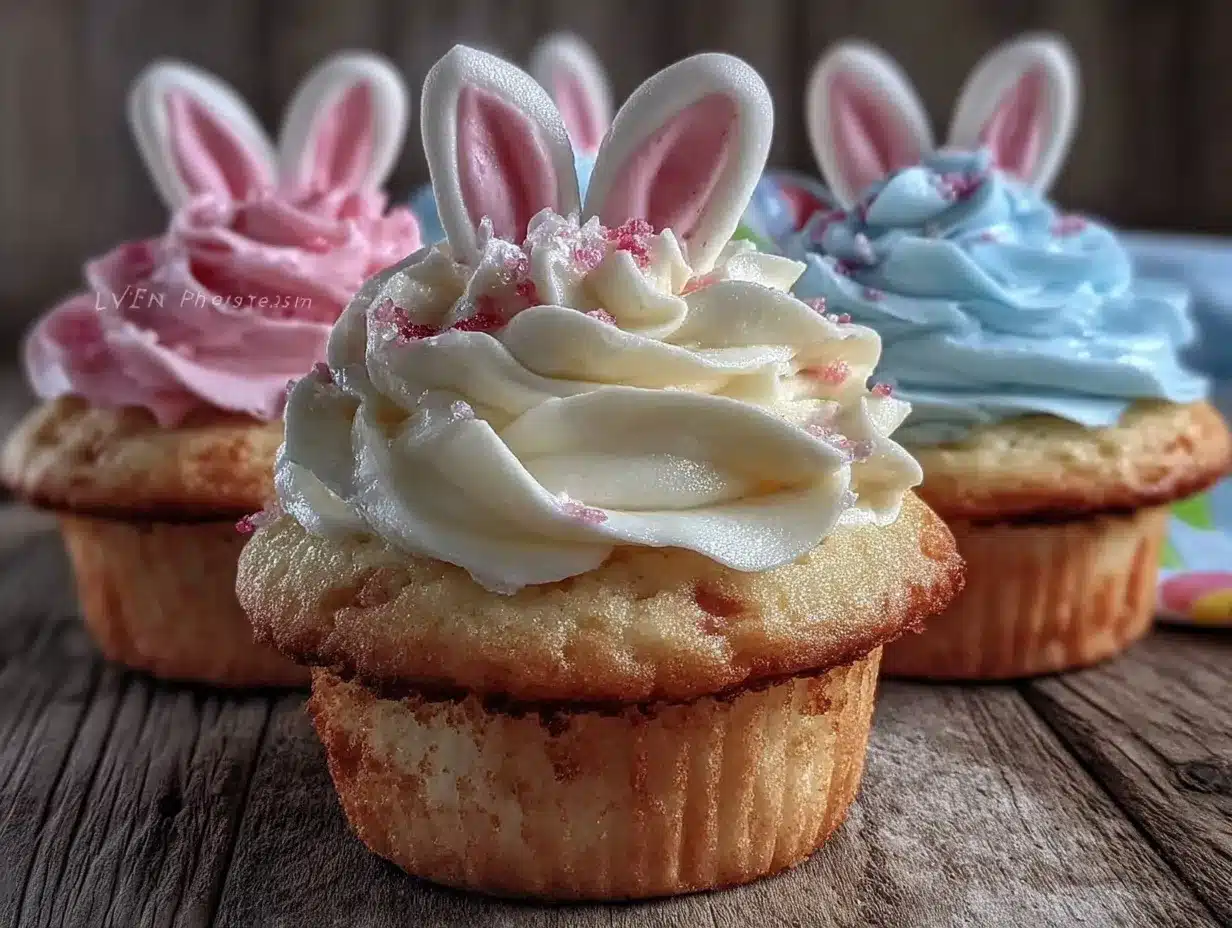
Spread or pipe the frosting on each cupcake. Then let the kids add mini marshmallows for tails, use melted candy melts to create bunny ears, and dot chocolate chips for eyes and noses. Sprinkle shredded coconut for extra fluff if you like. No two bunnies will look the same, and that’s the magic.
Total time: about 1 hour, including cooling. Active time is roughly 30 minutes, the rest is just waiting and decorating fun.
Expert Tips & Tricks
Here’s everything I’ve figured out from making this recipe dozens of times. These tips will save you from the mistakes I already made (and trust me, there were plenty!).
- Don’t Frost Warm Cupcakes — This is the #1 mistake. I burned my fingers and ended up with a runny frosting mess more than once. Make sure cupcakes are completely cool before frosting.
- Use Room Temperature Ingredients — Butter, eggs, and cream cheese all need to be soft. Cold ingredients make the batter lumpy and frosting harder to spread.
- Keep Decorations Organized — Set out bowls for candy melts, marshmallows, and chocolate chips. It keeps little hands from reaching into the same bag and creates less chaos.
- Melting Candy Melts — Melt in short bursts in the microwave, stirring between each. Overheating makes them grainy and hard to work with.
- Save Some Frosting for Later — If you have leftovers, keep it in an airtight container in the fridge. It makes a great dip for fruit or extra cupcakes.
- Practice Makes Perfect — Don’t stress about perfect bunny faces. The fun is in the messy, creative decorating. My kids’ first attempts always look a little wild, but that’s part of the charm.
Variations & Substitutions
Once you’ve got the base version down, here’s how I mix it up. I’ve actually tried all of these, and each brings something special to the table for different occasions.
- Chocolate Bunny Cupcakes — Swap half the flour for cocoa powder and add chocolate chips to the batter. These are a hit at Easter brunch.
- Gluten-Free Version — Use a 1:1 gluten-free baking flour blend. The cupcakes turn out just as fluffy, and the decorations stay the same.
- Dairy-Free Alternative — Replace butter with coconut oil and use a dairy-free cream cheese substitute for the frosting. I tested this for a friend, and it’s surprisingly good.
- Fruit-Infused — Add lemon zest or a handful of fresh berries to the batter for a spring twist. Great for a garden party or spring potluck.
- Holiday Party Version — Use pastel-colored frosting and edible glitter for a festive touch at Easter gatherings.
These cupcakes are perfect for family celebrations, spring weekend baking, or even a fun activity during a holiday party. For more easy recipes that fit into busy schedules and bring the family together, check out my quick zesty lemon chicken or creamy tuna pasta recipes — both fantastic for fast, flavorful meals.
Serving & Storage
I usually serve these Easter Bunny Cupcakes straight from the decorated platter — they look festive and inviting, and the frosting stays creamy longer at room temperature.
These cupcakes pair well with:
- Fresh fruit salad — adds a refreshing contrast
- Simple vanilla milk or chocolate milk — kids love dipping their cupcakes
- A light green salad with a citrus vinaigrette — balances the sweetness
Storage:
- Fridge: Store in an airtight container for up to 4 days. The frosting firms up in the fridge but softens when brought to room temp.
- Reheating: Let cupcakes sit at room temperature for 20 minutes before serving. Avoid microwaving frosting — it can melt and separate.
- Freezing: I don’t recommend freezing decorated cupcakes — frosting and candy melts don’t hold up well. Freeze plain cupcakes without frosting if you want to prep ahead.
Nutrition Information
I’m not a nutritionist, but here’s the breakdown if you’re keeping track. These numbers are per serving, based on 12 cupcakes.
| Calories | Protein | Carbs | Fiber | Sugar | Fat | Saturated Fat | Sodium |
|---|---|---|---|---|---|---|---|
| 280 | 3g | 38g | 1g | 26g | 12g | 7g | 180mg |
Look — this is a sweet treat made with butter and cream cheese frosting. It’s not a diet recipe, and I’m not going to pretend it is. But it beats store-bought cupcakes because you know what’s in it, and the decorating activity makes it worth every bite. For a lighter take, I sometimes swap cream cheese for Greek yogurt frosting and add fresh fruit toppings.
Final Thoughts
Remember that Saturday before Easter I mentioned? Those chaotic moments turned into one of my favorite family memories, thanks to these Easter Bunny Cupcakes kids can decorate. They’re forgiving, fun, and a great way to get everyone involved in the kitchen.
Make it yours. More frosting, extra marshmallows, colorful sprinkles — all good calls in my book. Swap out the candy melts for fondant or just let the kids get creative with fruit and nuts. The base is forgiving and perfect for customization.
If you make this, drop a comment and tell me how it went. And if something goes wrong, don’t hesitate to share that too — I genuinely want to help troubleshoot. That’s what the comments are for.
Happy cooking — I hope your kitchen smells amazing.
Frequently Asked Questions
Q: Can I make these Easter Bunny Cupcakes kids can decorate without cream cheese?
A: Yes, you can, but the frosting texture and flavor will be different. I’ve swapped cream cheese for buttercream or whipped cream frosting with good results, but cream cheese adds that perfect tang and sturdiness. If you try a buttercream, just make sure it’s thick enough to hold the decorations. My kids love the tangy cream cheese version best though.
Q: Why did my frosting turn out runny or grainy?
A: This usually happens if the cream cheese or butter wasn’t fully softened, or if you added liquid like milk too quickly. Also, overmixing powdered sugar can cause graininess. I make sure everything is at room temp before mixing and add milk a tablespoon at a time until I get the right spreadable consistency.
Q: Can I make these cupcakes ahead for an Easter party?
A: Absolutely, but I recommend baking the cupcakes a day or two ahead and storing them unfrosted in an airtight container. Frost and decorate them the day of the party — this keeps the frosting fresh and decorations intact. I’ve done this for holiday gatherings, and it’s a real time saver.
Q: Are there gluten-free or dairy-free options for this recipe?
A: Yes! For gluten-free, use a 1:1 gluten-free baking flour blend — it works just fine. For dairy-free, swap butter with coconut oil and use a dairy-free cream cheese alternative for the frosting. The texture is slightly different, but still delicious. I’ve tested these substitutions with friends who have dietary restrictions.
Q: Can I double this recipe for a larger crowd?
A: Yes, doubling the recipe is straightforward. Just double all ingredients and bake in batches or use multiple muffin tins. Keep an eye on baking time; it might vary slightly depending on your oven. I’ve baked double batches for Easter potlucks with no issues.
Q: What’s the best way to melt candy melts for bunny ears?
A: I melt candy melts in the microwave in 20-30 second bursts, stirring in between. This prevents overheating, which makes the melts grainy or lumpy. If you don’t have candy melts, you can use white chocolate chips or even shape bunny ears from fondant or marshmallows. Kids love the creativity!
Q: How do I keep the mini marshmallows from sliding off the frosting?
A: Press them gently but firmly into the frosting right after spreading so they stick well. If frosting is too soft or warm, marshmallows may slide. Cooling the cupcakes completely and chilling the frosting briefly after spreading helps keep everything in place during decorating.
Pin This Recipe!
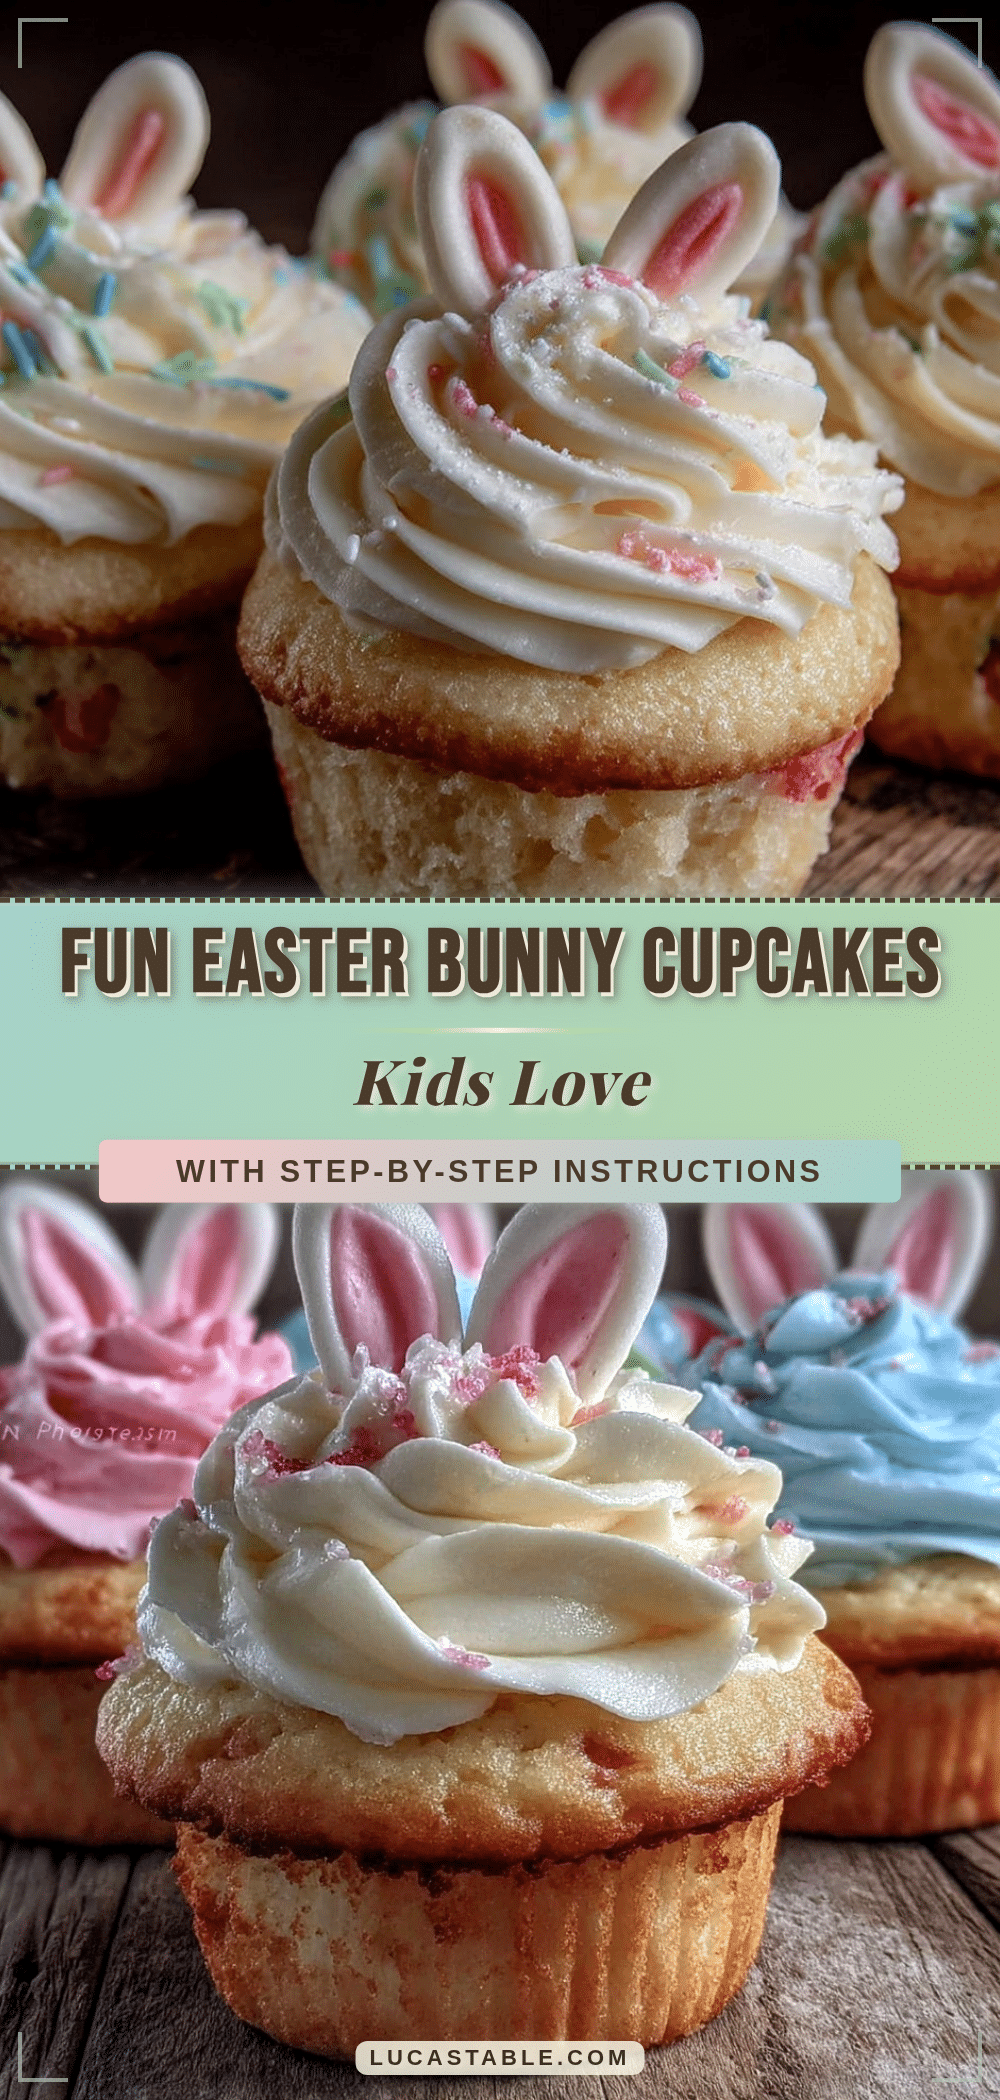
Easter Bunny Cupcakes Recipe Easy Spring Treat Kids Can Decorate
These Easter Bunny Cupcakes are a fun and easy spring treat that kids can decorate themselves, making them perfect for family celebrations and spring parties.
- Prep Time: 30 minutes
- Cook Time: 18-20 minutes
- Total Time: 1 hour
- Yield: 12 servings 1x
- Category: Dessert
- Cuisine: American
Ingredients
- 2 ½ cups (310g) all-purpose flour
- 2 ½ teaspoons baking powder
- Pinch of salt
- 1 ¾ cups (350g) sugar
- ½ cup (115g) unsalted butter, softened
- 3 large eggs
- 1 cup (240ml) whole milk
- 2 teaspoons vanilla extract
- 3 cups (360g) powdered sugar
- 8 oz (225g) cream cheese, softened
- Mini marshmallows
- Pink and white candy melts
- Mini chocolate chips
- Shredded coconut (optional)
Instructions
- Preheat oven to 350°F (175°C). Line a 12-cup muffin tin with paper liners or silicone cups.
- In a large bowl, whisk together the all-purpose flour, baking powder, and a pinch of salt.
- Using an electric hand mixer, beat the softened butter and sugar until light and fluffy.
- Add eggs one at a time, beating well after each addition, then stir in vanilla extract.
- Alternate adding the dry flour mixture and milk to the butter mixture, starting and ending with flour. Mix on low speed until smooth and pourable.
- Fill each cupcake liner about 2/3 full using a spoon or small ice cream scoop.
- Bake for 18-20 minutes or until a toothpick inserted in the center comes out clean.
- Cool cupcakes completely on a wire rack before frosting.
- Make the cream cheese frosting by beating softened cream cheese and butter until smooth. Gradually add powdered sugar and beat until fluffy. Add a splash of milk if frosting is too thick.
- Spread or pipe frosting on each cupcake. Decorate with mini marshmallows for tails, melted candy melts for bunny ears and noses, mini chocolate chips for eyes and whiskers, and sprinkle shredded coconut if desired.
Notes
[‘Do not frost warm cupcakes to avoid runny frosting.’, ‘Use room temperature ingredients for best results.’, ‘Keep decorations organized in small bowls to reduce mess.’, ‘Melt candy melts in short bursts in the microwave, stirring between each to avoid graininess.’, ‘Store leftover frosting in an airtight container in the fridge for later use.’, ‘Practice makes perfect; encourage creativity with decorations.’, ‘For gluten-free version, use a 1:1 gluten-free baking flour blend.’, ‘For dairy-free alternative, replace butter with coconut oil and use dairy-free cream cheese substitute.’, ‘Cupcakes can be baked ahead and stored unfrosted; frost and decorate on the day of serving.’]
Nutrition
- Serving Size: 1 cupcake
- Calories: 280
- Sugar: 26
- Sodium: 180
- Fat: 12
- Saturated Fat: 7
- Carbohydrates: 38
- Fiber: 1
- Protein: 3
Keywords: Easter cupcakes, bunny cupcakes, kids baking, spring treats, easy cupcakes, cream cheese frosting, kid-friendly dessert