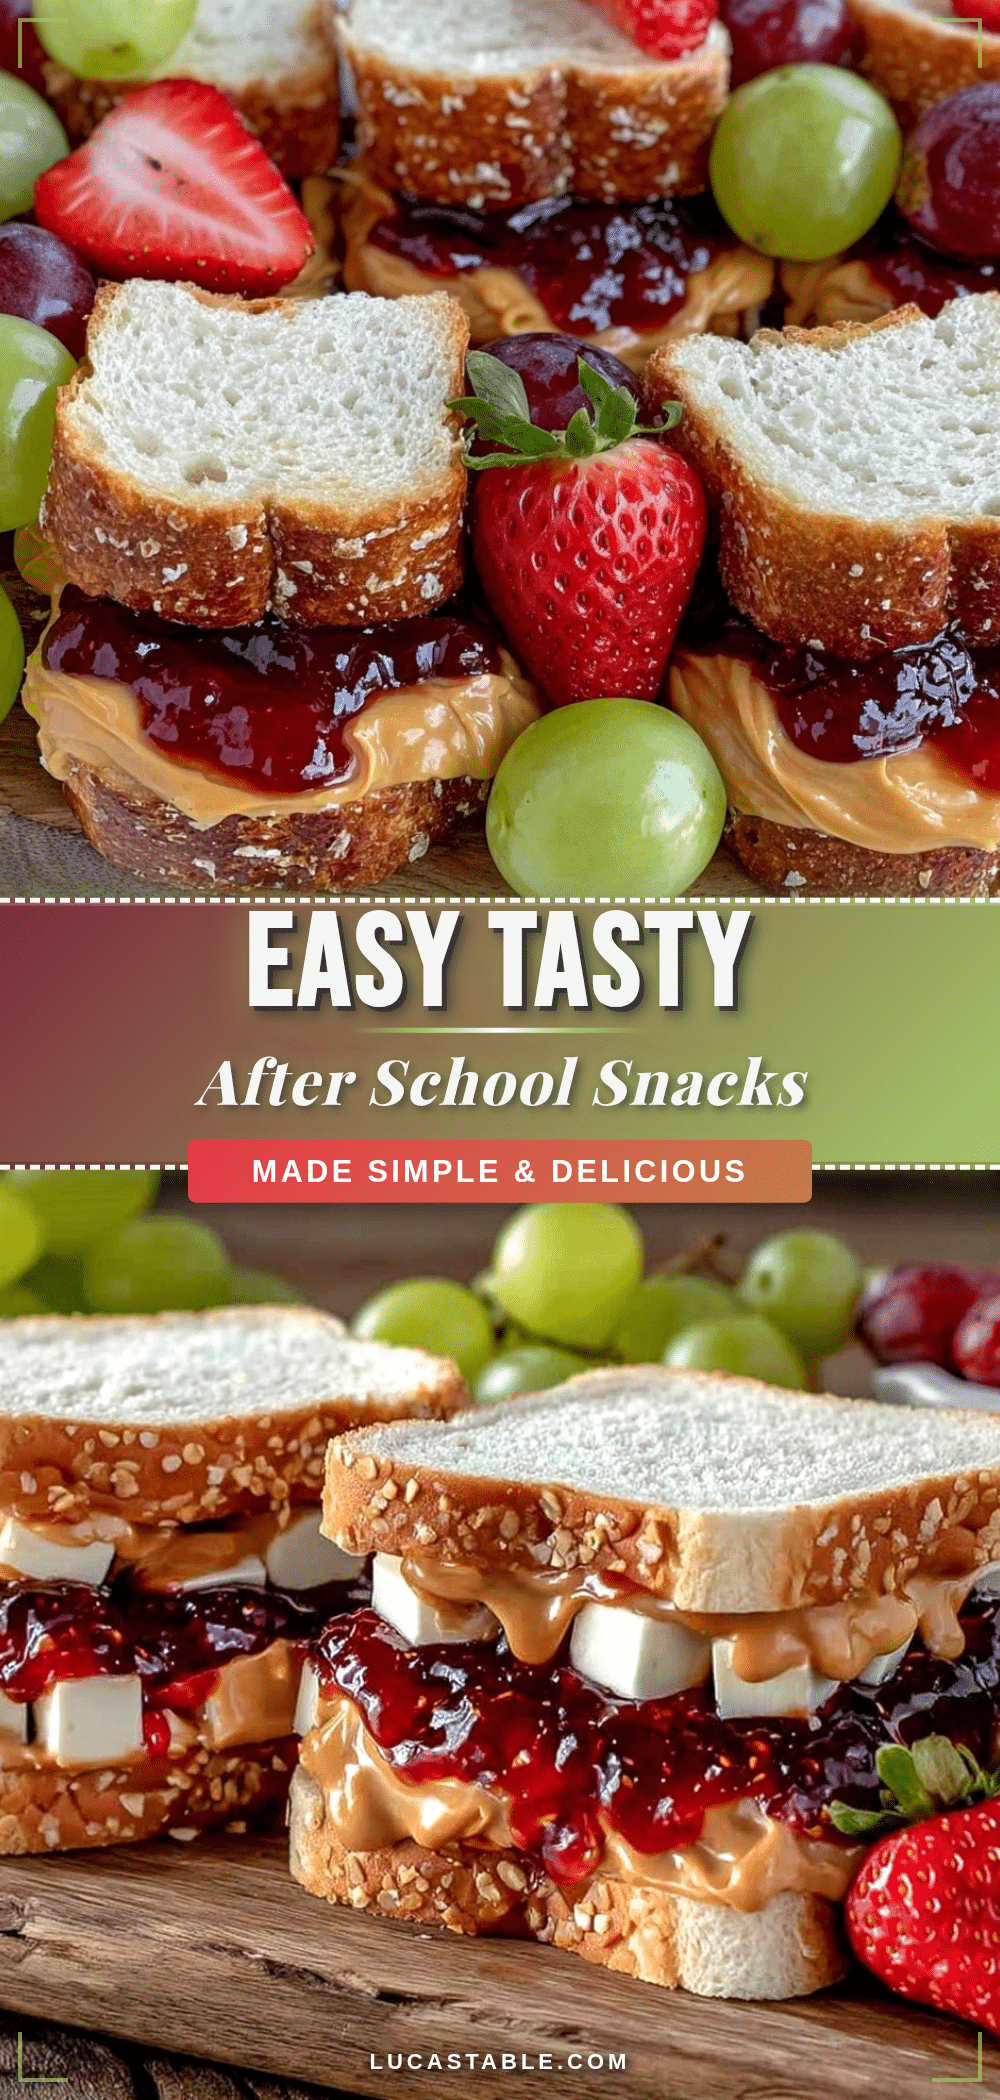
Last Thursday afternoon, my 9-year-old came home with that familiar “I’m starving” look, but I was still knee-deep in dinner prep. Instead of rushing to the rescue, I handed her a small bowl and told her she could make her own snack. She lit up and whipped up a quick, healthy treat on her own. That moment made me realize how empowering it is for kids to have a handful of after school snacks they can make alone—easy, healthy ideas that don’t require a grown-up hovering in the kitchen.
After years of juggling work, dinner, and a houseful of kids, I’ve tested and perfected a list of snacks that are just right for little hands: safe, simple, and actually good for them. These after school snacks kids can make alone aren’t just about convenience—they’re about building confidence and encouraging healthy habits early on. I’ve made these recipes dozens of times, and my kids’ friends always want the recipe too.
Whether your kid is a beginner or already loves to cook, these easy healthy recipes will become go-to staples for your family. Plus, they use ingredients you probably already have on hand. Let’s dive into these kid-friendly snacks that make after school hangouts happier and healthier.
Why You’ll Love These After School Snacks Kids Can Make Alone
This collection has completely changed how our afternoons flow. Here’s why I’m a fan:
- Hands-Off for Parents — These snacks require minimal supervision, which means I can focus on dinner or work while the kids feel proud of their creations. No more “Mom, can you help?” every five minutes.
- Built for Confidence — Each recipe breaks down tasks so kids can do them all by themselves, from spreading to mixing to assembling. My daughter went from hesitant to “Mom, I can do this!” in no time.
- Healthy Ingredients — No sneaky sugars or processed junk. These snacks are packed with nutrients, making them perfect for growing kids who need energy, not crashes.
- Quick and Simple — Most take under 10 minutes. Perfect for the short window between school and dinner.
- Flexible for All Ages — Younger kids might need a little help with spreading or chopping soft fruits, but older kids will breeze through these recipes solo.
This list shines for weeknight family snacks, especially when you want something both nutritious and satisfying without the fuss. I’ve also found these work great for meal prep Sunday, prepping snack supplies for the whole week.
Ingredients You’ll Need
Here’s the best part: most of this is stuff you already have. I’m picky about a few key ingredients because they make the snacks taste way better and hold up well when kids are making them solo.
- Whole grain bread or crackers — Choose sturdy slices or crackers that don’t crumble easily. I like whole wheat sandwich bread or multigrain crackers from brands like Triscuit for their crunch.
- Nut butters (1/2 cup / 125 ml) — Creamy peanut or almond butter works best. Avoid chunky unless your kid is confident with spreading. No nuts? Sunflower seed butter is a great allergy-friendly swap.
- Fresh fruit (2–3 cups / 300–450 g) — Apples, bananas, and berries are kid favorites. Wash and pre-slice for younger kids, or keep whole for older ones to slice themselves with a kid-safe knife.
- Yogurt (1 cup / 240 ml) — Plain or vanilla Greek yogurt; full-fat is creamier and more satisfying. I keep small containers on hand to make parfaits.
- Cheese sticks or cubes (6 oz / 170 g) — Mild cheeses like mozzarella or cheddar work well. Pre-cut for easy grabbing.
- Veggie sticks (1 cup / 150 g) — Carrots, cucumbers, and bell peppers sliced into sticks. My kids love dipping these in hummus.
- Hummus (1/2 cup / 125 ml) — Store-bought or homemade, just enough for dipping or spreading.
- Honey or maple syrup (optional, 2 tablespoons / 30 ml) — For a touch of natural sweetness in some recipes.
Equipment Needed
You don’t need anything fancy for these snacks. Here’s what I actually use and recommend:
- Kid-safe butter knife — The absolute must-have for spreading nut butters or soft cheeses. I love the ones with rounded tips and serrated edges designed for little hands.
- Small mixing bowls — Perfect for assembling yogurt parfaits or mixing spreads. Plastic or melamine bowls work well and won’t break if dropped.
- Cutting board — A small, colorful board sized for kids to feel comfortable chopping fruit or veggies.
- Measuring spoons (optional) — For kids who like precision or are learning to cook with a bit more control.
- Plate or snack tray — Keep it fun and organized with a divided plate or small tray so snacks don’t get mixed.
How to Make After School Snacks Kids Can Make Alone: Step by Step
Alright, let’s get into it. I’ll walk you through how I help my kids make these after school snacks on their own, including the little tricks that make it all work smoothly.
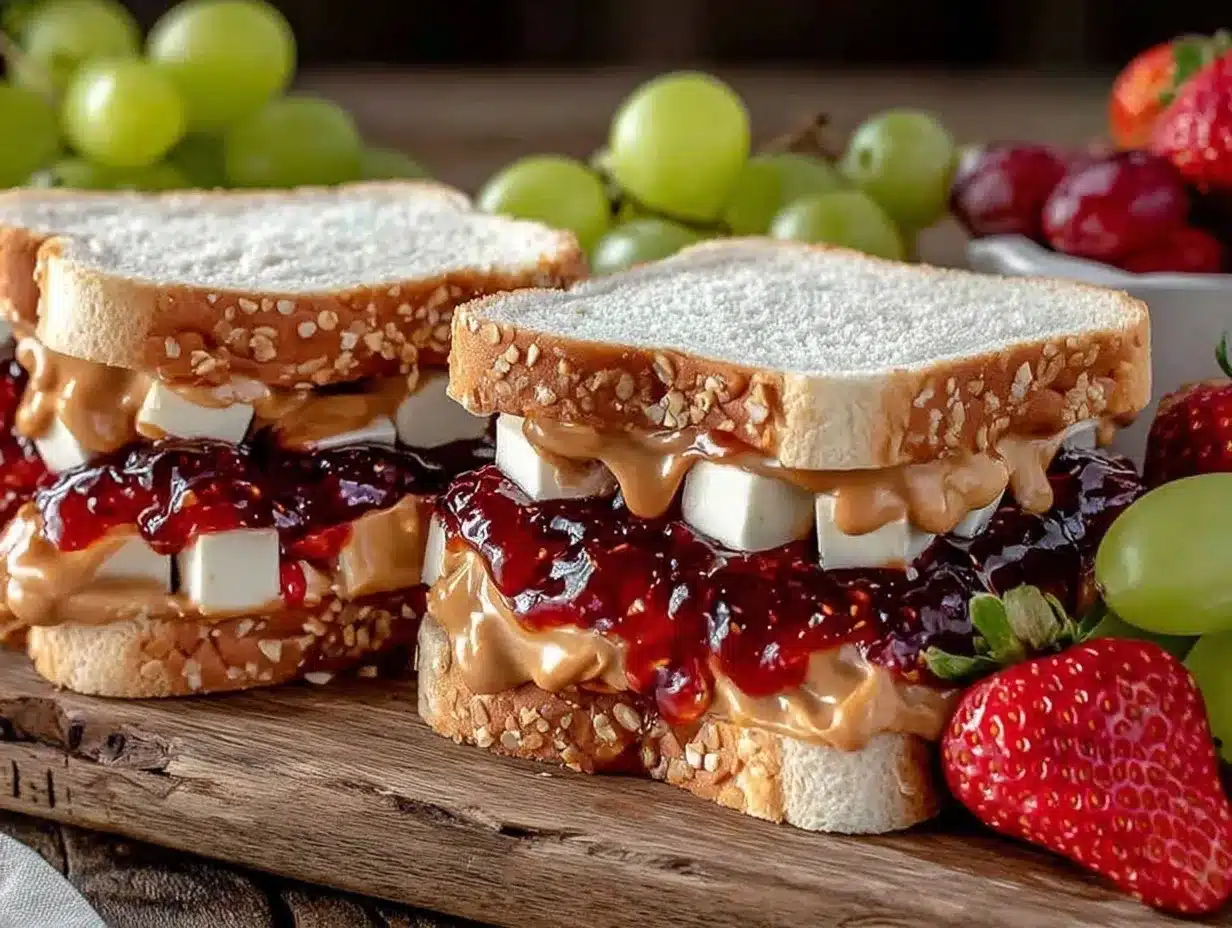
1. Nut Butter and Banana Sandwich
- Spread the nut butter evenly — Using a butter knife, your kid spreads 2 tablespoons of peanut or almond butter on one slice of whole grain bread. It should cover the bread without tearing it (which just takes a gentle hand).
- Slice the banana — With a kid-safe knife, slice a banana into thin rounds. The slices should be thin but sturdy enough to stack.
- Layer the banana slices — Place banana slices evenly over the nut butter. The bread will feel slightly heavier and it smells sweet.
- Top with the second slice — Press gently to make a sandwich. The sandwich should hold together without squishing out the filling.
Total time: about 5 minutes. Quick, satisfying, and packed with protein and potassium.
2. Yogurt Parfait
- Layer yogurt and fruit — Spoon 1/4 cup of Greek yogurt into a small bowl or cup. Add a layer of berries or sliced strawberries.
- Repeat layers — Alternate yogurt and fruit layers until the cup is full, finishing with fruit on top.
- Add a drizzle — If desired, drizzle a teaspoon of honey or maple syrup on top for a touch of sweetness.
Total time: about 7 minutes. This snack looks fancy but is so simple kids love making it themselves.
3. Cheese and Veggie Snack Plate
- Arrange cheese and veggies — Place 3–4 cheese cubes or a cheese stick on a plate. Add carrot, cucumber, and bell pepper sticks around it.
- Add a small bowl of hummus — Place a couple of spoonfuls of hummus in a dipping cup on the plate.
Total time: under 5 minutes. It’s colorful, crunchy, and the perfect balance of protein and fiber for after school.
Expert Tips & Tricks for Easy Healthy After School Snacks
Here’s everything I’ve figured out from making these snack recipes dozens of times. These tips will save you from the mistakes I already made.
Use Kid-Safe Tools
Invest in kid-friendly knives and spreaders. It’s worth it. My kids gained confidence fast, and I felt less nervous about them using real tools.
Pre-Prep Ingredients When Possible
If you’re short on time, wash and slice fruits and veggies after school or even the night before. Having everything ready means kids can just assemble without waiting.
Teach Portion Control Early
Show kids how much nut butter or yogurt to use. Too much can get messy and wasteful, too little leaves snacks bland. Using measuring spoons helps with consistency.
Keep It Fun
Let kids create faces or patterns with fruit slices on their sandwiches or parfaits. It makes snack time feel like playtime, encouraging them to try new ingredients.
Common Mistake: Spreading Tears Bread
Fix: Use a gentle hand and creamy nut butters. If the bread is stale, it won’t spread well. Fresh, slightly firm bread works best.
Variations & Substitutions for After School Snacks
Once your kid has mastered the basics, here’s how we mix it up to keep things interesting—and healthy.
- Mini Pita Pizzas — Swap whole grain bread for mini pita rounds. Kids spread tomato sauce, add shredded cheese, and top with veggies. Great for a weekend snack or holiday gathering.
- Fruit and Cheese Kabobs — Alternate grapes, apple chunks, and cheese cubes on skewers. Perfect for meal prep Sunday or a fun snack plate.
- Hummus and Pita Chips — Use whole wheat pita chips with hummus for dipping. My kids love this for a crunchy, protein-rich bite.
- Gluten-Free Option — Substitute crackers or bread with gluten-free versions. Most other ingredients are naturally gluten-free.
- Dairy-Free Option — Use coconut or almond yogurt in parfaits and swap cheese for dairy-free slices or omit.
Serving & Storage Tips
I usually serve these snacks on small plates or in snack-sized containers to keep portions manageable and visually appealing. Presentation matters—kids eat with their eyes first.
Storage: Most components can be prepped in advance and stored in airtight containers in the fridge for up to 3 days. Nut butters and crackers are best fresh to avoid sogginess.
Reheating: These snacks are designed to be eaten cold or at room temperature, which means zero reheating hassle. Perfect for kids to grab and go.
Freezing: Not recommended. Fresh fruit and yogurt don’t freeze well for snacks, and bread gets soggy.
Nutrition Information
I’m not a nutritionist, but here’s the breakdown if you’re keeping track. These estimates are per serving, based on 6 servings for most snacks.
| Calories | Protein (g) | Carbs (g) | Fiber (g) | Sugar (g) | Fat (g) | Saturated Fat (g) | Sodium (mg) |
|---|---|---|---|---|---|---|---|
| 180 | 7 | 20 | 4 | 8 | 8 | 1.5 | 120 |
Look — these are wholesome snacks made with real ingredients. Not diet food, and they’re not meant to replace meals. But they’re way better than bagged chips or candy bars, and my kids love them. When I want something lighter, I add more fresh fruit and veggies to bulk up the snack.
Final Thoughts
That Thursday afternoon when my daughter made her own snack? It was a small win but felt huge. She felt capable, and I felt relieved. That’s why I love these after school snacks kids can make alone—they bring independence and nutrition together without stress.
Make these your own. More nut butter? Always a yes in my book. Swap in any fruit or veggie your kid loves. Add a sprinkle of cinnamon or a drizzle of honey if that’s their thing. The base is forgiving and perfect for little hands learning the ropes.
If you try these, drop a comment and tell me how it went. And if something goes sideways, tell me that too—I genuinely want to help troubleshoot. That’s what the comments are for.
Happy cooking — I hope your kitchen smells amazing.
Frequently Asked Questions
Q: Can I make these after school snacks kids can make alone without nuts?
A: Absolutely! You can swap nut butters for seed butters like sunflower seed butter or even cream cheese. I’ve made these with my nut-allergic niece, and the snacks turned out just as tasty. Just watch for texture changes—seed butters can be a bit thinner.
Q: Why did my yogurt parfait turn out watery?
A: This usually happens if you add fruit that’s very juicy or if the yogurt is too thin. I’ve learned to drain berries slightly or pat them dry before layering. Also, use thicker Greek yogurt rather than plain yogurt to avoid watery layers.
Q: Can I make these snacks ahead for a holiday gathering?
A: Yes, some of them! Fruit and cheese kabobs and mini pita pizzas can be prepped a few hours ahead and kept chilled. I often prepare snacks like these for kids’ birthday parties or holiday playdates because they’re easy and popular.
Q: Are these snacks gluten-free or dairy-free?
A: They can be! Use gluten-free bread or crackers and swap dairy yogurt with coconut or almond yogurt. Cheese can be replaced with dairy-free slices or omitted. I’ve done this for friends with allergies—it works well as long as you have the right substitutes.
Q: Can I double or halve these snack recipes?
A: Totally. These recipes are flexible. Doubling works great if you have multiple kids or want to prep for several days. Halving is perfect for smaller appetites or younger kids. Just keep an eye on portion sizes to avoid waste.
Q: How do I get my picky eater to try these snacks?
A: My trick is to let kids help make their own snack. When they pick and assemble, they’re more likely to eat it. I also encourage fun presentation—faces made of fruit or colorful layers in parfaits make a big difference.
Q: Can kids safely slice fruit for these snacks?
A: Yes, with supervision at first and kid-safe knives. Start with soft fruits like bananas or seedless grapes, and teach proper handling. My 8-year-old was slicing fruit for yogurt parfaits in no time, and it’s a great skill for independence.
And if you’re looking for quick dinner ideas that your kids can help with after their snack, I highly recommend the quick zesty lemon chicken or the easy 15-minute spaghetti aglio olio. Both are simple enough for older kids to assist with and perfect for busy evenings.
Pin This Recipe!
After School Snacks Kids Can Make Alone: 10 Easy Healthy Recipes

A collection of easy, healthy, and kid-friendly after school snacks that children can prepare on their own, promoting independence and confidence while using simple, nutritious ingredients.
- Prep Time: 5 minutes
- Cook Time: 0 minutes
- Total Time: 5-7 minutes
- Yield: 6 servings
- Category: Snack
- Cuisine: American
Ingredients
- Whole grain bread or crackers (e.g., whole wheat sandwich bread or multigrain crackers)
- Nut butters (1/2 cup / 4 tablespoons) – creamy peanut or almond butter; sunflower seed butter as allergy-friendly option
- Fresh fruit (2–3 cups / about 10–15 oz) – apples, bananas, berries
- Yogurt (1 cup / 8 fl oz) – plain or vanilla Greek yogurt, full-fat preferred
- Cheese sticks or cubes (6 oz) – mild cheeses like mozzarella or cheddar
- Veggie sticks (1 cup / 5 oz) – carrots, cucumbers, bell peppers
- Hummus (1/2 cup / 4 fl oz)
- Honey or maple syrup (optional, 2 tablespoons / 1 fl oz)
Instructions
- Nut Butter and Banana Sandwich:
- 1. Spread 2 tablespoons of peanut or almond butter evenly on one slice of whole grain bread using a kid-safe butter knife.
- 2. Slice a banana into thin rounds with a kid-safe knife.
- 3. Layer banana slices evenly over the nut butter.
- 4. Top with a second slice of bread and press gently to form a sandwich.
- Yogurt Parfait:
- 1. Spoon 1/4 cup of Greek yogurt into a small bowl or cup.
- 2. Add a layer of berries or sliced strawberries.
- 3. Alternate yogurt and fruit layers until the cup is full, finishing with fruit on top.
- 4. Drizzle a teaspoon of honey or maple syrup on top if desired.
- Cheese and Veggie Snack Plate:
- 1. Arrange 3–4 cheese cubes or a cheese stick on a plate.
- 2. Add carrot, cucumber, and bell pepper sticks around the cheese.
- 3. Place a couple of spoonfuls of hummus in a small dipping cup on the plate.
Notes
Use creamy nut butters to avoid tearing bread. Pre-slice fruits and veggies for younger kids. Use kid-safe knives for slicing. Store prepped ingredients in airtight containers in the fridge for up to 3 days. Snacks are best served cold or at room temperature. Not recommended to freeze. Presentation with fun shapes or faces encourages kids to eat.
Nutrition
- Serving Size: One snack plate or s
- Calories: 180
- Sugar: 8
- Sodium: 120
- Fat: 8
- Saturated Fat: 1.5
- Carbohydrates: 20
- Fiber: 4
- Protein: 7
Keywords: after school snacks, healthy snacks, kids snacks, easy snacks, nut butter snacks, yogurt parfait, cheese and veggie plate, kid-friendly recipes, quick snacks