The clock had just slipped past midnight, and honestly, the fridge was looking pretty sad—leftovers that didn’t exactly scream “snack” were all I had. But then, in the back of the fridge, a lonely carton of hard-boiled eggs caught my eye. I wasn’t exactly planning a feast, just something quick to fend off the late-night munchies before crashing. I’d seen deviled eggs before, but they always struck me as this delicate, fancy thing that took forever. One half-hearted attempt later, I realized the yolks could be mashed with a bit of mayo and mustard, and hey, why not crisp them up for a little surprise texture?
Throw in some crispy bacon bits I had stashed away, sprinkle fresh chives from the windowsill planter, and suddenly, this accidental midnight snack turned into a repeat-worthy obsession. You know that kind of discovery where something simple just clicks? That’s what happened with these crispy deviled eggs with bacon and fresh chives. It’s not just about the flavor, but the unexpected crunch and smoky kick that totally changed my mind about deviled eggs.
Since then, I’ve found myself making these for casual hangouts and even bringing them along to potlucks because—let’s face it—people keep asking for the recipe. It’s like the crispy crust gives the familiar creamy filling this whole new personality. I’m betting you’ll find the same quiet magic in this recipe, whether you’re whipping them up for a sudden craving or a little party snack. It’s comfort food with a crisp, savory twist that feels just right.
Why You’ll Love This Crispy Deviled Eggs with Bacon and Fresh Chives Recipe
After many trial-and-error runs in my kitchen, I can say this recipe nails that perfect balance between creamy, crunchy, and smoky. It’s not your ordinary deviled eggs; the crispy coating adds an exciting twist that’ll get folks talking.
- Quick & Easy: Ready in about 30 minutes, which is great for busy nights or when last-minute guests pop in.
- Simple Ingredients: Nothing fancy needed—eggs, bacon, mayo, mustard, and fresh chives. I usually go with the best quality bacon I can find for that real smoky punch.
- Perfect for Parties: Whether it’s a casual get-together or a holiday appetizer, these always disappear fast.
- Crowd-Pleaser: Kids and adults alike love the crispy outside paired with the creamy inside.
- Unbelievably Delicious: The little crunch on the outside brings deviled eggs into a whole new flavor dimension.
What sets this recipe apart is the crispy coating around the deviled egg halves—something that isn’t common in traditional recipes. Instead of just chilled, creamy eggs, you get this warm, crunchy bite that surprises the palate. The bacon adds that irresistible smoky saltiness, while the fresh chives bring a bright oniony pop. Honestly, it’s a simple twist that makes these eggs feel special without complicating the process.
And if you want a quick dinner idea that pairs well, these crispy deviled eggs fit right alongside something like the quick zesty lemon chicken or the crispy BBQ chicken pizza for a spread that’s both satisfying and fuss-free.
What Ingredients You Will Need
This crispy deviled eggs recipe uses simple, wholesome ingredients to deliver bold flavor and satisfying texture without the fuss. Most are pantry staples, making it easy to whip these up anytime.
- Large eggs: 12, hard-boiled and peeled (I prefer farm-fresh eggs for richer yolks)
- Bacon: 6 slices, cooked until crispy and finely chopped (applewood smoked is my go-to)
- Mayonnaise: 1/3 cup (use a good-quality brand like Hellmann’s for creaminess)
- Dijon mustard: 1 tablespoon (adds a subtle tang)
- Apple cider vinegar: 1 teaspoon (balances the richness)
- Salt & pepper: To taste
- All-purpose flour: 1/2 cup (for coating the eggs before frying)
- Breadcrumbs: 1 cup, panko preferred for extra crunch
- Butter or neutral oil: For pan-frying (I like using a mix of butter and oil for flavor and crispiness)
- Fresh chives: 2 tablespoons, finely chopped (for garnish and fresh bite)
If you’re looking for a gluten-free option, swap the all-purpose flour and breadcrumbs with almond flour or gluten-free panko. For a dairy-free version, use oil instead of butter for frying, and swap mayo for a vegan alternative like aquafaba mayo.
In summer, I sometimes swap fresh chives for thinly sliced scallions or even dill, depending on what’s growing in my garden. The bacon is optional if you want to keep it vegetarian—just add a sprinkle of smoked paprika for that smoky note instead.
Equipment Needed
- A large pot for boiling eggs
- Slotted spoon (for easy egg removal)
- Mixing bowls (at least two: one for batter, one for breading)
- Fork or potato masher (to mash the yolks)
- Skillet or frying pan (non-stick preferred for frying the eggs)
- Tongs or slotted spatula (to carefully flip and remove eggs)
- Fine knife and cutting board (for chopping bacon and chives)
- Paper towels (for draining excess oil)
If you don’t have a non-stick skillet, a well-seasoned cast iron pan works wonders and adds a nice crust. For frying, you can also use an air fryer to get a similar crisp texture but with less oil. I’ve tried both, and while the air fryer is convenient, the skillet gives the eggs a golden crust that’s hard to beat.
Preparation Method

- Boil the eggs: Place 12 large eggs in a pot and cover with cold water by about an inch. Bring to a boil over medium-high heat, then cover and remove from heat. Let sit for exactly 12 minutes. This method avoids the dreaded green ring around yolks and makes peeling smoother.
- Cool and peel: Immediately transfer eggs to an ice bath to stop cooking and chill for 5 minutes. Gently crack and peel shells. Pat dry with paper towels.
- Prepare the filling: Slice eggs in half lengthwise. Carefully remove yolks and place in a bowl. Mash yolks with a fork or potato masher until smooth.
- Mix filling ingredients: Add 1/3 cup mayonnaise, 1 tablespoon Dijon mustard, 1 teaspoon apple cider vinegar, salt, and pepper to the mashed yolks. Stir until creamy and well combined. Taste and adjust seasoning if needed.
- Crisp the bacon: Cook 6 slices of bacon in a skillet over medium heat until crispy. Drain on paper towels and chop finely.
- Assemble deviled eggs: Gently fold most of the chopped bacon and half the chives into the yolk mixture, reserving some for garnish. Spoon or pipe the filling back into the egg white halves. Don’t overfill; a generous mound works best.
- Prepare the breading station: Place 1/2 cup all-purpose flour in a shallow bowl. In another shallow bowl, spread 1 cup panko breadcrumbs mixed with a pinch of salt and pepper.
- Coat the eggs: Lightly dredge each filled egg half in flour, shaking off excess, then press into the panko breadcrumbs, coating evenly. This creates that signature crispy crust.
- Fry the eggs: Heat 2 tablespoons of butter and 1 tablespoon neutral oil (like vegetable or canola) in a non-stick skillet over medium heat. Carefully place coated egg halves filling-side up in the pan. Fry for about 3-4 minutes or until golden and crisp on the bottom. Flip gently and fry the other side for 2-3 minutes. Be careful not to burn the coating.
- Drain and garnish: Remove eggs from skillet and place on paper towels to drain excess oil. Sprinkle with reserved bacon and fresh chives before serving.
If the coating starts to brown too quickly, lower the heat; patience is key to avoid burnt crumbs and get that lovely golden crunch. Also, use a shallow pan to avoid overcrowding, so the heat stays consistent.
Cooking Tips & Techniques
One thing I learned the hard way is not to skip drying the eggs thoroughly before breading. Even a bit of moisture ruins the crisp coating, making it soggy instead of crunchy. Pat those eggs dry like your life depends on it.
Also, don’t rush the frying. Medium heat is your friend here. Too hot, and the breading burns while the filling stays cold; too low, and the crust won’t crisp properly. I usually test with one egg first before frying the whole batch.
Using a mix of butter and oil allows the butter to add flavor without burning too fast, thanks to the higher smoke point of the oil. This little trick makes a huge difference in the final taste.
And if you want to prep ahead, you can fill the eggs and keep them refrigerated, then coat and fry right before serving. This keeps the crust fresh and the filling creamy.
Variations & Adaptations
These crispy deviled eggs are pretty flexible, and I’ve tried a few twists that worked great.
- Spicy kick: Add a teaspoon of sriracha or a dash of cayenne to the yolk mixture for heat.
- Herb swap: Use dill, parsley, or tarragon instead of chives depending on your mood or season.
- Cheese lover’s version: Mix in a tablespoon of finely grated sharp cheddar or Parmesan into the filling for extra richness.
- Air fryer method: After breading, place eggs in an air fryer at 375°F (190°C) for 6-8 minutes, flipping halfway, for a lighter crisp.
- Vegetarian: Skip bacon and add smoked paprika or a dash of liquid smoke for that smoky flavor.
Personally, I once tried adding a bit of finely chopped pickled jalapeños for a tangy heat burst. It surprised me how well it complemented the bacon and creamy yolk.
Serving & Storage Suggestions
Serve these crispy deviled eggs warm or at room temperature. I find the crust is at its best right after frying, so plan to serve them soon after cooking.
For presentation, arrange them on a platter and garnish with extra chopped chives and bacon bits. They pair beautifully with a crisp green salad or alongside an easy pasta dish like quick creamy tuna pasta for a light lunch or appetizer spread.
To store leftovers, place the eggs in an airtight container in the fridge for up to 2 days. Reheat gently in a skillet or oven to bring back some crispness—microwaving tends to soften the coating.
Keep in mind that the crispy crust will soften over time as it absorbs moisture, so these are best enjoyed fresh or reheated promptly.
Nutritional Information & Benefits
Each crispy deviled egg half contains roughly 70-90 calories depending on bacon and mayo quantity. They are a good source of protein from eggs and bacon, with healthy fats providing lasting energy.
Eggs deliver essential vitamins like B12 and D, plus choline, which supports brain health. Fresh chives add antioxidants and a bit of vitamin K, enhancing the nutritional profile.
For those watching carbs, this recipe remains relatively low-carb, especially if you swap breadcrumbs for almond flour. Just be mindful of mayo and bacon sodium content if you’re monitoring salt intake.
Overall, these crispy deviled eggs make for a satisfying snack or appetizer that balances indulgence with nutrition, fitting nicely in many diets.
Conclusion
These crispy deviled eggs with bacon and fresh chives have become my go-to for when I want something quick, tasty, and just a little bit different. The crunch adds a fun texture contrast that makes every bite interesting. Plus, the smoky bacon and bright chives take the classic filling up a notch without complicating the process.
Feel free to tweak the seasoning or try different herbs—it’s a recipe that welcomes your kitchen creativity. I still find joy in making these when I need a simple snack or a shareable appetizer. Honestly, it’s just one of those recipes that sticks with you.
If you give it a try, I’d love to hear how you make it your own. Drop a comment below or share your favorite variations. Here’s to crispy, creamy bites that never disappoint!
FAQs about Crispy Deviled Eggs with Bacon and Fresh Chives
Can I make these deviled eggs ahead of time?
Yes, you can prepare the filling and fill the egg whites a day ahead. Just wait to bread and fry them right before serving for the best crispiness.
What’s the best way to peel hard-boiled eggs easily?
Cooling eggs quickly in an ice bath right after boiling helps separate the membrane from the shell, making peeling easier and cleaner.
Can I bake the coated eggs instead of frying?
Absolutely! Bake at 400°F (205°C) on a greased baking sheet for about 10-12 minutes until golden and crisp. Flip halfway through for even browning.
Is there a dairy-free way to make this recipe?
Yes, use oil instead of butter for frying and choose dairy-free mayonnaise to keep it free of dairy.
How do I store leftovers to keep them crispy?
Store in an airtight container in the fridge up to 2 days. Reheat gently in a skillet or oven to bring back crunch; microwaving will soften the coating.
Pin This Recipe!
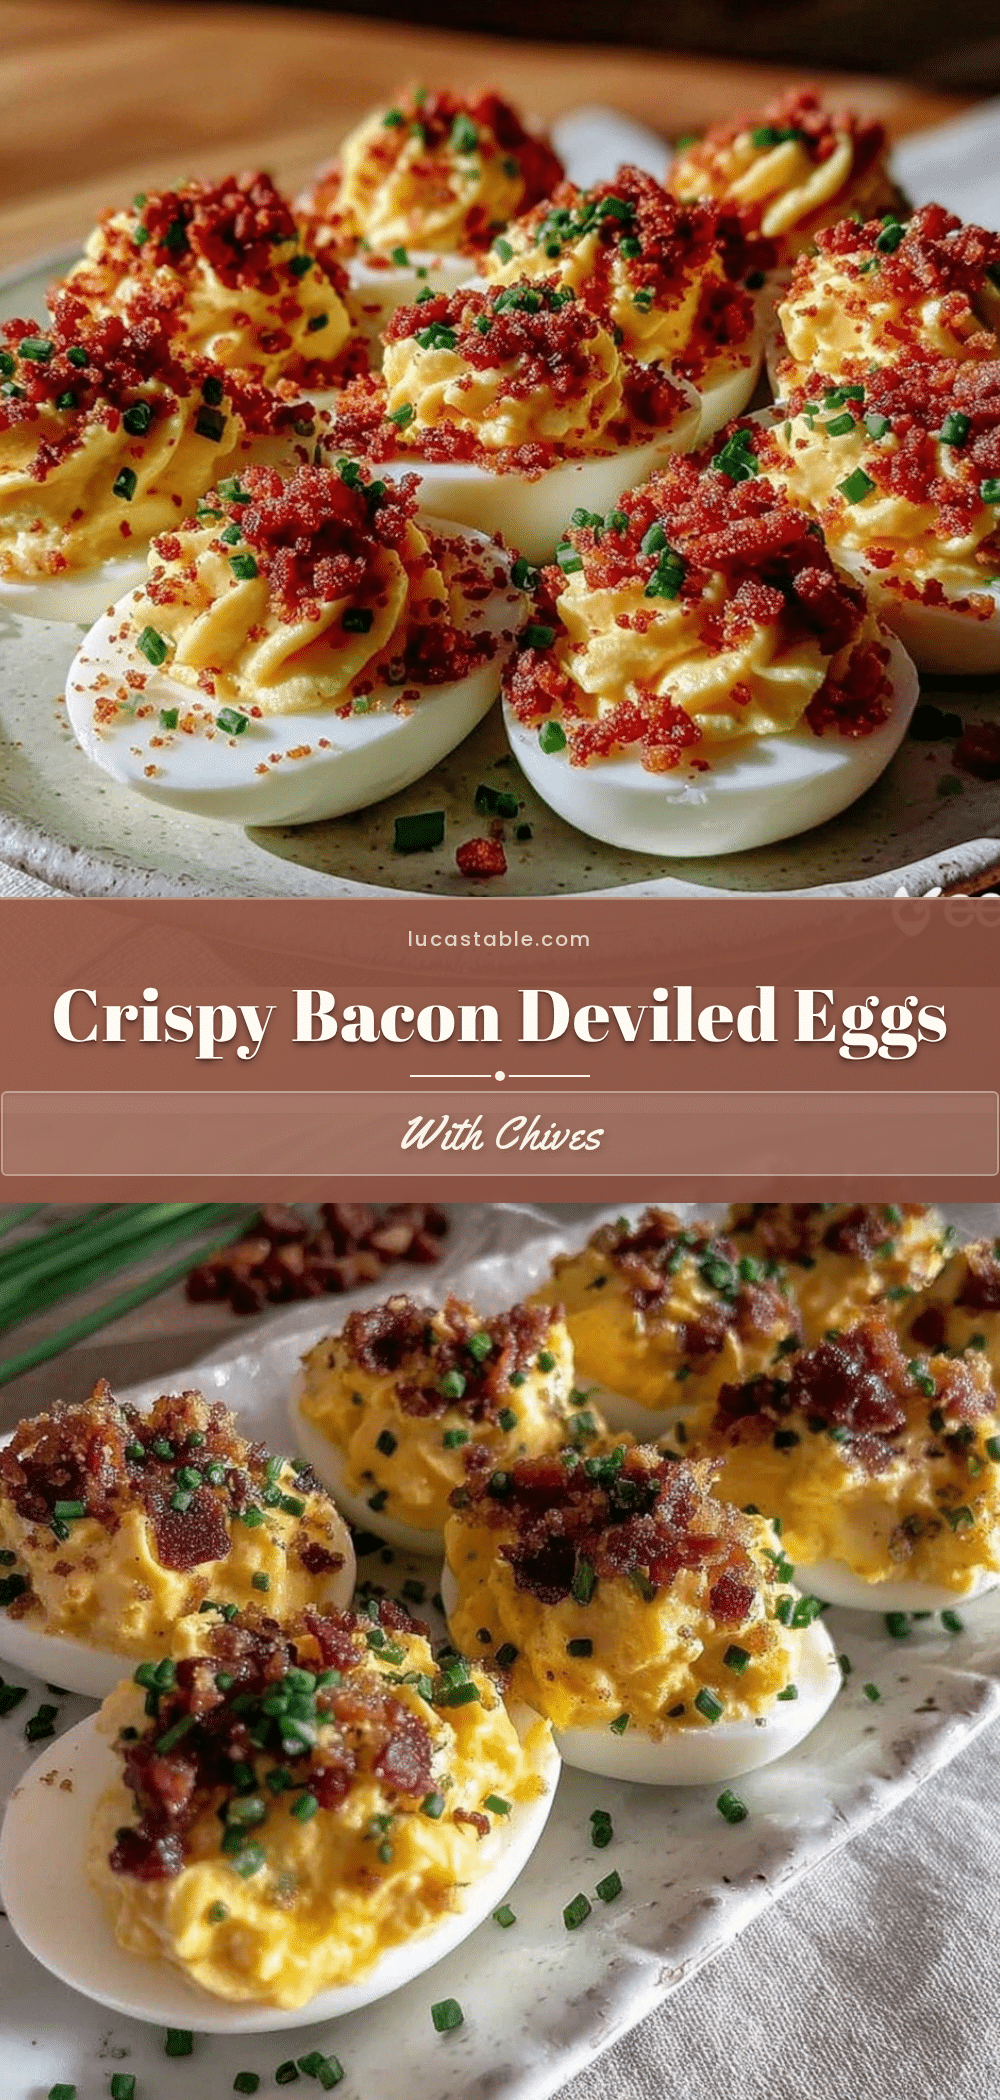
Crispy Deviled Eggs with Bacon and Fresh Chives

A quick and easy appetizer featuring hard-boiled eggs filled with a creamy yolk mixture, crispy bacon, and fresh chives, coated in breadcrumbs and pan-fried to golden perfection for a crunchy twist on classic deviled eggs.
- Prep Time: 15 minutes
- Cook Time: 15 minutes
- Total Time: 30 minutes
- Yield: 24 deviled egg halves (12 eggs) 1x
- Category: Appetizer
- Cuisine: American
Ingredients
- 12 large eggs, hard-boiled and peeled
- 6 slices bacon, cooked until crispy and finely chopped
- 1/3 cup mayonnaise
- 1 tablespoon Dijon mustard
- 1 teaspoon apple cider vinegar
- Salt and pepper to taste
- 1/2 cup all-purpose flour
- 1 cup panko breadcrumbs
- 2 tablespoons butter or neutral oil (vegetable or canola) for frying
- 2 tablespoons fresh chives, finely chopped
Instructions
- Place 12 large eggs in a pot and cover with cold water by about an inch. Bring to a boil over medium-high heat, then cover and remove from heat. Let sit for exactly 12 minutes.
- Immediately transfer eggs to an ice bath to stop cooking and chill for 5 minutes. Gently crack and peel shells. Pat dry with paper towels.
- Slice eggs in half lengthwise. Carefully remove yolks and place in a bowl. Mash yolks with a fork or potato masher until smooth.
- Add 1/3 cup mayonnaise, 1 tablespoon Dijon mustard, 1 teaspoon apple cider vinegar, salt, and pepper to the mashed yolks. Stir until creamy and well combined. Adjust seasoning if needed.
- Cook 6 slices of bacon in a skillet over medium heat until crispy. Drain on paper towels and chop finely.
- Gently fold most of the chopped bacon and half the chives into the yolk mixture, reserving some for garnish. Spoon or pipe the filling back into the egg white halves without overfilling.
- Place 1/2 cup all-purpose flour in a shallow bowl. In another shallow bowl, mix 1 cup panko breadcrumbs with a pinch of salt and pepper.
- Lightly dredge each filled egg half in flour, shaking off excess, then press into the panko breadcrumbs, coating evenly.
- Heat 2 tablespoons butter and 1 tablespoon neutral oil in a non-stick skillet over medium heat. Carefully place coated egg halves filling-side up in the pan. Fry for 3-4 minutes until golden and crisp on the bottom.
- Flip gently and fry the other side for 2-3 minutes. Remove eggs and place on paper towels to drain excess oil.
- Sprinkle with reserved bacon and fresh chives before serving.
Notes
Pat eggs dry thoroughly before breading to ensure a crispy coating. Fry on medium heat to avoid burning the breading while keeping the filling warm. You can prepare the filling and fill eggs a day ahead, then bread and fry just before serving. For a gluten-free version, substitute flour and breadcrumbs with almond flour or gluten-free panko. For dairy-free, use oil instead of butter and dairy-free mayonnaise. Baking at 400°F for 10-12 minutes is an alternative to frying.
Nutrition
- Serving Size: 1 deviled egg half
- Calories: 80
- Sugar: 0.5
- Sodium: 180
- Fat: 6
- Saturated Fat: 2
- Carbohydrates: 3
- Fiber: 0.3
- Protein: 5
Keywords: deviled eggs, crispy deviled eggs, bacon deviled eggs, appetizer, party snack, easy recipe, chives, crunchy deviled eggs


