I burned my first batch of dill pickle brine not once, but twice before figuring out why the cucumbers turned mushy instead of crisp. Honestly, I never thought refrigerator dill pickles would be something I’d get right without a whole lot of fuss. For years, I stuck to store-bought jars because making pickles at home seemed like a process full of guesswork. Then one day, after a late-night craving for something tangy and crunchy, I gave it another try—with a few tweaks learned the hard way. The result? Easy crisp refrigerator dill pickles that actually stayed crunchy and tasted fresh, without the long wait or complicated equipment.
You know that snap when you bite into a perfect pickle? It’s oddly satisfying, and it took me a while to nail that texture at home. The secret lies in the brine’s balance, the right kind of cucumbers, and a simple fridge pickling method that doesn’t require canning. I’m not here to sell you on a complicated process—this recipe is honest, straightforward, and made for anyone who likes quick homemade snacks with that classic dill punch.
After countless trials, I realized these pickles weren’t just a side dish—they became a staple in my kitchen. They’re fresh, tangy, and crisp enough to stand up to a hearty sandwich or even just on their own as a snack. Plus, making them is kind of addictive once you get the hang of it. This recipe stuck with me because it’s proof that crisp pickles don’t have to be complicated, and sometimes, the simplest things bring the most comfort.
Why You’ll Love This Recipe
From my experiments in the kitchen, I can say this easy crisp refrigerator dill pickles recipe hits the right notes every time. Here’s what makes it stand out:
- Quick & Easy: Ready to eat in just 24 hours, no canning or special equipment needed.
- Simple Ingredients: Pantry staples like vinegar, garlic, and dill—no obscure spices or additives.
- Perfect for Snacks & Sandwiches: Whether it’s a quick nibble or an addition to your zesty lemon chicken dinner, these pickles add a refreshing crunch.
- Crowd-Pleaser: Kids and adults alike love the tangy snap—great for potlucks or game day.
- Unbelievably Delicious: The balance of sour, savory, and herbal notes makes every bite feel fresh and satisfying.
What makes this different from other pickle recipes? It’s the way the brine is calibrated—not too salty, not too sweet—with just the right amount of garlic and dill. Plus, I toss in a couple of secret touches like fresh dill sprigs and a pinch of crushed red pepper for a subtle kick. This isn’t your grandma’s canned pickle recipe; it’s fridge pickling made simple, fast, and reliably crisp.
Honestly, this recipe stuck with me because it makes homemade pickles approachable. If you’ve ever been intimidated by traditional pickling, this is your shortcut to crunchy, flavorful pickles that you can tweak to your taste. It’s the kind of recipe that turns an ordinary cucumber into something worth savoring.
What Ingredients You Will Need
This recipe uses simple, wholesome ingredients that deliver bold flavor and a satisfying crunch without any fuss. Most of these are pantry staples, and the fresh dill is the star for that classic pickle aroma.
- Kirby cucumbers or pickling cucumbers, washed and sliced into spears or chips (these small, firm cucumbers hold up best for crispness)
- White vinegar (5% acidity) – the base of the brine, providing that tangy zip
- Water – to dilute the vinegar for balanced acidity
- Kosher salt (or pickling salt) – key for flavor and crisp texture
- Granulated sugar – just a touch to round out the tang
- Fresh dill sprigs – aromatic and essential for true dill pickle flavor; I like to use organic if possible
- Garlic cloves, smashed – adds a savory punch; fresh is best but jarred works in a pinch
- Black peppercorns – for a subtle peppery note
- Optional: Crushed red pepper flakes – if you like a little heat in your pickles
You might already have most of these on hand, which makes this recipe a no-brainer for quick pickling. If you want to experiment, replacing white vinegar with apple cider vinegar provides a fruitier twist. For a gluten-free option, ensure your salt is certified gluten-free (most kosher salts are). And if fresh dill isn’t available, dried dill weed can be used but won’t be quite as vibrant.
Equipment Needed
This recipe keeps equipment simple—no fancy canning gear required.
- Glass jars with lids (quart-sized Mason jars work perfectly; I prefer glass over plastic for flavor and durability)
- Measuring cups and spoons for accuracy in brine ratios
- Small saucepan to heat the brine mixture
- Sharp knife and cutting board for slicing cucumbers
- Tongs or fork to pack cucumbers into jars without bruising
If you don’t have Mason jars, any clean glass container with a tight-fitting lid will do. I’ve even used repurposed glass jars from store-bought pickles after thorough cleaning. No need to invest in canning equipment since these are fridge pickles, eaten cold and fresh. For maintenance, just hand wash your glass jars to keep them clear and odor-free for the next batch.
Preparation Method
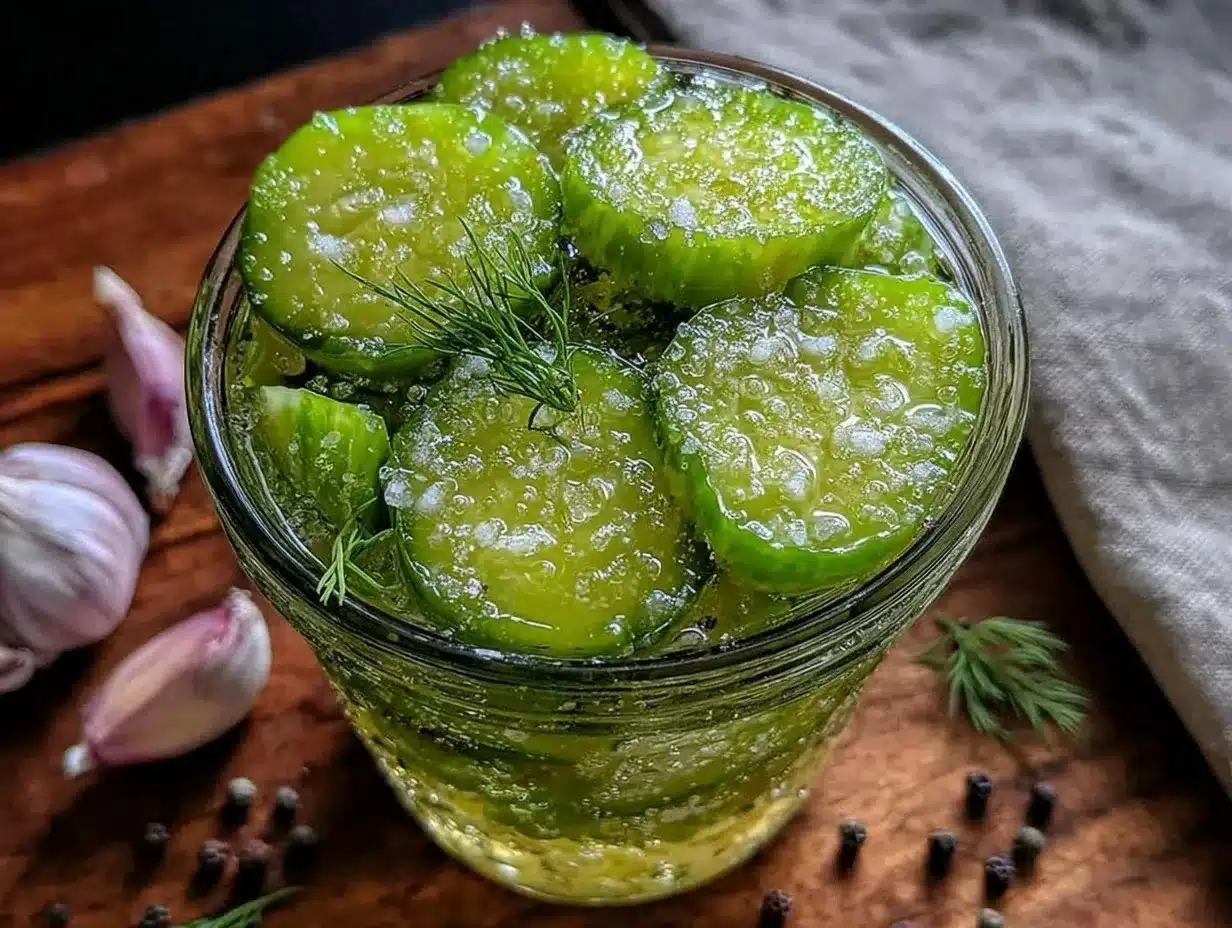
- Prepare the cucumbers: Wash 4 cups (about 600g) of Kirby cucumbers thoroughly. Slice into spears or rounds, depending on your preference. The key is uniform size for even pickling. Set aside.
- Make the brine: In a small saucepan, combine 1 cup (240ml) white vinegar, 1 cup (240ml) water, 1 tablespoon kosher salt, and 1 teaspoon sugar. Warm over medium heat, stirring until salt and sugar dissolve completely (about 3-5 minutes). Remove from heat and let cool slightly.
- Pack the jars: In two quart-sized jars, place 2-3 sprigs of fresh dill, 2 smashed garlic cloves, and 1 teaspoon black peppercorns each. Add a pinch of crushed red pepper flakes if you like. Then pack the sliced cucumbers tightly but without crushing.
- Pour the brine: Carefully pour the warm brine over the cucumbers in each jar, leaving about 1/2 inch (1.3 cm) headspace at the top. Use a clean utensil to release any air bubbles by gently pressing the cucumbers down.
- Seal and refrigerate: Screw lids on tightly and place jars in the refrigerator. Let them sit for at least 24 hours before tasting; they’ll keep developing flavor for up to 2 weeks.
- Check crispness: If you notice pickles softening, next time try adding a few grape leaves to the jar—they contain tannins that help maintain crunch.
This process is quick and forgiving. If your brine tastes too sharp, add a bit more water next time. If it’s too bland, a pinch more salt or garlic can fix that. I’ve found that slicing cucumbers the night before and refrigerating them uncovered helps remove excess moisture, keeping the pickles firmer once brined.
Cooking Tips & Techniques
Getting crisp dill pickles isn’t just about the recipe; technique matters a lot. Here are my tips from messing up batches to success:
- Choose the right cucumbers: Pick firm, small pickling cucumbers like Kirby. Avoid large slicing cucumbers since they tend to get mushy.
- Don’t skip the salt: Kosher or pickling salt helps draw out moisture and keeps cucumbers crisp. Table salt can make brine cloudy.
- Warm brine, cool jars: Pouring warm brine into cool jars prevents cooking the cucumbers, which would soften them.
- Use fresh dill: The aromatic oils in fresh dill make a big flavor difference. I always add extra sprigs for punch.
- Store pickles properly: Always refrigerate and keep lids tightly closed to avoid softening and off-flavors.
- Patience pays: Although ready in 24 hours, letting the pickles sit for 2-3 days deepens flavor and texture.
I learned the hard way that rushing this process or using the wrong cucumbers leads to disappointment. Also, avoid soaking cucumbers in water for long before pickling; it dilutes flavor and texture. And if you want to speed up snack prep, these pickles pair perfectly with quick recipes like creamy tuna pasta—the tang cuts through richness nicely.
Variations & Adaptations
One of the joys of refrigerator dill pickles is how easy it is to adapt them to your taste or dietary needs. Here are some ideas I’ve tried or considered:
- Spicy Dill Pickles: Add extra crushed red pepper flakes or a sliced jalapeño to the jar for a fiery kick.
- Garlic Lovers: Double the garlic cloves for a more pungent, savory flavor—great if you’re pairing pickles with grilled meats.
- Low-Sodium Option: Reduce salt by half and increase refrigeration time slightly to allow flavor build-up without over-salting.
- Herbal Twist: Toss in fresh thyme or rosemary sprigs for an earthy variation that adds complexity.
- Quick Bread and Butter Pickles: Add a tablespoon of sugar and a pinch of mustard seeds for a sweeter, tangy alternative.
For a different cooking method, some friends have tried this brine in a slow cooker on low heat for an hour, then refrigerated, but I prefer the raw crispness of traditional fridge pickles. If you have an allergy to garlic, substitute with a few slices of fresh ginger for a bright note. Personally, I love the classic dill version the best, but experimenting with herbs and heat keeps the experience fresh.
Serving & Storage Suggestions
These easy crisp refrigerator dill pickles are best served cold straight from the fridge. They make a perfect snack on their own or a crunchy accompaniment to sandwiches, burgers, or salads. Try pairing them with a BBQ chicken pizza for a tangy contrast that wakes up your taste buds.
Store pickles in their brine in sealed glass jars in the refrigerator. They keep well for up to 2 weeks, although I usually finish mine within a week because they’re so addictive. If you notice any cloudiness in the brine, that’s normal and harmless, but always check for off smells or mold—discard if that occurs.
When reheating dishes that include pickles, like a warm potato salad, add the pickles fresh after heating to keep their crunch. Over time, the flavor gets more intense, so taste every few days to decide your preferred stage. These pickles are also fantastic chopped up in creamy dips or tossed into a cold pasta salad for a burst of freshness.
Nutritional Information & Benefits
These refrigerator dill pickles are low in calories—about 10-15 calories per spear—and naturally fat-free. The key ingredients like vinegar and dill have benefits: vinegar can aid digestion and stabilize blood sugar, while dill is rich in antioxidants and has anti-inflammatory properties.
They’re a great snack if you’re watching carbs or following a gluten-free diet. Just watch the sodium content if you’re on a low-sodium plan, since pickles do carry salt. Personally, I find these pickles a satisfying way to add crunch and flavor without extra calories, which helps me snack smarter between meals.
Note: This recipe contains garlic, which some people may need to avoid due to allergies or sensitivities.
Conclusion
This easy crisp refrigerator dill pickles recipe is proof that homemade pickles don’t have to be intimidating or time-consuming. It’s straightforward, reliable, and yields satisfying crunchy pickles every time. I love how this recipe lets me customize flavor with simple tweaks, and the best part is having a fresh jar of pickles ready to brighten up any meal or snack.
Feel free to experiment with heat, herbs, or sweetness to make it your own—there’s no wrong way to enjoy these. And if you want more quick homemade dinner ideas to pair with these pickles, I highly recommend trying the easy spaghetti aglio olio or crispy chicken fried rice.
Give this recipe a shot, and drop a comment below with your favorite variations or how you like to enjoy your pickles. Homemade snacks like these make everyday cooking a little more fun and a lot more tasty.
FAQs
How long do refrigerator dill pickles last?
When stored properly in the fridge, these pickles last up to 2 weeks. For best taste and crunch, consume within the first week.
Can I use regular cucumbers instead of Kirby cucumbers?
You can, but Kirby or pickling cucumbers are firmer and hold their crunch better. Regular slicing cucumbers may result in softer pickles.
Do I have to boil the brine for refrigerator pickles?
Warming the brine helps dissolve salt and sugar quickly, but it shouldn’t be boiling hot when poured over cucumbers to avoid softening them.
Can I make these pickles spicy?
Absolutely! Adding crushed red pepper flakes or fresh jalapeños to the jar gives your pickles a nice spicy kick.
Why are my refrigerator pickles sometimes mushy?
Mushy pickles often result from using the wrong type of cucumber, brine that’s too salty or too weak, or pouring hot brine over cold cucumbers. Also, overripe cucumbers can soften quickly.
Pin This Recipe!
Easy Crisp Refrigerator Dill Pickles Recipe Perfect for Quick Homemade Snacks

This recipe delivers easy, crisp refrigerator dill pickles that stay crunchy and fresh without complicated canning. Ready in 24 hours, these pickles are perfect for quick homemade snacks with a classic dill punch.
- Prep Time: 15 minutes
- Cook Time: 5 minutes
- Total Time: 24 hours
- Yield: 2 quart-sized jars (about 8 servings) 1x
- Category: Snack
- Cuisine: American
Ingredients
- 4 cups (about 600g) Kirby cucumbers or pickling cucumbers, washed and sliced into spears or chips
- 1 cup (240ml) white vinegar (5% acidity)
- 1 cup (240ml) water
- 1 tablespoon kosher salt or pickling salt
- 1 teaspoon granulated sugar
- 2–3 sprigs fresh dill per jar
- 2 smashed garlic cloves per jar
- 1 teaspoon black peppercorns per jar
- Pinch of crushed red pepper flakes (optional)
Instructions
- Wash 4 cups (about 600g) of Kirby cucumbers thoroughly. Slice into spears or rounds, ensuring uniform size for even pickling. Set aside.
- In a small saucepan, combine 1 cup (240ml) white vinegar, 1 cup (240ml) water, 1 tablespoon kosher salt, and 1 teaspoon sugar. Warm over medium heat, stirring until salt and sugar dissolve completely (about 3-5 minutes). Remove from heat and let cool slightly.
- In two quart-sized jars, place 2-3 sprigs of fresh dill, 2 smashed garlic cloves, and 1 teaspoon black peppercorns each. Add a pinch of crushed red pepper flakes if desired.
- Pack the sliced cucumbers tightly into the jars without crushing.
- Carefully pour the warm brine over the cucumbers in each jar, leaving about 1/2 inch (1.3 cm) headspace at the top. Use a clean utensil to release any air bubbles by gently pressing the cucumbers down.
- Screw lids on tightly and place jars in the refrigerator. Let them sit for at least 24 hours before tasting; flavor develops for up to 2 weeks.
- If pickles soften, try adding a few grape leaves to the jar next time to help maintain crunch.
Notes
Use Kirby or pickling cucumbers for best crispness. Warm brine should not be boiling hot when poured to avoid softening cucumbers. Adding grape leaves can help maintain crunch. Refrigerate pickles for at least 24 hours before eating; flavor improves over 2-3 days. Store pickles in sealed jars in the fridge for up to 2 weeks. Adjust salt and sugar to taste if brine is too sharp or bland.
Nutrition
- Serving Size: 1/4 cup (about 2 spe
- Calories: 15
- Sugar: 1
- Sodium: 400
- Carbohydrates: 3
- Fiber: 0.5
Keywords: dill pickles, refrigerator pickles, quick pickles, homemade pickles, crisp pickles, easy snack, dill pickle recipe


