Let me tell you, the scent of toasted oats and sweet honey wafting through my kitchen is enough to make anyone’s mouth water. The first time I baked these chewy homemade granola bars bliss recipe bars, I was instantly hooked. It was one of those rare moments where you pause, take a deep breath, and just smile because, honestly, you know you’re onto something truly special. Years ago, when I was knee-high to a grasshopper, I remember my grandma pulling out her secret granola bar recipe on a rainy weekend. I wished I’d discovered this chewy homemade granola bars bliss recipe sooner—it’s dangerously easy and offers pure, nostalgic comfort.
My family couldn’t stop sneaking these bars off the cooling rack (and I can’t really blame them). Whether it was my kids running to school or friends grabbing a quick bite before heading out, these chewy homemade granola bars bliss bars quickly became a staple for family gatherings and gifting. You know what I mean—it’s that kind of snack that turns an ordinary afternoon into a moment to savor. Perfect for potlucks, sweet treats for your kids’ lunchboxes, or just brightening up your Pinterest snack board, this chewy homemade granola bars bliss recipe is one you’re going to want to bookmark.
Why You’ll Love This Chewy Homemade Granola Bars Bliss Recipe
After testing this chewy homemade granola bars bliss recipe multiple times (in the name of research, of course), I can confidently say it’s a winner for so many reasons:
- Quick & Easy: Comes together in under 20 minutes, perfect for busy weeknights or last-minute cravings.
- Simple Ingredients: No fancy grocery trips needed; you likely already have everything in your kitchen.
- Perfect for On-the-Go: Great for lunchboxes, hiking snacks, or an afternoon pick-me-up.
- Crowd-Pleaser: Always gets rave reviews from kids and adults alike.
- Unbelievably Delicious: The chewy texture and balanced sweetness make it next-level comfort food.
This isn’t just another granola bar recipe—it’s the best version you’ll find. The secret? A perfectly balanced mix of honey and brown sugar that keeps everything chewy, plus a touch of vanilla and a pinch of salt to bring out all the flavors. The oats toast just enough to add that nutty undertone, and the bars hold together without being rock-hard or crumbly. Honestly, this recipe feels like comfort food reimagined—simpler, faster, but with the same soul-soothing satisfaction.
Whether you’re impressing guests without stress or just turning a simple snack into something memorable, this chewy homemade granola bars bliss recipe hits the spot every single time.
What Ingredients You Will Need
This recipe uses simple, wholesome ingredients to deliver bold flavor and satisfying texture without the fuss. Most of these are pantry staples, but a few are key to that chewy magic.
- Old-fashioned rolled oats – 2 cups (180g); the heart of the bars, providing that chewy, hearty base (I recommend Bob’s Red Mill for best texture)
- Honey – ½ cup (120ml); natural sweetener that binds everything together and keeps bars chewy
- Brown sugar – ⅓ cup packed (70g); adds caramel notes and helps with that perfect chewiness
- Unsalted butter – ⅓ cup (75g), melted; adds richness and helps hold the bars together (use grass-fed if you want a deeper flavor)
- Vanilla extract – 1 teaspoon; for a warm, inviting flavor boost
- Salt – ¼ teaspoon; balances sweetness and enhances flavors
- Optional mix-ins: chopped nuts, dried cranberries, chocolate chips (about ½ cup combined); feel free to customize based on what you have on hand
For a gluten-free twist, swap the rolled oats with certified gluten-free oats. If you prefer a vegan option, substitute butter with coconut oil and use maple syrup instead of honey. In summer, I sometimes toss in fresh chopped dried apricots or swap nuts for seeds like pumpkin or sunflower for a nut-free version.
Equipment Needed
- 8×8-inch (20×20 cm) baking pan – for shaping the bars evenly
- Mixing bowls – at least one large bowl for combining ingredients
- Wooden spoon or silicone spatula – for mixing
- Measuring cups and spoons – to get those ingredient amounts just right
- Parchment paper – to line the pan and help with easy removal
- Sharp knife – for cutting bars cleanly once cooled
If you don’t have an 8×8 pan, a similar-sized square or rectangular pan will work just fine. Personally, I love using a silicone spatula—it’s gentle on the oats and helps scrape every bit of that delicious mixture. You can find budget-friendly parchment paper brands that work just as well as premium ones, so no need to splurge here.
Preparation Method
- Preheat your oven to 350°F (175°C). Line your 8×8-inch baking pan with parchment paper, leaving some overhang on the sides for easy lifting later. This step helps your bars come out in one solid piece.
- Toast the oats: Spread the rolled oats on a baking sheet and toast in the oven for about 8-10 minutes or until lightly golden and fragrant. Watch closely to prevent burning—this brings out that lovely nutty flavor essential for chewy homemade granola bars bliss bars.
- Mix the wet ingredients: In a large bowl, combine the melted butter, honey, brown sugar, vanilla extract, and salt. Stir until the sugar dissolves and everything is smooth and glossy. The mix should smell sweet and inviting—if it doesn’t, you might want to double-check your ingredients!
- Add the toasted oats: Carefully fold the toasted oats into the wet mixture. If you’re using optional mix-ins like nuts or dried fruit, fold them in now. The mixture should be sticky but manageable.
- Press into the pan: Transfer the mixture to your prepared pan. Using a spatula or clean hands, press the mixture firmly and evenly into the pan. This step is key—press firmly to avoid crumbly bars later.
- Bake: Place the pan in the oven and bake for 15-18 minutes. The edges should be golden brown, and the center should look set but still soft to the touch.
- Cool completely: Remove from the oven and let the bars cool in the pan on a wire rack. This usually takes about 1-2 hours. Cooling is crucial for that chewy texture and easy slicing.
- Cut and store: Once fully cooled, lift the bars out using the parchment overhang. Cut into 10-12 bars with a sharp knife. Store in an airtight container at room temperature or refrigerate for longer freshness.
Tip: If your bars crumble when cutting, try chilling them in the fridge for 30 minutes before slicing. Also, pressing down firmly before baking makes a world of difference in the final texture.
Cooking Tips & Techniques for Perfect Chewy Homemade Granola Bars Bliss
Getting chewy homemade granola bars bliss bars just right is all about mastering a few simple tricks.
- Don’t skip toasting the oats: It’s tempting to mix everything and bake, but toasting adds that depth of flavor that sets these bars apart.
- Melt the butter gently: Too hot and you risk cooking the honey, which can make bars hard instead of chewy. A slow melt helps keep that perfect texture.
- Press firmly and evenly: Use the back of a spatula or clean hands to compact the mixture well—this avoids crumbly bars that fall apart.
- Watch the baking time carefully: Bake until edges are golden but the center still looks slightly soft. Overbaking dries them out.
- Cool completely before cutting: Patience here is your friend. Cutting too soon means crumbly bars.
- Mix-ins matter: Add-ins like nuts or dried fruit should be chopped small enough to mix evenly, preventing dense or uneven bars.
I’ve had my fair share of burnt edges and crumbly bars, but following these tips has made me confident every time. Honestly, it’s like learning the secret handshake of granola bar making (and you’re in now!).
Variations & Adaptations to Suit Your Taste
One of the best things about this chewy homemade granola bars bliss recipe is how versatile it is. Here are some ways you can switch things up:
- Nut-free version: Swap nuts for pumpkin or sunflower seeds to keep that crunch without allergens.
- Chocolate twist: Add ¼ cup mini chocolate chips right after baking while bars are still warm for melty pockets of chocolate.
- Fruit-forward: Fold in ½ cup dried cherries or cranberries for a tart contrast to the sweet base.
- Gluten-free option: Use certified gluten-free oats and almond flour (about ¼ cup) for a slightly different texture that still holds together well.
- Spiced variation: Add ½ teaspoon cinnamon and a pinch of nutmeg to the oat mixture for a cozy flavor perfect for fall.
Personally, I love swapping in coconut flakes and chopped macadamia nuts for a tropical vibe. It’s amazing how a few tweaks can make this chewy homemade granola bars bliss recipe feel brand new every time.
Serving & Storage Suggestions
These chewy homemade granola bars bliss bars are best served at room temperature, straight from the container or lunchbox. They pair wonderfully with a hot cup of coffee or a glass of cold milk—perfect for breakfast or a mid-afternoon snack.
If you’re serving at a party or potluck, slice into smaller squares and arrange on a pretty platter for easy grabbing. You can wrap individual bars in parchment for gifting or school snacks.
Store bars in an airtight container at room temperature for up to 5 days. For longer storage, keep them in the fridge where they’ll stay fresh for 2 weeks or freeze for up to 3 months. When reheating, microwave for 10-15 seconds to bring back that soft, chewy texture.
Letting the bars sit overnight actually helps the flavors marry and the texture improve—so feel free to make them a day ahead. Honestly, they only get better with a little patience.
Nutritional Information & Benefits
Each chewy homemade granola bar bliss bar contains approximately:
| Calories | Fat | Carbohydrates | Protein |
|---|---|---|---|
| 180 kcal | 7g (mostly from butter and nuts/seeds) | 27g (mainly from oats and honey) | 3g |
Oats provide a good source of fiber, helping with digestion and sustained energy. Honey is a natural sweetener with antioxidants, and the nuts or seeds add healthy fats and protein—making these bars a balanced snack for busy days.
This recipe is naturally gluten-free if you use gluten-free oats and can be made vegan by swapping out honey for maple syrup and butter for coconut oil. Just a heads-up: contains nuts unless swapped for seeds, so watch for allergies.
From a wellness perspective, these bars offer a satisfying alternative to processed snacks, with real ingredients you can pronounce and trust.
Conclusion
So, why should you give this chewy homemade granola bars bliss recipe a try? Because it’s a snack that’s easy to make, uses simple ingredients, and tastes like it took hours to perfect. You can customize it to your taste buds, dietary needs, or whatever you have in your pantry.
I love this recipe because it brings back warm memories, satisfies snack cravings, and always impresses without fuss. Honestly, it feels like a warm hug in bar form, and I’m sure you’ll feel the same.
Give them a shot, and let me know how you customize your bars! Share your thoughts, adaptations, or favorite mix-ins in the comments below—I love hearing from you. Happy snacking!
FAQs About Chewy Homemade Granola Bars Bliss
How long do these granola bars last?
Stored in an airtight container at room temperature, they last about 5 days. Refrigeration extends freshness up to 2 weeks, or freeze for up to 3 months.
Can I use quick oats instead of rolled oats?
Quick oats can be used, but the texture will be less chewy and more crumbly. Rolled oats give the best chewy results.
How do I make these granola bars vegan?
Replace butter with coconut oil and honey with maple syrup. The texture will still be chewy and delicious.
Can I add protein powder to boost nutrition?
Yes, adding up to ¼ cup protein powder is fine, but you may need to slightly adjust the liquid ingredients to keep bars moist.
What’s the best way to cut the bars without crumbling?
Let the bars cool completely, preferably chill in the fridge for 30 minutes before slicing with a sharp knife for clean edges.
Pin This Recipe!

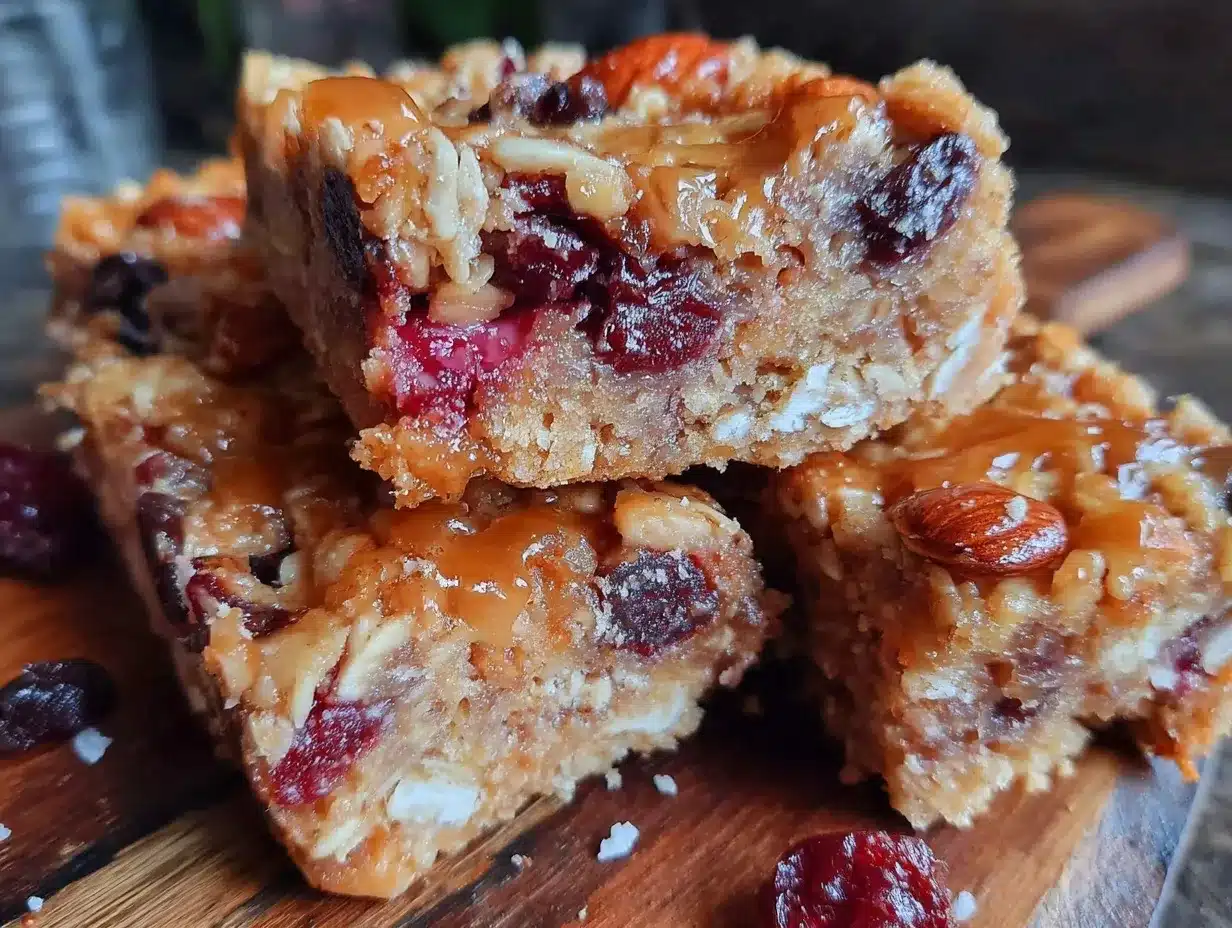
Chewy Homemade Granola Bars Bliss Recipe Easy 5-Ingredient Snack

These chewy homemade granola bars are quick and easy to make with simple ingredients, perfect for on-the-go snacks or lunchboxes. They offer a nostalgic, comforting flavor with a chewy texture and balanced sweetness.
- Prep Time: 10 minutes
- Cook Time: 18 minutes
- Total Time: 1 hour 30 minutes
- Yield: 10-12 bars 1x
- Category: Snack
- Cuisine: American
Ingredients
- 2 cups old-fashioned rolled oats (180g)
- ½ cup honey (120ml)
- ⅓ cup packed brown sugar (70g)
- ⅓ cup unsalted butter, melted (75g)
- 1 teaspoon vanilla extract
- ¼ teaspoon salt
- Optional mix-ins: ½ cup combined chopped nuts, dried cranberries, or chocolate chips
Instructions
- Preheat your oven to 350°F (175°C). Line an 8×8-inch baking pan with parchment paper, leaving some overhang on the sides for easy lifting.
- Toast the rolled oats on a baking sheet in the oven for 8-10 minutes until lightly golden and fragrant. Watch closely to prevent burning.
- In a large bowl, combine melted butter, honey, brown sugar, vanilla extract, and salt. Stir until sugar dissolves and mixture is smooth and glossy.
- Fold the toasted oats into the wet mixture. Add optional mix-ins like nuts or dried fruit if desired.
- Transfer the mixture to the prepared pan and press firmly and evenly using a spatula or clean hands.
- Bake for 15-18 minutes until edges are golden brown and center looks set but still soft.
- Remove from oven and cool completely in the pan on a wire rack for 1-2 hours.
- Lift bars out using parchment overhang and cut into 10-12 bars with a sharp knife.
- Store in an airtight container at room temperature for up to 5 days, refrigerate for 2 weeks, or freeze for up to 3 months.
Notes
Toast oats to enhance nutty flavor and chewiness. Melt butter gently to avoid cooking honey which can harden bars. Press mixture firmly before baking to prevent crumbling. Cool bars completely before cutting; chilling for 30 minutes helps with clean slicing. Customize with nuts, seeds, dried fruit, or chocolate chips. For vegan version, substitute butter with coconut oil and honey with maple syrup.
Nutrition
- Serving Size: 1 bar (if cut into 1
- Calories: 180
- Fat: 7
- Carbohydrates: 27
- Protein: 3
Keywords: granola bars, chewy granola bars, homemade granola bars, easy snack, 5-ingredient snack, healthy snack, lunchbox snack