“Hey, can you believe I actually forgot to defrost the chicken again?” That’s the text I sent my buddy on a chaotic Thursday evening, already feeling like dinner was doomed. Honestly, I wasn’t in the mood for a complicated meal or ordering takeout for the third time that week. So, I grabbed a can of beer—because why not?—and decided to try beer can chicken. I’d heard of it but never really believed it could be both simple and spectacular.
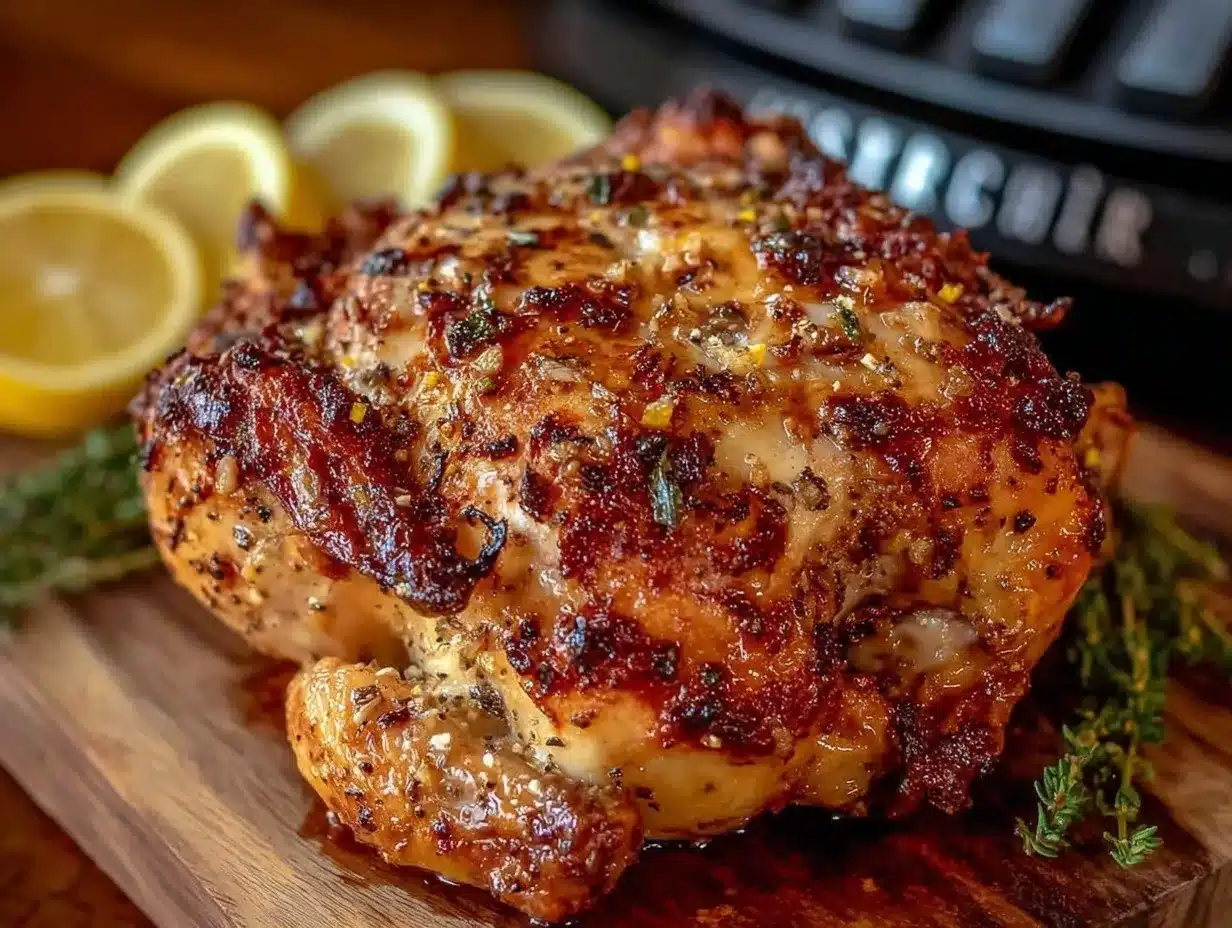
Turns out, that night’s last-minute experiment with a crispy beer can chicken recipe and a zesty lemon pepper rub became one of my go-to dinners. The chicken came out with a crackling skin, juicy inside, and this bright, peppery zing that made the whole house smell like a backyard barbecue. It was like a little victory in the middle of a hectic week, the kind of meal that feels like a reward without any fuss.
What surprised me most was how effortlessly the beer can method worked—not just for flavor but for texture. My skepticism about cooking a whole bird this way vanished with the first bite. The lemon pepper rub added just the right punch, cutting through the richness and turning the chicken into something unexpectedly fresh and addictive. That dinner became the quiet reminder that sometimes, the easiest dishes can be the most impressive.
So, if you’re juggling a busy schedule or just craving something crispy and satisfying with a little citrus snap, this crispy beer can chicken with zesty lemon pepper rub might just become your new favorite too. No fancy skills required, just a bit of patience and a can of your favorite brew.
Why You’ll Love This Recipe
When I first started making this crispy beer can chicken recipe, I wasn’t sure what to expect beyond the novelty of cooking a bird upright on a can. But after countless tries (yeah, I made it three times in one week), I can say it checks every box for a fuss-free, delicious dinner.
- Quick & Easy: Prep takes about 15 minutes, and then the oven does the heavy lifting while you relax or prep sides.
- Simple Ingredients: You probably already have everything in your pantry, from the lemon pepper seasoning to the beer itself (any pale lager or ale works).
- Perfect for Gatherings: Whether it’s a casual weekend dinner or a small get-together, this recipe impresses without stressing you out.
- Crowd-Pleaser: The crispy skin and juicy meat are a hit with both kids and adults, making it a reliable choice for family meals.
- Unbelievably Delicious: The zesty lemon pepper rub adds a bright, tangy layer that cuts through the richness, making each bite memorable.
What really sets this recipe apart is the lemon pepper rub’s balance—no bitterness, just a lively zing that pairs beautifully with the subtle caramelization from the beer steam. I’ve tweaked the seasoning to avoid overpowering the natural chicken flavor, unlike many other rubs that can be too salty or heavy.
And here’s a little insider tip: cooking the chicken on the beer can locks in moisture from the inside out, so you get tender meat even under that crispy skin. Honestly, it’s like magic, and it’s the kind of recipe that feels fancy but is super forgiving.
If you enjoy quick meals with bold flavors, you might also appreciate the quick zesty lemon chicken recipe that shares a similar bright citrus profile but in a quicker pan-fried style.
What Ingredients You Will Need
This recipe uses simple, wholesome ingredients to deliver bold flavor and satisfyingly crisp texture without any fuss or hard-to-find items. Most of these are pantry staples, and the lemon pepper rub can be made fresh or swapped with a quality pre-made blend.
- Whole Chicken (about 4 to 5 pounds / 1.8 to 2.3 kg) – Fresh or fully thawed for even cooking
- Beer (12 oz / 355 ml can) – A pale lager or ale works best; avoid strong IPAs to keep flavors balanced
- Lemon Pepper Rub:
- 2 tbsp lemon zest (freshly grated for best aroma)
- 1 tbsp cracked black pepper (coarse grind for texture)
- 1 tbsp kosher salt (or sea salt for subtle mineral notes)
- 1 tsp garlic powder (adds savory depth)
- 1 tsp smoked paprika (for color and mild smokiness)
- 1/2 tsp onion powder (optional but recommended)
- 1 tbsp olive oil (helps the rub stick and promotes crispiness)
- Optional Garnishes: Fresh parsley or thyme sprigs for serving
Ingredient Tips: I prefer organic chicken when possible for cleaner flavor. For the lemon zest, a microplane grater works wonders to get fine, fragrant zest without bitterness. Regarding the beer, I usually use a mid-range pale lager like Pilsner Urquell, but feel free to experiment with local craft beers—just keep it mild to avoid overpowering the chicken.
For a twist, you can swap olive oil with melted butter for a richer rub, especially if you’re after a slightly buttery crust. If you need a gluten-free option, double-check your beer choice or use a gluten-free beer alternative.
Equipment Needed
- Roasting Pan or Baking Sheet: Large enough to hold the upright chicken and catch drippings.
- Beer Can Chicken Holder (optional): This gadget stabilizes the bird on the can and makes handling easier, but you can also improvise with a sturdy, open-top can.
- Kitchen Tongs: For safely moving the hot chicken.
- Meat Thermometer: A must-have for checking doneness; probe thermometers with instant-read are best.
- Microplane Zester: For fresh lemon zest that really brightens the rub.
- Basting Brush: Helpful for applying the olive oil evenly over the chicken.
If you don’t have a beer can chicken holder, just make sure your chicken is balanced securely on the can so it doesn’t topple in the oven. I’ve done it both ways, and while the holder adds convenience, it’s not mandatory.
For budget-conscious cooks, a simple roasting rack inside your pan will work too, but the upright position is key here for crisp skin all around.
Preparation Method
- Prepare the Chicken: Remove any giblets from the cavity and pat the chicken dry with paper towels (about 5 minutes). Dry skin helps achieve that coveted crispy texture.
- Make the Lemon Pepper Rub: In a small bowl, mix together lemon zest, cracked black pepper, kosher salt, garlic powder, smoked paprika, and onion powder. Stir in olive oil until it forms a paste (about 3 minutes). This rub will stick better and infuse flavor evenly.
- Apply the Rub: Using your hands or a basting brush, coat the entire chicken generously with the lemon pepper rub, including inside the cavity for extra zing (about 5 minutes). Don’t rush—massage it in well for deeper flavor penetration.
- Prepare the Beer Can: Open the beer and pour out (or drink) about half the can to prevent overflow. Optionally, poke a few holes in the top with a can opener to allow steam to escape (optional but helpful). This step takes about 2 minutes.
- Set Up the Chicken on the Can: Carefully place the chicken upright onto the beer can so the can fits snugly inside the cavity. The chicken should stand steady on its legs and the can’s base (about 2 minutes). If you have a holder, use it now.
- Roast the Chicken: Place the chicken upright in your roasting pan. Put it in a preheated oven at 375°F (190°C). Roast for about 1 hour and 15 minutes to 1 hour and 30 minutes, or until the internal temperature reaches 165°F (74°C) measured in the thickest part of the thigh (without touching the bone).
- Check for Doneness: Start checking temperature around 1 hour and 10 minutes to avoid overcooking. The skin should be golden-brown and crispy, and juices should run clear (about 2 minutes).
- Rest the Chicken: Remove the chicken carefully (it will be hot!) and let it rest for 10-15 minutes before carving. This locks in the juices and makes slicing easier.
- Carve and Serve: Slice the chicken and garnish with fresh parsley or thyme if desired. Serve immediately for best texture.
Pro Tip: Keep an eye on your oven temperature as some ovens run hot or cold, which affects cooking time. Also, if your chicken skin isn’t crisping enough after cooking, you can pop it under the broiler for 2-3 minutes—but watch closely to avoid burning.
Cooking Tips & Techniques
Getting that perfectly crispy beer can chicken with a vibrant lemon pepper rub comes down to a few key techniques I’ve learned over several tries:
- Dry the Skin Thoroughly: Moisture is the enemy of crispiness. Pat the chicken skin dry before applying the rub. I sometimes let it air dry in the fridge for 30 minutes if time allows.
- Don’t Skip the Rub Inside the Cavity: The lemon pepper inside the chicken adds subtle aroma and flavor that you’ll notice with every bite.
- Use a Meat Thermometer: Overcooked chicken dries out fast. Check the internal temp in the thigh, not the breast, for accuracy.
- Let It Rest: I can’t stress this enough. Resting redistributes juices and makes carving easier.
- Beer Choice Matters: Avoid overly hoppy or bitter beers; a smooth lager or amber ale gives the best subtle steam flavor.
- Multi-Tasking Tip: While the chicken roasts, you can whip up a quick side like crispy chicken fried rice or a simple salad to complete your meal effortlessly.
I remember my first attempt when the chicken toppled over mid-roast (rookie mistake). Since then, I always make sure the can is steady and the chicken balanced. Trust me, it makes all the difference.
Variations & Adaptations
This crispy beer can chicken recipe is pretty flexible and welcomes plenty of tweaks depending on your mood or dietary needs.
- Spicy Kick: Add 1 tsp cayenne pepper or smoked chili powder to the lemon pepper rub for a smoky heat that pairs beautifully with the citrus.
- Herbaceous Twist: Mix fresh chopped rosemary, thyme, or oregano into the rub for an earthy, garden-fresh flavor profile.
- Gluten-Free Option: Use a gluten-free beer or substitute with a can of chicken broth for a similar steaming effect without gluten.
- Grilled Version: If you prefer outdoor cooking, this recipe translates well to the grill. Use indirect heat and cook upright on the beer can over a drip pan for about 1.5 hours, checking temperature frequently.
- Butter-Based Rub: Swap olive oil for melted butter in the rub for a richer, slightly more indulgent skin crust.
One time, I tried using fresh lime zest instead of lemon and paired it with cilantro for a south-of-the-border vibe—it was a hit at a casual summer BBQ. Feel free to experiment with your favorite citrus and herbs to make this recipe truly yours.
Serving & Storage Suggestions
This crispy beer can chicken shines best served warm straight from the oven, skin crackling and meat juicy. I like to carve it on a large wooden board for a rustic presentation that invites sharing.
For sides, simple roasted vegetables, garlic mashed potatoes, or a crisp green salad complement the zesty lemon pepper rub without competing. If you want a lighter touch, the easy zesty lemon garlic tilapia offers a fresh seafood alternative with a similarly bright citrus flavor.
Leftovers store well in an airtight container in the fridge for up to 3 days. Reheat gently in the oven at 325°F (160°C) covered with foil to keep the meat moist, then uncover in the last 5 minutes to refresh the skin’s crispness. Avoid the microwave if possible, as it tends to soften the skin.
Flavors actually deepen after a day, making the chicken even tastier as the lemon pepper rub settles in. This makes great next-day lunch or a protein-packed addition to salads and sandwiches.
Nutritional Information & Benefits
Per serving (about 1/6 of the chicken), this crispy beer can chicken provides approximately:
| Calories | 350 kcal |
|---|---|
| Protein | 35 g |
| Fat | 20 g |
| Carbohydrates | 1 g |
| Sodium | 700 mg (variable depending on salt used) |
Chicken is a great source of lean protein and essential amino acids, supporting muscle repair and satiety. The lemon zest and black pepper add antioxidants and vitamin C, boosting the immune system subtly. Using olive oil contributes heart-healthy fats, making this a balanced choice.
This recipe can be adapted for low-carb or gluten-free diets by selecting appropriate beer or broth and avoiding processed additives.
Conclusion
This crispy beer can chicken with zesty lemon pepper rub is one of those rare recipes that feels both indulgent and effortless. It’s perfect for anyone craving a juicy, tender chicken with a punch of citrusy brightness and a skin that crackles with every bite. I love how it turns a simple weeknight into something worth savoring, and I hope it becomes a staple in your rotation like it did in mine.
Don’t hesitate to play around with the flavors and share your favorite variations—I’m always curious to hear how others make it their own. And if you enjoy this, you might want to check out the quick crispy BBQ chicken pizza recipe for another way to enjoy that crispy chicken magic with a bold twist.
Here’s to many crispy, juicy dinners ahead!
FAQs
Can I use other types of beer for this recipe?
Yes, but mild pale lagers or ales work best. Avoid very bitter or hoppy beers as they can overpower the chicken’s flavor.
Is it safe to cook chicken on a beer can?
Absolutely, as long as you use a clean, unopened can and cook the chicken to the recommended internal temperature of 165°F (74°C).
Can I prepare the chicken in advance?
You can apply the rub and refrigerate the chicken uncovered for a few hours or overnight to enhance flavor and dry the skin for extra crispiness.
What if I don’t have a meat thermometer?
It’s best to invest in one for safety and quality, but if unavailable, ensure the juices run clear when you pierce the thickest part of the thigh and that the legs move easily.
Can I make this recipe gluten-free?
Yes, by choosing a gluten-free beer or using chicken broth instead of beer, you can keep the recipe safe for gluten-sensitive eaters.
Pin This Recipe!
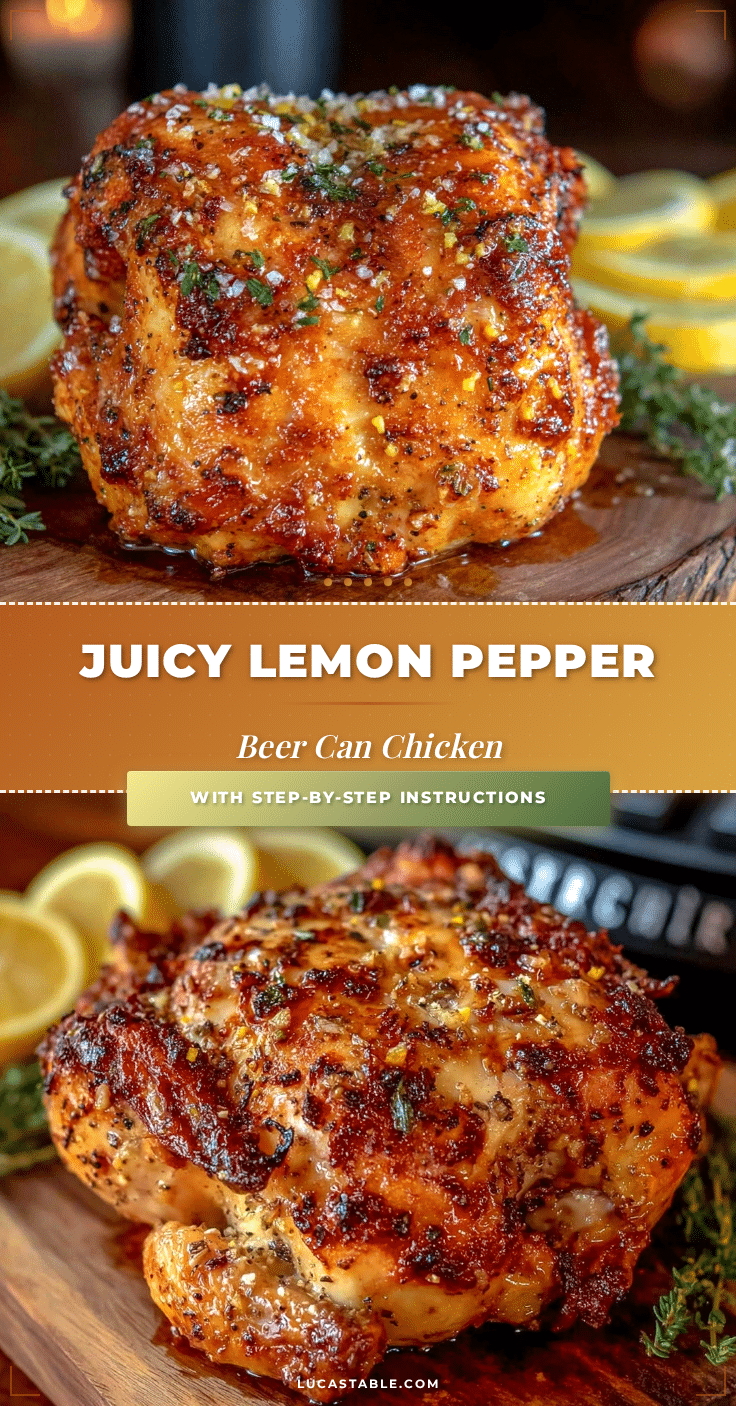
Crispy Beer Can Chicken Recipe Easy Zesty Lemon Pepper Rub Tutorial

A simple and spectacular beer can chicken recipe featuring a zesty lemon pepper rub that delivers crispy skin and juicy meat with a bright, peppery zing.
- Prep Time: 15 minutes
- Cook Time: 1 hour 30 minutes
- Total Time: 1 hour 45 minutes
- Yield: 6 servings 1x
- Category: Main Course
- Cuisine: American
Ingredients
- 1 whole chicken (4 to 5 pounds / 1.8 to 2.3 kg), fresh or fully thawed
- 1 can beer (12 oz / 355 ml), pale lager or ale
- 2 tbsp lemon zest (freshly grated)
- 1 tbsp cracked black pepper (coarse grind)
- 1 tbsp kosher salt or sea salt
- 1 tsp garlic powder
- 1 tsp smoked paprika
- 1/2 tsp onion powder (optional)
- 1 tbsp olive oil
- Optional garnishes: fresh parsley or thyme sprigs
Instructions
- Remove any giblets from the chicken cavity and pat the chicken dry with paper towels (about 5 minutes).
- In a small bowl, mix lemon zest, cracked black pepper, kosher salt, garlic powder, smoked paprika, and onion powder. Stir in olive oil until it forms a paste (about 3 minutes).
- Coat the entire chicken generously with the lemon pepper rub, including inside the cavity (about 5 minutes).
- Open the beer can and pour out or drink about half to prevent overflow. Optionally poke holes in the top of the can to allow steam to escape (optional, about 2 minutes).
- Place the chicken upright onto the beer can so the can fits snugly inside the cavity. Ensure the chicken stands steady on its legs and the can’s base (about 2 minutes). Use a beer can chicken holder if available.
- Place the chicken upright in a roasting pan and roast in a preheated oven at 375°F (190°C) for 1 hour 15 minutes to 1 hour 30 minutes, or until the internal temperature reaches 165°F (74°C) in the thickest part of the thigh.
- Start checking temperature around 1 hour 10 minutes to avoid overcooking. The skin should be golden-brown and crispy, and juices should run clear (about 2 minutes).
- Remove the chicken carefully and let it rest for 10-15 minutes before carving to lock in juices.
- Slice the chicken and garnish with fresh parsley or thyme if desired. Serve immediately.
Notes
Dry the chicken skin thoroughly before applying the rub for best crispiness. Use a meat thermometer to ensure the chicken reaches 165°F in the thickest part of the thigh. Let the chicken rest before carving to lock in juices. If skin isn’t crispy enough, broil for 2-3 minutes watching closely. Choose mild pale lagers or ales to avoid overpowering flavors. For gluten-free, use gluten-free beer or chicken broth. The recipe can be adapted for grilling using indirect heat.
Nutrition
- Serving Size: About 1/6 of the who
- Calories: 350
- Sodium: 700
- Fat: 20
- Carbohydrates: 1
- Protein: 35
Keywords: beer can chicken, crispy chicken, lemon pepper rub, easy chicken recipe, backyard barbecue, roasted chicken, zesty chicken