Introduction
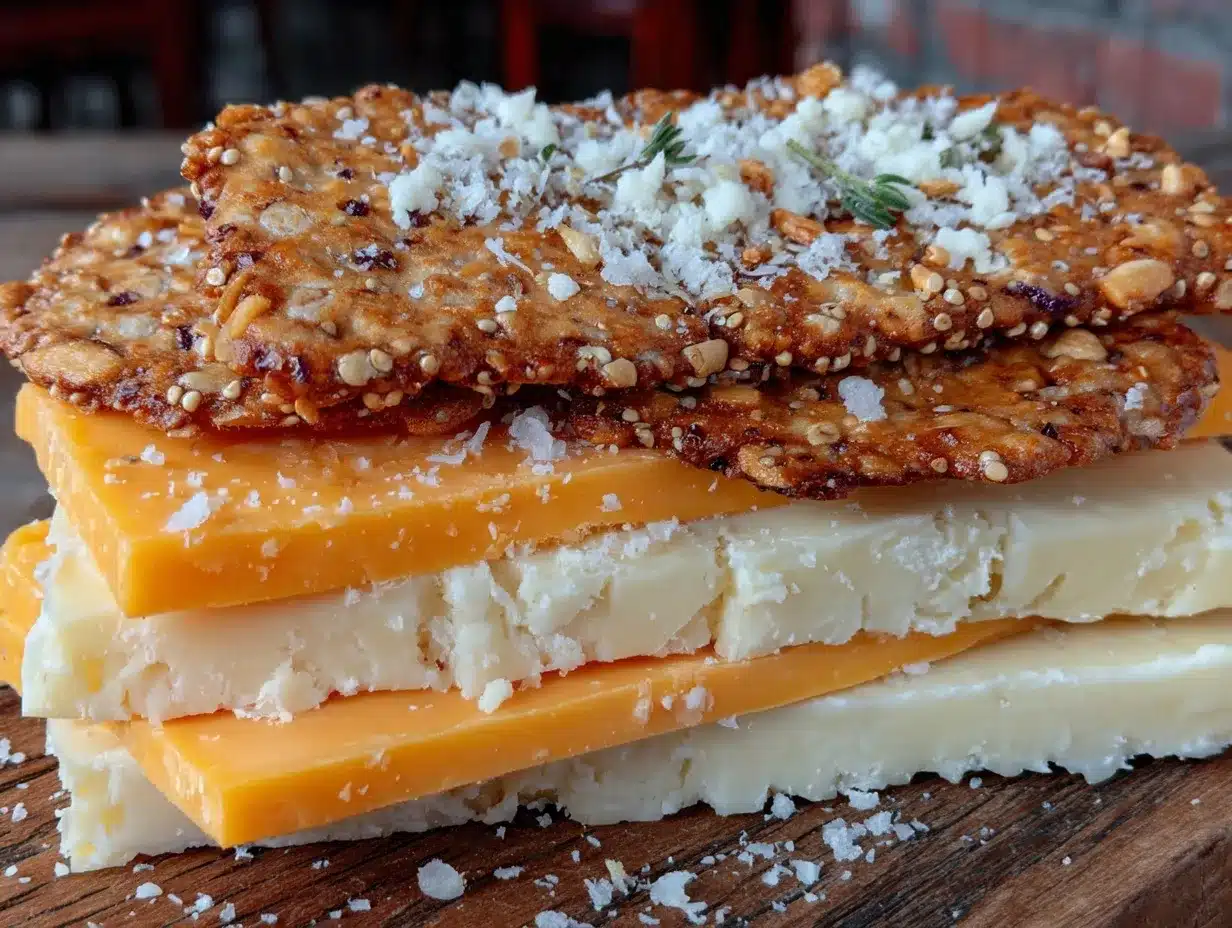
Let me tell you, the scent of golden, crispy cheese wafting from my oven is enough to make anyone’s mouth water. The first time I baked these crispy cheese and crackers, I was instantly hooked—the kind of moment where you pause, take a deep breath, and just smile because you know you’re onto something truly special. Years ago, when I was knee-high to a grasshopper, my grandma used to serve simple, crunchy snacks that felt like pure, nostalgic comfort. I never thought I could recreate that magic until I stumbled upon this dangerously easy recipe on a rainy weekend, trying to brighten up a dull afternoon.
Honestly, my family couldn’t stop sneaking these off the cooling rack (and I can’t really blame them). The crackers have that perfect snap, the cheese bubbles up just right, and together they make a snack that’s both fancy enough for guests yet simple enough for a quick nibble. You know what? This crispy cheese and crackers recipe is perfect for potlucks, a sweet treat for your kids, or to brighten up your Pinterest cookie board with something a little savory. After testing it multiple times (in the name of research, of course), it has become a staple for family gatherings and gifting. It feels like a warm hug wrapped in crunchy, cheesy goodness, and you’re going to want to bookmark this one.
Why You’ll Love This Recipe
From my kitchen experiments and family feedback, here’s what makes this crispy cheese and crackers recipe stand out:
- Quick & Easy: Comes together in under 30 minutes, perfect for busy weeknights or last-minute cravings.
- Simple Ingredients: No fancy grocery trips needed; you likely have everything in your pantry already.
- Perfect for Entertaining: Great for potlucks, game nights, or casual get-togethers where you want to impress without stress.
- Crowd-Pleaser: Always gets rave reviews from kids and adults alike, thanks to that irresistible crunch and savory punch.
- Unbelievably Delicious: The texture and flavor combo is next-level comfort food—crispy, cheesy, and just the right amount of buttery.
This recipe isn’t just another cheese and cracker snack. I add a little twist by seasoning the crackers with herbs and a touch of garlic powder, which gives them a perfectly balanced flavor that’s anything but boring. Plus, the cheese melts and crisps in a way that’s pure magic—almost like a gourmet treat you’d find at a fancy deli. It’s the kind of snack that makes you close your eyes after the first bite and say, “Yep, this is good.” Honestly, it’s comfort food reimagined—fast, tasty, and with that satisfying crunch that makes it impossible to stop munching.
What Ingredients You Will Need
This recipe uses simple, wholesome ingredients to deliver bold flavor and satisfying texture without the fuss. Most of these are pantry staples, and you can easily swap or upgrade based on what you have on hand.
- Cheese: Sharp cheddar cheese, shredded (about 2 cups or 200g) – I recommend a good-quality aged cheddar like Cabot for best melt and flavor.
- Crackers: Your favorite plain or lightly salted crackers (about 30 pieces) – I like using water crackers or buttery Ritz crackers; both work beautifully.
- Butter: Unsalted butter, melted (2 tablespoons) – adds richness and helps the seasoning stick.
- Garlic Powder: 1 teaspoon – brings a subtle savory depth.
- Dried Herbs: 1 teaspoon mixed Italian herbs or dried oregano – for a fragrant touch.
- Black Pepper: Freshly ground, to taste – just a pinch to balance the flavors.
- Optional: A sprinkle of smoked paprika or cayenne pepper for a smoky or spicy kick.
If you want to switch things up, you can swap the cheddar for pepper jack or gouda for a different cheese profile. For a gluten-free option, use gluten-free crackers, which crisp up just as well. If you prefer dairy-free, try a vegan cheese alternative that melts nicely, like Daiya or Follow Your Heart. Just keep in mind that the cheese’s melting properties are key to achieving that perfect crisp.
Equipment Needed
- Baking sheet – A rimmed baking sheet works best to catch any cheese drips and keep things tidy.
- Parchment paper or a silicone baking mat – Helps prevent sticking and makes cleanup a breeze.
- Mixing bowl – For combining melted butter with seasonings.
- Measuring spoons and cups – To get the seasoning just right.
- Grater – If shredding your own cheese (freshly shredded melts better than pre-shredded).
- Optional: Cooling rack – To let the crackers crisp up fully after baking.
If you don’t have parchment paper, lightly greasing the baking sheet works in a pinch. And if you’re on a budget, a simple rimmed cookie sheet from any store will do just fine. Personally, I find silicone baking mats to be worth the small investment—they save time and keep the bottoms perfectly crisp without burning.
Preparation Method
- Preheat the oven: Set your oven to 375°F (190°C) and line a baking sheet with parchment paper or a silicone mat.
- Prepare the seasoning mix: In a small mixing bowl, combine the melted unsalted butter, garlic powder, dried herbs, and freshly ground black pepper. Stir until well blended.
- Coat the crackers: Place the crackers in a large bowl or shallow dish. Drizzle the butter mixture over them and toss gently to coat each cracker evenly. Be careful not to break the crackers—gentle hands work best.
- Arrange crackers on the baking sheet: Spread the coated crackers in a single layer on the lined baking sheet, leaving a bit of space between each one for even crisping.
- Add the cheese: Sprinkle shredded sharp cheddar generously over each cracker. You want enough cheese to cover but not so much that it pools and burns.
- Bake: Place the baking sheet in the preheated oven and bake for 8–12 minutes. Watch closely starting at 8 minutes—the cheese should be bubbly and golden brown, with edges just starting to crisp.
- Cool and crisp: Remove the baking sheet from the oven and transfer the crackers to a cooling rack. They’ll firm up as they cool, giving you that perfect crispy texture.
- Serve and enjoy: Once completely cooled, serve immediately or store in an airtight container for later snacking.
Pro tip: If your cheese melts too fast and pools around the crackers, try using a slightly coarser shred next time, or reduce the baking time by a minute or two. Also, keep an eye on your crackers in the last few minutes—they can go from golden to burnt in a flash!
Cooking Tips & Techniques
From my many batches of crispy cheese and crackers, here are some tips to get the best results every time:
- Use freshly shredded cheese: Pre-shredded cheese often contains anti-caking agents that can affect melting. Freshly shredded cheddar melts smoother and crisps better.
- Don’t overcrowd the baking sheet: Giving each cracker room allows hot air to circulate, which helps achieve even crisping.
- Watch the oven carefully: Cheese can burn quickly once it starts browning, so stay nearby and check often in that last 3-5 minutes.
- Experiment with cheese types: For a milder flavor, try mozzarella mixed with a sharper cheese. For a smoky twist, add smoked gouda.
- Season the crackers before cheese: Tossing crackers in melted butter and spices ensures every bite is flavorful, not just cheesy.
- Cool completely: Letting the crackers cool on a rack helps them crisp up fully and prevents sogginess.
I once left a batch in too long (rookie mistake!) and learned that burnt cheese is not forgiving. Since then, timing and close watching have been my best friends when baking these crunchy delights.
Variations & Adaptations
Feel free to mix things up with these tasty variations:
- Spicy Kick: Add a pinch of cayenne pepper or red chili flakes to the butter seasoning for a fiery twist.
- Herb Lover’s Dream: Swap Italian herbs for fresh chopped rosemary and thyme for a fragrant, garden-fresh flavor.
- Gluten-Free Option: Use your favorite gluten-free crackers; they crisp just as well and make this snack accessible to everyone.
- Dairy-Free Version: Replace cheddar with a vegan cheese that melts well, like cashew-based or coconut oil-based varieties.
- Sweet & Savory: Sprinkle a touch of brown sugar or drizzle honey over the cheese just before baking for a caramelized surprise.
Personally, I love adding a little smoked paprika for that subtle smoky undertone. It’s a small change but makes the recipe feel special, especially for fall gatherings.
Serving & Storage Suggestions
Serve these crispy cheese and crackers warm or at room temperature for the best crunch. They pair beautifully with a glass of chilled white wine, a tangy mustard dip, or alongside a fresh charcuterie board featuring cured meats and olives.
To store, keep them in an airtight container at room temperature for up to 3 days. If you want to keep them longer, freeze the crackers in a sealed bag and toast them briefly in a toaster oven to refresh the crispness before serving.
Reheating in a conventional oven at 300°F (150°C) for 3–5 minutes works wonders to bring back that fresh-from-the-oven crunch. Just avoid the microwave—it tends to make them soggy fast.
Flavors deepen a bit after a day, so if you can wait, these crackers taste even better the next day. But honestly, they rarely last that long in my house!
Nutritional Information & Benefits
Each serving (about 8 crackers) provides roughly:
| Calories | 180 |
|---|---|
| Fat | 14g |
| Protein | 7g |
| Carbohydrates | 8g |
| Fiber | 0.5g |
Sharp cheddar cheese brings a solid dose of calcium and protein, while the crackers provide quick energy from carbs. Using unsalted butter lets you control sodium levels better. For those watching carbs, swapping crackers for low-carb or seed-based options works well.
This snack hits the spot for anyone needing a little pick-me-up without feeling weighed down. Just watch portion sizes—cheese is delicious but rich! For my wellness-conscious friends, pairing these with fresh veggies or a salad balances the indulgence.
Conclusion
Honestly, this crispy cheese and crackers recipe is a keeper. It’s simple, fast, and packs a flavor punch that makes snack time feel a little more special. You can easily customize it for your taste buds or dietary needs, so don’t hesitate to experiment. I love this recipe because it brings back warm memories while satisfying that craving for crunchy, cheesy goodness.
Give it a try, share it with friends, and please drop a comment below telling me how you tweaked it—because, you know, recipes are meant to be personalized! Happy snacking, and remember: the best snacks often come from the simplest ideas.
FAQs
What type of cheese works best for crispy cheese and crackers?
Sharp cheddar is my go-to for flavor and crispiness, but gouda, pepper jack, or mozzarella mixed with a sharper cheese also work well.
Can I make this recipe gluten-free?
Absolutely! Just use your favorite gluten-free crackers, and the recipe stays just as tasty and crispy.
How do I store leftover crispy cheese and crackers?
Keep them in an airtight container at room temperature for up to 3 days. For longer storage, freeze and re-toast before serving.
Can I prepare these in advance?
You can assemble the crackers and seasoning ahead of time, but bake just before serving to keep them perfectly crispy.
Is there a vegan alternative to this snack?
Yes! Use vegan cheese that melts well and dairy-free butter substitutes. Just keep an eye on melting times as they can differ.
Pin This Recipe!
Crispy Cheese and Crackers
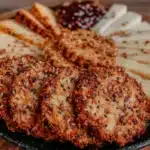
A quick and easy homemade gourmet snack featuring crispy, cheesy crackers seasoned with herbs and garlic powder. Perfect for potlucks, game nights, or a savory treat any time.
- Prep Time: 10 minutes
- Cook Time: 12 minutes
- Total Time: 22 minutes
- Yield: 8 servings (about 8 crackers per serving) 1x
- Category: Snack
- Cuisine: American
Ingredients
- 2 cups (200g) sharp cheddar cheese, shredded
- About 30 plain or lightly salted crackers (water crackers or Ritz crackers recommended)
- 2 tablespoons unsalted butter, melted
- 1 teaspoon garlic powder
- 1 teaspoon mixed Italian herbs or dried oregano
- Freshly ground black pepper, to taste
- Optional: sprinkle of smoked paprika or cayenne pepper
Instructions
- Preheat the oven to 375°F (190°C) and line a baking sheet with parchment paper or a silicone baking mat.
- In a small mixing bowl, combine melted unsalted butter, garlic powder, dried herbs, and freshly ground black pepper. Stir until well blended.
- Place crackers in a large bowl or shallow dish. Drizzle the butter mixture over them and toss gently to coat each cracker evenly without breaking them.
- Arrange the coated crackers in a single layer on the lined baking sheet, leaving space between each for even crisping.
- Sprinkle shredded sharp cheddar generously over each cracker, covering but not pooling.
- Bake for 8–12 minutes, watching closely starting at 8 minutes until cheese is bubbly and golden brown with edges crisping.
- Remove from oven and transfer crackers to a cooling rack to firm up and achieve perfect crispiness.
- Once cooled completely, serve immediately or store in an airtight container for later.
Notes
Use freshly shredded cheese for better melting and crisping. Avoid overcrowding the baking sheet to allow even crisping. Watch the oven closely in the last few minutes to prevent burning. For gluten-free, use gluten-free crackers. For dairy-free, use vegan cheese and butter substitutes. To reheat, bake at 300°F (150°C) for 3–5 minutes; avoid microwaving to prevent sogginess.
Nutrition
- Serving Size: About 8 crackers
- Calories: 180
- Fat: 14
- Carbohydrates: 8
- Fiber: 0.5
- Protein: 7
Keywords: crispy cheese crackers, homemade snack, easy snack recipe, cheesy crackers, party snack, gluten-free snack option, vegan cheese alternative