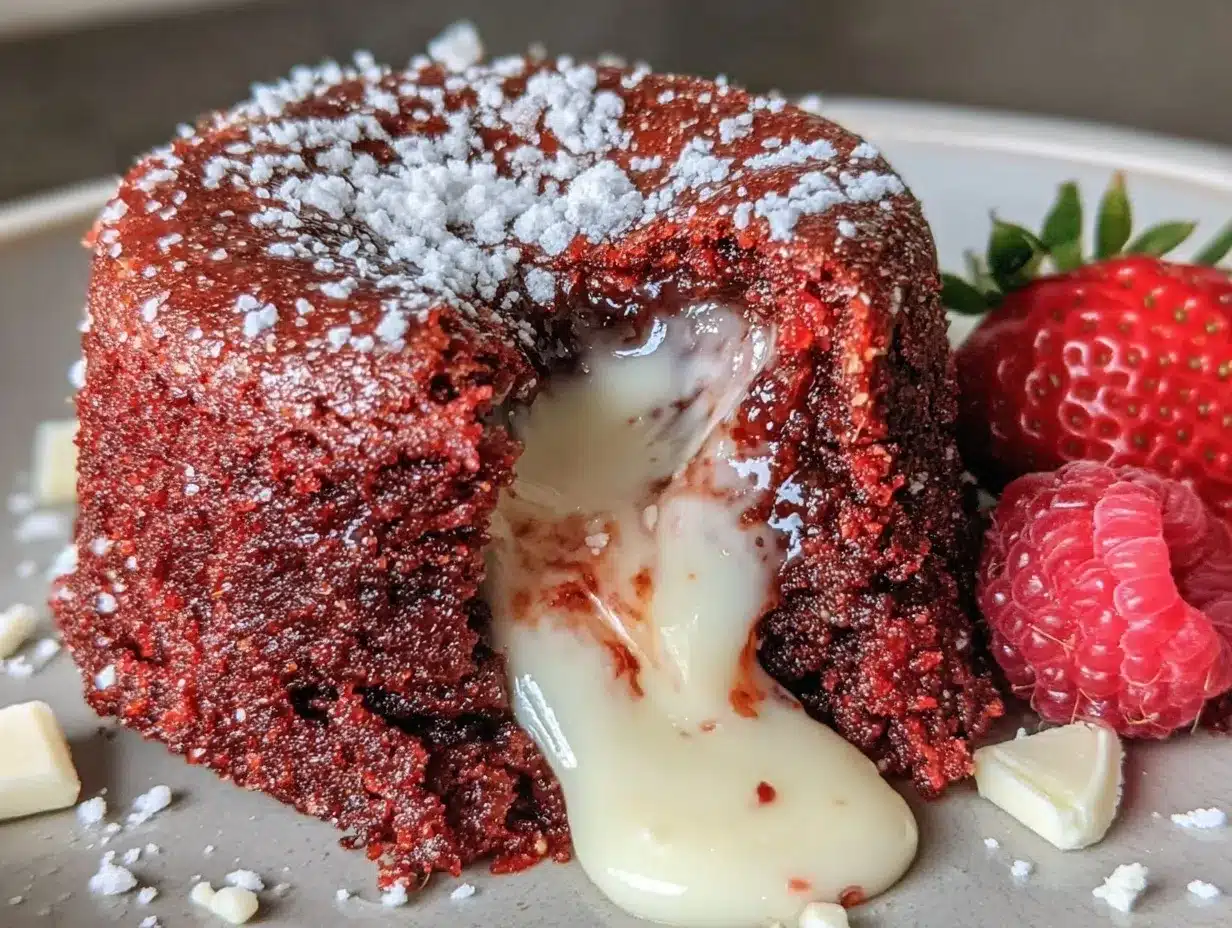
Let me tell you, the moment you crack open one of these decadent red velvet lava cakes and see that molten white chocolate oozing out, your heart will do a little happy dance. The rich, velvety crumb with that surprise creamy center? Honestly, it’s the kind of dessert that makes you pause, take a deep breath, and just grin because you know you’ve stumbled on something truly special. The first time I baked these, I was knee-high to a grasshopper in the kitchen experimenting with classic chocolate lava cakes, but this twist—red velvet with a luscious white chocolate core—instantly stole my heart.
Years ago, I found myself craving something festive yet utterly comforting. These cakes came together on a rainy weekend, perfect for warming up the house and lifting spirits. My family couldn’t stop sneaking bites off the cooling rack (and I can’t really blame them). It’s dangerously easy to make yet feels like pure, nostalgic comfort—like a warm hug on a chilly night. You know what’s great? These red velvet lava cakes are perfect for potlucks, sweet treats for your kids, or to brighten up your Pinterest cookie board with a splash of vibrant color and gooey goodness.
I’ve tested this recipe more times than I can count—in the name of research, of course—and it’s now a staple for family gatherings, gifting, and those moments when you just want to spoil yourself. Trust me, once you get a taste of the warm, melting white chocolate center paired with that tender, cocoa-infused cake, you’re going to want to bookmark this one forever.
Why You’ll Love This Recipe
Having baked and refined these decadent red velvet lava cakes with white chocolate centers countless times, I can confidently say this recipe hits all the right notes. Here’s why it’s become a favorite in my kitchen (and hopefully yours too):
- Quick & Easy: Comes together in under 30 minutes, making it perfect for last-minute dessert cravings or impressing guests without the hassle.
- Simple Ingredients: No fancy or hard-to-find items here—you likely have most of these pantry staples already.
- Perfect for Any Occasion: From cozy date nights to holiday celebrations, this recipe fits right in.
- Crowd-Pleaser: Kids adore the gooey center, and adults rave about the moist, flavorful cake.
- Unbelievably Delicious: The combination of rich red velvet and creamy white chocolate creates a texture and flavor combo that’s pure indulgence.
What sets this recipe apart? It’s all about the balance. The white chocolate is carefully chosen to melt just right, offering a silky center that contrasts perfectly with the dense yet tender cake. Plus, a splash of buttermilk and a hint of vanilla add that signature red velvet tang and moist crumb you won’t find in run-of-the-mill lava cakes. Honestly, it’s comfort food reimagined—without any fuss but with all the soul-soothing satisfaction.
This isn’t just another dessert; it’s the kind that makes you close your eyes after the first bite and smile. Impress your guests without stress, or treat yourself to a moment of pure indulgence—you deserve it.
What Ingredients You Will Need
This recipe uses simple, wholesome ingredients to deliver bold flavor and a satisfying texture without fuss. Most are pantry staples, and substitutions are easy if needed.
- For the Red Velvet Batter:
- All-purpose flour (1 cup / 125g) – For structure and tender crumb
- Unsweetened cocoa powder (2 tablespoons) – Use a good-quality Dutch-processed cocoa for deep color and flavor
- Granulated sugar (3/4 cup / 150g) – Adds sweetness
- Salt (1/4 teaspoon) – Balances the sweetness
- Baking powder (1 teaspoon) – Helps the cakes rise
- Baking soda (1/2 teaspoon) – Adds lift and tang
- Unsalted butter (6 tablespoons / 85g), melted – Adds richness
- Vegetable oil (2 tablespoons) – Keeps the cake moist
- Buttermilk (1/2 cup / 120ml), room temperature – Key to tender crumb and that classic red velvet tang (can substitute with milk + 1 tsp lemon juice)
- Large eggs (2), room temperature – For structure and moisture
- Pure vanilla extract (1 teaspoon) – Enhances flavor
- Red food coloring (1 tablespoon) – Gel or liquid, your choice for that iconic red hue
- For the White Chocolate Centers:
- White chocolate bars or chips (4 ounces / 115g) – I prefer a creamy brand like Ghirardelli for melting smoothly
Substitution tips: Use almond flour for gluten-free adaptation (note: texture will be slightly different). Swap dairy milk with coconut or oat milk for a dairy-free version, and replace butter with coconut oil if needed. For the white chocolate, vegan or dairy-free varieties work too, just be sure they melt well.
Equipment Needed
- Ramekins or small oven-safe baking dishes (4 to 6-ounce size) – These create perfect individual lava cakes. If you don’t have ramekins, small muffin tins lined with foil cups can work.
- Mixing bowls – For combining wet and dry ingredients separately.
- Whisk and spatula – For smooth batter mixing and folding.
- Electric mixer or hand whisk – Helpful but not absolutely necessary.
- Measuring cups and spoons – Accurate measurements make a big difference here.
- Cooling rack – To let the cakes rest briefly after baking.
- Oven mitts – Because safety first when handling hot ramekins!
Personally, I’ve found silicone ramekins handy for easy release, but classic ceramic ones give a more elegant presentation. For budget-friendly options, thrift stores often have perfect-sized ramekins at a steal. Maintaining ramekins is simple: soak in warm soapy water right after use to avoid stuck-on batter.
Preparation Method
- Preheat your oven to 425°F (220°C). Butter your ramekins generously and dust them with cocoa powder to prevent sticking (about 5 minutes prep).
- Prepare the white chocolate centers: Cut the white chocolate bars into small chunks, approximately 1 tablespoon pieces each. Set aside (5 minutes).
- Mix dry ingredients: In a medium bowl, sift together the all-purpose flour (125g), cocoa powder (2 tablespoons), sugar (150g), salt (1/4 teaspoon), baking powder (1 teaspoon), and baking soda (1/2 teaspoon). Whisk to combine evenly (3 minutes).
- Combine wet ingredients: In a separate large bowl, whisk melted butter (85g), vegetable oil (2 tablespoons), buttermilk (120ml), eggs (2), vanilla extract (1 teaspoon), and red food coloring (1 tablespoon) until smooth and well combined (4 minutes).
- Incorporate dry into wet: Slowly add the sifted dry ingredients to the wet mixture, folding gently with a spatula until just combined. Don’t overmix—stop when no flour streaks remain but batter is still light and airy (3 minutes). The batter will be thick but smooth.
- Fill ramekins: Spoon about 3 tablespoons of batter into each prepared ramekin. Place one piece of white chocolate in the center, then cover it with an additional 2 tablespoons of batter so the chocolate is fully encased (5 minutes).
- Bake: Place ramekins on a baking sheet and bake at 425°F (220°C) for 12-14 minutes. The edges should be firm but the center still slightly jiggly—this is key for that molten core.
- Rest and serve: Let the cakes cool in ramekins for 3-5 minutes. Run a knife around the edges to loosen, then invert onto dessert plates. Serve immediately for gooey, warm white chocolate lava (5 minutes).
Note: If you bake them longer, the center will firm up and lose that glorious lava effect. Also, avoid opening the oven door mid-bake to keep the temperature steady. If your oven runs hot, start checking at 11 minutes.
Cooking Tips & Techniques
Getting that perfect molten center can feel a bit tricky, but here’s what I’ve learned through trial and error:
- Use room temperature eggs and buttermilk to help the batter combine smoothly and rise evenly.
- Don’t skip the butter and cocoa powder dusting inside the ramekins. It makes unmolding much easier and prevents any sticky mess.
- Watch the baking time like a hawk. I once left mine in too long, and instead of lava, I got a dense cake—still tasty but not quite what we want!
- Test ramekin sizes: Smaller ramekins bake faster; adjust baking time accordingly.
- Let cakes rest briefly after baking to firm up the edges before unmolding.
- For extra gooey centers, try chilling the white chocolate pieces before baking—they’ll melt slower, giving you a longer-lasting lava effect.
- Multitasking tip: While the cakes bake, use the time to clean up or prep toppings like whipped cream or berries for plating.
Variations & Adaptations
One of the best things about these decadent red velvet lava cakes is how adaptable they are:
- Dietary: Swap all-purpose flour for gluten-free flour blends to make these gluten-free. For dairy-free, replace butter with coconut oil and use a plant-based milk with a splash of vinegar instead of buttermilk.
- Flavor Twists: Try swapping white chocolate centers for dark chocolate or caramel-filled centers. Adding a pinch of cinnamon or espresso powder to the batter can deepen the flavor.
- Seasonal: In spring or summer, top with fresh raspberries or strawberries for a bright contrast. In fall, add a dash of pumpkin spice or nutmeg to the batter for cozy warmth.
- Cooking Method: If you don’t have an oven, these can be carefully steamed in heatproof molds, though the texture will differ slightly.
- Personal Favorite: I once tried a salted white chocolate center—sprinkling flaky sea salt on the white chocolate chunks before baking. It took the flavor to a whole new level!
Serving & Storage Suggestions
Serve these decadent red velvet lava cakes warm, fresh from the oven, with a dusting of powdered sugar or a dollop of whipped cream or crème fraîche. They pair beautifully with a scoop of vanilla ice cream or fresh berries to add brightness and texture contrast. A cup of rich coffee or a glass of cold milk is the perfect companion for this dessert.
Store leftover cakes (if there are any!) in an airtight container in the refrigerator for up to 3 days. To reheat, pop them in the microwave for about 20 seconds or warm gently in the oven at 300°F (150°C) for 5-7 minutes, just until warm and gooey again. The flavor actually deepens after a day or so, making them a great make-ahead treat.
For longer storage, wrap each cooled cake tightly in plastic wrap and freeze for up to 2 months. Thaw overnight in the fridge and reheat as above. Just remember, the lava effect is best enjoyed fresh, so try to time servings close to baking.
Nutritional Information & Benefits
Each decadent red velvet lava cake with white chocolate center contains approximately 350-400 calories, depending on portion size. The cakes provide a moderate amount of fat and sugar, making them a true indulgence rather than everyday fare.
Key ingredients like cocoa powder bring antioxidants, while buttermilk adds calcium and protein. Using real butter and quality chocolate means you’re treating yourself to rich flavor alongside some wholesome fats. For those monitoring allergens, this recipe contains dairy, eggs, and gluten, but substitutions can be made to accommodate most dietary needs.
From a wellness perspective, I believe in balance—this dessert feels like a special reward after a day well-lived, perfectly suited to savoring moments with loved ones or just yourself.
Conclusion
These decadent red velvet lava cakes with white chocolate centers are more than just a dessert—they’re an experience. The combination of tender cake, vibrant color, and that molten, creamy heart is downright irresistible. Whether you’re looking to impress friends, celebrate a special occasion, or simply treat yourself to something extraordinary, this recipe delivers every time.
Feel free to play around with the ingredients and make it your own. That’s part of the fun! I love how these cakes bring a cozy, comforting vibe to any table, and I hope they do the same for you.
If you give this recipe a try, please drop a comment below or share your twists and tips—I’d love to hear how it turns out for you. Happy baking, and here’s to many gooey, joyful moments ahead!
Frequently Asked Questions
Can I prepare these lava cakes ahead of time?
You can assemble the cakes in ramekins and refrigerate for up to 24 hours before baking. Just add a couple of extra minutes to the baking time if baking cold.
What if I don’t have white chocolate? Can I use milk or dark chocolate instead?
Absolutely! Milk or dark chocolate chunks work beautifully as centers. The flavor will be richer and less sweet, which some folks prefer.
How do I know when the lava cakes are done baking?
The edges should be set and firm, but the center will still jiggle slightly when you gently shake the ramekin. That’s your sign to pull them out.
Can I make these gluten-free?
Yes! Replace the all-purpose flour with a gluten-free flour blend that includes xanthan gum. Texture may vary slightly but still delicious.
What’s the best way to unmold the cakes?
Run a knife gently around the edges to loosen, then invert onto a plate. If you greased and dusted the ramekins well, they should slide out easily.
Pin This Recipe!
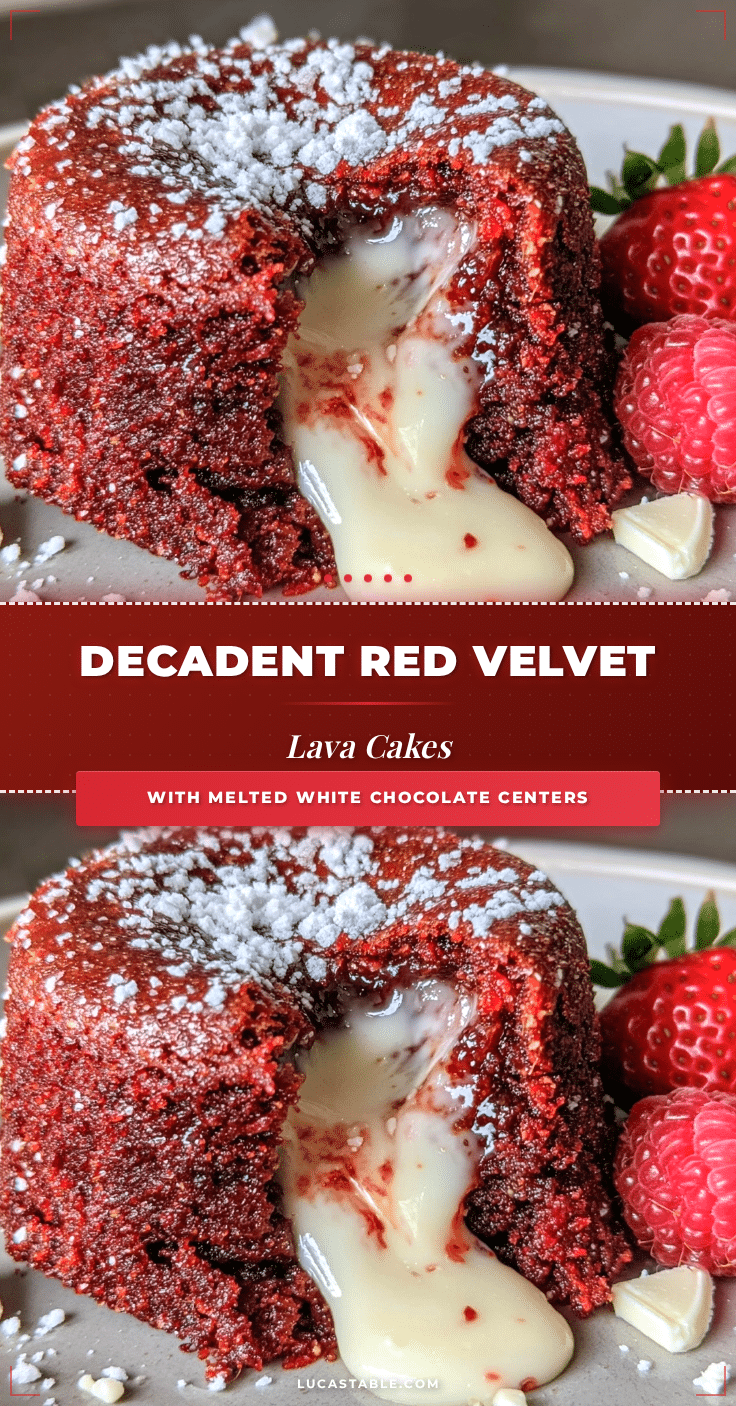
Decadent Red Velvet Lava Cakes with White Chocolate Centers
These decadent red velvet lava cakes feature a rich, velvety crumb with a molten white chocolate center, perfect for any occasion and easy to make in under 30 minutes.
- Prep Time: 15 minutes
- Cook Time: 14 minutes
- Total Time: 29 minutes
- Yield: 4 servings 1x
- Category: Dessert
- Cuisine: American
Ingredients
- 1 cup (125g) all-purpose flour
- 2 tablespoons unsweetened cocoa powder (preferably Dutch-processed)
- 3/4 cup (150g) granulated sugar
- 1/4 teaspoon salt
- 1 teaspoon baking powder
- 1/2 teaspoon baking soda
- 6 tablespoons (85g) unsalted butter, melted
- 2 tablespoons vegetable oil
- 1/2 cup (120ml) buttermilk, room temperature (or milk + 1 tsp lemon juice)
- 2 large eggs, room temperature
- 1 teaspoon pure vanilla extract
- 1 tablespoon red food coloring (gel or liquid)
- 4 ounces (115g) white chocolate bars or chips
Instructions
- Preheat your oven to 425°F (220°C). Butter your ramekins generously and dust them with cocoa powder to prevent sticking.
- Cut the white chocolate bars into small chunks, approximately 1 tablespoon pieces each. Set aside.
- In a medium bowl, sift together the all-purpose flour, cocoa powder, sugar, salt, baking powder, and baking soda. Whisk to combine evenly.
- In a separate large bowl, whisk melted butter, vegetable oil, buttermilk, eggs, vanilla extract, and red food coloring until smooth and well combined.
- Slowly add the sifted dry ingredients to the wet mixture, folding gently with a spatula until just combined. Do not overmix.
- Spoon about 3 tablespoons of batter into each prepared ramekin. Place one piece of white chocolate in the center, then cover it with an additional 2 tablespoons of batter so the chocolate is fully encased.
- Place ramekins on a baking sheet and bake at 425°F (220°C) for 12-14 minutes. The edges should be firm but the center still slightly jiggly.
- Let the cakes cool in ramekins for 3-5 minutes. Run a knife around the edges to loosen, then invert onto dessert plates. Serve immediately.
Notes
Use room temperature eggs and buttermilk for best results. Dust ramekins with cocoa powder to prevent sticking. Watch baking time carefully to maintain molten center. For extra gooey centers, chill white chocolate pieces before baking. If baking from refrigerated, add a couple of extra minutes to baking time. Avoid opening oven door mid-bake to keep temperature steady.
Nutrition
- Serving Size: 1 lava cake
- Calories: 375
- Sugar: 28
- Sodium: 210
- Fat: 22
- Saturated Fat: 13
- Carbohydrates: 40
- Fiber: 2
- Protein: 5
Keywords: red velvet lava cakes, white chocolate lava cakes, molten lava cake, easy dessert, homemade lava cake, red velvet dessert, white chocolate center