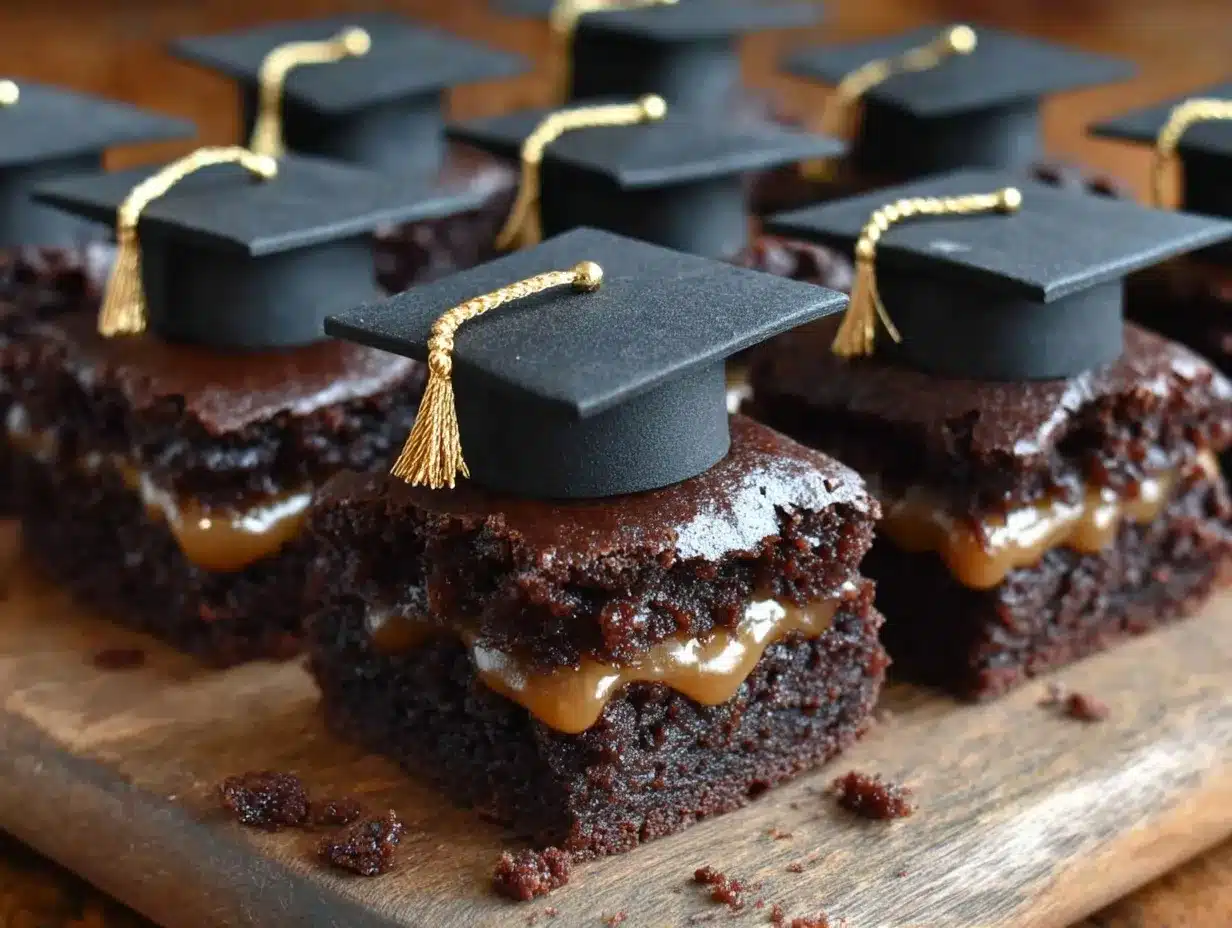
“You brought the cutest dessert, as always,” my neighbor whispered at the graduation party, eyeing those tiny brownie bites shaped like little caps. Honestly, I had been skeptical at first—how hard could it be to turn a brownie into a graduation cap? But after several attempts (and a fair share of peanut butter fights in the kitchen), these Perfect Graduation Cap Brownie Bites with Peanut Butter Filling became my go-to celebration treat.
It started with a last-minute text from my niece: “Can you bring something sweet for graduation?” I rummaged through the pantry, found some peanut butter and a box of brownies, and thought, why not make something fun and festive? The idea was simple but the execution took a few tries—peanut butter filling oozing out at first, caps that wouldn’t stay put—but once I nailed it, these bites felt like a little party on a plate.
Every bite offers a mix of fudgy brownie, creamy peanut butter, and a chocolate cap that’s just right—not too sweet, not too rich. I ended up making these a few times that week because, well, they disappeared fast. It’s funny how a simple idea can turn into a celebrated recipe, something I now look forward to making every graduation season. They aren’t just treats; they’re little reminders of joy, accomplishment, and a bit of kitchen chaos turned sweet success.
Why You’ll Love This Recipe
After testing and tweaking this recipe, I’m confident these Perfect Graduation Cap Brownie Bites with Peanut Butter Filling will win you over for many reasons:
- Quick & Easy: Ready in under 45 minutes, perfect for last-minute celebrations or casual get-togethers.
- Simple Ingredients: Uses pantry staples like peanut butter, boxed brownies, and chocolate—no fancy shopping required.
- Perfect for Graduations and Parties: These bites are a festive, fun finger food that’s great for any milestone or celebration.
- Crowd-Pleaser: Kids, teens, and adults alike rave about the creamy peanut butter center paired with rich brownie.
- Unbelievably Delicious: The texture combo—moist brownie with a smooth peanut butter surprise—is honestly addicting.
This isn’t your typical brownie recipe either. The trick is in the peanut butter filling—smooth, not too runny, that melts just right. Plus, the chocolate “cap” detail adds a playful touch that’s surprisingly simple but looks impressive. I’ve made plenty of dessert bites over the years, but these stand out because they’re not just tasty; they bring a little celebration to every bite.
For a busy parent or anyone juggling party prep, these bites offer a stress-free way to add charm and flavor without fuss. And if you want to peek at a savory dinner to complement this sweet treat, my quick zesty lemon chicken might be just the dish to balance your celebration meal.
What Ingredients You Will Need
This recipe uses simple, wholesome ingredients to deliver bold flavor and satisfying texture without the fuss. Most are pantry staples, and substitutions are easy if needed.
- Brownie base:
- 1 box of brownie mix (about 18.3 oz / 520 g) – I prefer Ghirardelli for rich chocolate flavor
- Ingredients called for on brownie box (usually eggs, oil, water)
- Peanut Butter Filling:
- 3/4 cup creamy peanut butter (smooth, not chunky, for easy spreading)
- 1/4 cup powdered sugar (to balance sweetness and thicken filling)
- 2 tablespoons unsalted butter, softened (adds richness)
- 1 teaspoon vanilla extract (optional, for flavor depth)
- Chocolate Caps:
- 1 cup semi-sweet chocolate chips (or chopped chocolate for better melting)
- 1 tablespoon coconut oil (helps chocolate set shiny and smooth)
- Edible gold dust or sprinkles (optional, for graduation sparkle)
If you need dairy-free options, swap butter for coconut oil in the filling and use dairy-free chocolate chips. For a gluten-free brownie, you can bake your favorite gluten-free brownie recipe or use a box mix like Betty Crocker Gluten-Free Brownies.
In summer, fresh berries on the side make a lovely fresh contrast, or you can sprinkle crushed nuts on the chocolate caps for texture variety. The peanut butter filling can also be swapped out for almond or cashew butter if you want a different nutty note.
Equipment Needed
- 8×8 inch baking pan (or similar size) for brownies – glass or metal works fine
- Mixing bowls – one for brownie batter, one for peanut butter filling
- Electric mixer or sturdy whisk (helps mix filling smoothly)
- Microwave-safe bowl or double boiler for melting chocolate
- Spoon or small offset spatula for spreading filling
- Sharp knife and cutting board for cutting brownie bites
- Optional: silicone mat or parchment paper for easy cleanup
I find a metal pan gives a better crust on brownies, but glass works if that’s what you have. When melting chocolate, I prefer a double boiler to avoid scorching, but the microwave on 30-second bursts with stirring is totally fine.
For spreading peanut butter filling, a small offset spatula or butter knife gives more control than a spoon. If you don’t have one, a clean fingertip works in a pinch (though it’s a little messier, but hey, it’s the kitchen, right?).
Preparation Method
- Prepare the brownie batter: Follow the instructions on your brownie box to mix the batter—usually combining the mix, eggs, oil, and water. Mix until just combined; overmixing can make brownies tough. (About 5 minutes)
- Bake the brownies: Pour the batter evenly into your greased or parchment-lined 8×8 inch pan. Bake at 350°F (175°C) for 25-30 minutes or until a toothpick inserted near the center comes out with a few moist crumbs. Let the brownies cool completely in the pan. (Cooling takes about 1 hour, but don’t rush this step!)
- Make the peanut butter filling: In a medium bowl, beat together creamy peanut butter, powdered sugar, softened butter, and vanilla extract until smooth and fluffy. The filling should be spreadable but thick enough to hold shape. If too stiff, add a teaspoon of milk; if too runny, add a bit more powdered sugar.
- Cut the brownies: Once cooled, carefully lift the brownie slab out using parchment paper edges or invert onto a cutting board. Cut into 24 even squares (approximately 2-inch / 5 cm squares). This size is perfect for bite-sized treats.
- Assemble the bites: Spread about 1 teaspoon of the peanut butter filling on 12 of the brownie squares. Top each with one of the remaining 12 brownie squares, gently pressing down to sandwich the filling.
- Prepare the chocolate caps: Melt the chocolate chips with coconut oil in 30-second intervals in the microwave, stirring well after each burst, or use a double boiler over simmering water. The mixture should be smooth and glossy.
- Top the bites: Using a small spoon or offset spatula, spread a thin layer of melted chocolate on top of each brownie “sandwich.” Before the chocolate sets, add a sprinkle of edible gold dust or sprinkles for that graduation sparkle. Let the chocolate harden completely at room temperature or in the fridge for about 15-20 minutes.
- Serve & enjoy: Arrange your Perfect Graduation Cap Brownie Bites on a festive platter and watch them disappear. These little treats look impressive but are surprisingly simple to make, perfect for celebrating your grad’s big day.
If the chocolate starts to thicken before you finish, gently rewarm it to keep it spreadable. Also, if your peanut butter filling feels too soft after chilling, let it come back to room temperature briefly before spreading.
Cooking Tips & Techniques
Making these brownie bites come together smoothly depends on a few key tips I picked up after several trials:
- Don’t skip the cooling step: Cutting warm brownies results in crumbling. Patience here helps keep neat edges.
- Peanut butter filling consistency matters: Too runny and it leaks out; too stiff and it’s hard to spread. Beat it until just fluffy and adjust with powdered sugar or milk.
- Chocolate melting: Heat gently and stir often. Burnt chocolate tastes bitter and looks dull.
- Use parchment paper: Lining your pan makes lifting and cutting brownies much easier and less messy.
- Multitasking: While brownies bake and cool, prepare the filling and melt the chocolate to save time.
- Personal experience: I once skipped the chocolate cap and the bites felt incomplete—don’t make the same mistake! That chocolate layer is the finishing touch that pulls the whole look and flavor together.
Variations & Adaptations
These Perfect Graduation Cap Brownie Bites are easy to customize to fit different tastes and dietary needs:
- Nut-free option: Replace peanut butter with sunflower seed butter or cream cheese frosting for a safe alternative.
- Flavor twists: Add a pinch of cinnamon or espresso powder to the brownie batter for depth. You can also mix mini chocolate chips into the peanut butter filling for texture.
- Seasonal adaptations: Swap the peanut butter filling for a raspberry jam or cream cheese mixture for a fruity or tangy surprise.
- Different chocolate caps: Use white chocolate tinted with natural food coloring for school colors or dark chocolate for a richer taste.
- Gluten-free: Use a trusted gluten-free brownie mix and ensure all other ingredients comply.
- Personal tried variation: I once added a sprinkle of crushed pretzels on top of the melted chocolate for a salty crunch. It was a hit at a party and added a fun texture contrast.
Serving & Storage Suggestions
Serve these brownie bites at room temperature for the best texture—the peanut butter filling is smooth and the chocolate cap has a satisfying snap. They look great arranged on a platter, maybe with some fresh fruit or nuts around the edges.
They pair surprisingly well with a cold glass of milk or a cup of coffee, making them a delightful after-dinner treat or party finger food. If you want to add a savory touch to your celebration meal, pairing with dishes like quick crispy chicken fried rice balances sweet and savory beautifully.
Store leftover bites in an airtight container at room temperature for up to 2 days or refrigerate for up to a week. If refrigerated, let them sit out for 15 minutes before serving to soften the filling nicely.
For longer storage, freeze the brownie bites in a single layer on a baking sheet, then transfer to a freezer-safe container. Thaw in the fridge overnight and bring to room temp before serving. Flavors sometimes deepen after chilling, making them even more indulgent.
Nutritional Information & Benefits
Each brownie bite (approximate) contains about 150 calories, 8g fat, 18g carbs, and 3g protein. While they are definitely a treat, the peanut butter adds some protein and healthy fats to balance the indulgence.
Peanut butter provides heart-healthy monounsaturated fats and is a good source of vitamin E and magnesium. Using a quality brownie mix with real cocoa gives antioxidants, too—though moderation is key!
This recipe can be adapted for dietary needs, such as gluten-free or dairy-free, making it accessible to many. Just remember to check labels for allergens if serving a crowd.
From a wellness perspective, I find that enjoying these bites as part of a balanced celebration meal makes them all the more satisfying—less guilt, more joy.
Conclusion
These Perfect Graduation Cap Brownie Bites with Peanut Butter Filling have become one of my favorite ways to celebrate milestones. They’re fuss-free, taste incredible, and bring a festive touch that’s hard to beat. Whether you’re throwing a party or just want a special treat to mark the day, these bites deliver.
Feel free to tweak the filling, chocolate, or brownie base to suit your taste—there’s room to make this recipe your own. I love how they bring a little extra joy and sweetness to any gathering, and I hope you find the same.
If you give them a try, I’d love to hear how they turned out for you or what fun variations you came up with. Sharing recipes like this is what makes cooking feel like a community.
Here’s to sweet celebrations and happy baking!
FAQs
- Can I make the peanut butter filling ahead of time?
Yes, you can prepare the filling a day in advance and store it covered in the fridge. Bring it back to room temperature before spreading for best texture. - What if I don’t have a boxed brownie mix?
No problem! You can use your favorite homemade brownie recipe. Just make sure to bake it in a similar size pan and cool completely before assembling. - Can I freeze these brownie bites?
Definitely. Freeze them in a single layer first, then store in an airtight container. Thaw overnight in the fridge before serving. - How do I prevent the peanut butter filling from leaking?
Make sure the filling is thick enough by adding powdered sugar as needed. Also, sandwich the brownies gently without pressing too hard. - Can I use crunchy peanut butter?
It’s best to use smooth peanut butter for easy spreading, but if you love texture, you can try crunchy—just be prepared for a slightly chunkier filling.
Pin This Recipe!
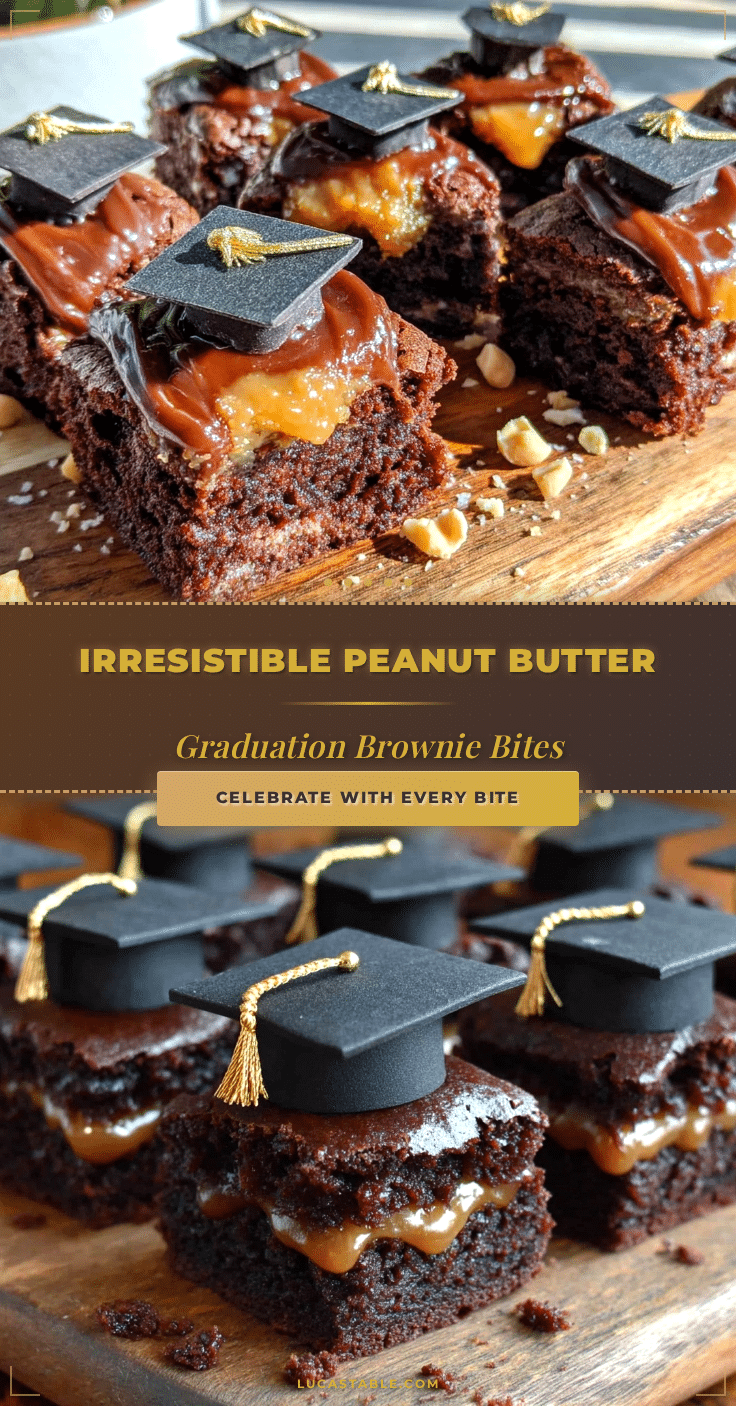
Perfect Graduation Cap Brownie Bites with Easy Peanut Butter Filling
These festive brownie bites feature a fudgy brownie base, creamy peanut butter filling, and a smooth chocolate cap, perfect for graduation celebrations and parties.
- Prep Time: 15 minutes
- Cook Time: 30 minutes
- Total Time: 1 hour 45 minutes
- Yield: 24 brownie bites 1x
- Category: Dessert
- Cuisine: American
Ingredients
- 1 box of brownie mix (about 18.3 oz / 520 g)
- Ingredients called for on brownie box (usually eggs, oil, water)
- 3/4 cup creamy peanut butter (smooth, not chunky)
- 1/4 cup powdered sugar
- 2 tablespoons unsalted butter, softened
- 1 teaspoon vanilla extract (optional)
- 1 cup semi-sweet chocolate chips
- 1 tablespoon coconut oil
- Edible gold dust or sprinkles (optional)
Instructions
- Prepare the brownie batter by following the instructions on your brownie box, mixing the mix, eggs, oil, and water until just combined (about 5 minutes).
- Pour the batter evenly into a greased or parchment-lined 8×8 inch pan. Bake at 350°F (175°C) for 25-30 minutes or until a toothpick inserted near the center comes out with a few moist crumbs. Let the brownies cool completely in the pan (about 1 hour).
- Make the peanut butter filling by beating together creamy peanut butter, powdered sugar, softened butter, and vanilla extract until smooth and fluffy. Adjust consistency with milk or powdered sugar as needed.
- Once cooled, lift the brownie slab out and cut into 24 even squares (approximately 2-inch squares).
- Spread about 1 teaspoon of peanut butter filling on 12 of the brownie squares. Top each with one of the remaining 12 brownie squares, gently pressing down to sandwich the filling.
- Melt the chocolate chips with coconut oil in 30-second intervals in the microwave or using a double boiler until smooth and glossy.
- Spread a thin layer of melted chocolate on top of each brownie sandwich. Before the chocolate sets, sprinkle edible gold dust or sprinkles if desired. Let the chocolate harden completely at room temperature or in the fridge for 15-20 minutes.
- Arrange the brownie bites on a platter and serve.
Notes
Do not skip the cooling step to avoid crumbling when cutting brownies. Adjust peanut butter filling consistency to avoid leaking. Melt chocolate gently to prevent burning. Use parchment paper for easier lifting and cutting. Rewarm chocolate if it thickens before finishing spreading. Let refrigerated filling come to room temperature before spreading.
Nutrition
- Serving Size: 1 brownie bite
- Calories: 150
- Fat: 8
- Carbohydrates: 18
- Protein: 3
Keywords: brownie bites, peanut butter filling, graduation dessert, easy brownies, party treats, chocolate caps, festive dessert