I’d claimed to hate eggnog for fifteen years. Fifteen years of wrinkling my nose at holiday parties, of muttering “I’m more of a mulled wine person” whenever a punch bowl appeared, of dodging the cartons that materialized in every grocery store aisle come November. It wasn’t even a principled stance—I’d just tasted one too many versions that felt like drinking liquid pumpkin pie spice mixed with chalk. So when my friend Maria shoved a cup toward me last December and said “Just try it, you judgmental weirdo,” I almost rolled my eyes right out of my head.
Then I took a sip. And honestly? I stood there in her candlelit kitchen, stared at the foam mustache I’d just acquired, and felt the universe quietly admit it had been wrong. The texture was velvety without being heavy—like drinking a cloud that had been taking notes from a crème brûlée. The warmth spread through my chest in a way that had nothing to do with the temperature. And that fresh nutmeg? I mean, I’d been using the pre-ground stuff my whole life like some sort of culinary caveman. This was different. This was the eggnog equivalent of hearing a song live after only knowing the radio version.
Maria just raised an eyebrow over her own mug. “Told you.” She didn’t even say “I told you so”—she just let the silence do the work. That’s the thing about a really good recipe, you know? It doesn’t need a big speech. It just sits there, warm and patient, waiting for you to catch up. I spent the rest of that night asking her questions about ratios and techniques, scribbling notes on a napkin that definitely had a wine stain on it. Maybe you’ve been there—that moment when a food you’ve spent years avoiding suddenly clicks, and you realize the problem wasn’t the dish itself, but the versions you’d been subjected to. This is that eggnog. The one that made me eat crow, and I’d do it again every single holiday season.
Why You’ll Love This Recipe
Let me tell you something I learned the hard way: homemade eggnog isn’t just better than store-bought—it’s a completely different experience. I tested six versions before landing on this one, and here’s what makes it worth the tiny bit of effort.
- Ready in 20 Minutes: No fussing, no complicated techniques. You’re twenty minutes away from the best eggnog of your life.
- Simple Pantry Ingredients: Eggs, milk, cream, sugar, vanilla, and nutmeg. That’s it. No weird stabilizers or artificial flavors.
- Perfect for Holiday Gatherings: Whether it’s Christmas Eve, a cookie swap, or just a Tuesday that needs some extra cheer, this fits right in.
- Completely Customizable: Spiked or virgin, thick or thin, dairy or plant-based—you’re in control.
- That Fresh Nutmeg Difference: I cannot stress this enough. Freshly grated nutmeg transforms this from “oh, that’s nice” to “wait, what did you put in this?”
What makes this recipe different from all the others? It’s the balance. Most homemade eggnogs are either too thin (tasting like sad milk) or too thick (tasting like custard you have to drink). This version hits that Goldilocks sweet spot—rich enough to feel indulgent, but light enough that you can have a second cup without regret. I spent three batches tweaking the cream-to-milk ratio, and let me tell you, my neighbors were very happy taste-testers.
This isn’t just good eggnog. It’s the kind that makes people close their eyes after that first sip. The kind that gets requested every single year. The kind that converted me after fifteen years of stubborn refusal. And if it can do that? It can win over anyone.
What Ingredients You Will Need
This recipe uses simple, wholesome ingredients to deliver that classic eggnog flavor without any of the artificial stuff you find in cartons. Most of these are already in your kitchen—you might just need to grab fresh nutmeg and eggs.
- 6 large egg yolks (room temperature—this helps them incorporate smoothly; save the whites for omelets or meringues)
- 1/2 cup (100g) granulated sugar (regular white sugar works perfectly; you can reduce to 1/3 cup if you prefer less sweet)
- 2 cups (480ml) whole milk (I recommend using whole milk for richness; 2% works but the texture won’t be as luxurious)
- 1 cup (240ml) heavy cream (don’t skimp here—this is what gives eggnog its signature velvety texture)
- 1 teaspoon vanilla extract (pure vanilla, not imitation, makes a noticeable difference)
- 1/2 teaspoon freshly grated nutmeg (plus more for garnish—this is non-negotiable; pre-ground nutmeg loses its punch)
- Pinch of salt (just a tiny pinch to balance the sweetness and brighten the flavors)
- Optional: 1/2 cup (120ml) bourbon, dark rum, or brandy (if you’re making it spiked; I prefer bourbon for its warm, vanilla notes)
Ingredient Tips: For the best texture, use eggs that are at least a few days old—they whisk up more easily than super-fresh ones. I’ve tested this with organic Valley eggs and standard store-brand eggs, and both work beautifully. If you’re using farm-fresh eggs with incredibly orange yolks, your eggnog will have a gorgeous golden color.
Substitution Guidance: Need it dairy-free? Swap the milk for oat milk (it’s the creamiest alternative) and use full-fat coconut cream instead of heavy cream. The flavor changes slightly, but it’s still delicious. For a lower-sugar version, use a monk fruit sweetener blend—just reduce the amount slightly since it’s sweeter than sugar.
Equipment Needed
You don’t need fancy equipment for this recipe, which is honestly one of the best things about it. Here’s what you’ll need:
- Medium saucepan (2-3 quart size works perfectly; I use my trusty stainless steel one that’s seen better days)
- Large mixing bowl (for whisking the egg yolks and sugar)
- Whisk (a standard wire whisk; I’ve used the same one for a decade and it’s never let me down)
- Fine-mesh strainer (this is important—it catches any bits of cooked egg for that silky smooth texture)
- Nutmeg grater or Microplane (a Microplane is ideal, but the little jar grater works too; avoid pre-ground nutmeg if you can)
- Measuring cups and spoons (for accuracy, especially with the nutmeg)
- Pitcher or jar for serving (something with a spout makes pouring easier)
If you don’t have a fine-mesh strainer, you can use cheesecloth or even a clean dish towel—just be careful not to burn yourself. And if you don’t have a Microplane, you can use the smallest holes on a box grater. I’ve done it that way in a pinch, and it works fine, though you get slightly larger nutmeg pieces. Honestly, the most important tool here is patience. Rushing the tempering process is the only way to mess this up.
Preparation Method
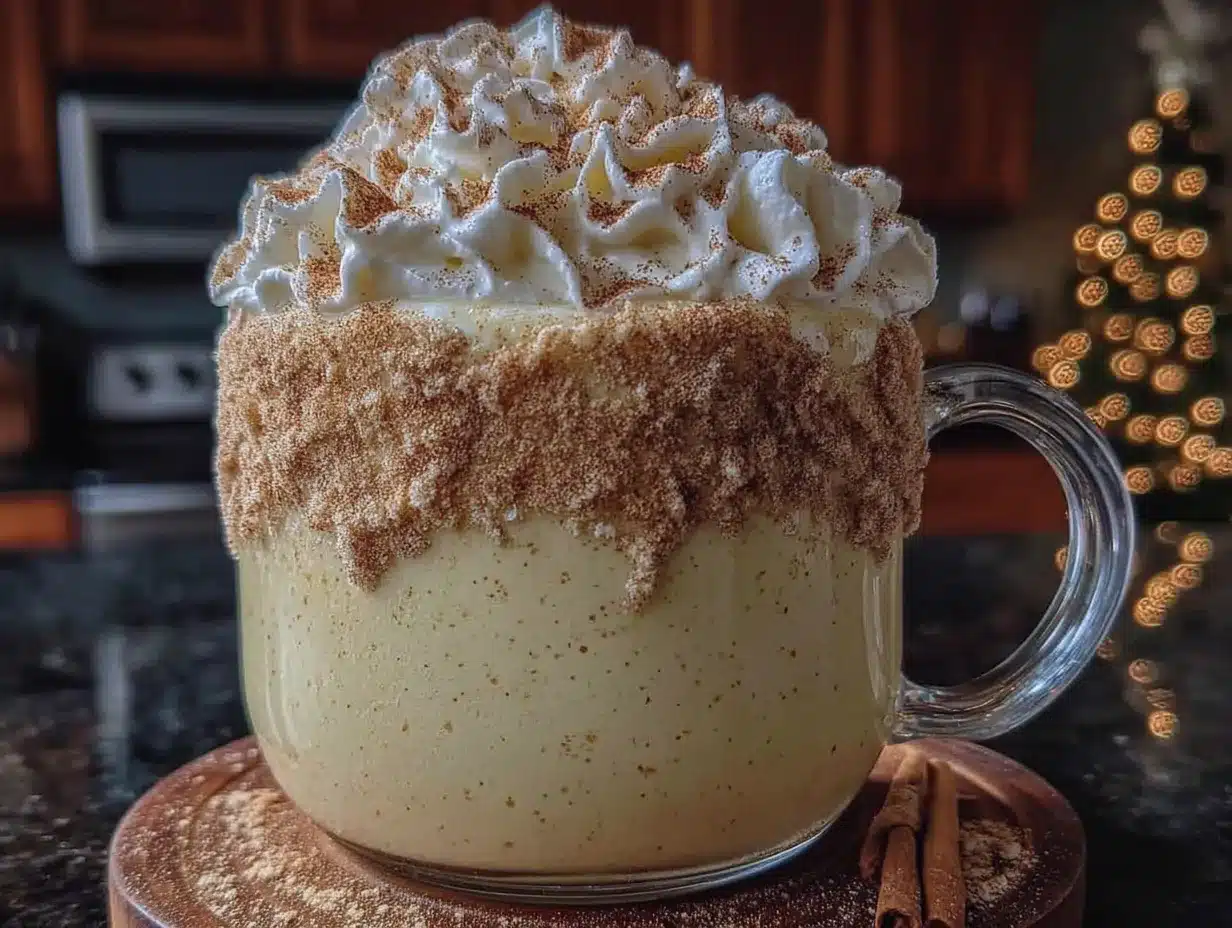
Making eggnog from scratch sounds fancy, but I promise it’s simpler than you think. Here’s exactly how to do it, with all the little details I wish someone had told me.
- Whisk the egg yolks and sugar together in your large mixing bowl until the mixture turns pale yellow and slightly thick—about 2 minutes of vigorous whisking. You’re looking for a ribbon stage where the mixture falls off the whisk in a smooth, continuous stream. Don’t rush this step; the sugar needs time to dissolve completely.
- Combine the milk, cream, and salt in your medium saucepan. Place it over medium heat and stir occasionally. You want it hot but not boiling—look for small bubbles forming around the edges and a slight steam rising. This takes about 4-5 minutes. If you see it starting to simmer, pull it off the heat immediately. Burnt milk is a tragedy I’ve experienced and do not recommend.
- Temper the egg mixture. This is the step that scares people, but it’s actually dead simple. While whisking the egg yolk mixture constantly, slowly pour about 1/2 cup of the hot milk mixture into the eggs. Keep whisking! You’re gradually warming the eggs so they don’t scramble. Then, still whisking, pour in another 1/2 cup. Now pour the entire egg mixture back into the saucepan with the remaining milk, whisking as you go.
- Cook over medium-low heat, stirring constantly with a wooden spoon or heatproof spatula. This takes about 5-8 minutes. You’re looking for the mixture to thicken enough to coat the back of your spoon—run your finger across the coated spoon and if the line holds, it’s ready. Do not let it boil, or you’ll have sweetened scrambled eggs. Ask me how I know.
- Remove from heat and strain immediately through your fine-mesh strainer into a clean pitcher or bowl. This catches any tiny bits of cooked egg that might have formed. Even if you think you did everything perfectly, strain anyway. Trust me on this.
- Stir in the vanilla extract and freshly grated nutmeg. If you’re adding alcohol, stir it in now. The heat will mellow the alcohol slightly, making everything blend beautifully.
- Cool to room temperature, then cover and refrigerate for at least 2 hours, though overnight is better. The flavors meld and deepen as it chills. I’ve made the mistake of serving it warm and it’s good, but cold? It’s transcendent.
- Serve chilled, with a fresh grating of nutmeg on top. If you’re feeling fancy, add a cinnamon stick or a dollop of whipped cream. But honestly, just the nutmeg is perfect.
Time Estimate: Active prep time is about 20 minutes, plus 2 hours minimum chilling time. Total time: 2 hours 20 minutes. Makes about 4 cups (8 servings).
Sensory Cue: When it’s done cooking, the mixture should feel silky and look like thin pudding. It will thicken more as it chills, so don’t worry if it seems a bit loose at this stage.
Cooking Tips & Techniques
I’ve made this recipe probably thirty times now, and I’ve made every mistake in the book so you don’t have to. Here’s what I’ve learned:
The Temper Trap: The first time I made eggnog, I poured the hot milk into the eggs too fast and ended up with little eggy bits floating around. Not a disaster, but not ideal. Pour slowly, whisk constantly, and don’t get distracted by your phone. This takes about 60 seconds of focus.
Low and Slow: Keep the heat at medium-low after you add the eggs back. I once got impatient and cranked it to medium-high, thinking “it’ll just cook faster.” It did not cook faster. It curdled. I had to start over. Learn from my impatience.
The Spoon Test: Instead of guessing when it’s thick enough, do the spoon test every minute after the 4-minute mark. Dip a clean spoon in, pull it out, and run your finger across the back. If the line holds and doesn’t get covered by liquid, you’re done. If it still runs, give it another minute.
Fresh Nutmeg Matters: I cannot overstate this. Pre-ground nutmeg loses its volatile oils within weeks and tastes dusty and flat. Whole nutmeg keeps for months and grates in seconds. I keep a whole nutmeg in my spice drawer and just grate what I need. The difference is night and day—like comparing fresh coffee to instant.
Make-Ahead Magic: This eggnog actually gets better after a day or two in the fridge. The flavors marry and mellow, and the texture becomes even silkier. I always make mine at least 24 hours before I plan to serve it. It’s one of those rare recipes that rewards patience.
Variations & Adaptations
One of the best things about this recipe is how easily it adapts to different tastes and dietary needs. Here are some variations I’ve tried and loved:
- Spiked Eggnog: Add 1/2 cup bourbon, dark rum, or brandy after removing from heat. My personal favorite is bourbon—it adds a warm vanilla note that complements the nutmeg beautifully. For a bourbon-rum blend, try 1/4 cup of each.
- Dairy-Free Version: Swap the whole milk for oat milk (it’s the creamiest alternative I’ve found) and use full-fat coconut cream instead of heavy cream. The coconut flavor is subtle but adds a lovely tropical note. I made this for a friend with lactose intolerance and she said it was the best eggnog she’d had in years.
- Vanilla Bean Eggnog: Split one vanilla bean and scrape the seeds into the milk mixture while it heats. The tiny black specks add visual appeal and a more complex vanilla flavor. It feels extra fancy without extra effort.
- Chocolate Eggnog: Whisk 2 tablespoons of unsweetened cocoa powder into the egg yolk mixture. It creates a chocolate-nog hybrid that’s absolutely ridiculous in the best way. I made this on a whim and it was gone in ten minutes.
- Lower-Sugar Version: Use 1/3 cup sugar instead of 1/2 cup, or substitute with a monk fruit sweetener blend. The texture stays the same, and the nutmeg adds enough flavor that you won’t miss the sweetness.
Serving & Storage Suggestions
This eggnog is best served cold, straight from the fridge, in small glasses or mugs. I like to use clear glass so you can see that gorgeous golden color. Top each serving with a generous grating of fresh nutmeg—don’t be shy with it. If you’re feeling extra festive, add a cinnamon stick for stirring or a dollop of lightly sweetened whipped cream.
Storage: Keep eggnog in an airtight container in the refrigerator for up to 4 days. The texture remains silky throughout, though the spice flavor may mellow slightly. I’ve never had it last longer than 3 days in my house, but it’s perfectly safe for 4.
Freezing: You can freeze eggnog for up to 2 months. Pour it into a freezer-safe container, leaving an inch of headroom for expansion. Thaw overnight in the refrigerator, then whisk vigorously before serving. The texture might be slightly less silky, but it’s still delicious. I’ve frozen batches for holiday emergencies and they’ve saved me more than once.
Reheating: If you prefer warm eggnog (some people do!), gently reheat it over low heat, stirring constantly. Do not boil. Add a splash of milk if it’s too thick. I personally prefer it cold, but my dad insists on warm eggnog with a shot of brandy, and who am I to argue with tradition?
Flavor Development: Here’s something interesting—the flavor actually improves after 24 hours in the fridge. The nutmeg and vanilla meld together, and the richness becomes more balanced. If you can plan ahead, make it a day before you need it. Your future self will thank you.
Nutritional Information & Benefits
Let’s be real—eggnog is a treat, not a health food. But knowing what’s in it helps you enjoy it mindfully. Per serving (about 1/2 cup, without alcohol):
- Calories: 280
- Fat: 18g
- Carbohydrates: 24g
- Protein: 7g
- Sugar: 22g
Health Highlights: Egg yolks are rich in choline, which supports brain health, and vitamin D, which is especially important during those short winter days. The milk and cream provide calcium for bone health. And nutmeg? It contains compounds that may have anti-inflammatory properties and has been used in traditional medicine for digestive health. That said, eat it because it tastes amazing, not because it’s a superfood.
Dietary Considerations: This recipe contains dairy and eggs. For a dairy-free version, see the variations section. For a lower-sugar version, reduce the sugar to 1/3 cup or use a sugar substitute. This recipe is naturally gluten-free and can be made nut-free by using standard dairy.
Conclusion
Look, I spent fifteen years avoiding eggnog. Fifteen years of holiday parties where I’d sip my wine and watch everyone else enjoy that creamy, spiced goodness. And honestly? I was missing out. Not because I was being stubborn (though I was), but because I’d never had the real thing. The homemade version made with fresh nutmeg and a little bit of patience. The version that makes you close your eyes on the first sip.
This recipe isn’t complicated. It’s not fancy. It’s just… right. It’s the eggnog that converted me, and I think it might convert you too. Whether you spike it with bourbon, keep it virgin, or play around with the variations, this is the eggnog that tastes like a warm hug in a mug. It’s the recipe I now make every single December, the one my friends text me about asking “Is it eggnog season yet?”
So here’s my challenge to you: make this for your next holiday gathering. Serve it with extra nutmeg on top and watch people’s faces. And if someone tells you they don’t like eggnog? Hand them a cup anyway. You never know—you might just change their mind.
I’d love to hear how yours turns out! Drop a comment below and let me know if you added bourbon or kept it classic. And if you have a favorite holiday drink tradition, share that too—I’m always looking for new recipes to try.
Frequently Asked Questions
Can I make this eggnog without alcohol?
Absolutely! The recipe works perfectly without any alcohol. Just skip the bourbon or rum and you’ll have a delicious virgin eggnog that’s perfect for all ages. The flavor is still rich and creamy—the alcohol is entirely optional.
Why did my eggnog curdle?
Curdling usually happens when the heat is too high or the eggs are added too quickly. Always keep the heat at medium-low after adding the eggs, and make sure you’re whisking constantly when you temper the egg mixture. If it does curdle, strain it through a fine-mesh strainer—it might still be salvageable, though the texture won’t be as silky.
How long does homemade eggnog last in the fridge?
Homemade eggnog stays fresh for up to 4 days in the refrigerator when stored in an airtight container. The flavor actually improves after 24 hours as the spices meld. Always give it a good stir before serving, as some separation is normal.
Can I use pre-ground nutmeg instead of fresh?
You can, but I really don’t recommend it. Freshly grated nutmeg has a warm, aromatic flavor that’s completely different from the dusty, flat taste of pre-ground nutmeg. Whole nutmegs last for months and grate in seconds with a Microplane. It’s a small change that makes a huge difference.
Is it safe to eat raw eggs in eggnog?
This recipe cooks the eggs gently on the stovetop, so they’re not raw. The tempering and cooking process brings the mixture to a temperature that’s safe for consumption. If you’re concerned about food safety, use pasteurized eggs or bring the mixture to 160°F (71°C) using a kitchen thermometer.
Pin This Recipe!
Cozy Classic Eggnog with Fresh Nutmeg – Easy Homemade Recipe
This homemade eggnog is velvety, rich, and perfectly balanced with fresh nutmeg. Ready in 20 minutes, it’s a holiday classic that will convert even the biggest eggnog skeptics.
- Prep Time: 20 minutes
- Cook Time: 10 minutes
- Total Time: 2 hours 30 minutes (includes 2 hours chilling)
- Yield: 8 servings 1x
- Category: Beverage
- Cuisine: American
Ingredients
- 6 large egg yolks (room temperature)
- 1/2 cup (100g) granulated sugar
- 2 cups (480ml) whole milk
- 1 cup (240ml) heavy cream
- 1 teaspoon vanilla extract
- 1/2 teaspoon freshly grated nutmeg (plus more for garnish)
- Pinch of salt
- Optional: 1/2 cup (120ml) bourbon, dark rum, or brandy
Instructions
- Whisk the egg yolks and sugar together in a large mixing bowl until pale yellow and slightly thick, about 2 minutes, until the mixture reaches ribbon stage.
- Combine the milk, cream, and salt in a medium saucepan over medium heat. Heat until small bubbles form around the edges and steam rises, about 4-5 minutes. Do not let it boil.
- Temper the egg mixture: While whisking the egg yolk mixture constantly, slowly pour about 1/2 cup of the hot milk mixture into the eggs. Keep whisking, then pour in another 1/2 cup. Pour the entire egg mixture back into the saucepan with the remaining milk, whisking as you go.
- Cook over medium-low heat, stirring constantly with a wooden spoon or heatproof spatula, for 5-8 minutes, until the mixture thickens enough to coat the back of a spoon. Do not let it boil.
- Remove from heat and strain immediately through a fine-mesh strainer into a clean pitcher or bowl.
- Stir in the vanilla extract and freshly grated nutmeg. If adding alcohol, stir it in now.
- Cool to room temperature, then cover and refrigerate for at least 2 hours, preferably overnight.
- Serve chilled with a fresh grating of nutmeg on top.
Notes
For best results, use room temperature egg yolks and fresh whole nutmeg. The eggnog improves after 24 hours in the fridge as flavors meld. Do not let the mixture boil after adding eggs to prevent curdling. For a dairy-free version, use oat milk and full-fat coconut cream.
Nutrition
- Serving Size: 1/2 cup
- Calories: 280
- Sugar: 22
- Sodium: 80
- Fat: 18
- Saturated Fat: 10
- Carbohydrates: 24
- Protein: 7
Keywords: eggnog, homemade eggnog, holiday drink, Christmas eggnog, fresh nutmeg, easy eggnog recipe, classic eggnog


