I wasn’t expecting to get dessert advice from the high school biology teacher at my son’s parent-teacher conference. But there I was, sitting in a tiny plastic chair, clutching a progress report, while Mr. Patterson—a man who usually talks about cell mitosis—started describing how he makes these shimmering, layered jello cups every single Christmas. He said his kids go absolutely bonkers for them, and honestly, the way his eyes lit up, I believed him. He scribbled the basic idea on the back of my son’s spelling test, and I shoved it in my purse, thinking, “Sure, a science teacher making jello. Makes sense.”
That was three years ago. That crumpled piece of paper is now stained and taped to the inside of my kitchen cabinet. Let me tell you, those Easy Christmas Sparkle Jello Cups have saved my sanity more times than I can count, especially on those frantic December weeknights when the kids are bouncing off the walls and I still need to bring something to the school holiday party. They are the ultimate “I need this done in 20 minutes of active time” treat. You just layer, chill, and boom—you look like a holiday hero.
I love that these aren’t just pretty to look at. They have that satisfying, wobbly texture that kids find hilarious, and the layers of red and green create a festive “wow” factor without requiring any fancy piping bags or baking skills. Honestly, I’ve messed this up plenty of times—forgot to let one layer set fully, poured the next one too hot and melted the previous layer into a muddy brown mess. But you know what? The kids still ate it. They called it “Christmas swamp jello” and loved it even more. That’s the kind of forgiving recipe this is. It’s resilient, just like us tired parents trying to get through the holiday season.
Why You’ll Love This Recipe
If you are looking for a holiday dessert that doesn’t require turning on the oven or standing over a hot stove, you have found your match. These Easy Christmas Sparkle Jello Cups are my go-to for every December weeknight gathering. Here is why I keep coming back to them, and why I think you will too:
- Quick & Easy: The actual hands-on time is about 15-20 minutes. The rest is just waiting for the fridge to do its magic. You can prep these while helping with homework or packing lunches for the next day.
- Simple Ingredients: You only need a box of red jello, a box of green jello, some unflavored gelatin, and a can of sweetened condensed milk. No weird extracts or hard-to-find items. I bet you have most of these in your pantry right now.
- Perfect for Weeknight Holiday Chaos: These are ideal for the week leading up to Christmas. You can make them on a Tuesday, and they will stay perfect in the fridge until the Friday class party. They actually taste better after a day or two.
- Crowd-Pleaser: I have yet to meet a kid who turns down jello. The creamy, milky layer in the middle makes them feel more like a fancy dessert than just plain jello. The adults love them too—they are nostalgic and light after a heavy holiday meal.
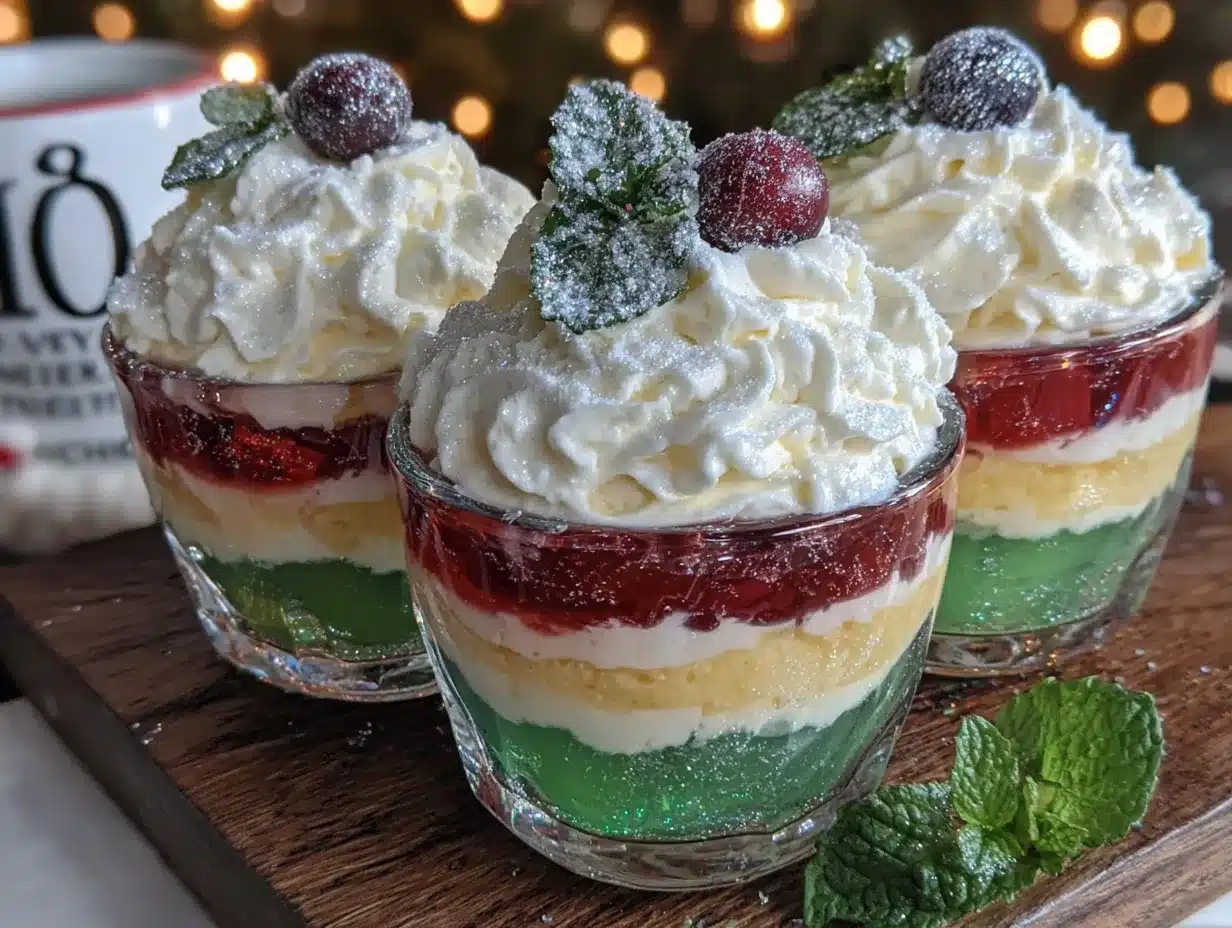
- Unbelievably Festive: The “sparkle” comes from the way the light catches the translucent layers. It genuinely looks like tiny Christmas lights in a cup. It is the easiest way to make a table look festive without spending money on decorations.
What makes these different from every other jello recipe out there is the texture. We aren’t just making regular jello cups. By adding a creamy, opaque gelatin layer in between the clear red and green layers, you get that beautiful, professional-looking stripe effect. It feels like a real dessert, not just a kids’ snack. It is the kind of treat that makes you close your eyes after the first bite because it tastes exactly like childhood, but it looks good enough for a holiday dinner table.
What Ingredients You Will Need
This recipe uses straightforward ingredients to create a stunning visual effect. You likely have most of these in your kitchen already, which is the best part. Here is exactly what you need to grab at the store:
For the Red Layer (Strawberry or Raspberry)
- 1 box (3 oz) Strawberry or Raspberry Jello: This is your base red layer. I prefer the brand name Jell-O for consistency, but store brands work fine too. Just make sure it is the standard 3-ounce box. The flavor isn’t super important—just pick a red one the kids will like.
- 1 cup boiling water: This dissolves the gelatin powder completely. Use a kettle or microwave to get the water hot.
- 1/2 cup cold water: This helps cool the mixture down so it sets properly without melting the previous layer.
For the Green Layer (Lime or Green Apple)
- 1 box (3 oz) Lime or Green Apple Jello: Pick your favorite green flavor. Lime is classic, but green apple is a fun twist that kids seem to love. I personally use lime because it reminds me of the holidays.
- 1 cup boiling water
- 1/2 cup cold water
For the Creamy White Layer
- 1 envelope (0.25 oz) unflavored gelatin: This is the secret to the “sparkle” and structure. The plain gelatin makes the creamy layer firm enough to hold its shape between the jello layers. Do not skip this—regular jello won’t set the milk properly.
- 1/4 cup cold water: You will sprinkle the unflavored gelatin over this to let it “bloom” before heating it.
- 1/2 cup boiling water: This dissolves the bloomed gelatin.
- 1 can (14 oz) sweetened condensed milk: This gives the creamy layer its sweetness and that luxurious, thick texture. Do not use evaporated milk—it isn’t sweet enough and won’t set the same way. I use Eagle Brand, but any brand works.
- 1 teaspoon vanilla extract: Optional, but it rounds out the flavor and makes the creamy layer taste like frosting. (Adds richness)
Optional Toppings & Garnishes
- Whipped cream: A dollop on top right before serving makes it extra special. (Use dairy-free coconut whipped cream if needed)
- Red and green sprinkles: For that extra “sparkle” factor. The kids love helping with this step.
- Maraschino cherries: One on top of each cup looks super festive.
Ingredient Selection Tip: When buying the unflavored gelatin, look for Knox brand—it is the most reliable. I have tried generic versions, and sometimes they don’t set as firmly, which is a bummer when you are trying to get those clean layers. Also, make sure your sweetened condensed milk is not expired. I once grabbed a can from the back of my pantry that was a year old, and it had turned slightly grainy. Fresh is best here.
Equipment Needed
You don’t need any fancy kitchen gadgets for this recipe. That is the beauty of it. Here is what you will need:
- Small clear plastic cups (5 oz or 7 oz): These are perfect for showing off the layers. I buy the ones with lids from the party supply store. The clear cups are non-negotiable for the “sparkle” effect—you want people to see the stripes. A pack of 24 costs about three bucks.
- Two liquid measuring cups: One for the hot water and one for the cold. Glass measuring cups are best because they don’t absorb odors.
- Two small mixing bowls: For preparing the red and green jello separately. I use Pyrex bowls because they are microwave-safe and easy to clean.
- One medium mixing bowl: For the creamy white layer.
- A whisk: A small whisk works best for dissolving the gelatin without lumps. A fork can work in a pinch, but a whisk is faster.
- A ladle or a liquid measuring cup with a spout: This makes pouring the jello into the small cups much easier and less messy. I use a 1-cup Pyrex measuring cup for this.
- A refrigerator: You need space for the cups to sit level. A flat spot on a shelf is better than the door, which gets bumped too much.
- A tray or baking sheet: Place the cups on a tray before moving them to the fridge. This catches any spills and makes it easy to move them all at once.
Budget-Friendly Option: If you don’t want to buy clear plastic cups, you can use small glass jars (like the ones from baby food or jam). Just make sure they are heat-safe and clean. I have also used small mason jars, and they look adorable. Just be careful when pouring hot liquid into glass—let it cool slightly first to avoid cracking.
Preparation Method
This method looks complicated because there are three layers, but I promise it is just a waiting game. The actual work is minimal. Here is how to get those perfect, sparkling stripes:
Step 1: Prepare the Green Layer (Bottom Layer)
In a small bowl, empty the box of green jello. Add 1 cup of boiling water and whisk for about 2 minutes until the powder is completely dissolved. You should see no granules at the bottom. Then, stir in 1/2 cup of cold water. Set this aside to cool for about 10 minutes. You want it to be just warm to the touch, not hot. If it is too hot, it can melt the previous layer later on.
Step 2: Pour the First Layer
Place your clear cups on a tray. Using your ladle or measuring cup, divide the green jello evenly among the cups. You want to fill each cup about 1/3 of the way full. Do not fill it more than that, or you won’t have room for the other two layers. Carefully transfer the tray to the fridge. Let this layer set for at least 1 hour, or until it is firm to the touch. Do not rush this step—if the layer is still tacky, the next layer will mix in and you will lose the clean line.
Step 3: Prepare the Creamy White Layer
While the green layer is setting, make the creamy layer. In a medium bowl, sprinkle the envelope of unflavored gelatin over 1/4 cup of cold water. Let it sit for 5 minutes. This is called “blooming”—the gelatin will absorb the water and look like a firm, spongy mass. Don’t skip this step; it is crucial for the texture. After 5 minutes, pour 1/2 cup of boiling water over the bloomed gelatin and whisk until it is completely dissolved. The mixture should be clear. Then, whisk in the entire can of sweetened condensed milk and the vanilla extract. Stir until everything is smooth and combined. Set this aside to cool to room temperature. Do not refrigerate it yet, or it will start to set before you can pour it.
Step 4: Add the Creamy Layer
Once the green layer is fully set (firm and jiggly but not sticky), take the cups out of the fridge. Gently pour the creamy white mixture over the green layer. Fill each cup to about the halfway point. Use the back of a spoon to slow the pour if you are nervous about disturbing the green layer. The creamy layer is heavier than the jello, so it will sink slightly, but it should stay on top. Return the cups to the fridge for another 1 to 1.5 hours, or until the creamy layer is set and firm.
Step 5: Prepare the Red Layer (Top Layer)
About 10 minutes before the creamy layer is done setting, prepare the red jello. In a clean bowl, empty the box of red jello. Add 1 cup of boiling water and whisk until dissolved. Then, add 1/2 cup of cold water. Let this cool to room temperature. If you pour hot jello over the creamy layer, it will melt the milk layer and ruin the stripes. Patience is key here.
Step 6: Add the Final Red Layer
Once the creamy layer is firm to the touch, take the cups out again. Gently pour the cooled red jello over the creamy layer, filling the cups almost to the top. Leave a little room for toppings if you plan to add whipped cream. Return the tray to the fridge. Let the cups set for at least 4 hours, but overnight is best. The longer they sit, the firmer and cleaner the layers become.
Step 7: Garnish and Serve
Right before serving, add a dollop of whipped cream to each cup. Top with red and green sprinkles or a maraschino cherry. The contrast of the white cream against the red and green jello is what makes these “sparkle.” Serve them cold straight from the fridge.
Sensory Cue: When you tap the side of the cup, the layers should jiggle independently. If they all wobble together as one solid mass, they haven’t set long enough. Give them more time. The perfect cup has three distinct, wiggly stripes that look like they are floating.
Cooking Tips & Techniques
I have made these Easy Christmas Sparkle Jello Cups at least a dozen times, and I have made every mistake in the book. Here is what I have learned so you don’t have to repeat my failures:
The Temperature Trap: The most common mistake is pouring the next layer too hot. I ruined my first batch because I was in a hurry. The hot red jello melted the creamy layer, and I ended up with a pinkish-greenish-brownish mess. It tasted fine, but it looked like a science experiment gone wrong. Always let your jello mixture cool to room temperature before pouring it over a set layer. Touch the side of the bowl—if it feels warm, wait 10 more minutes.
The Blooming Blunder: I once forgot to bloom the unflavored gelatin for the creamy layer. I just tossed the powder into the hot water and condensed milk. The result was a grainy, lumpy layer that never set properly. The unflavored gelatin needs those 5 minutes in cold water to hydrate. It is a non-negotiable step. Set a timer if you have to.
Multitasking Strategy: Here is how I fit this into a busy weeknight. I make the green layer and pop it in the fridge right after dinner cleanup. Then, while the kids are doing homework, I make the creamy layer. I pour it on, and it goes back in the fridge. I do the red layer right before I go to bed. By the time I wake up, the cups are perfect. The active time is spread out over the evening, so it never feels like a chore.
The Cup Size Matters: If you use cups that are too big (like 9 oz), the layers will be too thick, and they will take forever to set. Stick to 5 oz or 7 oz cups. The layers are thin enough to set in about an hour each. I learned this the hard way when I used giant tumblers and had to wait 6 hours for the first layer to firm up.
Consistency Tip: For the cleanest lines, wipe the inside of the cup with a paper towel before pouring the next layer. Sometimes, condensation or splashes from the previous layer can leave a film that makes the new layer look cloudy. A quick wipe keeps everything crystal clear.
Variations & Adaptations
Once you master the basic method, you can really have fun with these. Here are some ways I have changed them up depending on the occasion or what I have on hand:
1. The “Snowy” Blue & White Version (Winter Theme)
Instead of red and green, use blue raspberry jello for the bottom and top layers, and keep the creamy white layer in the middle. This looks like a snowy winter sky. I made these for a “Frozen”-themed birthday party, and the kids lost their minds. You can also use clear lemon jello for a more translucent look.
2. The Dairy-Free Adaptation
If you have a dairy allergy in the house, swap the sweetened condensed milk for a can of full-fat coconut cream mixed with 1/4 cup of sugar or agave. You will need to add an extra 1/2 envelope of unflavored gelatin to help it set because coconut cream is thinner than condensed milk. The texture is slightly less firm, but it still works beautifully. I have made this for a friend’s kid, and it was a hit.
3. The “Sparkle” Booster
For an extra visual pop, add a few edible glitter flakes or star-shaped sprinkles to the red and green jello layers before they set. Stir them in gently so they float in the middle of the layer. The light catches the glitter, and it genuinely looks like magic. My daughter calls them “fairy cups.” Just make sure the glitter is labeled “edible” and not craft glitter—trust me on this one.
4. The Low-Sugar Version
Use sugar-free jello boxes for both the red and green layers. For the creamy layer, use a can of low-fat sweetened condensed milk or a sugar-free condensed milk alternative. The texture will be slightly less rich, but the visual effect is exactly the same. I have done this for my mother-in-law who is watching her sugar intake, and she didn’t even notice the difference.
5. The Boozy Adult Version (For Grown-Up Parties)
For an adults-only gathering, replace the cold water in the jello layers with an equal amount of vodka or coconut rum. Use 1 cup of boiling water to dissolve the jello, then add 1/2 cup of alcohol instead of cold water. The alcohol will make the jello slightly softer, so add an extra 1/2 envelope of unflavored gelatin to the jello mix to compensate. These are dangerous because they taste so fruity and sweet—go easy on them!
Serving & Storage Suggestions
These cups are best served cold, straight from the fridge. The contrast between the cool, jiggly jello and the fluffy whipped cream on top is what makes them so satisfying.
Serving Temperature: Do not let them sit out at room temperature for more than 30 minutes. The jello will start to “sweat” and the whipped cream will deflate. If you are serving them at a party, keep the tray on a bed of ice or take them out of the fridge right as people are ready to eat.
Presentation Ideas: Arrange the cups on a large, flat platter in the shape of a Christmas tree—one cup at the top, two below it, three below that, and so on. Line the platter with fake snow or white table confetti for extra flair. The kids get a kick out of the tree shape. I also like to tie a small ribbon around each cup for a more polished look.
What to Serve With Them: These cups are sweet and light, so they pair well with savory holiday snacks. I often serve them alongside a cheese platter or some salty pretzels. The saltiness balances the sweetness. For a drink, serve them with sparkling apple cider or hot chocolate. The temperature contrast is lovely.
Storage Instructions: Store the cups in the refrigerator with their lids on. They will stay fresh for up to 5 days. Do not freeze them—jello gets watery and grainy when thawed. The flavors actually meld together and get better after 24 hours. I find that the creamy layer becomes smoother and more integrated with the jello layers by day two.
Reheating: You don’t reheat jello. If you want to serve them warm, you have made a different dessert. Serve them cold. That is the whole point.
Nutritional Information & Benefits
Let’s be honest—these are a treat, not a health food. But here is a rough breakdown of what you are getting per serving (assuming one 5 oz cup with whipped cream):
- Calories: Approximately 180-220 calories per cup
- Carbohydrates: 35-40 grams (mostly from sugar)
- Protein: 4-5 grams (from the gelatin and milk)
- Fat: 4-6 grams (from the condensed milk and cream)
- Sugar: 30-35 grams
Health Benefits of Key Ingredients: Gelatin is actually good for you. It is pure protein and contains collagen, which supports joint health and skin elasticity. The sweetened condensed milk provides calcium and vitamin D, which are essential for bone health. So, while these are sugary, they aren’t completely empty calories. The red and green jello also contain a tiny bit of vitamin C if you use flavors with real fruit juice.
Dietary Considerations: This recipe is naturally gluten-free and nut-free, which makes it safe for school parties where allergies are a concern. It is not dairy-free unless you use the coconut cream adaptation mentioned above. It is also not low-sugar unless you use the sugar-free jello and low-fat condensed milk. The recipe contains gelatin, so it is not vegetarian or vegan.
Personal Wellness Perspective: I believe in balance. The holidays are a time for joy and indulgence. I don’t stress about the sugar content of these cups because they are a special occasion treat. My kids eat them once a year, and the memory of making them together is worth more than the sugar grams. If you are worried about portion control, use smaller 3 oz cups. That cuts the calories in half and still gives everyone a taste of the magic.
Conclusion
These Easy Christmas Sparkle Jello Cups are the kind of recipe that makes you look like you put in way more effort than you actually did. They are forgiving, fun to make, and absolutely beautiful on the table. I love that I can make them days ahead of time and not have to worry about last-minute baking stress. They have become a December tradition in my house, and I hope they become one in yours too.
I encourage you to play around with the colors and flavors. Make them for a class party, a family gathering, or just a random Tuesday night when the kids need a little holiday cheer. They are so simple that even the smallest hands can help—my 5-year-old loves sprinkling the gelatin powder into the water (with supervision, of course).
If you try these, please come back and let me know how they turned out. Did your kids love them? Did you try a wild flavor combination? I want to hear all about it. Drop a comment below or tag me in your photos. The holidays are about sharing joy, and these little cups are full of it. Happy holidays, and happy cooking!
Frequently Asked Questions
Can I use sugar-free jello for this recipe?
Absolutely. Sugar-free jello works perfectly for the red and green layers. It sets the same way and has the same texture. Just follow the package directions for dissolving it. The only difference is the taste—it is slightly less sweet, but the sweetened condensed milk layer balances it out nicely.
How far in advance can I make these cups?
You can make them up to 5 days in advance. Store them in the fridge with lids on. They actually taste better after a day or two because the flavors meld together. I usually make them on a Sunday for a Friday party. Just don’t add the whipped cream until right before serving, or it will deflate and get watery.
Why did my creamy layer turn out lumpy?
This usually happens when the unflavored gelatin isn’t fully dissolved. Make sure you let it bloom in cold water for a full 5 minutes before adding the boiling water. Whisk vigorously until the liquid is completely clear. If you see any specks, keep whisking. Lumps can also happen if you pour the hot milk mixture into cold gelatin—always make sure both are at room temperature before combining.
Can I make these without the creamy layer?
Yes, but they won’t have the same “sparkle” effect. You can just make two layers of red and green jello for a simpler version. The cups will be translucent and look like stained glass. They are still festive, just not as creamy. If you skip the creamy layer, you can make the entire batch in about 2 hours because you only need to set two layers.
My layers keep mixing together. What am I doing wrong?
The most common cause is pouring the next layer too soon or too hot. Make sure the previous layer is completely set—it should feel firm and jiggly, not tacky or sticky. Also, let your jello mixture cool to room temperature before pouring. If it is even slightly warm, it will melt the layer below. Patience is the secret ingredient here. Give each layer a full hour in the fridge, and you will get those clean stripes.
Pin This Recipe!
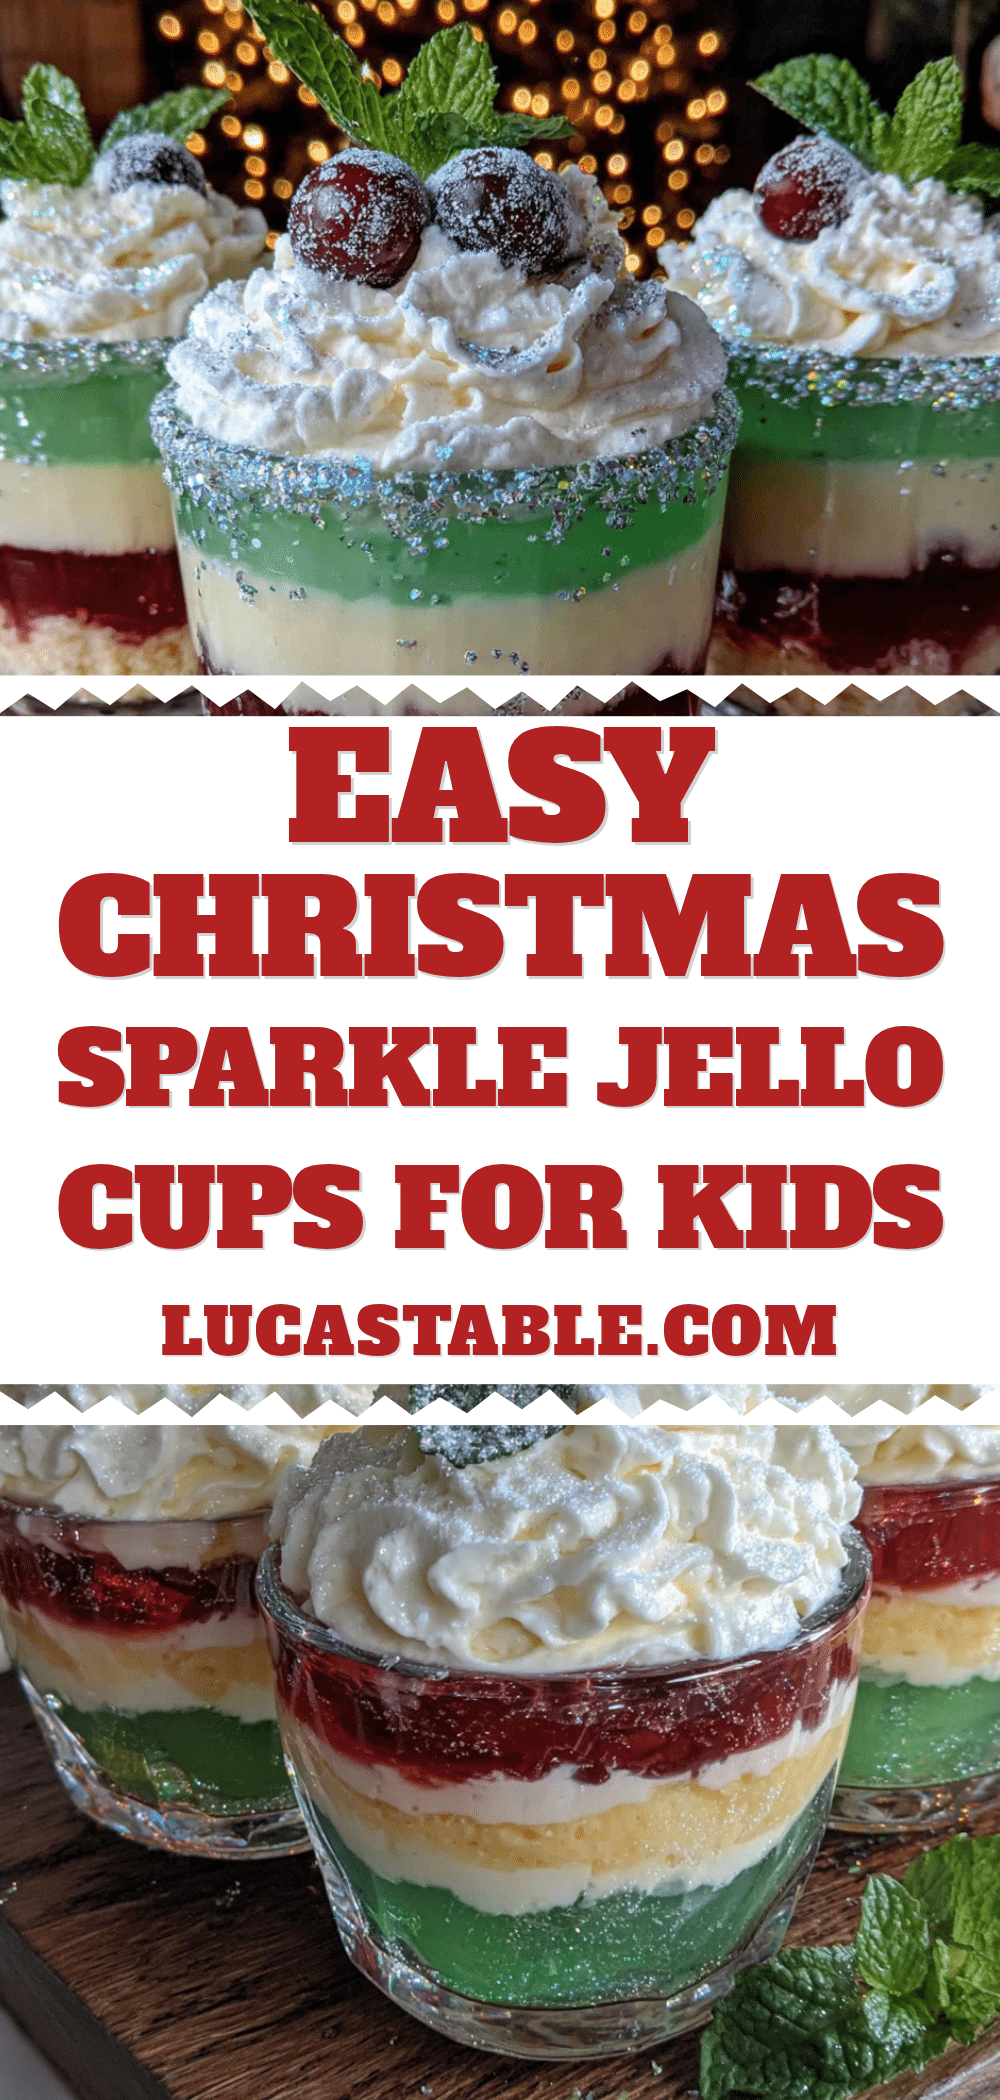
Easy Christmas Sparkle Jello Cups Recipe (Kids Love It!)
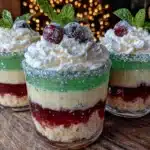
These shimmering, layered jello cups are the ultimate quick and easy holiday dessert. With just 20 minutes of active time, you can create a festive treat that kids and adults love, featuring beautiful red and green stripes with a creamy middle layer.
- Prep Time: 20 minutes
- Cook Time: 0 minutes
- Total Time: 6 hours 20 minutes (includes chilling time)
- Yield: 12 servings 1x
- Category: Dessert
- Cuisine: American
Ingredients
- 1 box (3 oz) Strawberry or Raspberry Jello
- 1 cup boiling water (for red layer)
- 1/2 cup cold water (for red layer)
- 1 box (3 oz) Lime or Green Apple Jello
- 1 cup boiling water (for green layer)
- 1/2 cup cold water (for green layer)
- 1 envelope (0.25 oz) unflavored gelatin
- 1/4 cup cold water (for blooming gelatin)
- 1/2 cup boiling water (for creamy layer)
- 1 can (14 oz) sweetened condensed milk
- 1 teaspoon vanilla extract (optional)
- Whipped cream (for garnish, optional)
- Red and green sprinkles (for garnish, optional)
- Maraschino cherries (for garnish, optional)
Instructions
- Prepare the green layer: In a small bowl, dissolve the green jello in 1 cup boiling water, whisking for 2 minutes. Stir in 1/2 cup cold water. Let cool for 10 minutes.
- Pour the first layer: Divide the green jello evenly among clear plastic cups, filling each about 1/3 full. Refrigerate for at least 1 hour until firm.
- Prepare the creamy layer: In a medium bowl, sprinkle unflavored gelatin over 1/4 cup cold water. Let bloom for 5 minutes. Pour 1/2 cup boiling water over bloomed gelatin and whisk until dissolved. Whisk in sweetened condensed milk and vanilla extract. Cool to room temperature.
- Add the creamy layer: Once green layer is set, gently pour creamy mixture over it, filling cups to halfway. Refrigerate for 1 to 1.5 hours until firm.
- Prepare the red layer: About 10 minutes before creamy layer is set, dissolve red jello in 1 cup boiling water. Stir in 1/2 cup cold water. Cool to room temperature.
- Add the final red layer: Once creamy layer is firm, gently pour cooled red jello over it, filling cups almost to the top. Refrigerate for at least 4 hours or overnight.
- Garnish and serve: Just before serving, top with whipped cream, sprinkles, or a cherry. Serve cold.
Notes
Let each layer set completely before adding the next to avoid mixing. Always cool jello mixtures to room temperature before pouring over set layers. For best results, make a day ahead and refrigerate overnight. The cups can be stored in the fridge for up to 5 days.
Nutrition
- Serving Size: 1 cup (5 oz)
- Calories: 200
- Sugar: 33
- Sodium: 120
- Fat: 5
- Saturated Fat: 3
- Carbohydrates: 38
- Protein: 4
Keywords: Christmas jello cups, holiday dessert, easy jello recipe, layered jello, kids dessert, no-bake dessert, festive treat