It was 11:47 PM on a random Wednesday in early November, and I was supposed to be asleep. But my brain had other plans — specifically, it was fixated on the idea of making turkey cookies for a Friendsgiving I was hosting in two days. I didn’t have a proper cookie cutter shaped like a turkey (who does at 11 PM?), but I had a round biscuit cutter, a bag of candy corn I’d bought on a whim, and a very specific vision that felt way too urgent to ignore. So there I was, standing in my kitchen in pajama pants, rolling out sugar cookie dough while my cat judged me from the counter. Honestly, that late-night kitchen session turned into one of my favorite recipe experiments ever. The first few cookies looked a little… chaotic. One turkey had three eyes, another looked more like a confused duck. But by batch three, I had cracked the code. These adorable turkey sugar cookies became the absolute star of that party, and now I can’t imagine a fall gathering without them. Let me tell you, there’s something about a cookie that looks like a tiny turkey that just makes people smile — and that’s exactly what you’re going to create today.
Why You’ll Love This Recipe
I’ve tested this recipe at six different gatherings over the past two years, and every single time, someone asks for the recipe before they’ve even finished their first cookie. That’s not me bragging — that’s me telling you this works.
- Quick & Easy : From start to finish, these cookies take about 45 minutes. The decorating part takes a little patience, but it’s so worth it when you see the finished product.
- Simple Ingredients : You probably already have most of these in your pantry. No weird specialty items that you’ll use once and forget about.
- Perfect for Parties : Whether it’s Thanksgiving, a fall potluck, or just a Tuesday that needs some joy, these cookies fit right in. They’re conversation starters, honestly.
- Crowd-Pleaser : Kids love them, adults love them, even people who claim they “don’t do themed food” end up grabbing two.
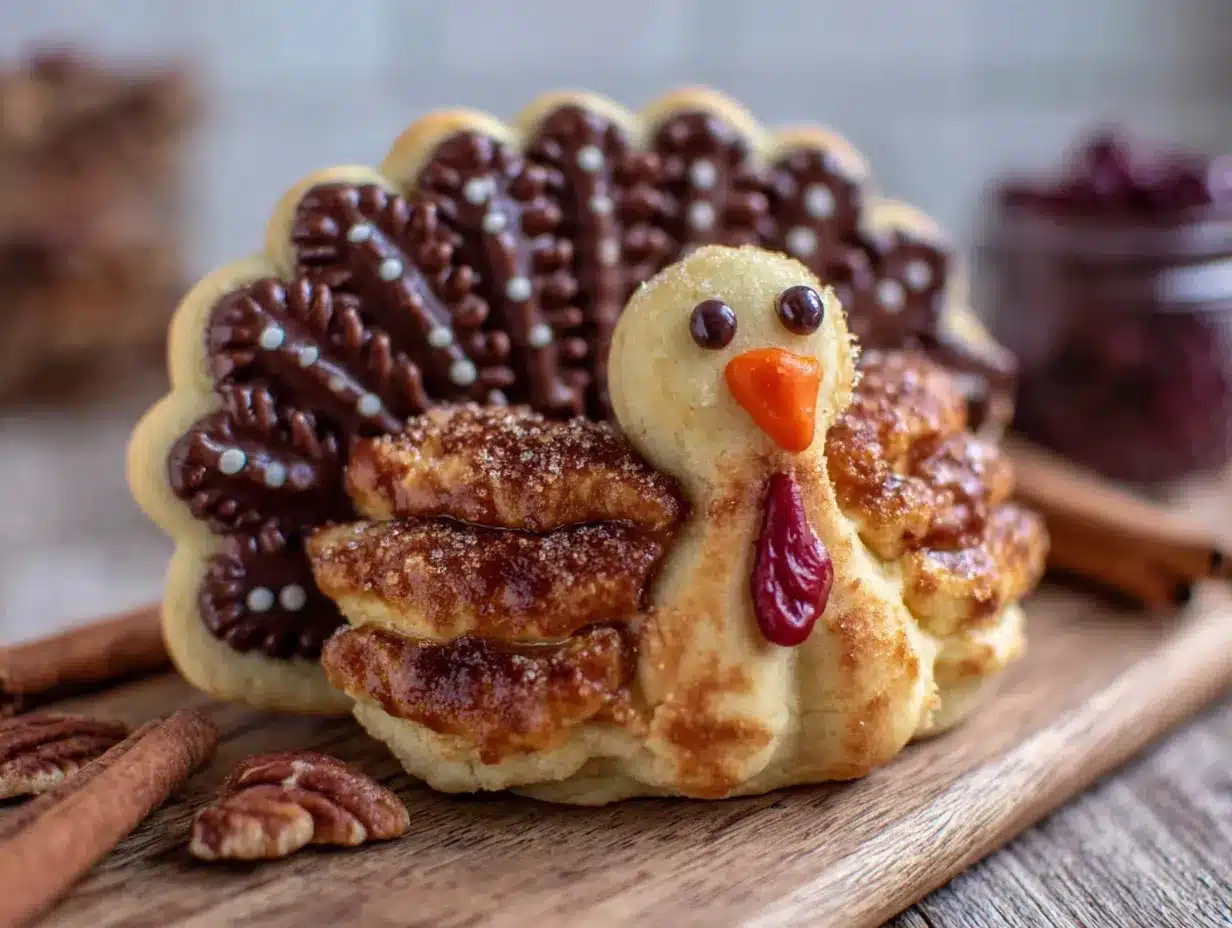
- Unbelievably Adorable : The candy corn feathers and pretzel stick legs make these cookies look like little works of art. Your guests will be taking photos before they take bites.
What makes this recipe different from the dozens of turkey cookie recipes out there? It’s the method. I figured out that using a round cookie cutter instead of a turkey-shaped one actually gives you more control over the design. Plus, the dough recipe I’m sharing is my absolute go-to — it holds its shape perfectly during baking, doesn’t spread too much, and has that perfect balance of buttery and sweet that makes sugar cookies actually worth eating.
This is the kind of recipe that makes you feel like a rockstar host. You set out a platter of these at your gathering, and suddenly you’re the person who made the cutest thing on the table. And honestly, isn’t that what we all want when we’re hosting?
What Ingredients You Will Need
This recipe uses simple, straightforward ingredients to create cookies that are both delicious and structurally sound for decorating. I’ve tested these ingredients multiple times to get the perfect balance of flavor and functionality.
For the Sugar Cookie Dough
- 2 ¾ cups all-purpose flour (spooned and leveled — don’t scoop directly from the bag or you’ll get too much)
- 1 cup unsalted butter, softened to room temperature (I use Land O’Lakes — it’s consistent and reliable)
- 1 cup granulated sugar
- 1 large egg, room temperature
- 1 teaspoon vanilla extract (pure vanilla makes a difference here, not imitation)
- ½ teaspoon baking powder
- ¼ teaspoon salt
For the Royal Icing
- 2 cups powdered sugar, sifted (sifting prevents lumps — trust me on this one)
- 2 tablespoons meringue powder (I prefer Wilton brand for consistency)
- 3–4 tablespoons water, room temperature
- ½ teaspoon vanilla extract or clear almond extract (almond gives a nice flavor and keeps the icing white)
For Decorating (The Fun Part)
- Candy corn (about 30 pieces per dozen cookies — buy two bags to be safe)
- Pretzel sticks (the thin ones work best for turkey legs)
- Brown candy melts or chocolate chips (for the turkey body)
- Orange and black gel food coloring (for the beak and eyes — Wilton brand gels work great)
- Small round candy eyes (optional, but they make the faces so much easier)
If you’re dairy-free, you can substitute the butter with a high-quality vegan butter stick (not the spreadable kind in a tub). I’ve had good results with Earth Balance. For a gluten-free version, use a 1:1 gluten-free flour blend that contains xanthan gum — Cup4Cup works really well here.
One thing I learned the hard way: don’t use margarine. It makes the cookies spread too much and they lose their shape. Stick with real butter or a good vegan butter stick.
Equipment Needed
You don’t need a ton of fancy equipment for these cookies, which is part of why I love this recipe. Here’s what you’ll need:
- Round cookie cutter (2.5 to 3 inches in diameter — a drinking glass works in a pinch, I’ve done it)
- Baking sheets (half-sheet pans work best for even baking)
- Parchment paper or silicone baking mats (silicone mats give the most even browning)
- Electric mixer (stand mixer or hand mixer both work — I use my KitchenAid for the dough)
- Rolling pin (with thickness guides if you have them — ¼ inch is the sweet spot)
- Piping bags or zip-top bags for the icing
- Small round piping tip (#2 or #3 works well for details)
- Cooling rack (wire rack is essential for letting cookies cool completely before decorating)
- Small bowls for separating candy corn colors if you want to get fancy
If you don’t have piping bags, don’t stress. Snip a tiny corner off a zip-top bag and it works just fine. I’ve decorated entire batches this way when I couldn’t find my piping tips.
Preparation Method
Let’s get into the actual process. I’ve broken this down step by step so you don’t miss anything. Take your time with the decorating part — it’s the most fun.
- Make the dough. In a medium bowl, whisk together the flour, baking powder, and salt. In a large bowl (or stand mixer), beat the softened butter and sugar together on medium speed until light and fluffy — about 2 to 3 minutes. Scrape down the sides of the bowl. Add the egg and vanilla extract, then beat until combined. Gradually add the dry ingredients to the wet mixture, mixing on low speed until a soft dough forms. Don’t overmix — stop as soon as the flour disappears.
- Chill the dough. Divide the dough into two discs, wrap each tightly in plastic wrap, and refrigerate for at least 1 hour. This step is non-negotiable. Chilled dough holds its shape better and doesn’t spread as much during baking. I once skipped this step because I was in a hurry, and my cookies turned into blobs. Learn from my mistake.
- Preheat and prep. When you’re ready to bake, preheat your oven to 350°F (175°C). Line two baking sheets with parchment paper or silicone mats.
- Roll and cut. On a lightly floured surface, roll one disc of dough to ¼-inch thickness. Use your round cookie cutter to cut out circles. Re-roll the scraps once — after that, the dough gets tough. Place the circles about 2 inches apart on the prepared baking sheets.
- Bake. Bake for 8 to 10 minutes, or until the edges are just barely golden. The centers should still look pale. Let the cookies cool on the baking sheet for 5 minutes, then transfer to a wire rack to cool completely. Don’t even think about decorating until they’re 100% cool — warm cookies will melt your icing.
- Make the royal icing. In a clean bowl, combine the powdered sugar, meringue powder, and 3 tablespoons of water. Beat on low speed until combined, then increase to medium-high and beat for 4 to 5 minutes. The icing should be thick and glossy. Add the remaining tablespoon of water if needed to reach a consistency that holds a ribbon when you lift the beater. Divide the icing into small bowls and tint with food coloring as desired — you’ll want brown for the body, orange for the beak, and black for the eyes.
- Assemble the turkey bodies. Once the cookies are cool, pipe a small amount of brown icing in the center of each cookie — this is the turkey’s body. While the icing is still wet, gently press three candy corn pieces in a fan pattern behind the body to create the feathers. The candy corn should stick out from behind the brown icing like a tail fan.
- Add the legs. Break pretzel sticks in half (or use whole ones for longer legs). Gently press two pretzel pieces into the bottom of the brown icing body, angling them slightly outward. Let the icing set for about 10 minutes so the pretzels stay put.
- Add the face details. Using orange icing, pipe a small triangle for the beak. Use black icing to add two tiny dots for eyes. If you’re using candy eyes, press them into the brown icing while it’s still slightly tacky.
- Let everything set. Allow the decorated cookies to sit at room temperature for at least 2 hours so the icing hardens completely. This is important if you’re stacking or transporting them.
One thing I always do: make a few extra cookies because you’ll definitely eat one (or three) during the decorating process. Quality control, you know?
Cooking Tips & Techniques
After making these cookies more times than I can count, I’ve picked up some tricks that make the process smoother and the results more consistent.
Keep the dough cold. If your dough starts getting sticky or soft while you’re rolling it out, pop it back in the fridge for 10 minutes. Warm dough is the enemy of clean cookie shapes. I learned this the hard way when my first batch turned into one giant cookie blob — which was delicious, but not what I was going for.
Use a light touch with flour. When rolling out the dough, use just enough flour to prevent sticking. Too much flour makes the cookies dry and tough. I keep a small bowl of flour nearby and dust my surface and rolling pin lightly.
Don’t overbake. Sugar cookies continue to bake on the hot sheet after you pull them out of the oven. Pull them when the edges are just barely golden, even if the centers look underdone. They’ll firm up as they cool. Overbaked cookies are dry and crumbly — not ideal for holding up candy corn and pretzels.
Work in an assembly line. When decorating, pipe all the brown bodies first, then add all the candy corn, then all the pretzels. This saves time and keeps your workflow efficient. I tried decorating one cookie completely before moving to the next, and it took forever.
Use a toothpick for details. If your piping skills aren’t perfect (mine definitely aren’t), use a toothpick to gently nudge the icing into place. It’s great for positioning candy eyes or fixing a crooked beak.
Plan your timing. Make the dough a day ahead and keep it refrigerated. Bake the cookies the morning of your party. Decorate in the afternoon. This way, you’re not exhausted when guests arrive. Hosting is stressful enough without adding last-minute cookie drama.
Variations & Adaptations
One of the best things about this recipe is how customizable it is. Here are some variations I’ve tried and loved.
Chocolate Turkey Cookies: Replace ¼ cup of the flour with unsweetened cocoa powder. The chocolate version looks amazing with the candy corn — the contrast is gorgeous. I made these for a Halloween party and they disappeared faster than the regular ones.
Gluten-Free Version: Use a 1:1 gluten-free flour blend. I’ve had great results with King Arthur Measure for Measure. The cookies will be slightly more delicate, so handle them gently when decorating.
Vegan Option: Substitute the butter with vegan butter sticks, use a flax egg (1 tablespoon ground flaxseed mixed with 3 tablespoons water), and use vegan royal icing made with aquafaba instead of meringue powder. It works, but the texture is slightly different — still delicious though.
Mini Turkey Cookies: Use a smaller round cutter (1.5 inches) and mini candy corn. These are perfect for kids’ parties or as toppings on cupcakes. I made a batch of minis last year and they were adorable.
Spiced Version: Add 1 teaspoon of cinnamon and ½ teaspoon of nutmeg to the dry ingredients. The warm spices pair beautifully with the sweetness of the candy corn. This is my personal favorite for fall gatherings.
If you’re not a fan of candy corn (I know, controversial), you can use colored candy melts or small fruit leather strips cut into feather shapes. I tried fruit leather once — it worked but was a bit sticky to handle. Stick with candy corn if you can.
Serving & Storage Suggestions
These cookies are best served at room temperature, arranged on a platter in a fan pattern so the turkey feathers show. I like to place them on a rustic wooden board or a white platter — the contrast makes the colors pop.
For parties, arrange the cookies in rows with the turkey heads facing outward. It creates a fun visual that guests love. I always put a few extra cookies on the side because people will grab them faster than you expect.
Storage: Store decorated cookies in an airtight container at room temperature for up to 5 days. Place parchment paper between layers to prevent the icing from sticking. Don’t refrigerate them — the cookies will dry out and the icing can get sticky from condensation.
Freezing: You can freeze the undecorated baked cookies for up to 3 months. Wrap them tightly in plastic wrap and then foil. When you’re ready to decorate, thaw them at room temperature for about an hour, then proceed with the icing and decorations. I do this all the time for holiday parties — it saves so much stress.
Reheating: These aren’t really a reheating kind of cookie, but if you want them slightly warm, pop an undecorated one in the microwave for 5 to 7 seconds. Don’t microwave decorated cookies — the icing will melt and get messy.
One thing I’ve noticed: the flavors actually get better after a day or two. The cookies soften slightly, and the candy corn melds with the icing. They’re still delicious on day one, but day two is where the magic happens.
Nutritional Information & Benefits
Let’s be real — these are sugar cookies with candy corn and icing. They’re a treat, not a health food. But here’s the estimated nutritional breakdown per cookie (based on 24 cookies):
| Nutrient | Amount per Cookie |
|---|---|
| Calories | 185 |
| Total Fat | 8g |
| Saturated Fat | 5g |
| Carbohydrates | 27g |
| Sugar | 18g |
| Protein | 2g |
| Sodium | 65mg |
On the bright side, these cookies are free from artificial preservatives and high-fructose corn syrup (assuming you use good-quality candy corn). The butter provides a small amount of vitamin A, and hey — there’s something to be said for the mental health benefits of creating something cute and sharing it with people you love.
If you’re watching your sugar intake, you can reduce the icing amount or use a sugar substitute in the cookie dough. I’ve tried making them with monk fruit sweetener — the texture is slightly different, but they’re still good.
Allergen note: This recipe contains wheat, dairy, and eggs. The candy corn may contain corn syrup and artificial colors. Check labels if you have specific allergies.
Frequently Asked Questions
Can I make these cookies ahead of time for a party?
Absolutely! Bake the cookies up to 3 days ahead and store them undecorated in an airtight container. Decorate them the day before or the morning of your party. The decorated cookies will stay fresh for up to 5 days at room temperature.
My dough is too sticky. What did I do wrong?
Your butter might have been too soft, or you might need to chill the dough longer. Pop it in the fridge for 30 minutes to an hour. If it’s still sticky after chilling, dust your work surface and rolling pin with a little more flour.
Can I use store-bought sugar cookie dough?
You can, but the texture won’t be as good. Store-bought dough tends to spread more, which can make the turkey shapes less defined. If you’re short on time, go for it — just know the results won’t be quite as polished.
My candy corn keeps falling off. How do I fix this?
Make sure the icing is still wet when you press the candy corn into it. If the icing has started to set, the candy corn won’t stick. Work in small batches — pipe icing on 3 to 4 cookies at a time, add the candy corn, then move on to the next batch.
Can I freeze decorated cookies?
I don’t recommend freezing decorated cookies because the icing can crack and the candy corn can get sticky when thawed. Freeze undecorated cookies instead, then decorate after they’ve thawed.
Conclusion
These adorable turkey sugar cookies have become my go-to party contribution for every fall gathering, and I honestly can’t imagine showing up to a Friendsgiving without them. They’re fun to make, they look impressive on a platter, and they taste exactly like the kind of cookie that makes you close your eyes and smile. The best part? You don’t need to be a professional baker to pull them off. If I can figure this out at 11 PM on a Wednesday with a cat judging me, you can absolutely make these for your next party.
I’d love to see how your turkeys turn out! Leave a comment below and tell me about your decorating adventures — did you add any fun variations? Did your guests love them? Share a photo if you’re feeling brave. And hey, if you make a batch that looks more like confused ducks than turkeys, that’s okay too. They’ll still taste amazing.
Happy baking, and here’s to cookies that make people smile before they even take a bite.
Pin This Recipe!
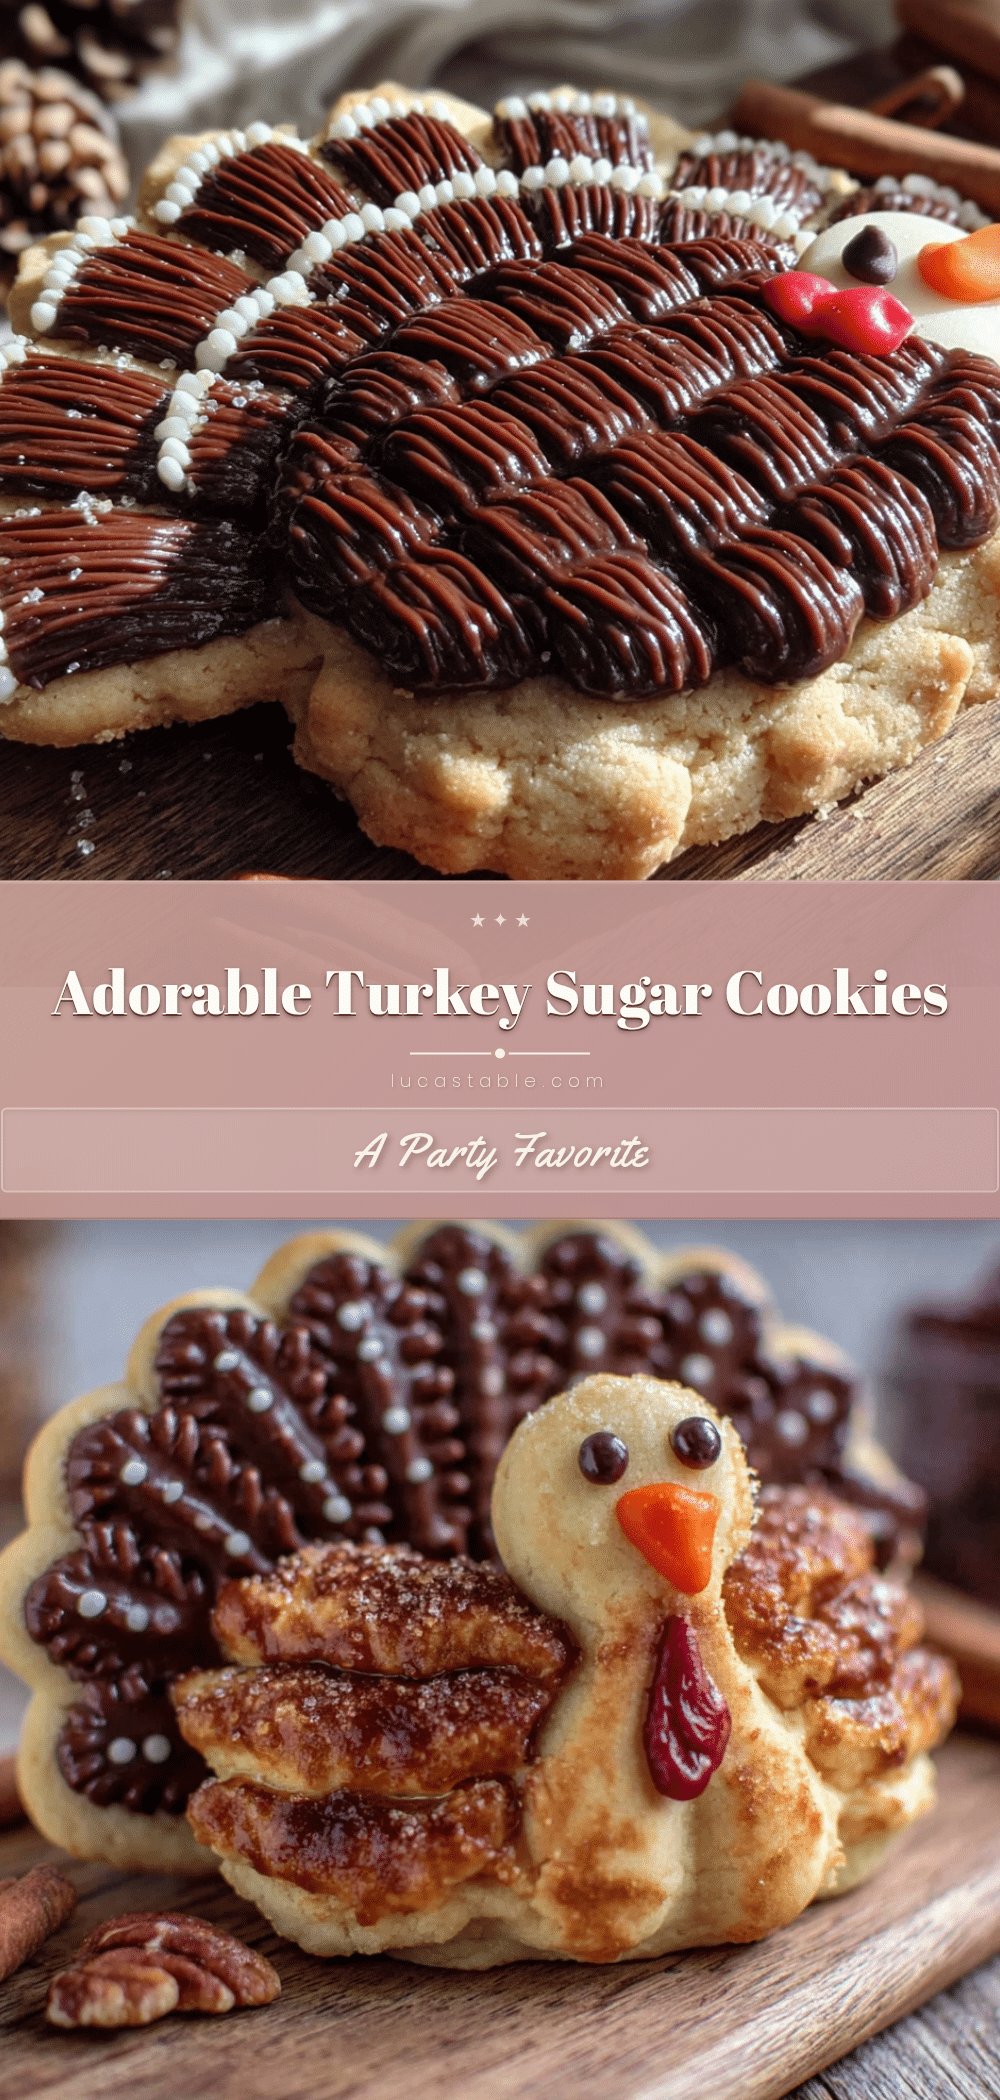
Best Easy Adorable Turkey Sugar Cookies Recipe Perfect for Parties
These adorable turkey sugar cookies are the perfect fall treat for Thanksgiving, Friendsgiving, or any gathering. Made with a simple sugar cookie dough, royal icing, candy corn feathers, and pretzel stick legs, they’re fun to make and guaranteed to impress your guests.
- Prep Time: 15 minutes
- Cook Time: 10 minutes
- Total Time: 45 minutes
- Yield: 24 servings 1x
- Category: Dessert
- Cuisine: American
Ingredients
- 2 ¾ cups all-purpose flour (spooned and leveled)
- 1 cup unsalted butter, softened to room temperature
- 1 cup granulated sugar
- 1 large egg, room temperature
- 1 teaspoon vanilla extract (pure vanilla)
- ½ teaspoon baking powder
- ¼ teaspoon salt
- 2 cups powdered sugar, sifted
- 2 tablespoons meringue powder
- 3–4 tablespoons water, room temperature
- ½ teaspoon vanilla extract or clear almond extract
- Candy corn (about 30 pieces per dozen cookies)
- Pretzel sticks (thin ones)
- Brown candy melts or chocolate chips
- Orange and black gel food coloring
- Small round candy eyes (optional)
Instructions
- Make the dough: In a medium bowl, whisk together flour, baking powder, and salt. In a large bowl, beat softened butter and sugar on medium speed until light and fluffy (2-3 minutes). Add egg and vanilla, beat until combined. Gradually add dry ingredients, mixing on low until a soft dough forms. Do not overmix.
- Chill the dough: Divide dough into two discs, wrap tightly in plastic wrap, and refrigerate for at least 1 hour.
- Preheat and prep: Preheat oven to 350°F (175°C). Line two baking sheets with parchment paper or silicone mats.
- Roll and cut: On a lightly floured surface, roll one disc of dough to ¼-inch thickness. Use a round cookie cutter (2.5-3 inches) to cut out circles. Place 2 inches apart on prepared sheets.
- Bake: Bake for 8-10 minutes until edges are just barely golden. Cool on baking sheet for 5 minutes, then transfer to a wire rack to cool completely.
- Make royal icing: Combine powdered sugar, meringue powder, and 3 tablespoons water. Beat on low, then medium-high for 4-5 minutes until thick and glossy. Add more water if needed. Divide and tint with food coloring (brown, orange, black).
- Assemble turkey bodies: Pipe brown icing in the center of each cookie. While wet, press 3 candy corn pieces in a fan pattern behind the body for feathers.
- Add legs: Break pretzel sticks in half and press two pieces into the bottom of the brown icing, angling outward. Let set for 10 minutes.
- Add face details: Pipe a small orange triangle for the beak and two black dots for eyes. If using candy eyes, press into tacky icing.
- Let set: Allow decorated cookies to sit at room temperature for at least 2 hours until icing hardens completely.
Notes
Keep dough cold to prevent spreading. Don’t overbake; cookies continue to bake on hot sheet. Work in assembly line when decorating. Use a toothpick for fine details. Make dough a day ahead to save time. Store decorated cookies in airtight container at room temperature for up to 5 days. Freeze undecorated cookies for up to 3 months.
Nutrition
- Serving Size: 1 cookie
- Calories: 185
- Sugar: 18
- Sodium: 65
- Fat: 8
- Saturated Fat: 5
- Carbohydrates: 27
- Protein: 2
Keywords: turkey cookies, sugar cookies, Thanksgiving cookies, fall cookies, candy corn cookies, easy cookie recipe, party cookies


