I wasn’t expecting cooking advice from the guy fixing my washing machine, but there I was, knee-deep in soapy water that had flooded my laundry room, listening to him describe exactly how to make the best pumpkin muffins. His name was Dave, and apparently, before he started repairing appliances, he’d spent fifteen years as a pastry chef at a little bakery in Vermont. “You want that bakery-style dome,” he said, wiping his hands on a rag and looking at my sad, flat muffins cooling on the counter. “Your oven’s running hot, and you’re overmixing. Let me tell you what my old boss used to do.”
And honestly? I almost laughed him off. But there was something about the way he said it—like he genuinely cared about my muffin situation—that made me grab a notepad. He scribbled down a few notes on a napkin he pulled from his truck, and I’ll admit, I was skeptical. I mean, the man was holding a wrench in one hand and a plumbing snake in the other. But the next weekend, I tried his method, and let me tell you, it changed everything. The tops puffed up like little golden clouds, the streusel stayed crunchy instead of sinking into the batter, and the pumpkin flavor was warm and deep without being overpowering.
That was three years ago, and I haven’t used another pumpkin muffin recipe since. Maybe you’ve been there—trying batch after batch, hoping for that perfect domed top and tender crumb, only to end up with something that tastes fine but looks a bit sad. I get it. I really do. These quick bakery-style pumpkin muffins with streusel topping are the ones that finally worked for me, and they’ve become my go-to for fall mornings, school bake sales, and those nights when you just need something warm and cozy. Dave probably doesn’t remember giving me that napkin, but I still have it tucked in my recipe box. And every time I make these muffins, I think about how the best recipes often come from the most unexpected places.
Why You’ll Love This Recipe
Let’s be real for a second. Weeknight dinners are chaos, mornings are rushed, and the last thing you need is a complicated recipe that requires a trip to three different stores. That’s exactly why these muffins work so well for busy people. They come together in under 40 minutes from start to finish, and I’ve tested them at least a dozen times to make sure they’re foolproof.
- Quick & Easy: From mixing bowl to oven in about 10 minutes flat. No stand mixer required, no complicated techniques. Just a bowl, a whisk, and some elbow grease.
- Simple Ingredients: You probably already have most of this stuff in your pantry. Canned pumpkin, basic baking staples, and a few warm spices. No fancy extracts or hard-to-find items.
- Perfect for Busy Mornings: Make a batch on Sunday, and you’ve got breakfast sorted for the week. They freeze beautifully, too, which is a lifesaver when you’re running late.
- Crowd-Pleaser: I’ve brought these to potlucks, office parties, and neighbor gatherings. They disappear fast. Kids love them, adults love them, and nobody guesses how simple they are.
- Unbelievably Delicious: That streusel topping? It stays crunchy and buttery, not soggy or melted into the muffin. The texture is tender and moist without being dense or gummy.
What makes these different from every other pumpkin muffin recipe out there is the technique. Most recipes tell you to mix everything together and call it a day, but that’s where things go wrong. Overmixing creates tough muffins with flat tops. The secret here is a gentle hand and a specific approach to combining wet and dry ingredients. Plus, that streusel gets a little trick—a touch of cinnamon and a pinch of salt—that makes it taste like something from a fancy bakery, not your average kitchen.
This is the kind of recipe that makes you close your eyes after the first bite. It’s comfort food reimagined—faster, simpler, but with the same soul-soothing satisfaction. Perfect for impressing guests without stress, or turning a regular Tuesday morning into something memorable.
What Ingredients You Will Need
This recipe uses simple, wholesome ingredients to deliver bold flavor and satisfying texture without the fuss. Most of these are pantry staples, which means you can whip up a batch anytime the craving hits without a special grocery run.
For the Muffins
- All-purpose flour, 2 cups (240g) — Provides structure and gives the muffins that tender crumb. I prefer Gold Medal or King Arthur for consistent results.
- Granulated sugar, 1 cup (200g) — Adds sweetness and helps create that golden-brown top. You can reduce to 3/4 cup if you prefer less sweet muffins.
- Light brown sugar, 1/2 cup (100g), packed — Adds moisture and a deeper, caramel-like sweetness. Dark brown sugar works too, but the flavor will be more intense.
- Baking powder, 2 teaspoons — The main leavening agent that gives the muffins their rise. Make sure it’s fresh—test it by dropping a bit in hot water; if it fizzes, it’s good.
- Baking soda, 1/2 teaspoon — Helps neutralize the acidity from the pumpkin and contributes to a tender texture.
- Salt, 1/2 teaspoon — Enhances all the flavors and balances the sweetness. Don’t skip it!
- Ground cinnamon, 2 teaspoons — The star spice in pumpkin baking. I recommend Saigon cinnamon for a warmer, more aromatic flavor.
- Ground nutmeg, 1/2 teaspoon — Adds that classic fall warmth. Freshly grated is best if you have it.
- Ground ginger, 1/2 teaspoon — Gives a subtle kick that complements the pumpkin beautifully.
- Ground cloves, 1/4 teaspoon — A little goes a long way. Adds depth without overpowering.
- Canned pumpkin puree, 1 can (15 oz or 425g) — Not pumpkin pie filling! Make sure you’re getting 100% pure pumpkin. Libby’s is my go-to brand for consistent moisture content.
- Large eggs, 2 — Room temperature is ideal for better incorporation. If you forget, place them in a bowl of warm water for 5 minutes.
- Vegetable oil, 1/2 cup (120ml) — Keeps the muffins incredibly moist. Canola or avocado oil work well too. Melted coconut oil is a good substitute.
- Milk, 1/4 cup (60ml) — Adds moisture and helps create a tender crumb. Whole milk is best, but 2% or plant-based milk like oat milk works fine.
- Vanilla extract, 2 teaspoons — Enhances the overall flavor profile. Pure vanilla extract is worth the splurge here.
For the Streusel Topping
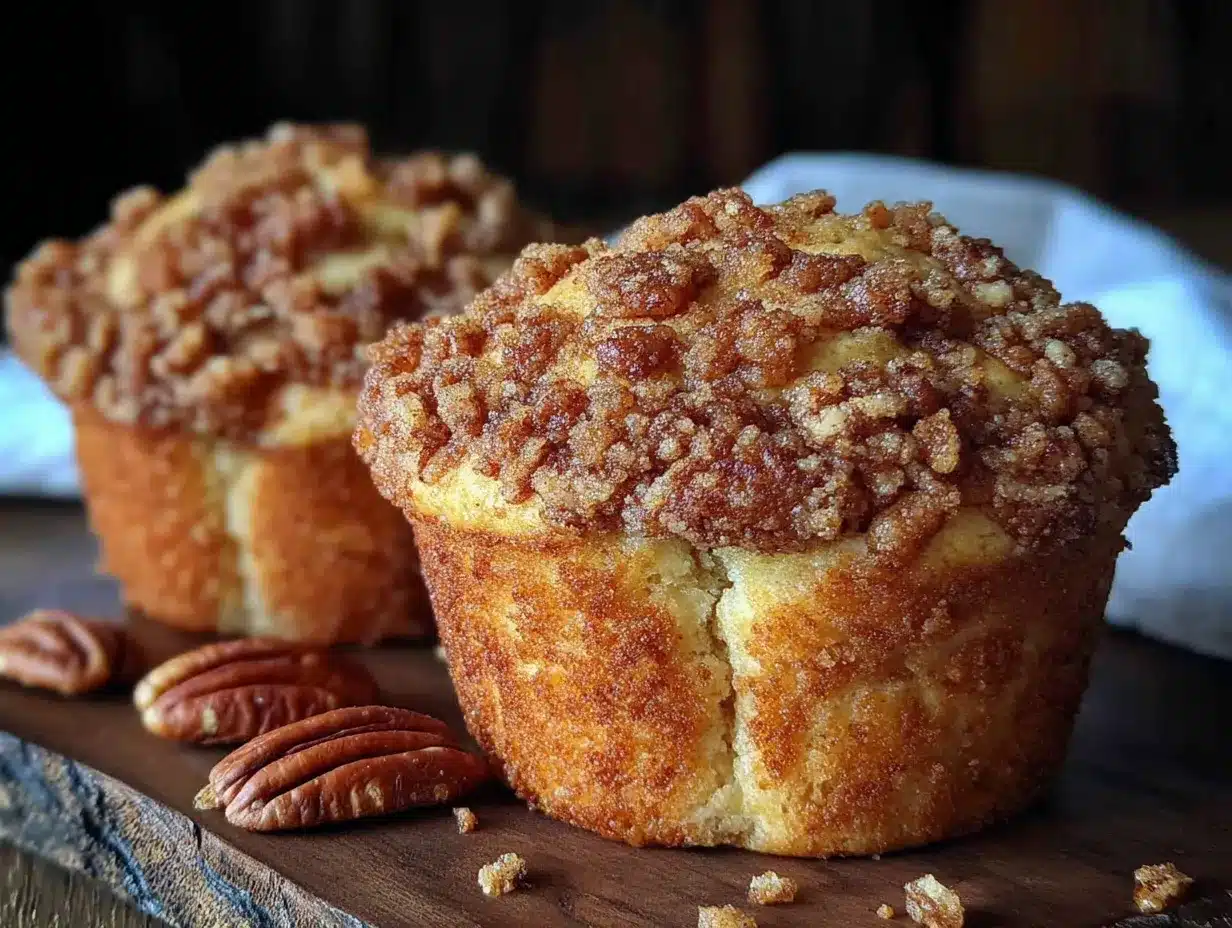
- All-purpose flour, 1/2 cup (60g) — The base of the streusel that creates those crumbly bits.
- Light brown sugar, 1/4 cup (50g), packed — Adds sweetness and helps the streusel caramelize slightly in the oven.
- Granulated sugar, 2 tablespoons (25g) — Balances the brown sugar and adds a bit of crunch.
- Ground cinnamon, 1 teaspoon — Infuses the topping with warm spice.
- Salt, 1/8 teaspoon — A tiny pinch that makes a big difference in flavor.
- Unsalted butter, 1/4 cup (56g), cold and cubed — The key to a crumbly streusel. Keep it cold until you’re ready to cut it into the flour mixture.
Ingredient Substitution Notes
If you’re gluten-sensitive, you can substitute the all-purpose flour with a good 1:1 gluten-free baking flour blend. I’ve had success with Bob’s Red Mill. For a dairy-free option, use melted coconut oil instead of butter in the streusel and your preferred plant-based milk in the batter. The texture will be slightly different but still delicious.
Equipment Needed
You don’t need a fancy kitchen to make these muffins. Here’s what you’ll need, along with some tips I’ve learned the hard way.
- 12-cup standard muffin tin — I use a non-stick one from Wilton, and it works perfectly. If yours tends to stick, go heavy on the paper liners.
- Paper muffin liners — Not strictly necessary, but they make cleanup so much easier. I prefer the unbleached parchment ones for a rustic look.
- Two large mixing bowls — One for dry ingredients, one for wet. Nothing fancy needed—I use my grandmother’s old ceramic bowls.
- Whisk — For combining dry ingredients and smoothing out the wet mixture. A fork works in a pinch.
- Rubber spatula — For gently folding the wet and dry ingredients together. This is crucial for avoiding overmixing.
- Pastry cutter or two forks — For cutting the butter into the streusel ingredients. If you don’t have a pastry cutter, cold fingers work surprisingly well.
- Measuring cups and spoons — Accurate measurements matter in baking. I recommend metal measuring cups for dry ingredients and glass for liquids.
- Kitchen scale (optional but helpful) — Weighing your flour ensures consistent results every time. I use a simple OXO scale that cost about $20.
- Cooling rack — Allows air to circulate around the muffins so they don’t get soggy on the bottom. If you don’t have one, a clean dish towel works as a temporary solution.
One tip about muffin tins: if you’re using a dark, non-stick pan, reduce your oven temperature by 25°F to prevent the bottoms from over-browning. I learned this after ruining a batch—the tops looked perfect, but the bottoms were practically charcoal.
Preparation Method
Follow these steps carefully, and you’ll have bakery-worthy muffins in no time. I’ve included sensory cues at each stage so you know exactly what to look for.
- Preheat your oven to 425°F (220°C). This high initial temperature creates that dramatic domed top. After 5 minutes, you’ll reduce the heat to 350°F (175°C) to finish baking without burning the streusel. Line your muffin tin with paper liners or grease generously with butter or cooking spray.
- Make the streusel first. In a small bowl, combine 1/2 cup flour, 1/4 cup packed brown sugar, 2 tablespoons granulated sugar, 1 teaspoon cinnamon, and 1/8 teaspoon salt. Add the cold, cubed butter. Use a pastry cutter or your fingers to work the butter into the flour mixture until it resembles coarse sand with some pea-sized clumps. You want varied textures—some fine crumbles, some bigger chunks. Pop it in the refrigerator while you prepare the muffin batter. This keeps the butter cold so the streusel stays crunchy.
- Whisk the dry ingredients together. In a large bowl, combine 2 cups flour, 1 cup granulated sugar, 1/2 cup packed brown sugar, 2 teaspoons baking powder, 1/2 teaspoon baking soda, 1/2 teaspoon salt, 2 teaspoons cinnamon, 1/2 teaspoon nutmeg, 1/2 teaspoon ginger, and 1/4 teaspoon cloves. Whisk until everything is evenly distributed. You’ll see the spices create a beautiful warm color throughout the flour.
- Mix the wet ingredients. In a separate bowl, combine the entire can of pumpkin puree, 2 eggs, 1/2 cup vegetable oil, 1/4 cup milk, and 2 teaspoons vanilla extract. Whisk until smooth and glossy. The mixture should be a vibrant orange color and smell incredibly aromatic from the vanilla. Make sure there are no streaks of egg white visible.
- Combine wet and dry ingredients. Pour the wet mixture into the bowl with the dry ingredients. Here’s the crucial part: use a rubber spatula to fold them together gently. Use a cutting motion through the center, then scrape around the edges. Stop as soon as you no longer see streaks of flour. A few small lumps are totally fine—actually, they’re desirable. Overmixing at this stage develops gluten and creates tough, dense muffins. The batter should look thick and slightly shaggy, not smooth like cake batter.
- Fill the muffin cups. Divide the batter evenly among the 12 muffin cups. I use a 1/4-cup measuring cup or a large cookie scoop for even portions. Fill each cup all the way to the top—almost overflowing. This is the secret to that bakery-style dome. Don’t worry if it looks like too much batter; it will rise beautifully.
- Add the streusel. Take the streusel out of the refrigerator. Sprinkle it generously over each muffin, pressing down gently so it adheres to the batter. Use all of it—don’t hold back. You want a thick, craggy topping that will become golden and crunchy.
- Bake at high heat first. Place the muffin tin in the preheated 425°F oven. Bake for exactly 5 minutes. Don’t open the oven door during this time. This initial blast of heat creates steam that pushes the batter up, forming that coveted domed top.
- Reduce the temperature. After 5 minutes, reduce the oven temperature to 350°F (175°C) without opening the door. Bake for an additional 12-15 minutes. The muffins are done when a toothpick inserted into the center comes out clean or with a few moist crumbs. The tops should be golden brown, and the streusel should look crunchy and slightly caramelized. If you gently press the top, it should spring back.
- Cool properly. Remove the muffin tin from the oven and let it cool on a wire rack for 5 minutes. This allows the muffins to set and makes them easier to remove. After 5 minutes, transfer the muffins directly to the cooling rack. If you leave them in the tin too long, the bottoms will steam and become soggy. Let them cool completely if you’re storing them, or enjoy one warm—I won’t judge.
Cooking Tips & Techniques
I’ve made these muffins more times than I can count, and I’ve definitely made my share of mistakes. Here’s what I’ve learned so you don’t have to repeat my failures.
Don’t overmix the batter. This is the number one mistake home bakers make. I once had a friend over who offered to help, and she mixed the batter until it was perfectly smooth. The muffins came out dense and tough, with flat tops. The batter should look a little lumpy and uneven. Trust the process—those lumps will bake out. Mix just until the flour disappears, about 10-12 strokes with a spatula.
Use room temperature ingredients. Cold eggs and milk can cause the batter to seize up and create uneven texture. I know you’re busy, so here’s a shortcut: place the eggs in a bowl of warm water for 5 minutes, and microwave the milk for about 15 seconds. Not hot, just no longer cold to the touch.
Don’t skip the high-heat start. That initial blast of 425°F is non-negotiable for achieving the domed top. I tried baking them at a steady 350°F once because I was in a hurry, and the results were flat and sad. The high heat creates steam that lifts the batter before the structure sets. It only takes 5 minutes, and it makes all the difference.
Keep the streusel cold. If your streusel gets warm before baking, the butter will melt into the batter instead of staying on top. That’s why I refrigerate it while preparing the batter. If your kitchen is particularly warm, pop it in the freezer for 10 minutes instead.
Check your oven temperature. Ovens lie. I learned this after burning three batches of cookies in a row. An inexpensive oven thermometer costs about $10 and can save you from ruined baked goods. If your oven runs hot, reduce the temperature by 25°F. If it runs cool, add a few minutes to the baking time.
Let them cool completely before storing. I know it’s tempting to pack them up while they’re still warm, but that traps steam and makes the streusel soggy. Patience pays off here. If you can wait, let them cool completely on the rack for about 30 minutes before transferring to an airtight container.
Variations & Adaptations
Once you’ve mastered the basic recipe, feel free to play around. Here are some variations I’ve tried and loved.
Chocolate Chip Pumpkin Muffins: Fold in 1 cup of semi-sweet chocolate chips along with the wet and dry ingredients. The chocolate pairs beautifully with the warm spices. I prefer mini chocolate chips because they distribute more evenly, but regular ones work too. Just toss them in a tablespoon of flour before adding to prevent them from sinking to the bottom.
Cream Cheese Filled Pumpkin Muffins: This is my indulgent weekend version. Mix 4 oz of softened cream cheese with 2 tablespoons of sugar and 1/2 teaspoon of vanilla. Place a spoonful of muffin batter in each cup, add a dollop of the cream cheese mixture, then cover with more batter. The cream cheese creates a gooey, tangy center that’s absolutely dreamy.
Gluten-Free Version: Substitute the all-purpose flour with a 1:1 gluten-free baking flour blend that contains xanthan gum. I’ve used Bob’s Red Mill with great success. The texture will be slightly more tender and delicate, so handle the batter gently. You might need to add an extra tablespoon of milk if the batter seems too thick.
Vegan Adaptation: Replace the eggs with flax eggs (2 tablespoons ground flaxseed mixed with 6 tablespoons water, let sit for 5 minutes). Use melted coconut oil instead of butter in the streusel, and choose a plant-based milk like oat or almond. The muffins will be slightly denser but still delicious. I tested this for a friend’s vegan brunch, and nobody could tell the difference.
Spice It Up: If you love bold flavors, add 1/4 teaspoon of cardamom or allspice to the dry ingredients. I once added a pinch of cayenne pepper for a sweet-heat combo that surprised everyone. Start small—you can always add more next time.
Serving & Storage Suggestions
These muffins are versatile and can be enjoyed in so many ways. Here’s how to make the most of them.
Serving Temperature: They’re best at room temperature or slightly warm. If you’re serving them for breakfast, pop them in a 300°F oven for 5 minutes to re-crisp the streusel. For a special treat, split one in half, toast it lightly, and spread with salted butter. The combination of warm, crunchy streusel and melting butter is pure heaven.
What to Serve With Them: A hot cup of coffee or chai tea is the obvious pairing, but don’t overlook a glass of cold milk or a dollop of Greek yogurt with honey. For a brunch spread, serve them alongside scrambled eggs and fresh fruit. They also make a great afternoon snack with a cup of spiced apple cider.
Storage Instructions: Store leftover muffins in an airtight container at room temperature for up to 3 days. Place a paper towel at the bottom of the container to absorb excess moisture, and another paper towel on top. Change the paper towels daily if you’re storing longer. Do not refrigerate—the cold air dries them out and makes the streusel soft.
Freezing Instructions: These muffins freeze beautifully. Let them cool completely, then place them in a single layer on a baking sheet and freeze for 1 hour. This prevents them from sticking together. Transfer to a freezer-safe bag or container, removing as much air as possible. They’ll keep for up to 3 months. To thaw, leave them at room temperature for about 30 minutes, or microwave for 20-30 seconds.
Reheating Tips: For the best texture, reheat muffins in a 350°F oven for 5-7 minutes. The microwave works in a pinch, but it will soften the streusel. If you’re reheating from frozen, add an extra 2-3 minutes in the oven.
One thing I love about these muffins is that the flavors actually deepen after a day or two. The spices meld together, and the pumpkin flavor becomes more pronounced. So if you can resist eating them all immediately, they’ll reward you on day two.
Nutritional Information & Benefits
While these muffins are definitely a treat, they do offer some nutritional perks thanks to the pumpkin. Here’s a rough estimate per muffin based on the recipe as written.
| Nutrient | Amount Per Muffin |
|---|---|
| Calories | 320 |
| Total Fat | 14g |
| Saturated Fat | 4g |
| Cholesterol | 35mg |
| Sodium | 280mg |
| Total Carbohydrates | 46g |
| Dietary Fiber | 2g |
| Sugars | 28g |
| Protein | 4g |
| Vitamin A | 80% DV |
| Vitamin C | 2% DV |
| Calcium | 6% DV |
| Iron | 8% DV |
Health Benefits of Pumpkin: Pumpkin is packed with vitamin A, which supports eye health and immune function. It’s also a good source of fiber, which aids digestion and helps you feel full longer. The antioxidant beta-carotene gives pumpkin its vibrant orange color and may help reduce inflammation. Plus, the spices like cinnamon and ginger have their own anti-inflammatory properties.
Dietary Considerations: This recipe is vegetarian-friendly. For a lower-sugar version, reduce the granulated sugar to 3/4 cup and the brown sugar to 1/4 cup in the batter. The muffins will be less sweet but still delicious. If you’re watching your fat intake, you can replace half the oil with unsweetened applesauce, though the texture will be slightly denser. These muffins contain gluten, dairy, and eggs, so they’re not suitable for those with related allergies without modifications.
I personally love that these muffins feel indulgent but have a hidden vegetable. It’s a small win when you’re feeding a family or just trying to sneak some nutrition into your morning routine.
Conclusion
These quick bakery-style pumpkin muffins with streusel topping have become a staple in my kitchen, and I hope they become one in yours too. They’re the kind of recipe that proves you don’t need professional training or fancy equipment to create something truly special. With simple ingredients and a few smart techniques, you can have warm, domed, streusel-topped muffins on your table in under 40 minutes.
What I love most about this recipe is how forgiving it is. You can tweak the spices, add mix-ins, or adjust the sweetness to your liking. It’s a canvas for your creativity. And honestly? The best part is watching someone take that first bite and seeing their eyes light up. That never gets old.
I’d love to hear how these turn out for you. Did you add chocolate chips? Try the cream cheese filling? Have your own secret trick for perfect muffins? Drop a comment below and share your experience. And if you know someone who could use a little baking inspiration, feel free to share this recipe with them. Happy baking, friends!
Frequently Asked Questions
Can I use fresh pumpkin instead of canned?
Yes, you can. Roast a small sugar pumpkin at 400°F until tender, about 45 minutes. Scoop out the flesh and puree it until smooth. You’ll need about 1 3/4 cups of puree to replace one 15-ounce can. Just be aware that fresh pumpkin puree has more water content, so your muffins might be slightly more delicate. Squeeze the puree in a clean kitchen towel to remove excess moisture if it seems watery.
Why did my streusel sink into the batter?
This usually happens for one of two reasons: the streusel butter was too warm, or the muffin batter was too thin. Make sure your streusel stays cold until you’re ready to use it. Also, double-check that you’ve measured your flour correctly. Too much liquid in the batter can cause the streusel to sink. If your batter seems runny, add an extra tablespoon of flour.
Can I make these muffins ahead of time?
Absolutely. You can prepare the dry ingredients and the streusel up to 2 days ahead and store them separately in airtight containers. When you’re ready to bake, just mix the wet ingredients and combine. You can also freeze the baked muffins for up to 3 months. They’re perfect for meal prep—make a double batch on Sunday and enjoy them all week.
How do I get even bigger muffin tops?
For truly sky-high domes, fill the muffin cups all the way to the top—even slightly overflowing. Use paper liners that are slightly taller than your muffin tin. The initial 425°F blast is crucial for creating that dramatic rise. Also, let the batter rest for 10 minutes after mixing before filling the cups. This allows the flour to hydrate fully and creates a better structure for rising.
Can I reduce the sugar in this recipe?
Yes, you can reduce the granulated sugar to 3/4 cup and the brown sugar to 1/4 cup without significantly affecting the texture. The muffins will be less sweet, which some people prefer. Don’t reduce the sugar in the streusel, though—it needs that sugar for texture and browning. If you’re using a sugar substitute like monk fruit or stevia, follow the package instructions for conversion, but note that the texture may be slightly different.
Pin This Recipe!
Best Easy Bakery-Style Pumpkin Muffins with Streusel

These quick and easy bakery-style pumpkin muffins with a crunchy streusel topping come together in under 40 minutes. With simple ingredients and a few smart techniques, you’ll get perfectly domed, tender, and moist muffins every time.
- Prep Time: 10 minutes
- Cook Time: 17-20 minutes
- Total Time: 27-30 minutes
- Yield: 12 muffins
- Category: Breakfast, Dessert
- Cuisine: American
Ingredients
- All-purpose flour, 2 cups (240g)
- Granulated sugar, 1 cup (200g)
- Light brown sugar, 1/2 cup (100g), packed
- Baking powder, 2 teaspoons
- Baking soda, 1/2 teaspoon
- Salt, 1/2 teaspoon
- Ground cinnamon, 2 teaspoons
- Ground nutmeg, 1/2 teaspoon
- Ground ginger, 1/2 teaspoon
- Ground cloves, 1/4 teaspoon
- Canned pumpkin puree, 1 can (15 oz or 425g)
- Large eggs, 2
- Vegetable oil, 1/2 cup (120ml)
- Milk, 1/4 cup (60ml)
- Vanilla extract, 2 teaspoons
- All-purpose flour, 1/2 cup (60g) (for streusel)
- Light brown sugar, 1/4 cup (50g), packed (for streusel)
- Granulated sugar, 2 tablespoons (25g) (for streusel)
- Ground cinnamon, 1 teaspoon (for streusel)
- Salt, 1/8 teaspoon (for streusel)
- Unsalted butter, 1/4 cup (56g), cold and cubed (for streusel)
Instructions
- Preheat your oven to 425°F (220°C). Line a 12-cup muffin tin with paper liners or grease generously.
- Make the streusel: In a small bowl, combine 1/2 cup flour, 1/4 cup packed brown sugar, 2 tablespoons granulated sugar, 1 teaspoon cinnamon, and 1/8 teaspoon salt. Add cold, cubed butter. Use a pastry cutter or your fingers to work the butter into the flour mixture until it resembles coarse sand with some pea-sized clumps. Refrigerate while preparing the batter.
- Whisk dry ingredients: In a large bowl, combine 2 cups flour, 1 cup granulated sugar, 1/2 cup packed brown sugar, 2 teaspoons baking powder, 1/2 teaspoon baking soda, 1/2 teaspoon salt, 2 teaspoons cinnamon, 1/2 teaspoon nutmeg, 1/2 teaspoon ginger, and 1/4 teaspoon cloves. Whisk until evenly distributed.
- Mix wet ingredients: In a separate bowl, combine the entire can of pumpkin puree, 2 eggs, 1/2 cup vegetable oil, 1/4 cup milk, and 2 teaspoons vanilla extract. Whisk until smooth and glossy.
- Combine wet and dry ingredients: Pour the wet mixture into the dry ingredients. Use a rubber spatula to fold together gently with a cutting motion. Stop as soon as no streaks of flour remain. A few small lumps are fine.
- Fill the muffin cups: Divide the batter evenly among the 12 muffin cups, filling each cup all the way to the top.
- Add the streusel: Sprinkle the refrigerated streusel generously over each muffin, pressing down gently so it adheres.
- Bake at high heat: Place the muffin tin in the preheated 425°F oven. Bake for exactly 5 minutes without opening the door.
- Reduce temperature: After 5 minutes, reduce the oven temperature to 350°F (175°C) without opening the door. Bake for an additional 12-15 minutes, until a toothpick inserted into the center comes out clean or with a few moist crumbs.
- Cool: Remove the muffin tin from the oven and let it cool on a wire rack for 5 minutes. Then transfer the muffins directly to the cooling rack to cool completely.
Notes
For best results, do not overmix the batter. Use room temperature ingredients. The initial high heat (425°F) is crucial for domed tops. Keep streusel cold until ready to use. Let muffins cool completely before storing to keep streusel crunchy.
Nutrition
- Serving Size: 1 muffin
- Calories: 320
- Sugar: 28
- Sodium: 280
- Fat: 14
- Saturated Fat: 4
- Carbohydrates: 46
- Fiber: 2
- Protein: 4
Keywords: pumpkin muffins, bakery-style muffins, streusel topping, fall baking, easy muffin recipe


